
Three backup methods are available for OneNote notebooks. OneNote offers built-in options for automatic and manual backups, and a web version for exporting notebooks. Additionally, you can use third-party backup software to back up your notebooks to an external drive.
Why Do You Need to Backup OneNote?
Microsoft OneNote is a note-taking software that acts as a digital notebook. With it, you can jot down handwritten or digital notes and add multimedia content like online videos, audio files, and even screen clipping.
Since notebooks include work notes, project information, meeting records, and other critical content, backing up them is recommended.
This can help:
- Prevent data loss caused by accidental deletion, data corruption, and hardware failure.
- Recover notebooks when sync errors occur.
- Undo accidental changes, for example, deleting pages or sections while editing.
- Quickly restore specific pages, sections, or entire notebooks.
Here is a quick video guide:
How to Backup OneNote in Windows 11/10
You can back up your OneNote notebooks in three ways. Check the table below and choose the right method based on your needs.
| Method | Best for | Main advantage |
| OneNote built-in backup option | Simple local notebook backups | Easy to set up, use, and restore |
| OneNote export | Creating an offline copy | Keeps a separate copy for manual storage |
| MiniTool ShadowMaker | Protecting OneNote and other files | Provides broader data protection |
Method 1: Back up Notebooks via the OneNote Desktop App
OneNote is capable of backing up and saving all your work contents manually as well as automatically.
Step 1. Open your OneNote and go to the File page.
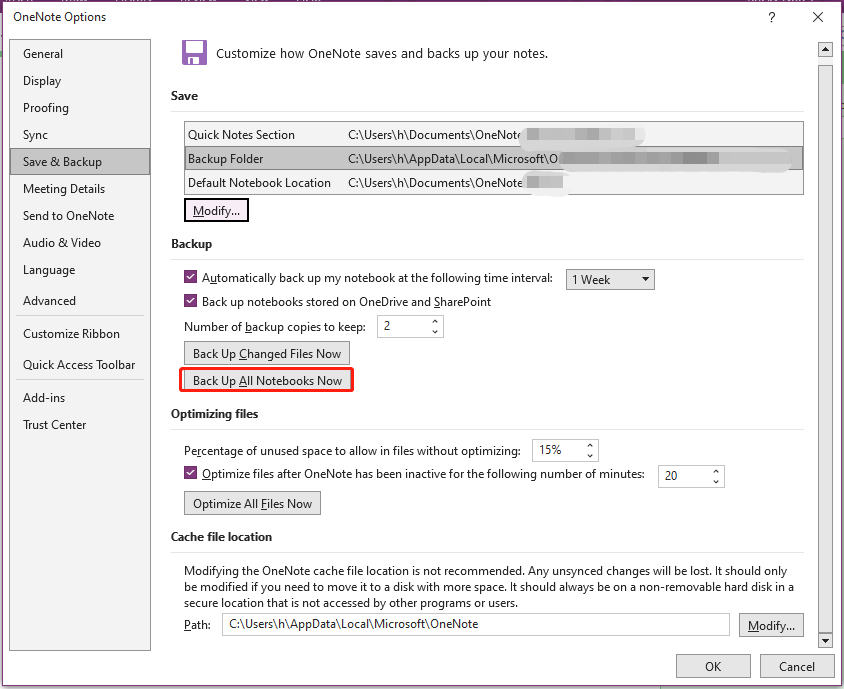
Step 2. Select Options in the bottom left corner to evoke the OneNote Options window > choose Save & Backup in the left pane.
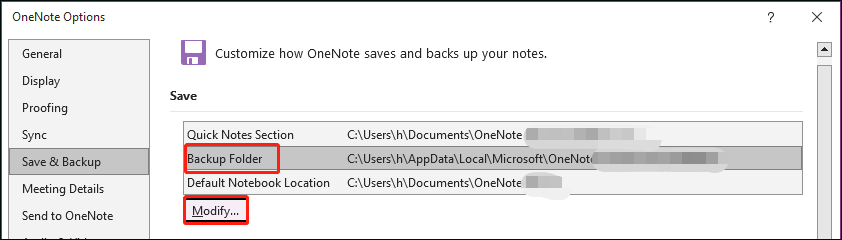
Step 3. Under Save, go to Backup Folder > click on Modify > change the location of OneNote backup folder > hit Select.
Step 4. Under Backup, expand the drop-down menu beside Automatically back up my notebook at the following time interval to choose the backup frequency.
Step 5. Confirm your backup settings and then click on Back Up All Notebooks Now to run the task.
Restore OneNote Backup
How can you bring your OneNote content back to life? Here goes:
Step 1. Launch OneNote > navigate to File > Info > click on Open Backups.
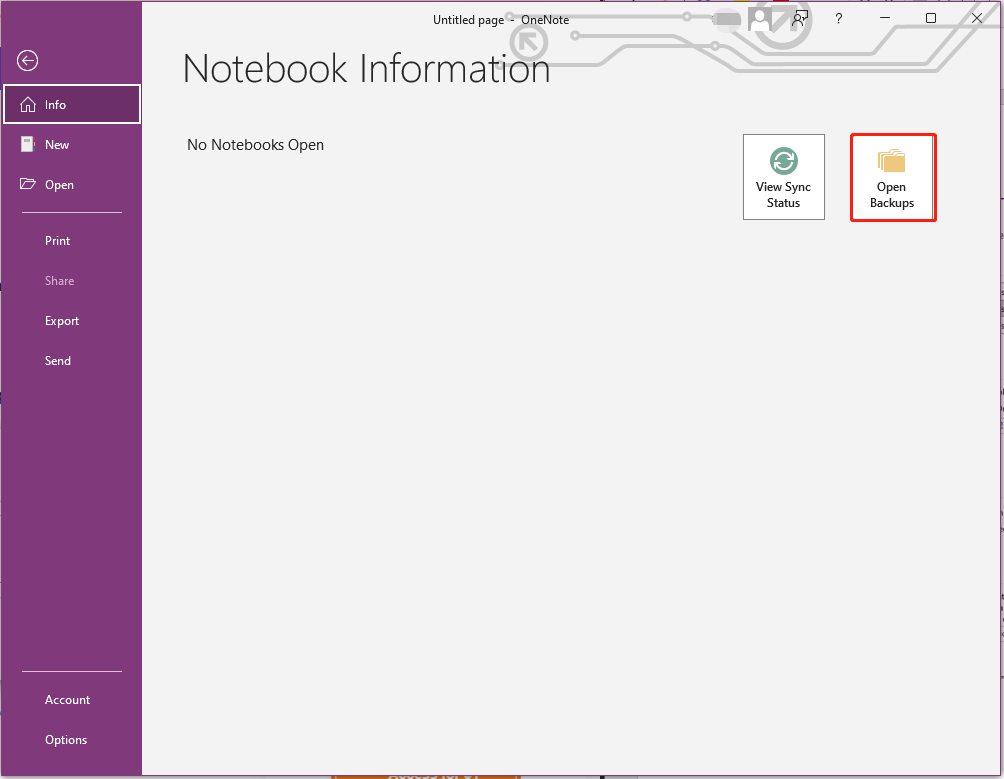
Step 2. In the Open Backup box, open your notebook folder by double-clicking it > select a specific page > click Open. Then it will display on your OneNote.
Step 3. Right-click on the section tab > choose Move or Copy > select where you want to move into in Move or Copy Section > click on Copy.
Step 4. After restoring your notes, right-click the backed-up section and choose Close.
Once done, go to the notebooks list and then you can continue working on your original notebook.
Method 2: Export Notebooks via the Web
If you use the web version of OneNote, you can export notebooks directly for backup.
Step 1: Go to the OneNote web and log in to your account.
Step 2: Right-click a notebook and choose Export to download a copy of your data to your computer.
Method 3: Backup Notebooks with MiniTool ShadowMaker
OneNote’s built-in backup is useful for protecting notebooks, but it is not designed to provide complete PC protection.
To back up OneNote files along with documents, pictures, and other important data, use a professional backup tool such as MiniTool ShadowMaker. It provides comprehensive protection, allowing you to create a system image and back up files, folders, disks, and partitions.
Step 1. Click the download button below to install MiniTool ShadowMaker on your PC. After launching it, hit Keep Trial to enter its home page.
MiniTool ShadowMaker TrialClick to Download100%Clean & Safe
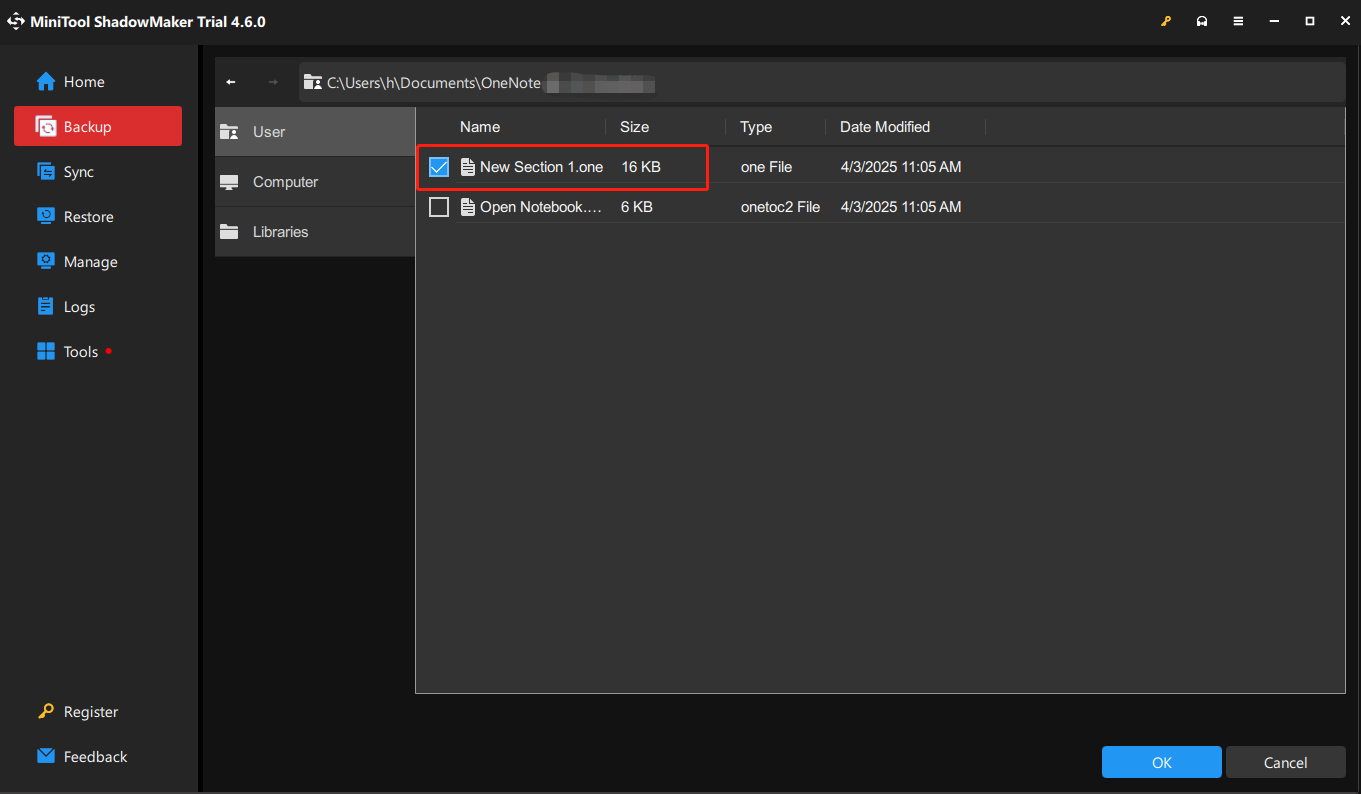
Step 2. Navigate to the Backup page > select the SOURCE module > choose Folders and Files > pick out the notebooks you need to save > click on OK.
Step 5. Open the DESTINATION section to select an external hard drive (recommended) to store the OneNote backup image files.
Step 6. Tap on Options in the lower right > turn on Schedule Settings > set a particular time point in each day, week, month, or event to carry out the job > hit OK.
Step 6. Click on Back Up Now to execute the backup task.
Recover Notebooks from Backup
To resurrect the backed-up items, the steps are as follows:
Step 1. In MiniTool ShadowMaker, go to the Restore tab.
Step 2. Look for the image of your notebooks and then click on Restore next to it. If there is no the backup task, click on Add Backup to browse and add it to the list.
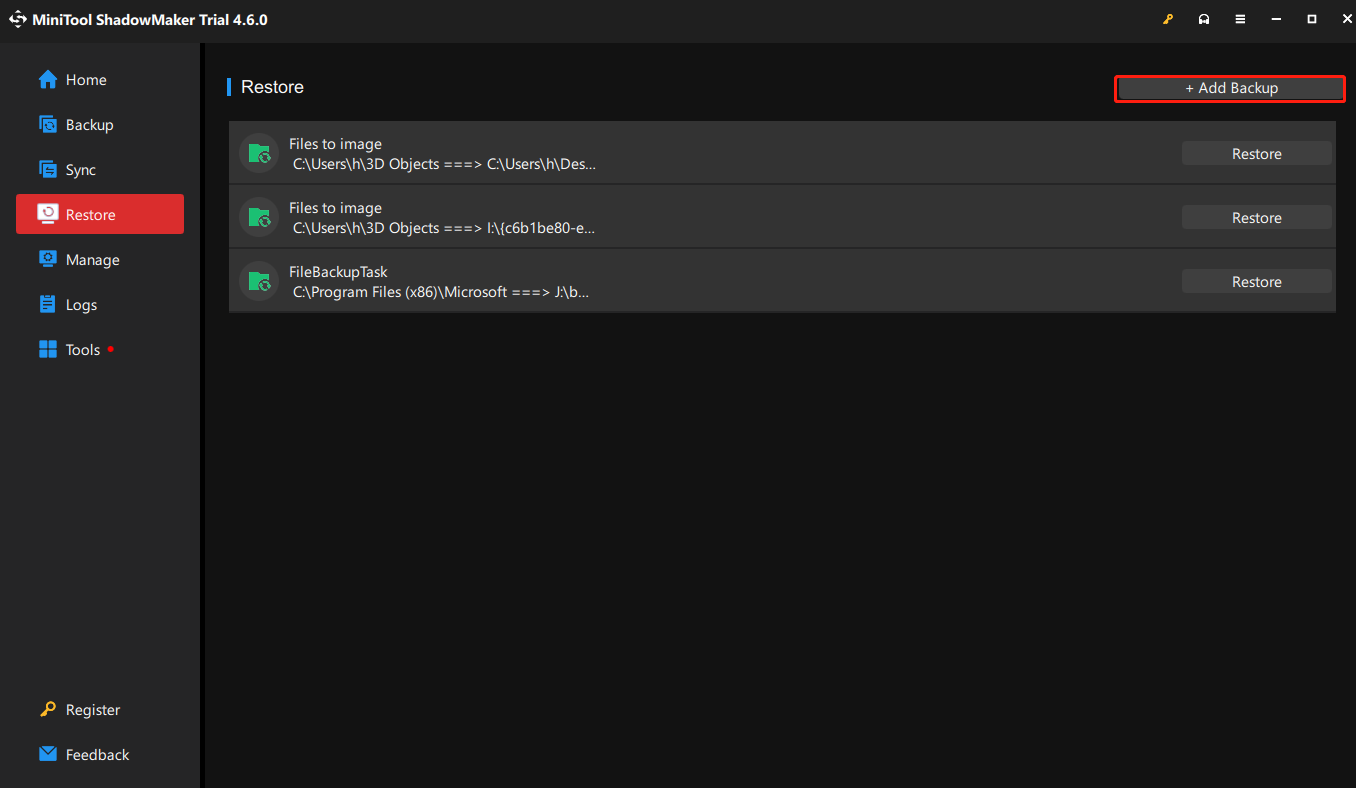
Step 3. Then follow its wizard to complete the recovery.
Make a Rough Comparison
| OneNote | MiniTool ShadowMaker | |
| Backup | Manually or automatically back up all or changed files | Support full/differential/incremental backup and automatic backup |
| Location | OneDrive/external hard drive/NAS/USB hard drive/local hard drive | External hard drive/NAS/USB hard drive/local hard drive |
| Restore | Manual import | One-click recovery |
| Advanced settings | No encryption and rely on the security of the storage location | Support backup encryption and compression |
In the sight of OneNote backup, the OneNote backup feature is sufficient.
However, if everything taken into consideration, you can see the third-party backup program has more comprehensive functions for backup.
The better is, for double insurance, to use the former to back up notebooks to the cloud, and the latter to regularly back up the entire OneNote storage directory.
Wrapping Things Up
To backup OneNote on Windows 11/10, you can try a third-party backup tool like MiniTool ShadowMaker or use the backup feature in OneNote. If you want to protect the overall OneNote folder, MiniTool ShadowMaker may be a better choice.
Do you have any difficulties or queries while using our product? If so, please feel free to contact us via [email protected] and we’ll reply to you as soon as possible. Appreciate your support.
Backup OneNote FAQ
About The Author

Position: Columnist
Vera has been working at the MiniTool Team for over 10 years as a technical editor and content writer. She mainly focuses on disk and partition management, data recovery, Windows backup and restore, and PC troubleshooting. Through in-depth software testing and hands-on experience, she has helped users solve a wide range of computer problems and better protect their data on Windows devices.
User Comments :