About CRITICAL SERVICE FAILED
The CRITICAL SERVICE FAILED bug check has a value of 0x0000005A. It is a blue screen error that makes the Windows operating system unable to run.
This error can cause a persistent boot loop or lead to frequent system crashes, rendering the PC unusable and putting your data at risk.
Normally, this error occurs unpredictably during use and is often triggered by recent Windows updates or significant system modifications. Additionally, it can be triggered by the following reasons:
- Corrupted or faulty driver
- Incompatible new hardware or drivers
- Broken Windows update
- Corrupted system file
- Faulty hardware
- Incorrect BIOS/UEFI settings
- Registry corruption/configuration issues
Suggestions: Back Up Important Data
As above says, CRITICAL SERVICE FAILED is a critical error that may put your data at risk. Therefore, it is essential to use Windows backup software to back up your important data for data security.
To do that, it is highly recommended to use MiniTool ShadowMaker. It offers the Backup feature and is good at Windows 10 backup and Windows 11 backup.
Step 1. Download, install, and launch MiniTool ShadowMaker on your PC.
MiniTool ShadowMaker TrialClick to Download100%Clean & Safe
Step 2. Select Backup from the left panel. Then, go to SOURCE, and click Folders and Files.
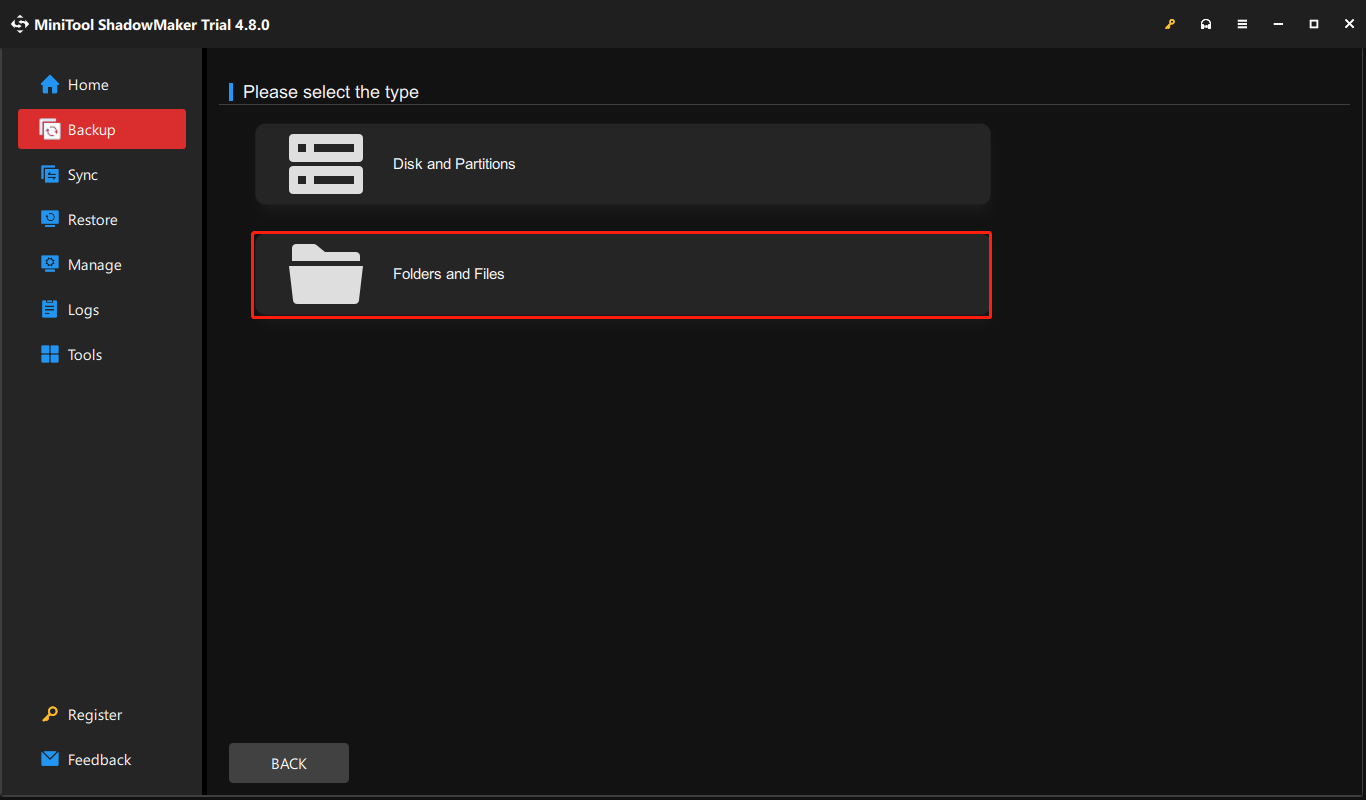
Step 3. Choose the files that you want to back up and click OK.
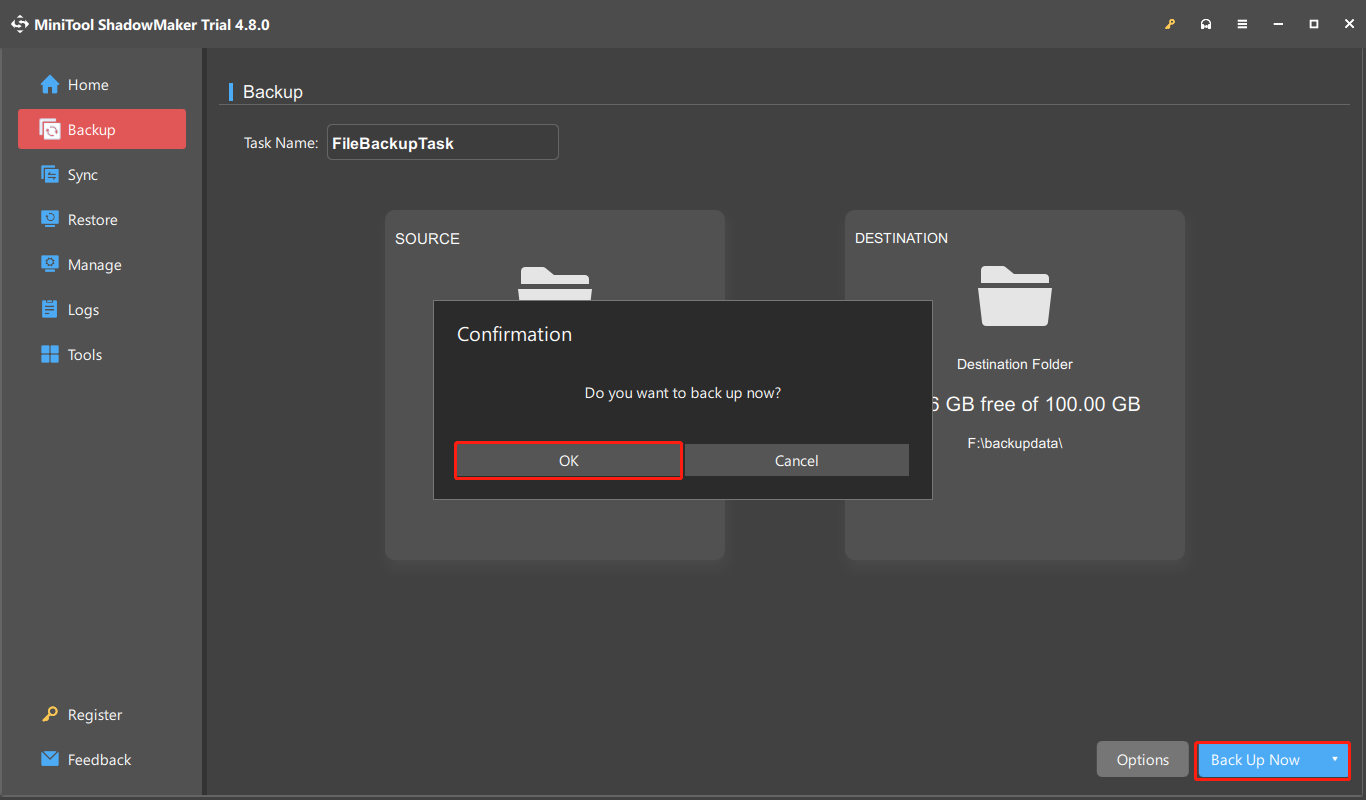
Step 4. Go to DESTINATION, choose a location as the storage path for the backup task, and click OK.
Step 5. Click Back Up Now and OK sequentially to start the backup process immediately.
How to Fix CRITICAL SERVICE FAILED in Windows 10/11
To fix CRITICAL SERVICE FAILED in Windows 10/11, use Startup Repair, then disable driver signature enforcement. If these fails, enter safe mode to run commands like SFC, DISM, or CHKDSK, update/reinstall problematic drivers, or perform a system restore.
Here’s the detailed breakdown.
Boot to Safe Mode
Safe mode a diagnostic startup state of Windows operating systems.
It loads only essential system files and drivers, excluding third-party applications and custom settings. This makes it ideal for finding out the software or drivers causing system instability and boot failures.
Follow the tutorial to boot Windows into safe mode:
Step 1. Boot into the Automatic Repair screen.
- Power on your PC.
- When the Windows logo appears, immediately press and hold the Power button to force a shutdown.
- Repeat this 2-3 times until you see the “Preparing Automatic Repair” screen.
Step 2. In the Automatic Repair screen, click Advanced options.
Step 3. Select Troubleshoot > Advanced options > Startup Settings and click Restart.
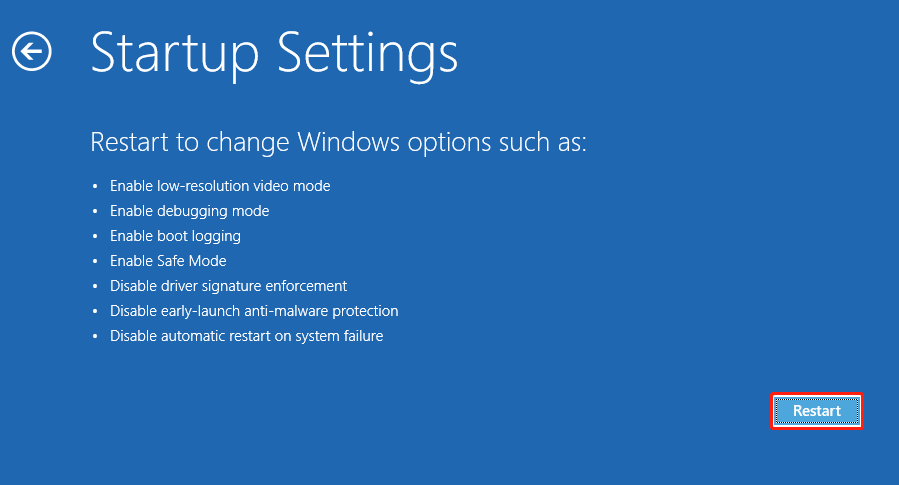
Step 4. Press the number 5 or F5 key to boot into safe mode with networking.

Step 5. If you have a password set, enter it and press Enter to log in.
Key Technical Solutions
The following are the key technical solutions to the CRITICAL_SERVICE_FAILED BSOD error.
Approach 1. Run Startup Repair
Windows Startup Repair is a built-in diagnostic tool designed to automatically resolve common boot issues. Follow these steps to use it to fix the CRITICAL_SERVICE_FAILED BSOD error:
- Boot into the Automatic Repair screen and click Advanced options.
- Select Troubleshoot > Advanced options > Startup Repair.
- Then the Windows Startup Repair tool will automatically diagnose and fix the computer problems.
Approach 2. Disable Driver Signature Enforcement
Driver signature enforcement is a security feature in Windows. It prevents Windows from loading unsigned or improperly signed drivers and then protects the system from malicious code.
Disabling it will allow you to install and use drivers that are not officially signed and might help you bypass the Windows CRITICAL SERVICE FAILED error. Here’s how to do that:
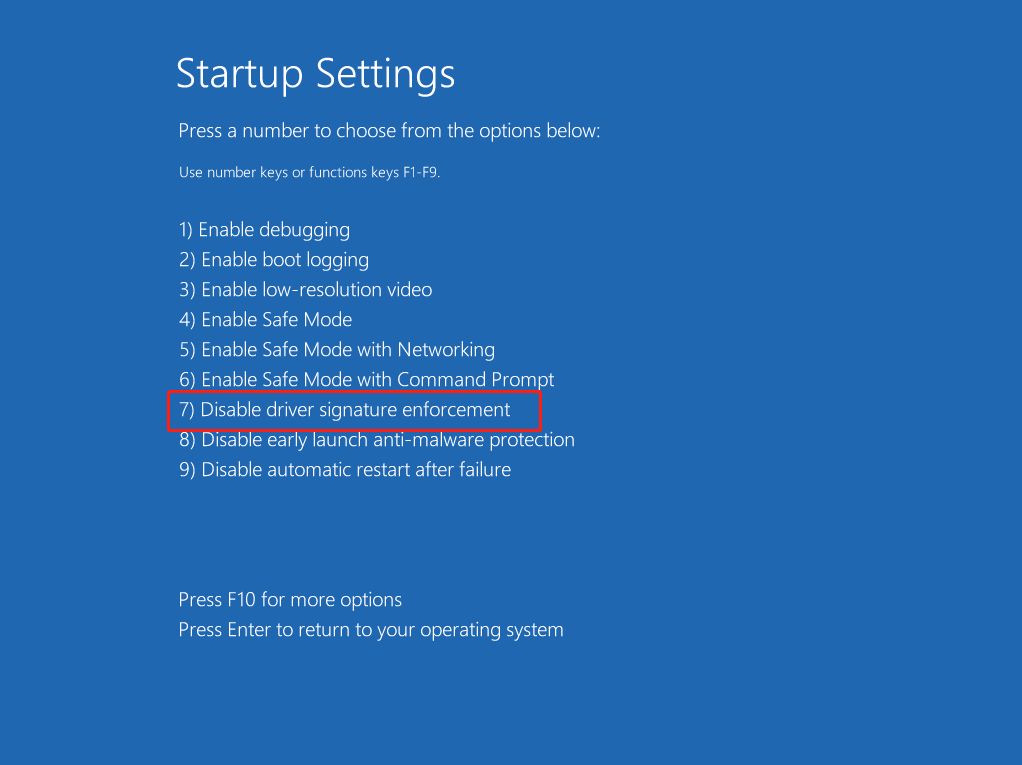
- Enter the Startup Settings page in WinRE.
- Press number 7 or F7 to choose Disable driver signature enforcement.
Once you have completed these steps, driver signature enforcement will be disabled. Restart your computer to verify if the CRITICAL_SERVICE_FAILED error has been resolved.
Approach 3. Update Drivers
Incompatible, corrupt, or outdated drivers may also trigger the CRITICAL_SERVICE_FAILED error. To address this error, update all outdated drivers. Here’s the step-by-step guide:
Step 1. Right-click the Windows icon on the taskbar and select Device Manager from the pop-up menu.
Step 2. Expand one of the categories to find if there are any drivers with the yellow triangle. Right-click the driver and select Update driver.
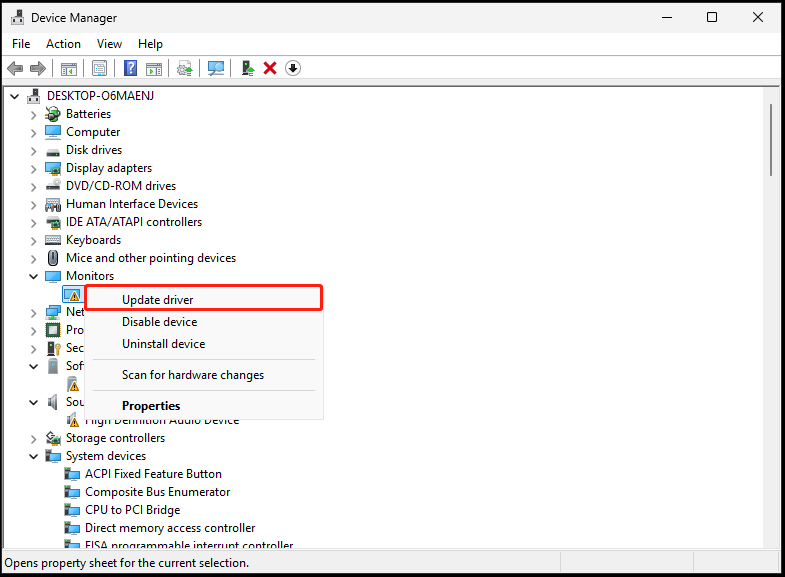
Step 3. In the prompted window, select Search automatically for drivers.

Step 4. Follow the instructions displayed on the screen to complete the update process.
Approach 4. Uninstall Updates/Apps
If you receive the CRITICAL_SERVICE_FAILED error after installing an update or a specific application, uninstall it to resolve the issue. Here’s how to do that:
Step 1. Press Win + S to open Search, type control panel, and press Enter.
Step 2. Set View by to Large icons and select Programs and Features.
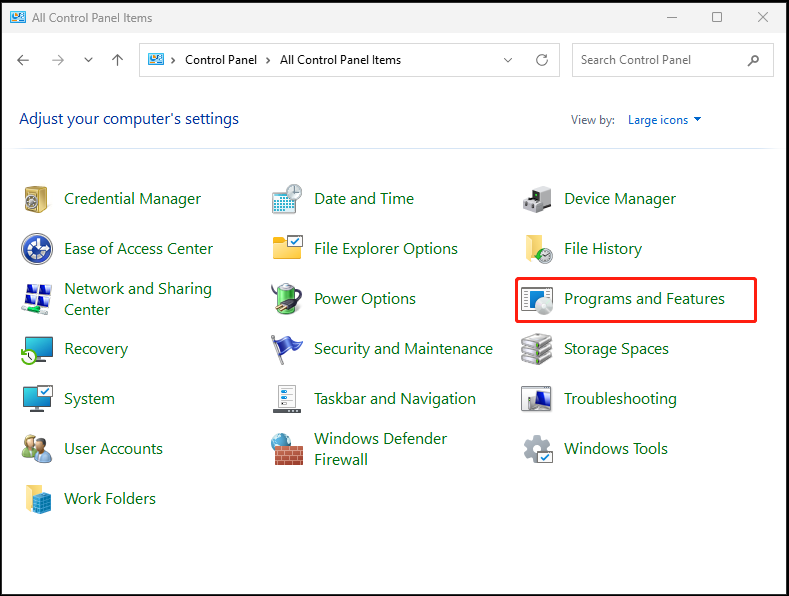
Step 3. Find the software you’ve installed recently, right-click it, and select Uninstall.
Step 4. Follow the on-screen instructions to complete the process. After that, restart your PC and check if the error has been resolved. If it hasn’t, continue by uninstalling the updates.
- Open Control Panel and go to the Programs and Features page again.
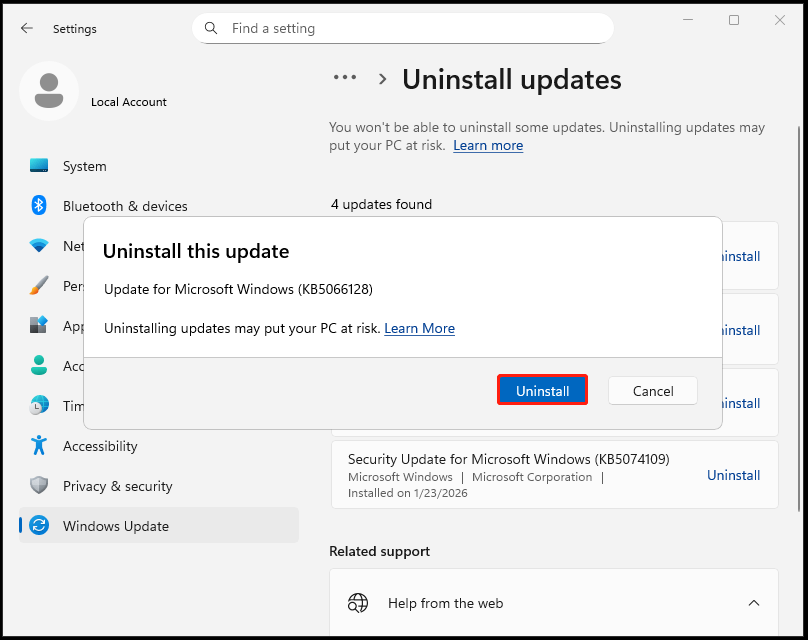
- Click View installed updates from the left panel.
- Find and locate the latest update from the list and click Uninstall next to it.
- Click Uninstall in the prompted Uninstall this update window.
Approach 5. Run SFC & DISM
Sometimes, corrupted system files can also cause BSOD errors, such as the Windows CRITICAL SERVICE FAILED error.
SFC scans and repairs corrupted or missing system files. DISM repairs the underlying Windows image (component store). Also, it can fix the corruption that prevents SFC from working.
Therefore, run DISM first and then SFC to troubleshoot the error:
Step 1. Run Command Prompt as administrator.
- Open Search.
- Type cmd in the search box.
- Find Command Prompt under Best match.
- Right-click it and select Run as administrator.
Step 2. In the prompted window, execute the following commands one by one to perform a DISM scan:
- DISM.exe /Online /Cleanup-Image /ScanHealth
- DISM.exe /Online /Cleanup-Image /CheckHealth
- DISM.exe /Online /Cleanup-Image /RestoreHealth
Step 3. Once DISM scan is complete, type the following command and press Enter to start the SFC scan.
Then, it starts to scan all protected Windows system files and replace corrupt, missing, or changed versions with correct ones.
Step 4. Once done, restart the computer to check if the blue screen error persists.
Approach 6. Run CHKDSK
If the hard drive on your computer is corrupted or faulty, the Windows CRITICAL SERVICE FAILED error may show up on your screen as well. To resolve this, run the CHKDSK command to identify and repair file system corruption or mark bad sectors.
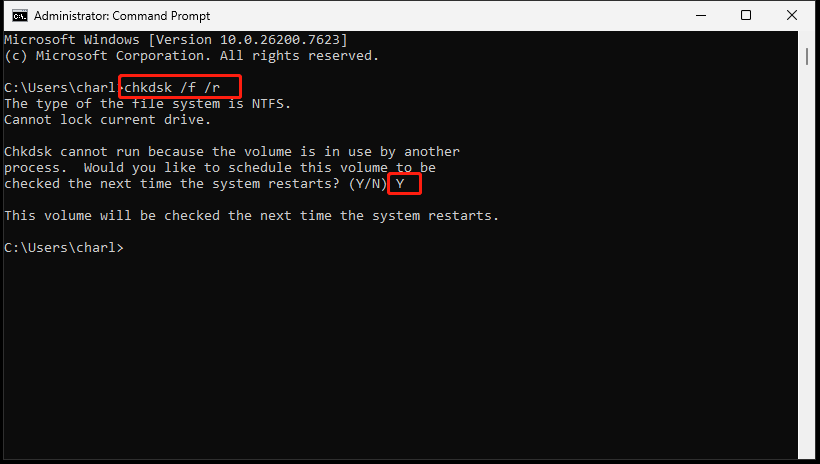
Step 1. Run Command Prompt as administrator.
Step 2. Type chkdsk /f /r and press Enter to check and fix hard drive errors.
- /f: This parameter fixes logical errors in the disk’s file system.
- /r: This parameter performs a deep scan to locate bad sectors on the disk. Additionally, it attempts to recover readable information from it and reallocates that data to spare sectors.
Step 3. Type Y and press Enter to proceed. Then, restart your computer.
Step 4. Wait for the process to complete. Once done, disk errors may be fixed.
Approach 7. Rebuild Boot Configuration Data
Boot Configuration Data (BCD) is a database in Windows that stores crucial boot-time configuration parameters. It enables the Windows Boot Manager to load the operating system.
Corrupted configuration files may also result in the stop code CRITICAL SERVICE FAILED error. To address it, rebuild BCD with the following steps:
Step 1. Run Command Prompt as administrator.
Step 2. Perform the following commands one by one.
- bootrec /scanos
- bootrec /fixmbr
- bootrec /rebuildbcd
Step 3. Once finished, exit Command Prompt and restart your PC. Now, check if the error has been resolved.
Approach 8. Perform System Restore
System Restore in Windows reverts system files, registry, and applications to a previous state to fix instability without affecting personal files. If you have created a system restore point before the CRITICAL SERVICE FAILED blue screen error occurs, try this method.
Here’s the detailed guide:
Step 1. Press Win + R to open Run, type rstrui.exe, and click OK.
Step 2. In the pop-up System Restore window, click Next.
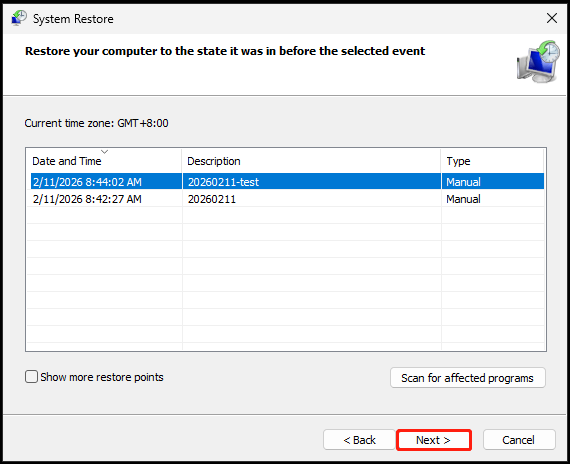
Step 3. Select a proper restore point from the list and click Next.
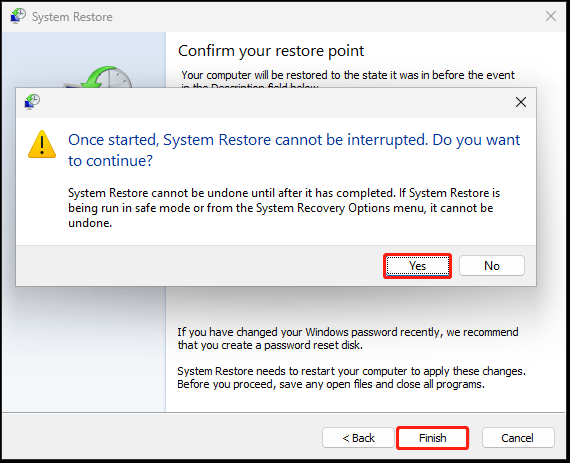
Step 4. Confirm your restore point on the next page. Then, click Finish and Yes sequentially to proceed.
Advanced Solutions
If none of the above approaches can help you resolve the stop code CRITICAL SERVICE FAILED error, try the following advanced solutions.
Approach 1. Check Hardware
CRITICAL SERVICE FAILED can also occur due to faulty hardware. To troubleshoot it, check RAM via Windows Memory Diagnostic.
The Windows Memory Diagnostic is a built-in, free tool to check RAM for faults causing crashes or blue screens.
Here’s how to use it to check RAM:
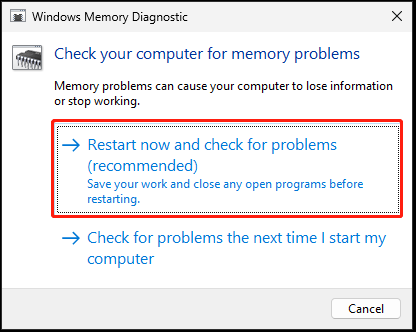
Step 1. Open Run, type mdsched.exe, and press Enter.
Step 2. In the prompted window, select Restart now and check for problems (recommended).
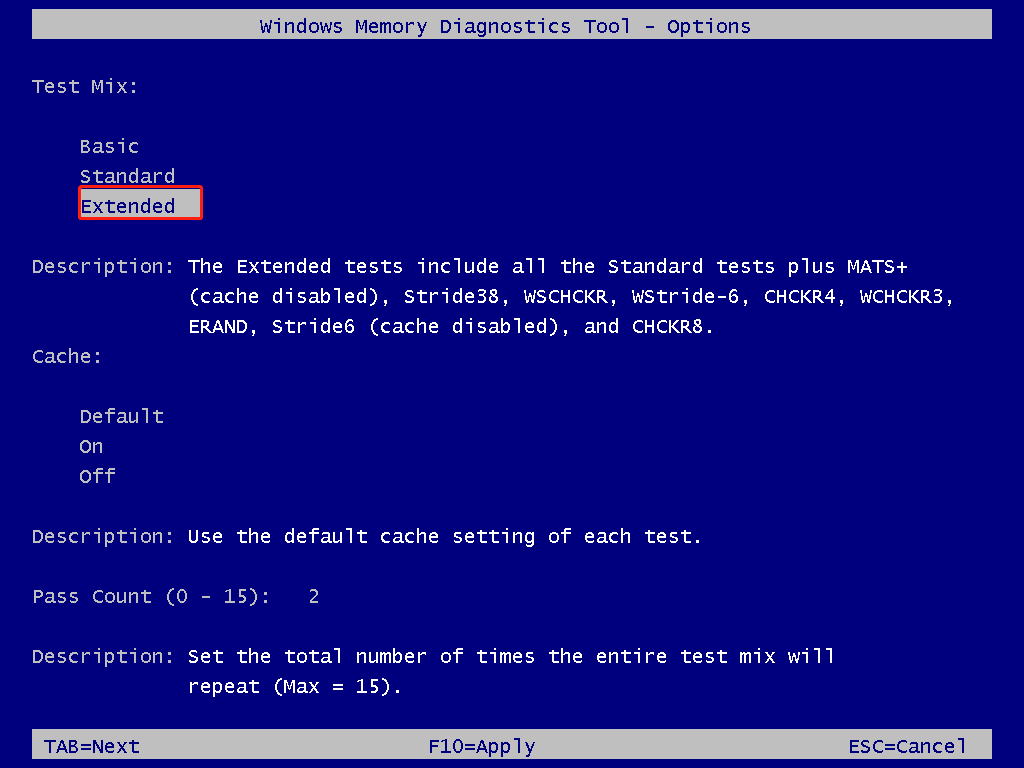
Step 3. Your computer will restart and automatically start the memory test. During the process, press F1 to access the Windows Memory Diagnostic – Options page, use the arrow keys to select Extended, and press F10 to confirm the operation.
Step 4. After the test finishes, check the memory test result in Event Viewer. Here are the steps:
- Press Win + X to open the Quick Link menu.
- Select Event Viewer.
- Go to Windows Logs > System.
- Click Filter Current Log in the right panel.
- Check MemoryDiagnostics-Results from the Event sources’ drop-down menu.
- Click OK.
- View the filtered results for any detected errors.
If errors are found in this memory test, it is likely that one or more RAM modules are faulty and need replacement.
Approach 2. Reset PC
Resetting the PC returns the system to its original factory state. This will reinstall the operating system and resolve performance issues, eliminate malware, or free up space. Therefore, use it as a last resort to fix the CRITICAL SERVICE FAILED BSOD error.
For more information, refer to the Reset the PC guide.
Conclusion
This post analyzes what causes the CRITICAL SERVICE FAILED BSOD error and explores how to fix this error on Windows with some useful approaches. Try these methods one by one until your PC works normally.
To keep your data secure, use MiniTool ShadowMaker to back up all important files. When you have some doubts about this software, please feel free to contact us by sending emails to [email protected].
CRITICAL SERVICE FAILED FAQ
Create a Windows bootable USB drive USB, boot from it, select Repair your computer > Troubleshoot > Advanced Options > Command Prompt, then run the following commands: bootrec /fixmbr, bootrec /scanos, and bootrec /rebuildbcd.
For more information about this error, refer to the Boot Configuration Data Unreadable Error 0xc000014c guide.
To fix this error without a disc, use Startup Repair, rebuild the BCD via Command Prompt in the Windows Recovery Environment (WinRE), or disable Secure Boot/Fast Boot in BIOS.
For more information, refer to the 0xc000000f error guide.
About The Author

Position: Columnist
Charlotte is a technology columnist with a strong focus on the Windows operating system, specializing in disk management, backup, and data recovery. She is passionate about analyzing computer errors, identifying root causes, and delivering practical solutions. In her free time, she stays updated on the latest developments in computer systems and hardware while continuously learning new technologies to broaden her expertise. Her writing style is clear and easy to understand, making complex technical topics accessible even to users with limited computer knowledge.
User Comments :