What Is File History?
It is a good habit to back up your folders and files. File History is an inbuilt backup program in Windows 10/11 that can allow you to create a backup of data from C:\User\<username> folder including Documents, Music, Pictures, Downloads, Videos, Desktop and more. You can choose to back up files to an external drive or a network drive to protect them from a system crash, hard disk failure, malware attack and other computer problems.
How to turn on File History or turn it off on a computer? There are 4 ways for you! Scroll down to try these methods and start to experience this amazing feature now!
How to Enable or Disable File History on Windows 10/11?
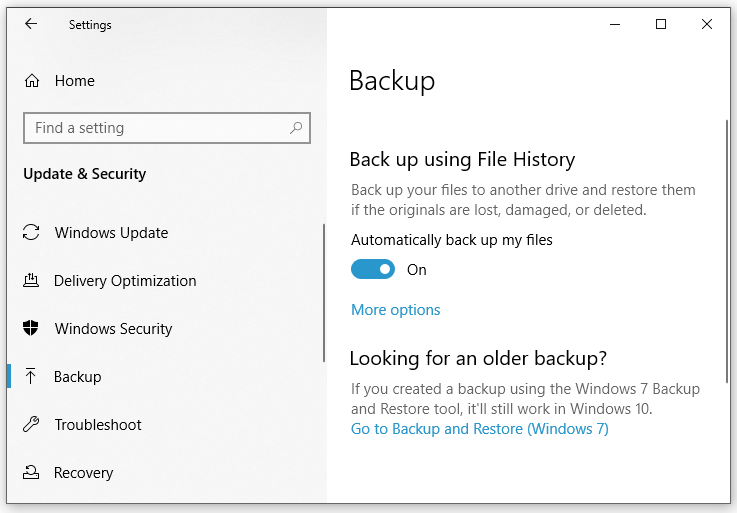
Way 1: via Windows Settings
First, you can enable/disable File History, customize the storage device, backup frequency, and add/remove folders via Windows Settings. To do so:
Step 1. Press Win + I to open Windows 10 Settings.
Step 2. In the settings menu, click on Update & Security.
Step 3. Under the Backup tab, hit Add a drive to choose an appropriate storage drive to back up your files.
Step 4. After selecting a drive, you can see the Automatically back up my files option is toggled on. Also, you can turn it off according to your needs. For more advanced settings such as customizing backup frequency, adding or removing backup folders and more, go to More options.
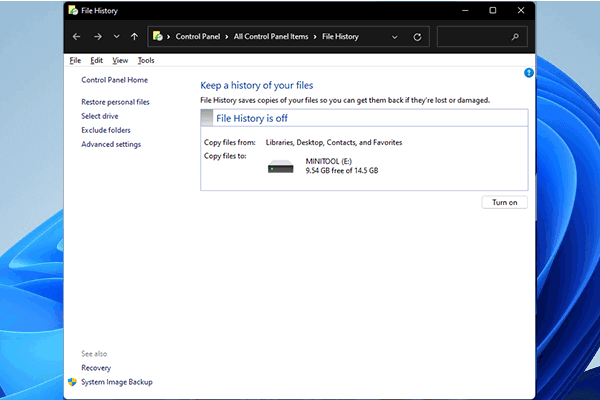
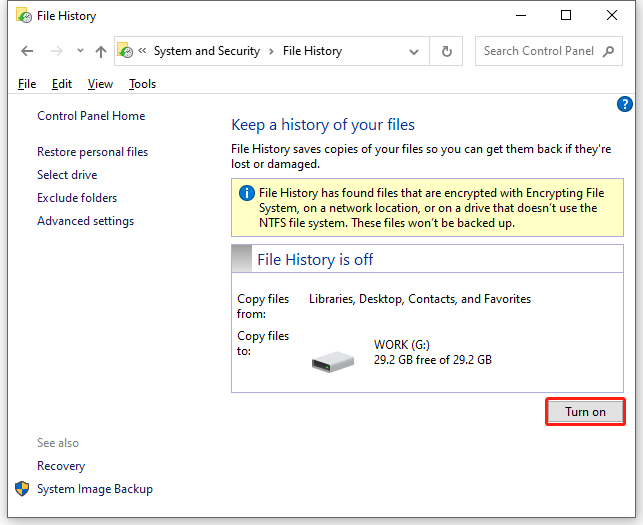
Way 2: via Control Panel
Control Panel contains settings that control almost everything. You can modify some settings to turn on or turn off File History. Here’s how to do it:
Step 1. Open the Run dialog by hitting Win + R altogether.
Step 2. Type control.exe and hit Enter to open Control Panel.
Step 3. Under Adjust your computer’s settings, click on System and Security.
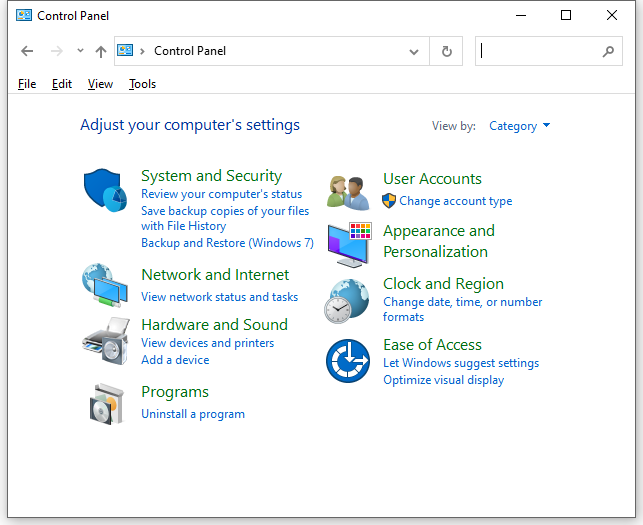
Step 4. In the right pane, hit File History. Then, you can click on Turn on or Turn off to enable or disable File History.
Way 3: via Registry Editor
The registry keys save the information in Windows Registry and Windows can use the information to carry out specific tasks including enabling or disabling File History. Here’s how to create the missing key and value for File History:
Before making any changes on Registry Editor, it is highly advised to back up the registry database in case something goes wrong
Step 1. Type regedit.exe in the Run box and hit Enter to launch Registry Editor.
Step 2. Navigate to the following path:
Computer\HKEY_LOCAL_MACHINE\Software\Policies\Microsoft\Windows
Step 3. Right-click on Windows and select New > Key > name the new key to FileHistory.
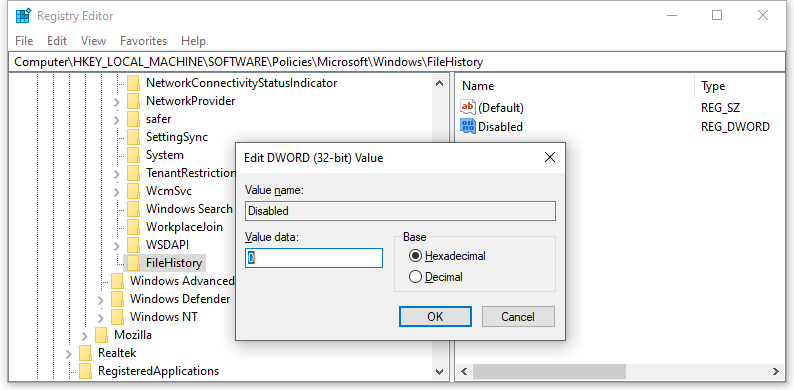
Step 4. Click on the FileHistory key and right-click on the empty space on the right pane to select New > DWORD (32-bit) Value > name the value Disabled.
Step 5. Double-click on the Disabled value to set the Value data to 0 to enable File History or set it to 1 to disable the feature.
Way 4: via Local Group Policy Editor
Local Group Policy Editor is one of the administrative-level programs that allows you to centralize and configure your operating system to fit your needs. It stores information about Windows applications and processes in the form of policies. If you need to enable or disable File History, you can edit the relevant policies.
If you are a user of Windows Home, please skip this method because Windows Home Edition doesn’t support Local Group Policy Editor.
Step 1. Type gpedit.msc and hit Enter to open Local Group Policy Editor.
Step 2. Navigate to the following path:
Computer Configuration > Administrative Templates > Windows Components > File History
Step 3. In the right-hand pane, double-click on Turn off File History.
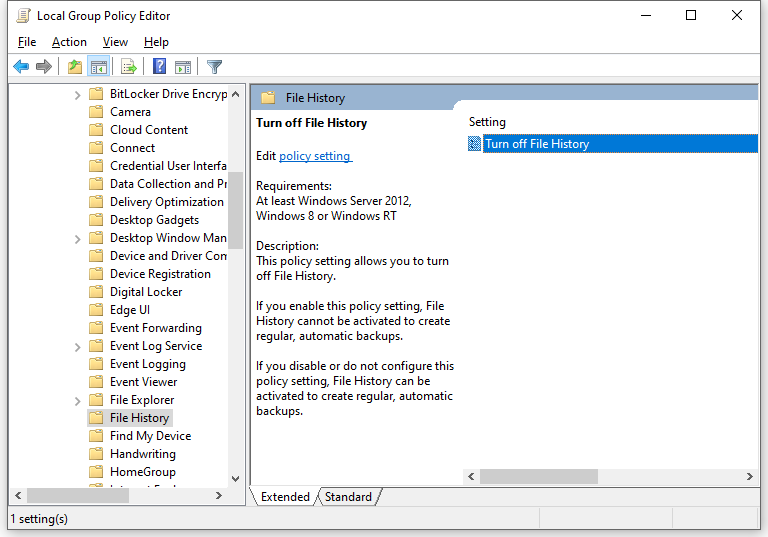
Step 4. To turn off File History, tick Enabled and hit Apply. To turn on File History, tick Disabled and apply the changes.
Suggestion: Back up More Data with MiniTool ShadowMaker
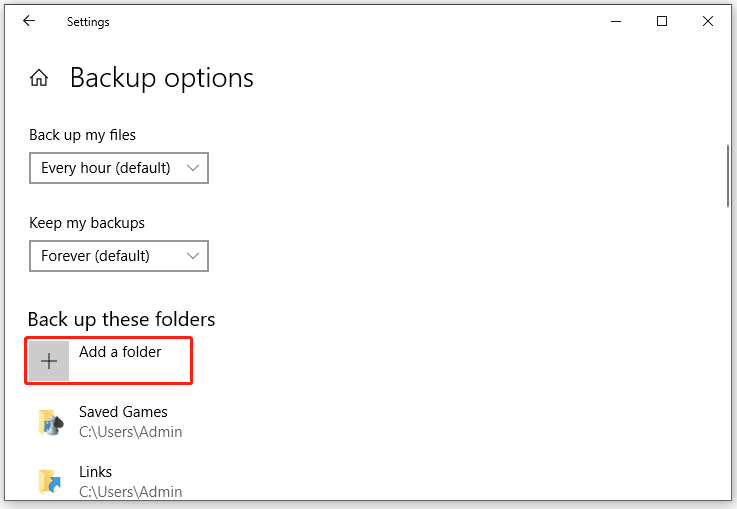
As mentioned in the first part, File History backs up folders in Libraries by default. To back up other files and folders, you can hit Add a folder to add them from your computer.
However, if you want to back up other data, File History will not satisfy you. To back up more flexibly, you can rely on a third-party program – MiniTool ShadowMaker. This Windows backup software allows you to create a backup of systems, disks, or partitions besides files/folders to internal/external hard drivers, USB hard drives, SD card, network drive and more. Here, let’s see how to make a backup with this freeware:
Step 1. Launch this software and hit Keep Trial.
MiniTool ShadowMaker TrialClick to Download100%Clean & Safe
Step 2. In the Backup section, select the backup source and destination.
# Backup source – By default, you can see the system is selected in SOURCE. Also, you can choose to back up other data by clicking on SOURCE and then choosing from Folders and Files & Disk and Partitions.
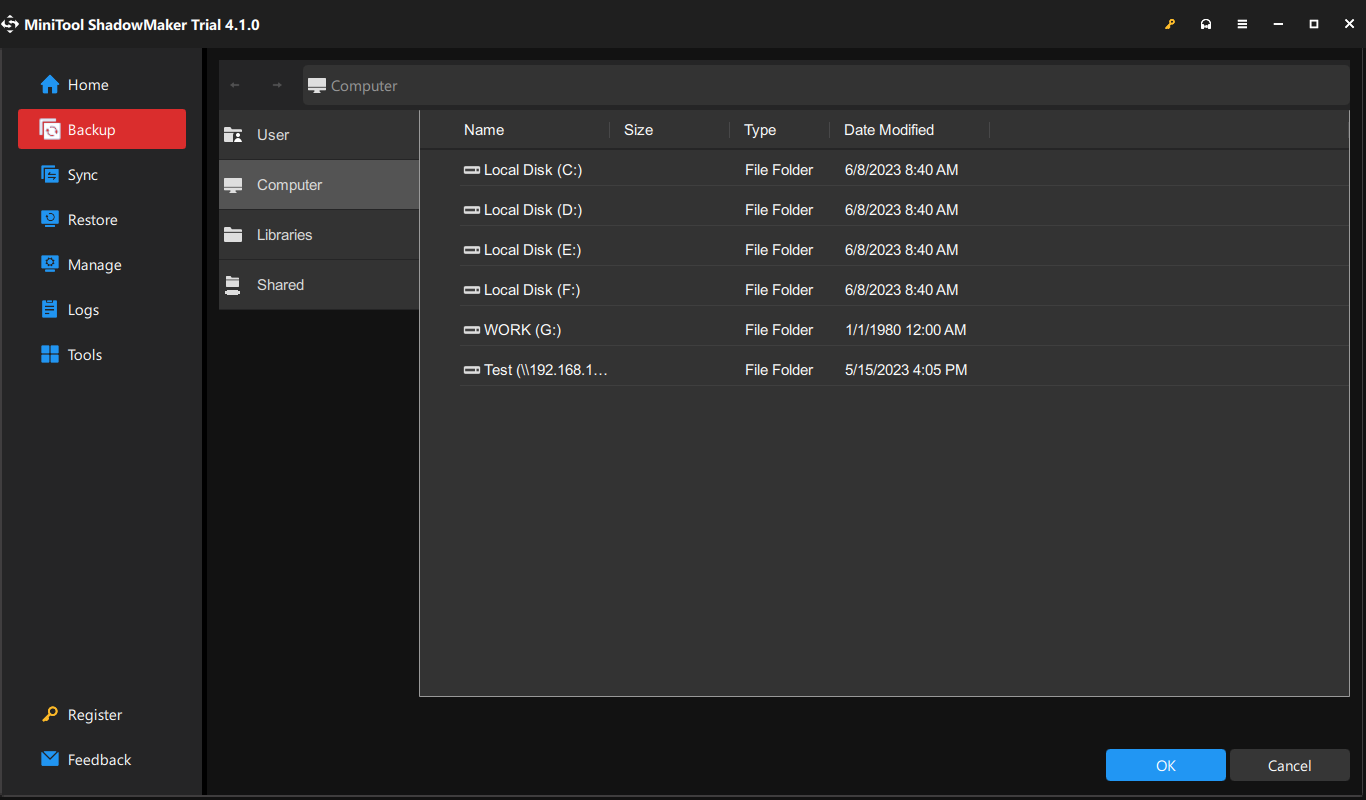
# Backup destination – go to DESTINATION to select a backup address from User, Computer, Libraires and Shared.
- User – refers to all the folders under C:\User\username.
- Libraries – refers to this location: C:\User\Public.
- Computer – involves all the drives that Windows can detect.
- Shared – means the shared folders that are accessible by other computers under the same LAN.
Step 3. Click on Back Up Now to start the process right now.
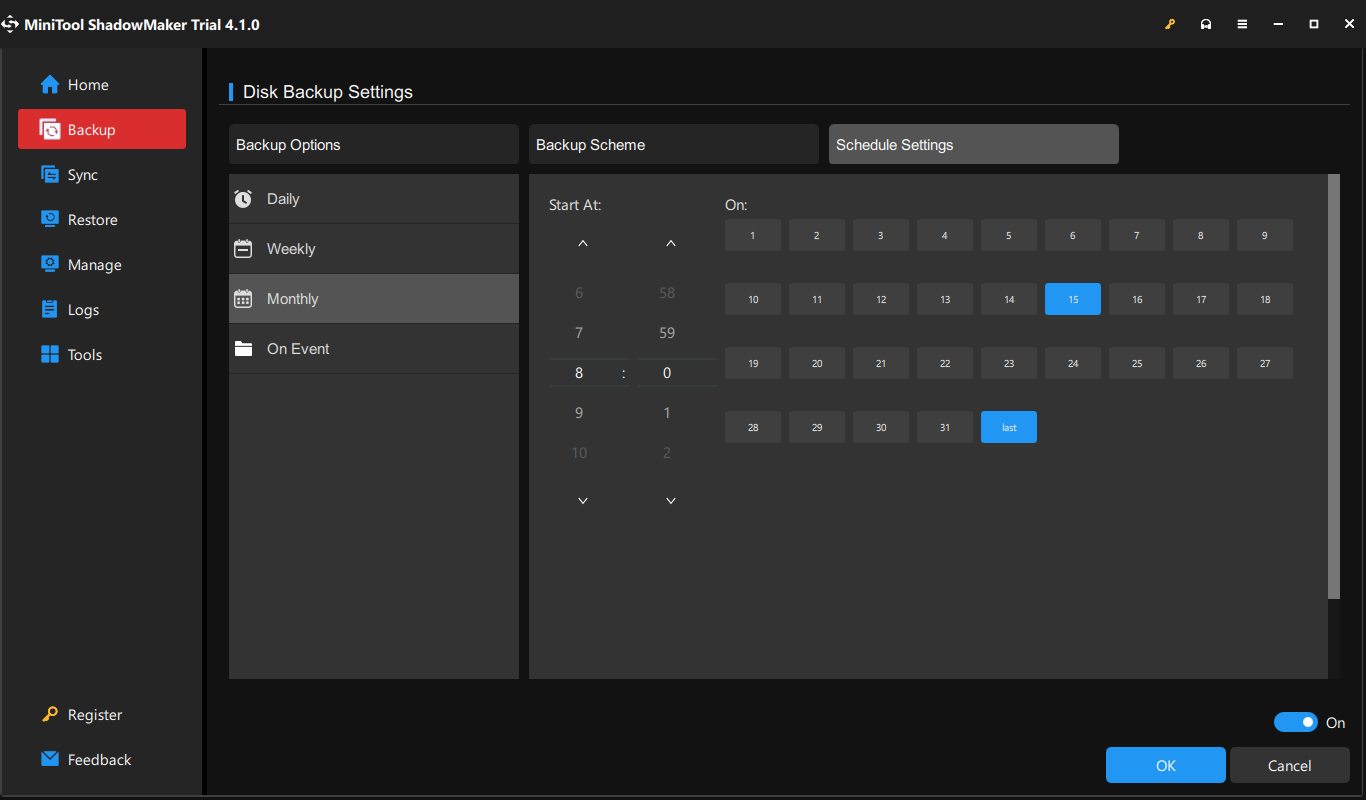
Being similar to File History, MiniTool ShadowMaker can also help you to create an automatic backup. To do so: Click on Options in Backup > toggle on Schedule Settings > set a specific time point to customize a daily, weekly, monthly, or on-event backup.

We Need Your Voice
How to enable File History? How to disable File History? I believe you are clear now. Do you have better ways to turn on or off it? Or, do you have more ideas or suggestions about MiniTool ShadowMaker? Share them in the comment zone below or contact us via [email protected]!
User Comments :