OneDrive Deleting Files Automatically
OneDrive is a popular file hosting service used to keep your photos, videos, and files backed up, protected, synced, and accessible on all your devices. But recently, more and more users reported that OneDrive keeps deleting files automatically without any permission.
As an online cloud storage service, keeping users’ data safe is what’s more important. Many users choose OneDrive to sync or back up their files and the “OneDrive deleting files automatically” issue may make their files lose and hard to find back.
Tip: You can try another sync alternative – MiniTool ShadowMaker. Different from OneDrive, you can sync your files locally, which will be a safer way to keep your data.
The issue can be triggered by multiple reasons, such as an outdated Windows operating system, and bad sectors in your hard disks. Besides, an outdated OneDrive client may cause the error. You can also check whether the date and time of your system are correct.
In the next part, you can learn how to restore your deleted files.
Restore Deleted Files from Recycle Bin
Once you receive the message that tells you your files have been deleted by OneDrive, you can check the Recycle bin first and try some ways to restore the deleted files.
The way may fail but worth trying.
Step 1: Right-click on the OneDrive icon from the right-bottom side of the system’s tray and choose Help and Settings.
Step 2: Choose Settings and then go to the Account tab.
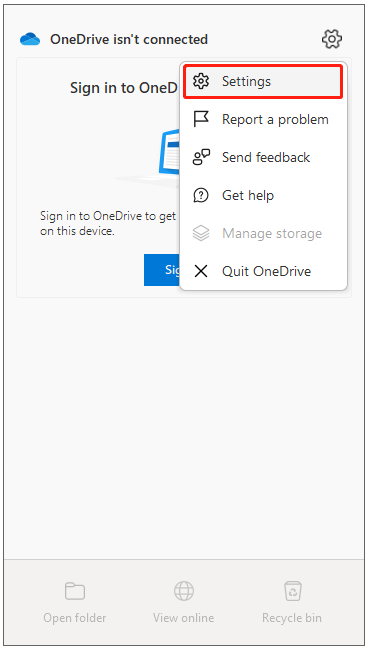
Step 3: Choose the Unlink this PC link and then click Unlink account to confirm the choice to unlink the PC from OneDrive.
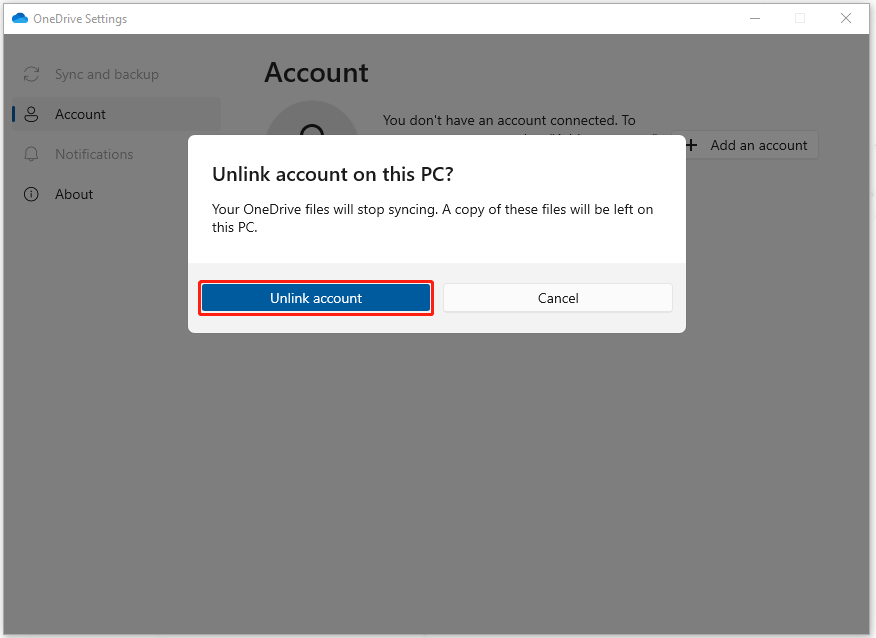
Step 4: Then repeat the steps to unlink all other PCs that are connected to your OneDrive account, disconnect the Internet, and exit the OneDrive application.
Step 5: Go to the system Recycle bin where if the deleted files appear, right-click on it to choose Restore.
If not there, you can go to the OneDrive website and log into your account; then choose Recycle bin from the left panel to find your deleted files and click Restore to recover your files.
After you finish these steps, you may have restored your files. To prevent OneDrive from deleting files automatically, you can go to the next part for further moves.
How to Prevent OneDrive from Deleting Files Automatically?
Fix 1: Check Your Hard Drive for Bad Sectors
To check whether your hard drives have bad sectors, you can do as follow.
Step 1: Type cmd in the Search box and run Command Prompt with administrative rights.
Step 2: When the window pops up, input chkdsk #: /f /r/x and press Enter.
Note: Please replace #: with the drive letter you want to check.
Then you wait until the check ends and restart your computer.
Fix 2: Update the OneDrive Client
Another way to avoid OneDrive deleting files in Windows is to update the OneDrive client.
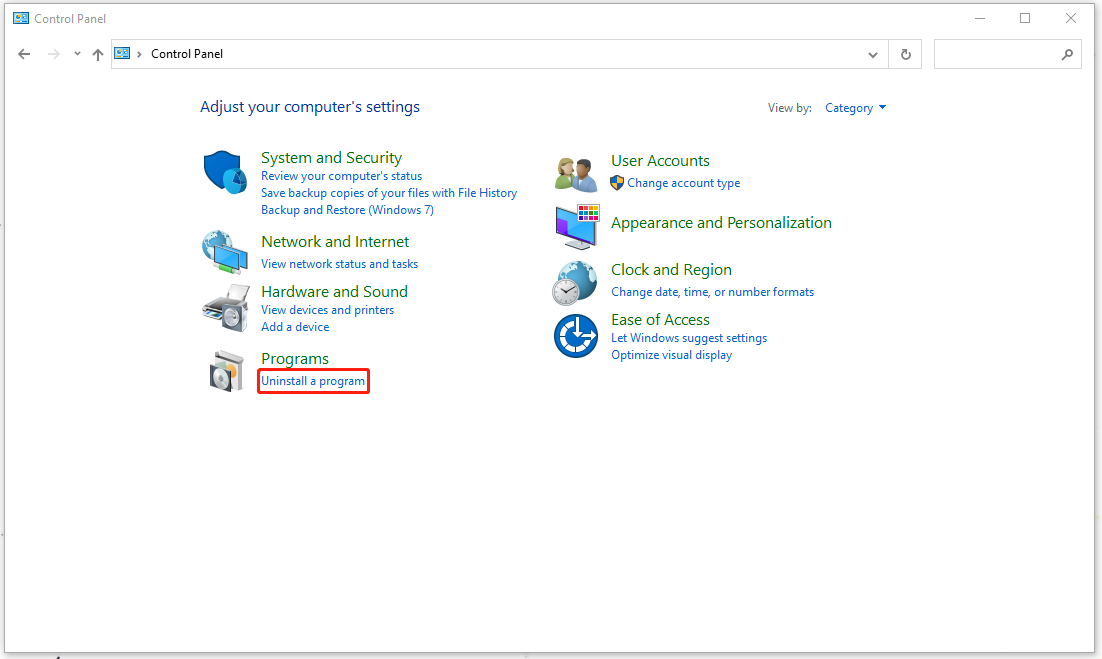
Step 1: Type Control Panel in Search and open it.
Step 2: Click Uninstall a program under Programs and locate and right-click on Microsoft OneDrive to choose Change.
Step 3: In another window, check the option of Online Repair and then Repair.
After that, you can check if your OneDrive still deletes files automatically.
Fix 3: Update Windows
The last method is to update Windows. The specific steps are as follows.
Go to Start > Settings > Update & Security > Windows Update > Check for updates.
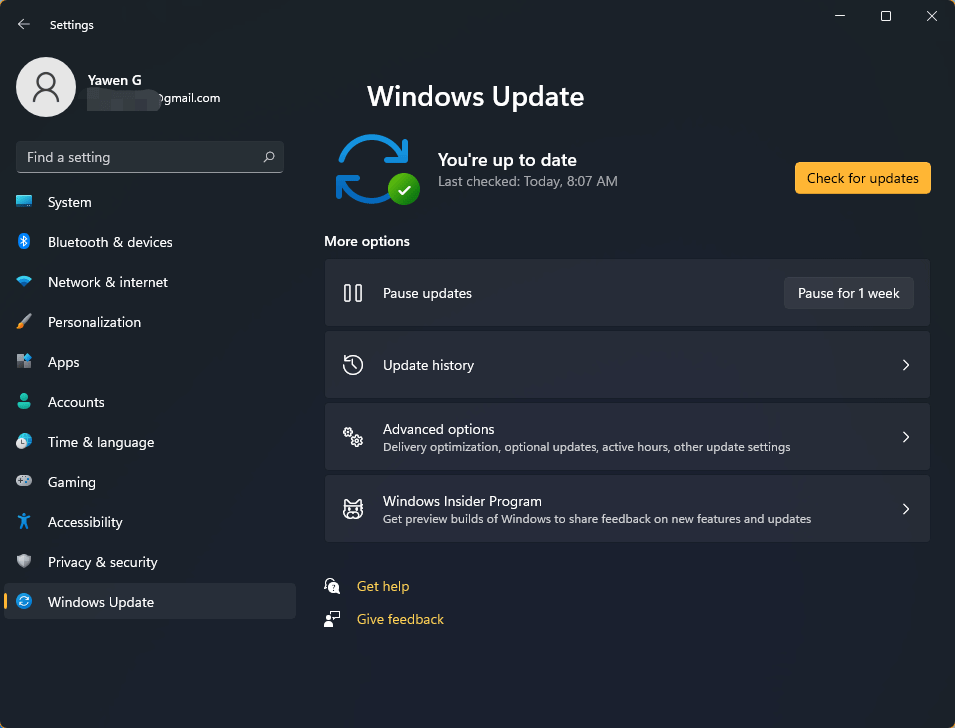
Then Windows will automatically check for available newer updates for your device.
Back Up Your Files in Advance
Even though the above methods can help you restore deleted files but no one can make sure the thing won’t happen again. Besides, it is hard to say that your files can get back every time. The best method to help you cope with the “OneDrive deleting files automatically” issue is backup.
You can back up your files in advance with MiniTool ShadowMaker. It is not only a sync tool but also a backup expert. You can back up your systems, files, folders, partitions, and disks with this program. Go to download and install this tool and you will get a 30-day free trial version.
MiniTool ShadowMaker TrialClick to Download100%Clean & Safe
Step 1: Open the program and click Keeps Trial.
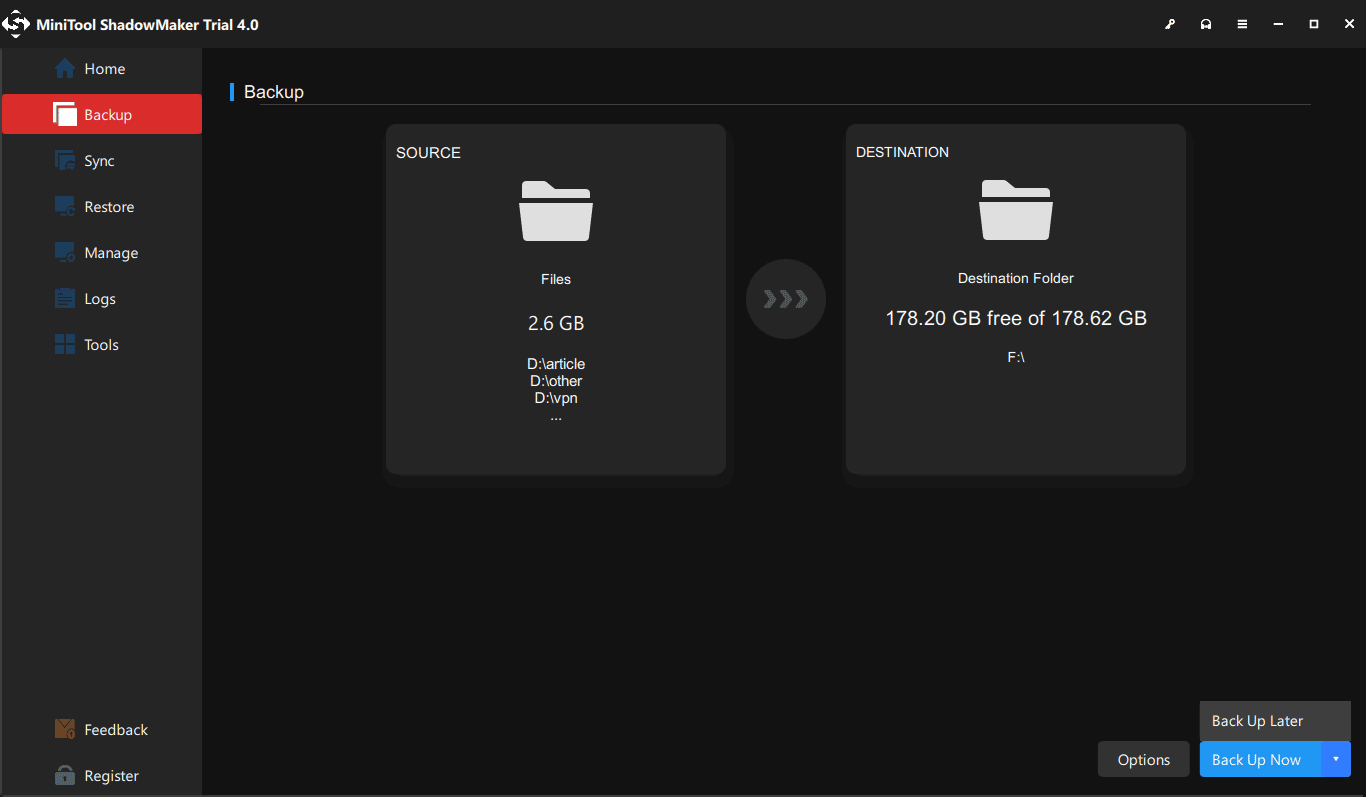
Step 2: In the Backup tab, choose the SOURCE section and then Files and Folders to choose the file you want to back up. Then go to DESTINATION to choose where you want to back up to.
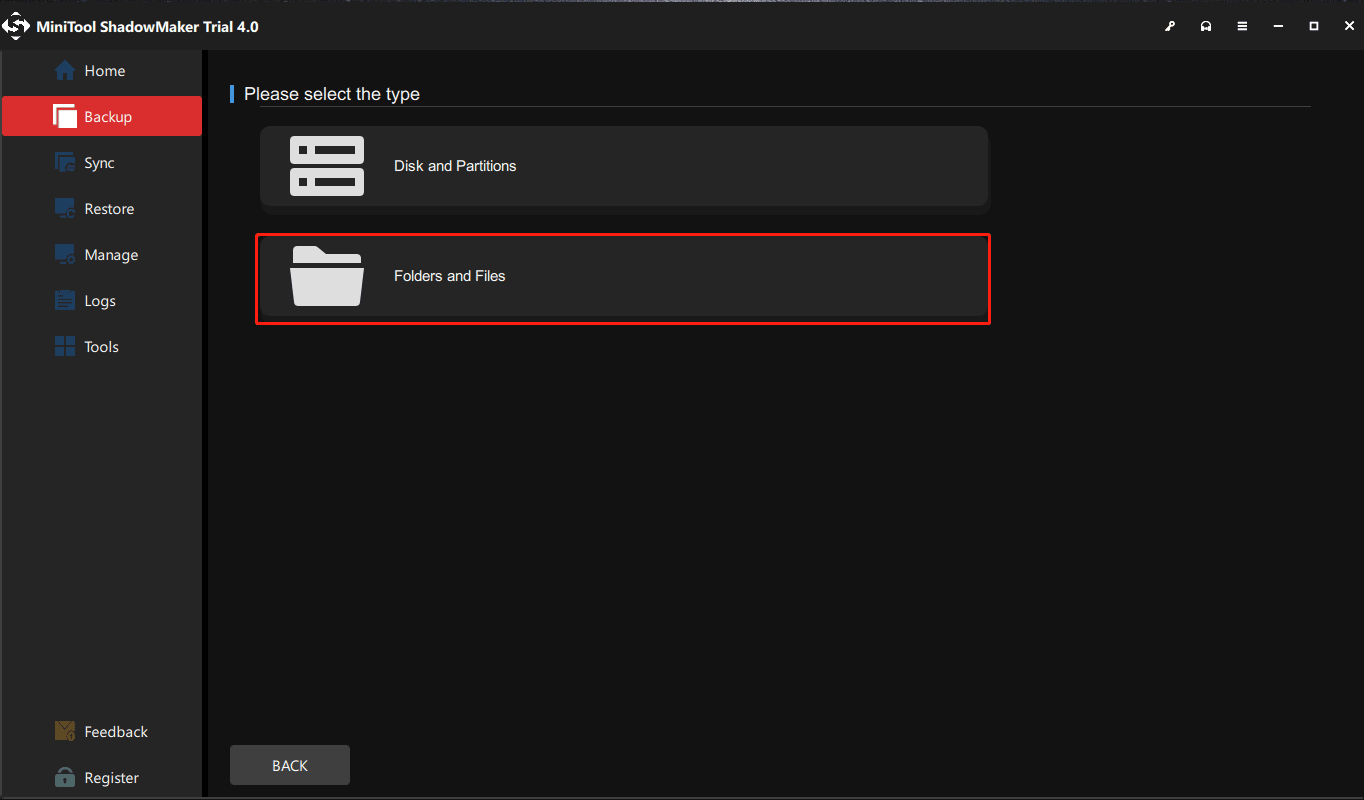
Step 3: Click Back Up Now or Back Up Later to initiate the backup task. The delayed backup task is in the Manage tab.
Bottom Line:
OneDrive is quite useful to store your files in the cloud but it is awful to encounter the OneDrive deleting files automatically issue. This post has given you some methods to help resolve the issue. Hope this article can be useful for you.
If you have encountered any issues when using MiniTool ShadowMaker, you can leave a message in the following comment zone and we will reply as soon as possible. If you need any help when using MiniTool software, you may contact us via [email protected].

![[SOLVED] How To Recover Permanently Deleted Files In Windows](https://images.minitool.com/minitool.com/images/uploads/2018/08/recover-permanently-deleted-files-thumbnail.png)