When you are trying to install a new program on Windows 10 you may receive an error message Windows Installer service could not be accessed. But, don’t worry. This post will show you the top 4 ways to solve the Windows Installer not working Windows 10 issue. After fixing this problem, use MiniTool software to create a system image.
Windows Installer Service Could Not Be Accessed
It is annoying that you can’t successfully install a new program on Windows 10/8/7. For example, you may receive an error message that says that Windows Installer service could not be accessed. This can occur if the Windows Installer is not correctly installed. Contact your personnel for assistance, as shown in following picture:

As a matter of fact, many computer users complain that they have met this error message and they don’t know how to fix this Windows Installer error. This error may occur when Windows Installer files are damaged or missing.
However, don’t worry. You have come to the right place. This article will introduce 4 ways to solve the Windows Installer service cannot be accessed issue. You can try to use them one by one.
4 Ways to Fix Windows Installer Service Could Not Be Accessed
Here, in this part, we will show you the 4 ways to solve error 1719 Windows Installer service could not be accessed in detail. Actually, each method is easy to operate.
Solution 1. Remove the Earlier Version of the Software
In order to solve the Windows Installer service could not be accessed issue, it is recommended to remove the previous version of software since the old version of software always gives rise to some unexpected issues. Plus uninstalling the previous program is always an effective way to solve Windows Installer service could not be accessed issue.
Furthermore, this method is pretty easy to operate. If you don’t know how to uninstall a piece of software, you can read the following instructions:
Step 1: Type Control Panel in the search box of Windows 10 and click it to enter its main interface.
Step 2: Click Programs and Features to continue. Then, choose the program you want to remove and right-click it to choose Uninstall from the context menu.
After you have successfully uninstalled the previous version of the software you can reinstall the program to check whether the error 1719 Windows Installer service could not be accessed is solved.
Solution 2. Manually Start Microsoft Installer Service
If the first method is not working, you can go on to the second solution. Try to manually start the Microsoft Installer Service to fix the Windows Installer not working Windows 10 issue. Microsoft Installer is a utility application in the Windows operating system which is used to install, maintain or remove software.
So, when you meet Windows Installer service could not be accessed you can try to check whether the Window Installer has stopped. Here, we will show you how to start the Microsoft Installer Service step by step.
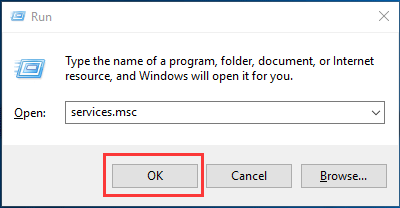
Step 1: Press the Windows key and R key together to launch the Run dialog. Then input services.msc in the Run box and click OK or hit Enter to continue.
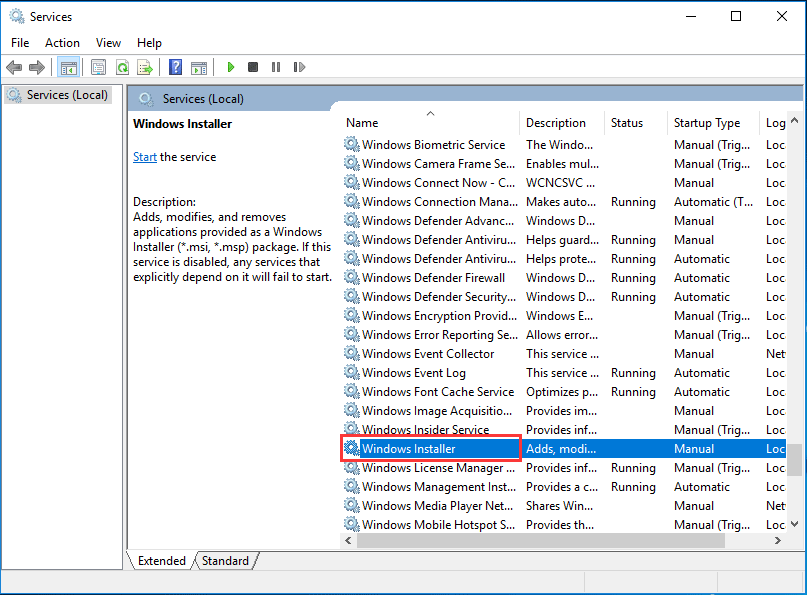
Step 2: Then the Service window will pop up. You need to choose Windows Installer to continue.
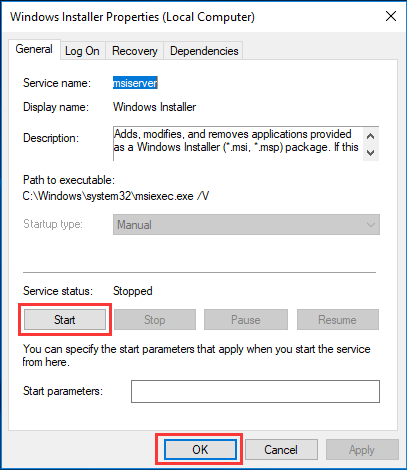
Step 3: Double-click the Windows Installer service to go to the Windows Installer Properties window. You need to change the Service status from Stopped to Running by clicking the Start button. Then click OK to continue.
After that, you can reboot your computer to check whether the issue Windows Installer service could not be accessed is solved.
Solution 3. Re-register Microsoft Installer Service
Now, you can go to the third method to fix the Windows Installer error if the above two methods have failed. Then, you can try to re-register the Microsoft Installer Service. Then the detailed operations to re-register Microsoft Installer service are as follows:
Step 1: Type cmd in the search box of Windows 10 and choose Command Prompt to continue.
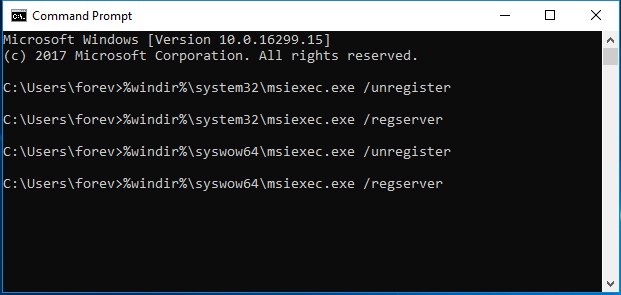
Step 2: In the Command Prompt window you need to input the following commands and hit Enter after each command to continue:
%windir%\system32\msiexec.exe /unregister
%windir%\system32\msiexec.exe /regserver
%windir%\syswow64\msiexec.exe /unregister
%windir%\syswow64\msiexec.exe /regserver
Step 3: You can type exit command to close the command prompt window.
After you have finished the above steps you can restart your computer and reinstall the program to check whether the issue Windows Installer service cannot be accessed is solved.
Solution 4. Reinstall Windows Installer
Now, we will go to the fourth method. In order to solve the Windows Installer service could not be accessed you can try to reinstall Windows Installer. We will tell you how to reinstall Windows Installer in detail.
Step 1: Press the Windows key and R key together to launch the Run dialog. Then type cmd in the box and click OK or hit Enter to continue.
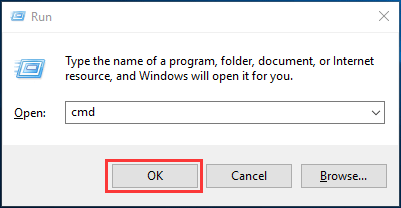
Step 2: Then you need to type the following command and hit Enter after each command to continue:
cd %windir%\system32
ren msi.dll msi.old
ren msiexec.exe msiexec.old
ren msihnd.dll msihnd.old
Step 3: Then, you can exit the command prompt windows by typing exit command. After that, you can reboot your computer and update the Windows Installer to the latest version. In order to update to latest one you need to go to the Microsoft official website to download and install the latest Windows Installer.
Step 4: After the latest Windows Installer in installed you can restart your computer and install the program you need and check whether the issue Windows Installer not working Windows 10 has been solved.
Top Recommendation
After you have solved the Windows Installer service could not be accessed issue you had better create a system image to avoid a similar error in the coming days. With a system image, you can take advantage of it to restore it to the previous state instead of spending so much time to solve the problem when you come across a similar issue again.
MiniTool ShadowMaker
There are two ways to create a system image. On the one hand, Windows snap-in program can help you to create a system image, but on the other hand, you can use a piece of third-party software to create a system image. Here, we recommend MiniTool ShadowMaker.
MiniTool ShadowMaker, the best backup software for Windows 10, is a good assistant to create a system image. With its various powerful features, it can back up the operating system, files and folders, disks, partitions and so on.
In addition, it also has a Restore feature which plays an essential role in performing recovery solutions. For instance, it can be used to restore computer to an earlier date when some accidents occur. Also, MiniTool ShadowMaker is an automatic tool which can safeguard your computer and data well.
So as to create a system image to protect computer and data, you can download MiniTool ShadowMaker Trial which can be used for 30 days by clicking on the following button or choose to purchase an advanced edition.
MiniTool ShadowMaker TrialClick to Download100%Clean & Safe
Now, we will show you how to back up Windows 10 with MiniTool ShadowMaker.
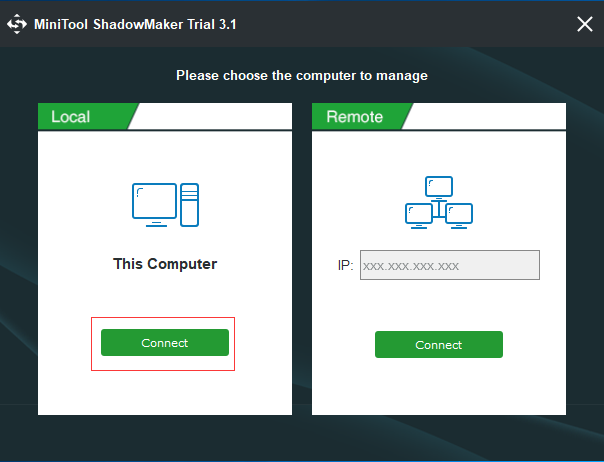
Step 1: Install the backup tool and launch it. Then click Keep Trial. Then click Connect in the Local tab to enter its main interface.
Step 2: MiniTool ShadowMaker will remind you to back up immediately if you haven’t used this software to perform any backup action. Thus, you just need to click SET UP BACKUP to continue. MiniTool ShadowMaker is designed to back up the operating system by default.
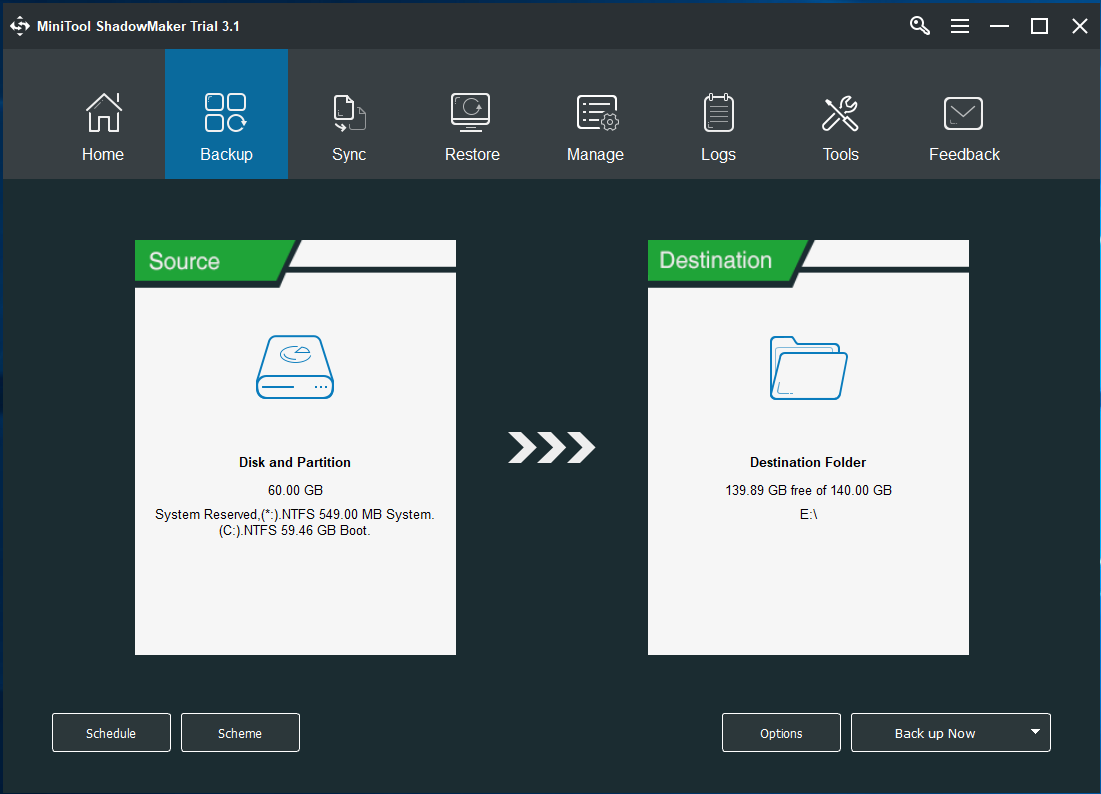
In addition, you can also click the Backup tab to enter the backup interface. Then, you can click the Source and Destination tabs to choose what you want to back up and decide where you want to save the backup image.
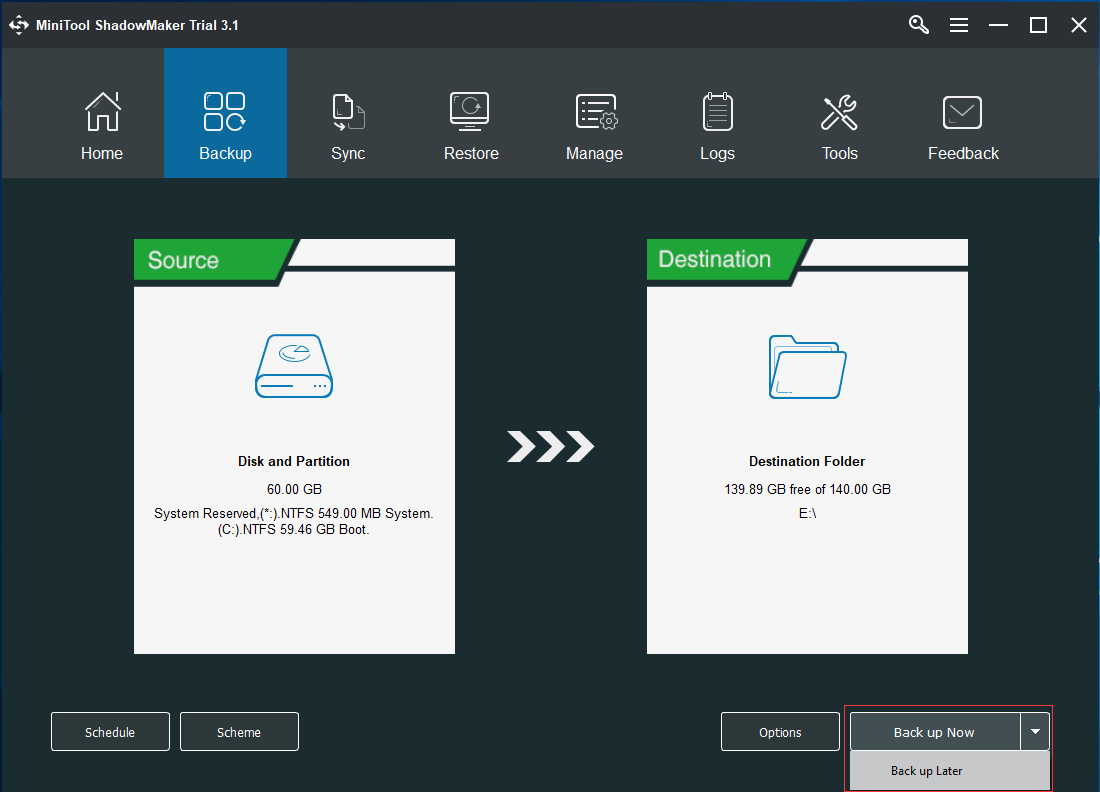
Step 3: After that, you can click Back up Now to perform the action immediately. You can also choose Back up Later from the drop-down menu to delay the process.
Read 3 Types of Backup: Full, Incremental, Differential – MiniTool to know more information on backup scheme.
Step 4: After you have created a system image you had better create a bootable mediathat is used to boot your computer into MiniTool Recovery Environment when your computer can’t normally boot from the operating system. Thus, you can go to the Tools tab to choose the Media Builder feature to continue.
As you can see, the operation methods of creating a system image by MiniTool ShadowMaker are pretty easy. Thus, you can download it to create a system image for the sake of protecting your PC and data well.
MiniTool ShadowMaker TrialClick to Download100%Clean & Safe
Windows Snap-in Program
In the above part, we have introduced how to create a system image with MiniTool ShadowMaker. Now, we will show you another way that is using Windows snap-in tool to create a system image so that you can restore your PC to its previous state. You can see the detailed operations in the following part.
Step 1: Type Control Panel in the search box of Windows 10. Then, choose it to enter its main interface.
Step 2: Choose Backup and Restore(Windows 7) to continue.
Step 3: Then click Create a system image in the left window to continue.

Step 4: Next, you need to choose a destination to save the system image. Here, you can choose a hard disk, a DVD disk and a network location. Then click Next to continue.
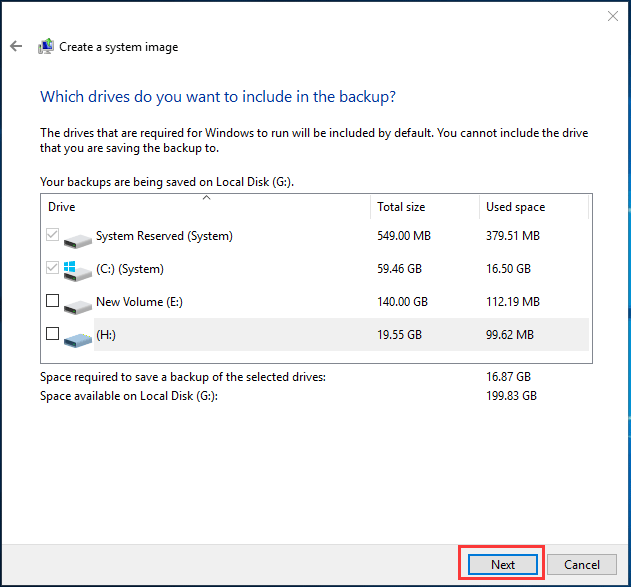
Step 5: Then you need to choose the source to back up. The System Reserved partition and C drive are checked by default. If you want to back up other partitions, you can check them together. Then, click Next to continue.
Step 6: Then, you are required to confirm the location and backup source. After that, click Start backup to perform this process immediately.
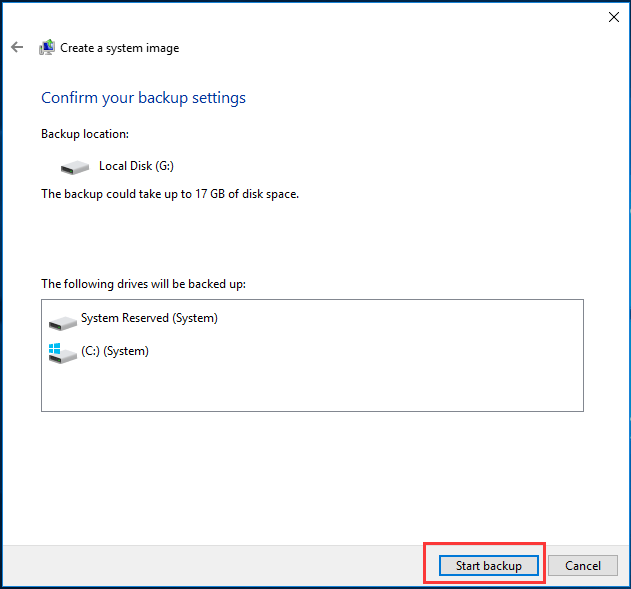
After that, you need to wait patiently for the process to be completed.
How to Restore Computer to Earlier Date in Windows 10/8/7 (2 Ways)
Bottom Line
In this article, we have introduced 4 solutions for the issue the Windows Installer service could not be accessed. You can choose any one of the solutions to solve the Window Installer not working problem. If you have any better solutions you can share them in the comment zone.
In addition, it is recommended to create a system image so as to perform some recovery solutions when encountering some accidents. There are two ways to create a system image, so you can choose either one.
From comparison, we think MiniTool ShadowMaker is more convenient to create a system image. In addition, if you have any problem with MiniTool ShadowMaker, please don’t hesitate to contact us via the email [email protected].
Windows Installer Not Working FAQ
- Remove the earlier version of the software.
- Manually start Microsoft installer service.
- Re-register Microsoft installer service.
- Reinstall Windows installer.
- Open Run dialog.
- Type gpedit.msc in the box and click OK to continue.
- Navigate to Local Computer Policy\Computer Configuration\Administrative Templates\Windows Components\Window Installer.
- Double-click Turn off Windows Installer and choose Enabled to continue.
- Click Apply and OK to execute the changes.
- Open Run dialog.
- Type %systemroot%\system32 in the box and click OK.
- Right-click Msi.dll and choose Properties.
- Navigate to the Version tab and note the File version number.
- Open Run dialog.
- Type services.msc in the box and click OK to continue.
- In the Services window, find out Windows installer and right-click it.
- Choose Properties.
- Change the Startup type to Manual.
- Change the Service status to Start.
User Comments :