Most people will be freaked out when finding that the system is not booted as usual. Different kinds of error messages may appear on the computer screen. “One of your disks needs to be checked for consistency” is a common one.
Are you familiar with this error? Do you know what the best way is to deal with it? If you happen to be the victim of this problem, congratulations, you’ve got to the right place. In the following content of this article, I’ll show you how to deal with the Windows needs to check disk for consistency situation properly (how to recover files after check disk and how to fix check disk for consistency error according to your needs).
You may jump to the paragraph you are interested in directly.
Error Message – One of Your Disks Needs to Be Checked For Consistency
The situations in which Windows asks to check your hard drive for consistency can be roughly divided into two types:
- The disk check can be finished automatically and completely. Then, you can boot into the system as usual.
- The disk check for consistency freeze, so you cannot start your computer successfully.
In this part, I’ll talk about them respectively and show you how to work with the “CHKDSK deleted my data” issue & how to get data off a hard drive that won’t boot.
Files Are Missing after Check Disk
When encountering the “one of your disks needs to be checked for consistency” error, many users are prone to let the disk check run in order to fix the problems they may think exist on their computer disk. Sometimes, the check process can be finished smoothly, but sometimes, it can’t be done. Well, does it mean everything goes fine when the check disk is finished completely and you start the computer successfully? Of course not!
Please look at this case:
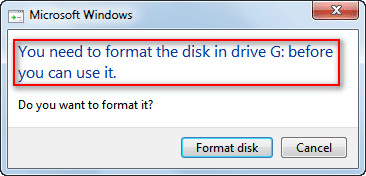
Hi, guys. Just got this error when I switched on my computer: one of your disks needs to be checked for consistency. (G:) The disk in question is one of the two partitions (F: and G:) of an old HD that I just slotted into my new system 3 days ago. It was working fine, and able to browse files on it fine until earlier. I let the chkdsk run, and it found some errors and orphaned files etc. Now when I’m in Windows, under My Computer, F: shows with details of space etc., and G: is there but doesn’t show details. What do you suggest I do next? My OS is in my new drive, so it isn’t a problem. This old drive has been with me for 7 years, and I’m wondering if it could be failing. Also, I was shifting the CPU earlier, could it have been due to that? EDIT: Just tried accessing G: in My Computer, and after the green bar filled up for a while, a message popped up saying: G: needs to be formatted before use. Do you want to format it now? I clicked No, and then an error message popped up saying: G: is not accessible. Data Error: Cyclic Redundancy Check.– asked by shank on SevenForums
Shank said that he was in Windows and found that G: didn’t show details. When he tried accessing G:, the message popped up, saying that G: needs to be formatted before use. In this case, he loses access to all the files saved on G:, obviously. If any of those files are important to him, he will definitely make every effort to recover data after check disk.
Press Any Key to Skip Disk Checking Not Working
When Windows asks to check disk for consistency, there are also some people choose to reject this request. They prefer to press any key to skip the disk checking, as prompt said. Yet, how will you respond when one of your disks needs to be checked for consistency stuck? Are you afraid of losing all the data saved on the current computer? Please don’t be, since I have a way to help you recover data from the internal disk (see the next part).
Let’s see a specific case first:
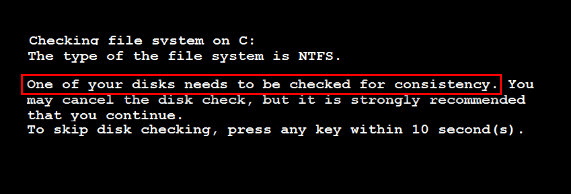
I am currently having an issue. Whenever I start up my PC, the following message appears: Checking file system on C:. The type of the file system is NTFS. Volume label is ACER. One of your disks needs to be checked for consistency. You may cancel the disk check, but it is strongly recommended that you continue. To skip disk checking, press any key within 1 second(s). This message counts down to 1 second and freezes. I tried leaving it for 4 hours today as I went to school. Came home, and it was still on this screen. As I said, every time I start up my computer, this message appears and I am forced to force shut down the computer if I do not hit a key in time. I am wondering if there is an alternative and recommended option to run this disk check to avoid skipping this message on every startup.– put forward by Sean1082 on SevenForums
Sean said that when the message counted down to 1 second, the process froze. Then, he left the computer opening. But when he came home from school 4 hours later, the computer was still stuck on the same screen. And every time when he starts up the computer, the same message appears. In cases like this, people will be wondering how they can avoid the auto check on startup and how to recover files after check disk was stuck.
How to Recover Data after CHKDSK
I’ll teach you how to recover data in detail in the following content.
Recover Data from External Hard Disk
1. Choose a proper edition of Power Data Recovery.
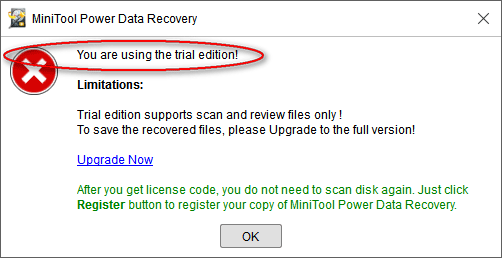
- If you are worried about the performance, please use the Trial Edition first.
- If you need to recover data immediately but don’t have special requirements, please choose the Personal Edition.
- If you need to recover data in a business environment, please select a license for the business.
Click to see the comparison of different license types and click on the corresponding button to buy.
MiniTool Power Data Recovery TrialClick to Download100%Clean & Safe

2. Download & install the data recovery software.
Download the software and run the setup program to install the data recovery software to your computer.
You should copy & paste your license key into the text box to register first if you are using the advanced edition.
3. Choose the certain disk type.
You need to specify the type of the disk needs to be scanned. For instance, to recover data from the local drive, you should click on “This PC”.
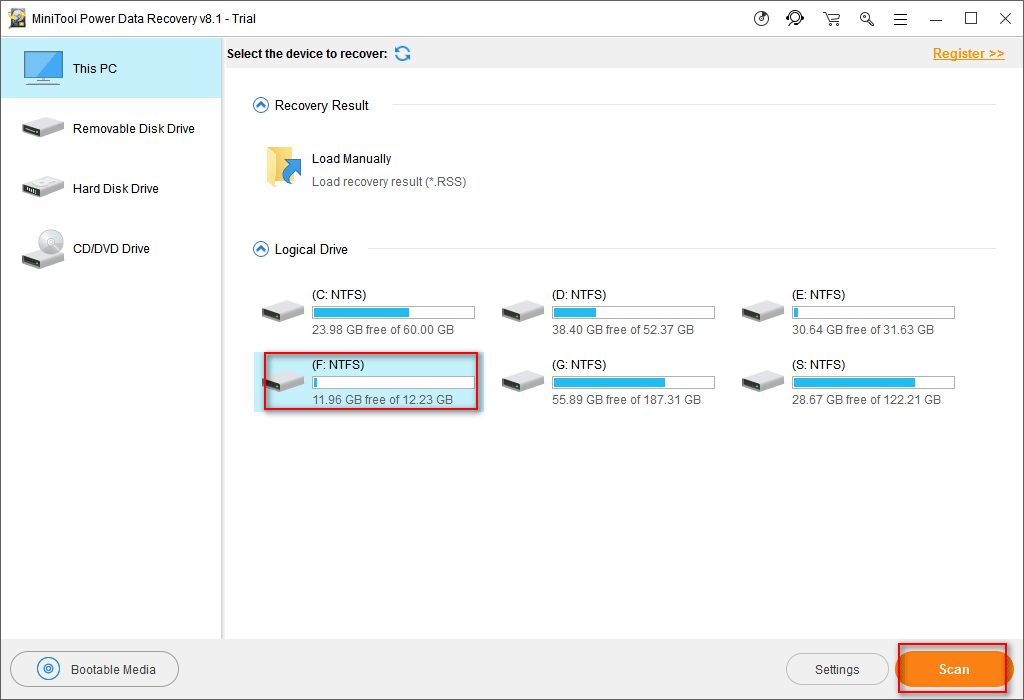
4. Select the target drive to scan.
You’ll see a list of all disks available in the column you have selected. At this time, you must select the one on which the error message appears. Then, click on the “Scan” button in the lower right corner to start detecting files.
5. Select the files you need to recover.
You may browse the scan results during or at the end of the scan. Please make sure which files you need and check them to recover by pressing the “Save” button. Then, set a storage path for them and click on the “OK” button to confirm your selection.
This method also works for the data recovery from the internal hard disk that is working well
Restore Data from Non-bootable Internal Hard Drive
How to recover data from non-booting computer? You need a bootable edition of MiniTool Power Data Recovery. Of course, you also need to choose a license type for it. The trial edition is not suitable anymore in this case since it is only able to scan the files for you, not recover. (I’ll take Personal License as an example in the rest steps; other license types are basically the same)
Please install the Personal Edition to another computer that works fine. Then, use it to make a bootable disk within a few clicks (see “How to make a Boot Disk?” in part 2 of Data Recovery From Corrupted Internal Hard Disk – Ultimate Guide).
1. Restart your computer and press corresponding button to enter the BIOS. Then, change the boot order of your computer to make this boot disk the first boot device. After that, exit BIOS and save changes.
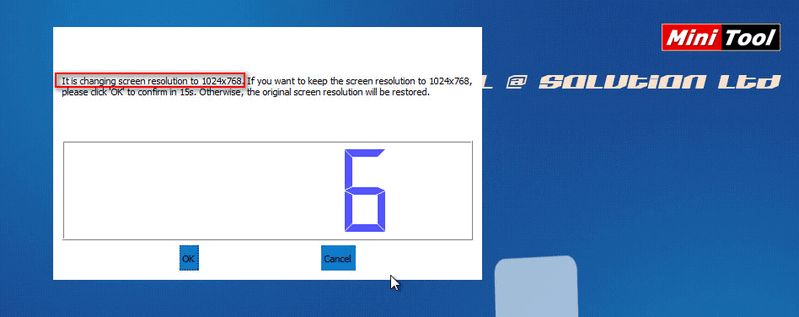
2. After a while, you’ll see the picture shown below. At this time, you may choose to change the screen resolution or not.
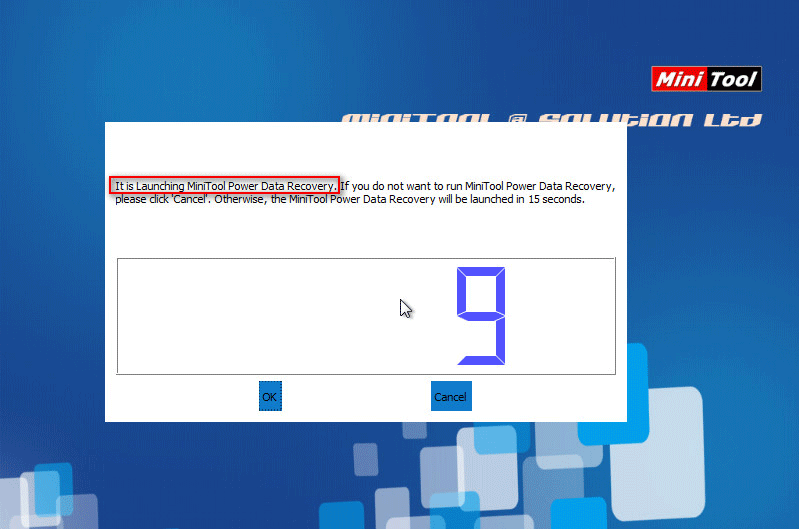
3. Afterwards, the following software launching prompt window will appear. You should choose to run MiniTool Power Data Recovery.
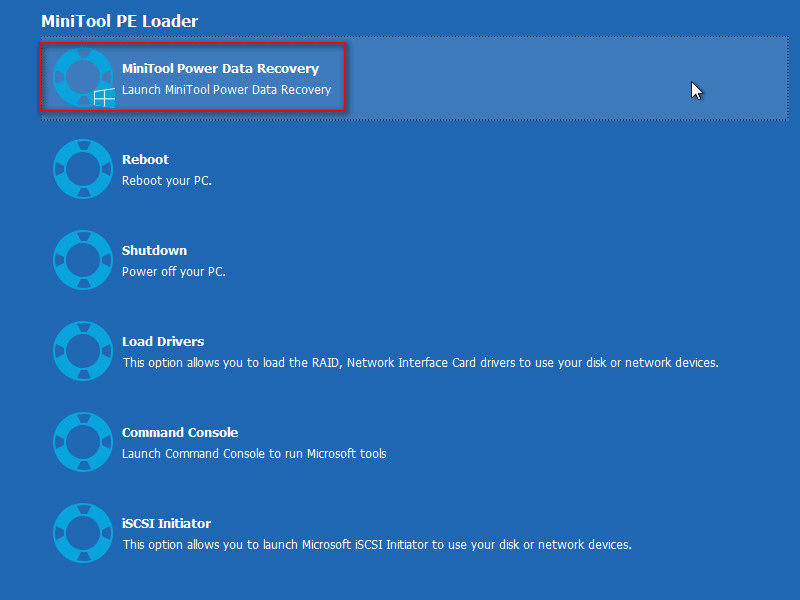
4. Then, select the first option in the MiniTool PE Loader window.
5. Now, you’ll be brought to the main window of MiniTool Power Data Recovery and you should repeat step 3 ~ step 5 mentioned in the previous situation to finish the recovery.
Solutions – Fix Check Disk for Consistency Error
In general, the automatic disk check may appear when:
- The battery is loose or moved.
- The computer shuts down improperly or illegally.
- A sudden power outage occurs while the computer is running.
- The computer case is moved while the computer is running.
- A USB device is unplugged before the computer has a chance to finish the current activity with it.
Check Disk for Errors in Windows
When that happens, you should let the check run to see whether it can be finished and whether you can access your system after that. If you enter the OS successfully, you may check your hard disk for errors in Windows and try to fix them completely or you can test the hard disk with a diagnostic tool to find and solve the problem.
There are steps of how to check hard disk for errors in Windows 7.
Disable Disk Check on Startup in Windows
But, what if Windows run CHKDSK on every reboot? How to stop checking file system on C in Windows 7 or other systems? Those are questions that bother a lot of users.
Here, I’ll show 4 common ways to cancel a disk check on your Windows computer (take Windows 7 as an example).
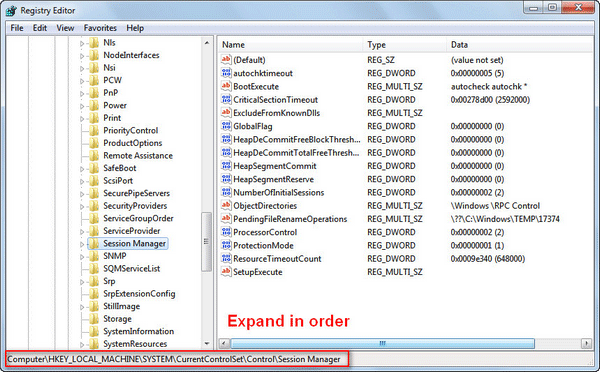
Method one: disable the check in the registry editor.
- Click on the start menu; then, type “regedit” into the search box and press “Enter”.
- Right click on the regedit.exe appeared in the result list and choose “Run as administrator”.
- Navigate to “HKEY_LOCAL_MACHINE\SYSTEM\CurrentControlSet\Control\Session Manager”.
- Locate and double-click on the “BootExecute” on the right pane.
- Change the value from “autocheck autochk *” to “autocheck autochk /k:C *” (C refers to the letter of the drive on which disk check is performed).
Method two: make use of disk defragmenting.
- Open Windows Explorer and find the drive on which check disk has been performed.
- Right click on this drive and choose “Properties”.
- Navigate to “Tools” tab and then click on “Defragment now” under “Defragmentation”.
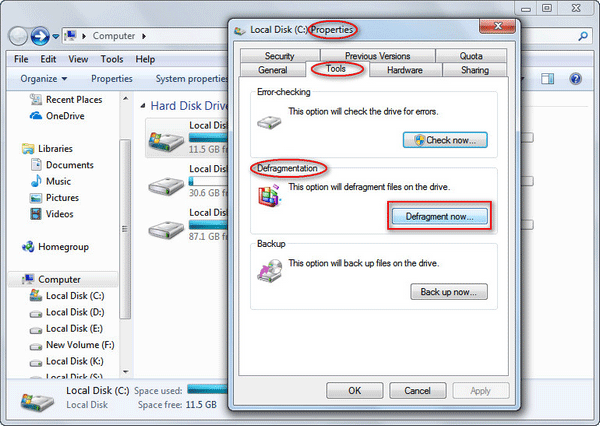
Please note that you can also open the Command Prompt and type “chkdsk *: /f” (* stands for the target drive letter) to complete this task.
Method three: repair the file system error.
- Restart the computer and hold down F8 button.
- Choose to repair the computer.
- Enter the command line mode.
- Type “chkdsk *: /r /f” (* stands for the target drive letter).
Method four: format the disk.
If all the above methods fail, you will have to format the corresponding hard drive.
Conclusion
When you, unfortunately, run into “one of your disks needs to be checked for consistency” error, you must stay calm. Please remember that your data is always the most important thing of all. So you’re suggested to recover data first before you try any other ways to try to fix the check disk for consistency error (after all, “CHKDSK deleted my files” is not an individual case).
When you’re pretty sure that you have got all the data you need, you can try the methods I have mentioned above or other ways you have found on the internet to fix the error.
User Comments :