Windows administrator permission allows you to have full control over a computer system. MiniTool introduces it in detail and explains how to manage admin rights, including granting admin permissions, enabling the hidden admin account, and so on.
What Is Administrator Permission in Windows
Windows administrator permissions are the highest level of system access, offering full control over your system and the ability to perform critical tasks.
What Allows
An admin account enables you to run system-wide tasks that the standard account cannot, including:
- Install/uninstall software: Add or remove programs across the entire Windows system. The action involves modifying directories such as C:\Program Files and C:\Program Files (x86), as well as the system registry.
- Modify system settings: Tweak core configurations that affect the system security and stability, such as Windows Registry, local security policies, and system time.
- Manage user accounts: Create a new account, delete existing accounts and associate data, or modify the permission levels.
- Access all files: View, edit, or delete any file on the device, including those in other users’ profile folders, such as C:\Users\Username\Downloads.
How Windows Administrator Permission Works
Windows uses two primary layers to manage administrator permissions to protect the system.
#1. User Account Control (UAC)
UAC is a security feature that limits applications to standard user privileges to prevent unauthorized changes to the system.
It utilizes the Split Token Model to enhance security. Windows creates two separate access tokens for administrators: a limited, standard user token and a full, administrative token.
The standard token is used for daily tasks, such as browsing, running office applications, and sending emails. When a task requires administrator rights, UAC triggers a prompt to require administrator consent or credentials.
This approach effectively mitigates security risks, preventing malicious software from silently taking control.
#2. Administrator Protection (Windows 11)
Administrator Protection is a security feature introduced in Windows 11, designed to apply the principle of least privilege.
Only when needed, Windows grants just-in-time (JIT) elevation rights. To put it simply, a user won’t own admin rights all the time, but is granted only for the duration of a specific task.
Moreover, this feature requires users to authenticate via Windows Hello when performing privileged actions.
Administrator Protection effectively enhances security, reduces attack surface, improves user control, and strengthens the system against UAC weaknesses.
How to Check if You Have Windows Administrator Rights
To check for administrator permissions in Windows, follow the steps in Windows 10/11:
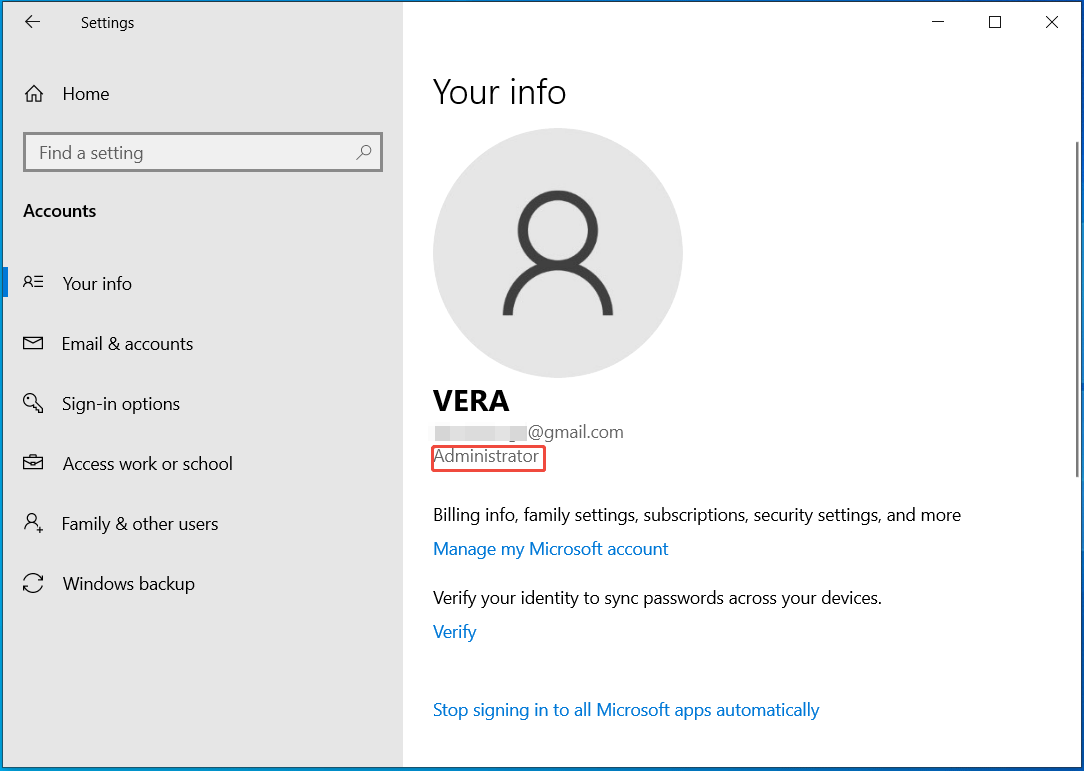
Step 1: Click Start > Settings.
Step 2: Choose Accounts and go to the Your info tab.
Step 3: If you see Administrator under the user name, you have full permissions.
Alternatively, it is available to check if you have admin rights via Control Panel, Command Prompt, or Computer Management. For details, see the checking for administrator privileges guide.
How to Grant Administrator Permissions to a Standard User
Sometimes it is essential to grant admin rights to a standard user account to allow that person to install software, change system configurations, or access sensitive files.
The following are 3 common methods to make a user an administrator.
Via Settings
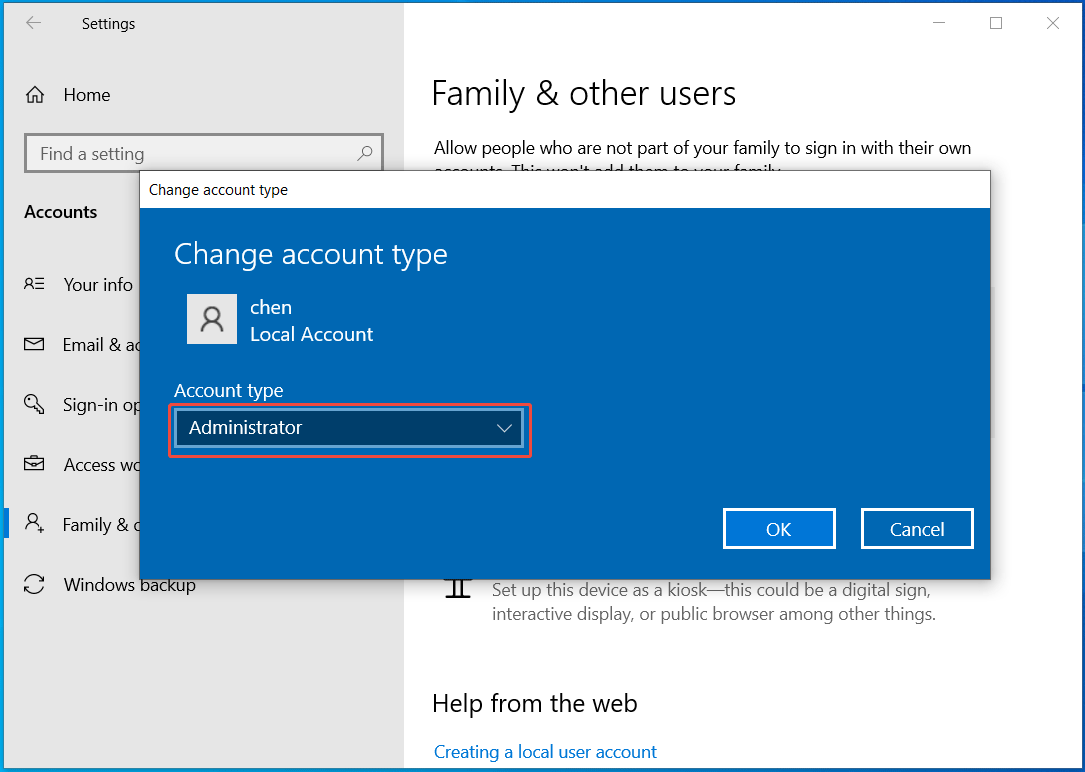
Step 1: Navigate to Settings > Accounts.
Step 2: Under Family & other users (Windows 10) or Other users (Windows 11), locate the user, and click Change account type.
Step 3: Set the Account type to Administrator and click OK to save the change.
Via User Accounts
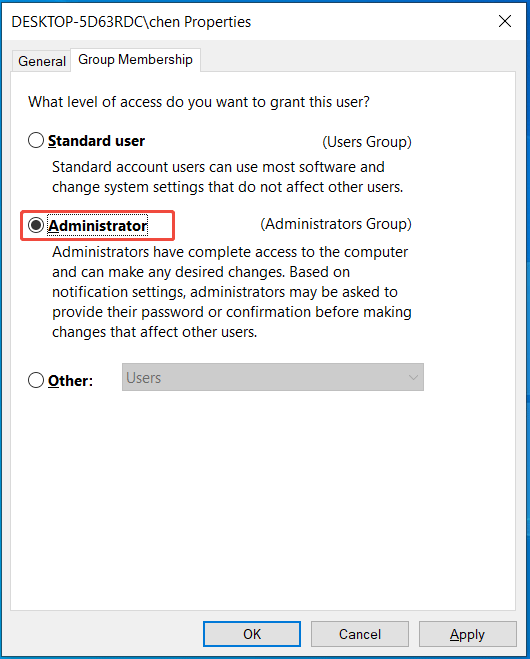
Step 1: Press Win + R to open the Run window, type netplwiz, and click OK to access the User Accounts window.
Step 2: Select the standard user and click Properties.
Step 3: In Group Membership, choose Administrator and click Apply > OK to activate the change.
Via Control Panel
Step 1: Type Control Panel in the Windows Search box and press Enter.
Step 2: Set View by to Category and choose User Accounts.
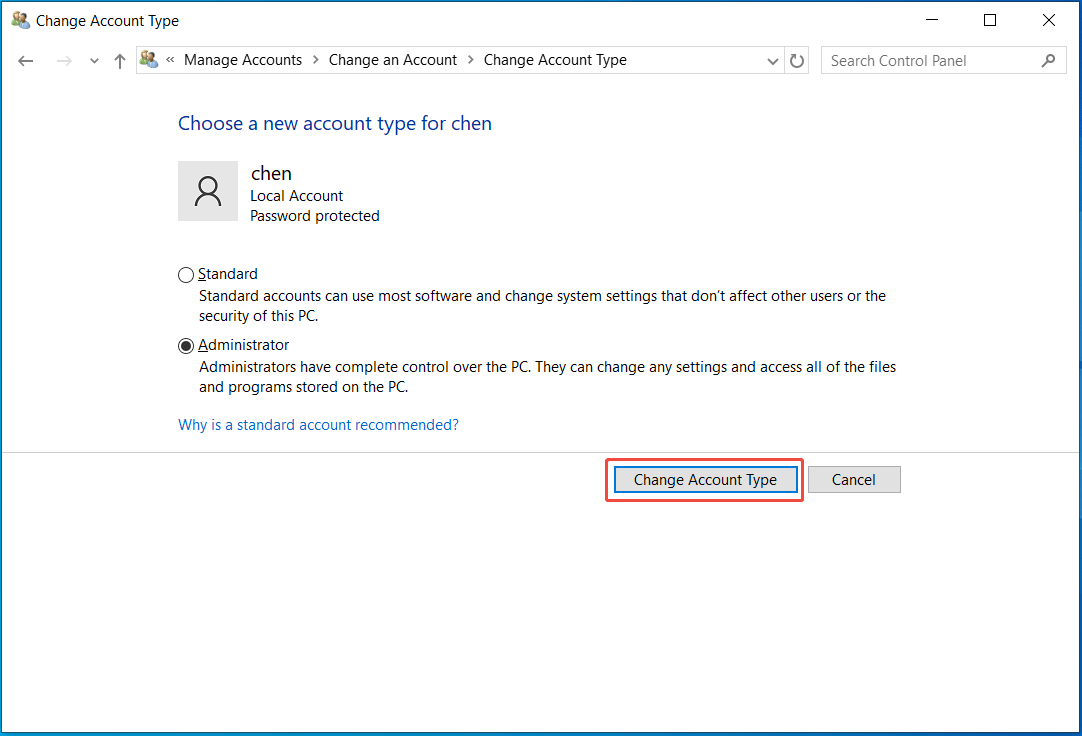
Step 3: Click Change account type and select an account.
Step 4: Choose Change the account type, select Administrator, and click Change Account Type.
Enable the Hidden Admin Account
Windows has a built-in Administrator account that is hidden. It is disabled by default for security. When you need to troubleshoot issues, enable this account with the steps below.
Step 1: Type cmd into the Search box and click Run as administrator.
Step 2: Type net user administrator /active:yes and press Enter.
Run Tasks with Elevated Rights
Run an App as Administrator
Some programs require Windows administrator permissions to function properly. To always run an app with admin rights:
Step 1: Right-click on the app and choose Properties.
Step 2: In the Compatibility tab, choose Run this program as an administrator.
Step 3: Click Apply, then OK.
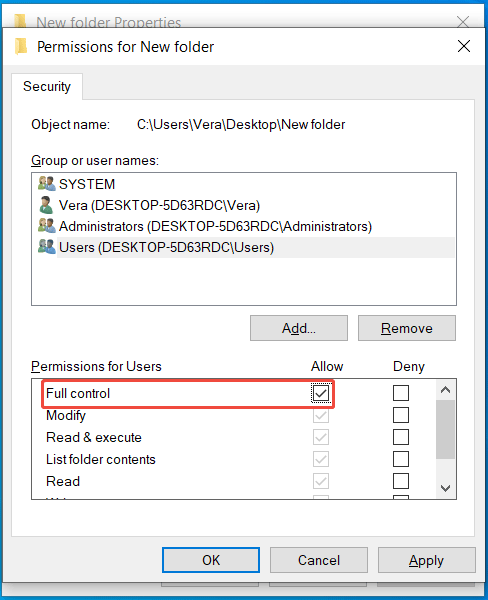
Grant Folder Access
When accessing a folder, the “Access Denied” error may appear. You need to grant administrator permissions to this folder:
Step 1: Right-click the folder and choose Properties.
Step 2: In the Security tab, choose Edit.
Step 3: Select a name and check the box under the Allow column for Full control.
Step 4: Click OK to save the change.
Bottom Line
Administrator permission in Windows is important for full system control. Learn how it works and how to grant admin rights from this guide.
If necessary, follow the steps above to enable the hidden admin account to troubleshoot issues.
Windows Administrator Permission FAQ
1. You use a standard account.
2. UAC is limiting actions for security.
3. A specific file or folder requires you to take ownership.
4. IT policies override local admin rights if you use a PC from school or work.
Step 1: Press Win + R, type secpol.msc, and click OK.
Step 2: Head to Security Settings > Local Policies > Security Options.
Step 3: Double-click User Account Control: Run all administrators in Admin Approval Mode in the left pane and choose Disabled.
Step 4: Save the change.
Step 1: Go to Control Panel, set View by to Large icons, and click User Accounts.
Step 2: Click Change User Account Control settings and move the slider to the bottom (Never notify).
Step 3: Choose OK > Yes.
About The Author

Position: Columnist
Vera has been working at the MiniTool Team for over 10 years as a technical editor and content writer. She mainly focuses on disk and partition management, data recovery, Windows backup and restore, and PC troubleshooting. Through in-depth software testing and hands-on experience, she has helped users solve a wide range of computer problems and better protect their data on Windows devices.
User Comments :