When you try to clone HDD to SSD with Acronis True Image for Crucial, you may encounter the “Acronis True Image for Crucial not working” issue. This post from MiniTool provides possible reasons and solutions.
Acronis True Image for Crucial is a piece of software that can be used to clone data, back up data, and migrate operating systems. However, it has some bugs and these problems prevent Acronis True Image for Crucial from working.
There are some common issues of Acronis True Image for Crucial:
- SSD does not detect Acronis.
- Crucial SSD is not appearing in the destination disk.
- Acronis can’t recognize the new external USB drive.
- Acronis True Image for Crucial clone failed.
- …
intel-data-migration-software-not-cloning
How to Fix Acronis True Image for Crucial Not Working
How to fix Acronis True Image for Crucial not working? Try the below solutions:
- Acronis True Image for Crucial requires a Crucial BX-series or MX-series SSD to clone or back up data from devices or disks connected via SATA or a SATA cable from a laptop adapter. Thus, you need to check the SSD series and your cable.
- Acronis True Image for Crucial requires that your source images are no error. Thus, you need to check if there are any errors in your source image.
- Acronis True Image for Crucial cloning fails is the inability to clone the hidden recovery partition. Thus, you can also check if there is a hidden recovery partition.
- Update Acronis True Image for Crucial.
Try Acronis True Image for Crucial Alternative
You can use the professional backup software – MiniTool ShadowMaker to replace Acronis True Image for Crucial. It supports data migration with several SSD brands, not limited to Crucial. As an alternative to Acronis True Image for Crucial, this program provides you with the Clone Disk feature to transfer all contents from the old hard drive to the new Crucial SSD in Windows 11/10/8/7 without losing data or messing up the cloning process.
Now you can download and try MiniTool ShadowMaker.
MiniTool ShadowMaker TrialClick to Download100%Clean & Safe
Then, let’s see how to migrate SSHD to SSD step by step.
Step 1: Connect the SSD to your computer. Launch MiniTool ShadowMaker, and click Keep Trial to continue to use the Trial edition.
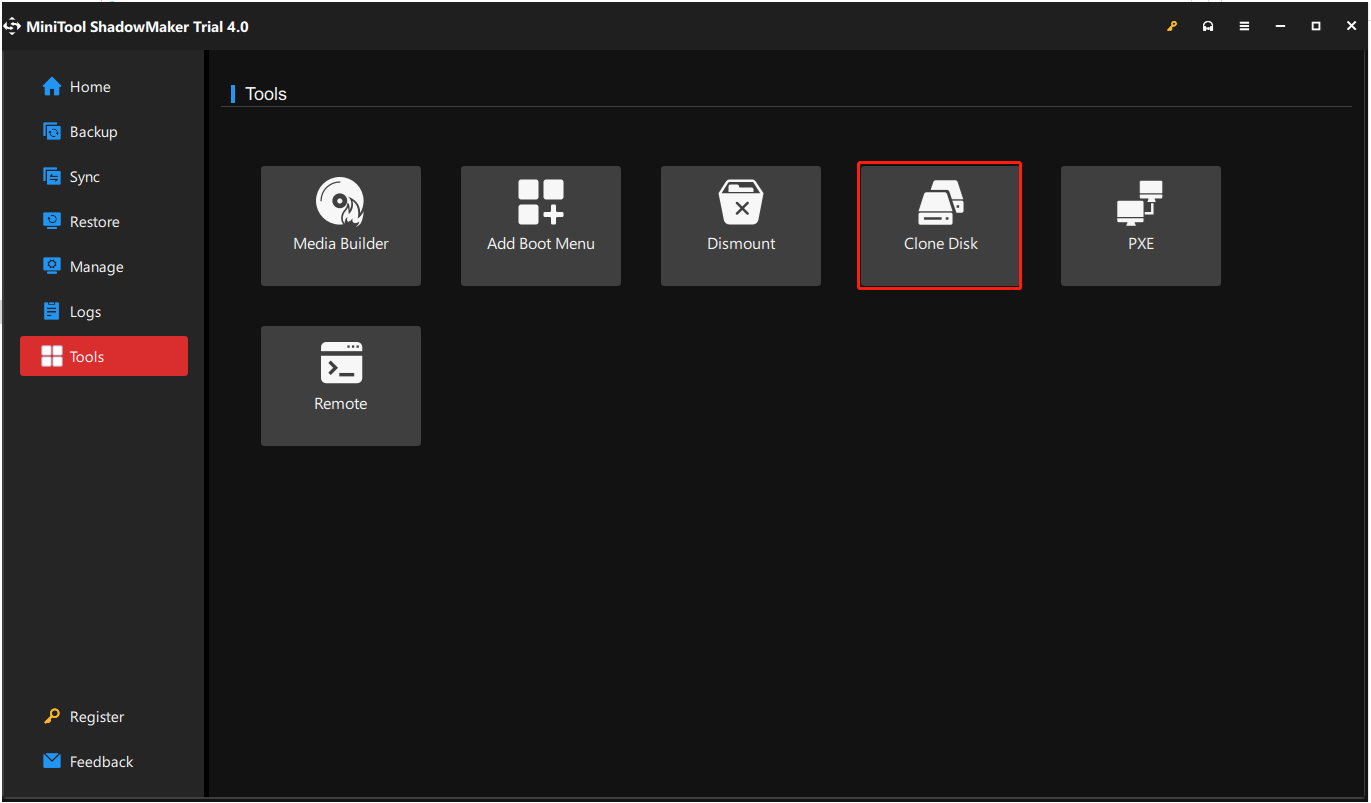
Step 2: After entering the main interface, navigate to the Tools tab. And then choose the Clone Disk feature to continue.

Tip: MiniTool ShadowMaker supports you to clone the dynamic disk, but it is just for the simple volume.
Step 3: Next, you are required to choose the source disk and the target disk for cloning. Here, you intend to clone HDD to SSD, thus, please set the HDD as the source disk and the SSD as the target disk.
Step 4: After you have successfully selected the disk clone source and destination, click OK to continue.

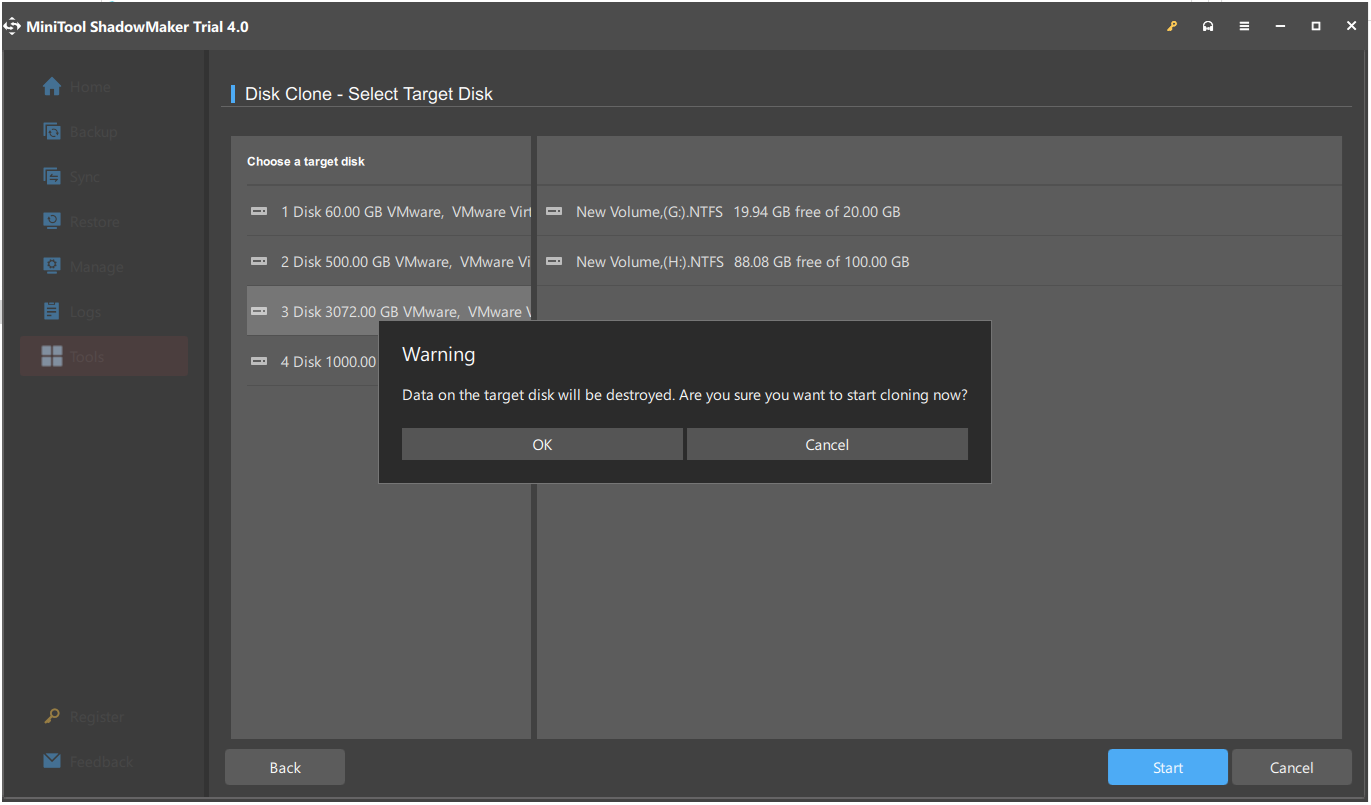
Step 5: Then you will receive a warning message that tells you all data on the target disk will be destroyed during the disk cloning process. Then click OK to continue.
Note: If there are important data on the target SSD, you had better back them up in advance.
Step 6: Then it will begin to clone HDD to SSD and you need to wait several minutes until the process is finished.
Step 7: When the disk clone process is finished, you will receive a message which tells you that the source disk and the target disk have the same signature. Thus, you need to remove the HDD from your computer and insert the SSD into the PC.
User Comments :