Some of you might find that AutoFill is not working in Excel. Can you come up with any solutions on that? If not, then you have come to the right spot. This post on MiniTool Website will provide you with 6 ways to solve Excel AutoFill not working.
AutoFill Is Not Working in Excel
AutoFill is a very useful feature in Microsoft Excel that populates data in empty cells as per the data in the selected cells. However, this feature might go wrong sometimes. The reasons for Excel cell AutoFill not working might be various, for example, corrupted installation of Microsoft Office, insufficient data, Automatic Calculation being disabled, disabled fill handle and more. Let’s see how to fix them in detail.
Microsoft Excel is one of the best office tools that can help you to organize and manage data transfer. You might run into all kinds of issues when using it. Therefore, it is better to create a backup of your excel files as a precaution in case anything goes wrong during work hours. With a backup copy created by the PC backup software – MiniTool ShadowMaker, you can restore your data easily after an occurrence of data loss.
MiniTool ShadowMaker TrialClick to Download100%Clean & Safe
How to Fix AutoFill Not Working in Excel?
Fix 1: Check Your Data
To make AutoFill work properly, make sure the first two cells in Excel are filled. If you have only filed one cell, no wonder AutoFill is not working in Excel.
Fix 2: Enable Automatic Calculation
AutoFill for formula is only available when the Calculation Option is set to Automatic. If this option is set to manual, follow these steps to change it to automatic:
Step 1. Launch Microsft Excel and go to the Formula tab.
Step 2. Under the Calculation group, hit Calculation Options and then select Automatic.

Fix 3: Modify AutoCorrect Options
In addition to checking spelling problems in worksheets, the AutoCorrect feature in Excel can also inspect if you call out formulas the wrong way and corrects them automatically. Follow these steps to enable this option:
Step 1. Click on File > Options > Proofing > AutoCorrect Options.
Step 2. Under the AutoFormat As You Type tab, tick Fill formulas in tables to create calculated columns and hit OK to save the changes.

Fix 4: Enable Fill Handle
If Excel AutoFill not working is still there, you can check if you have enabled the fill handle option. To do so:
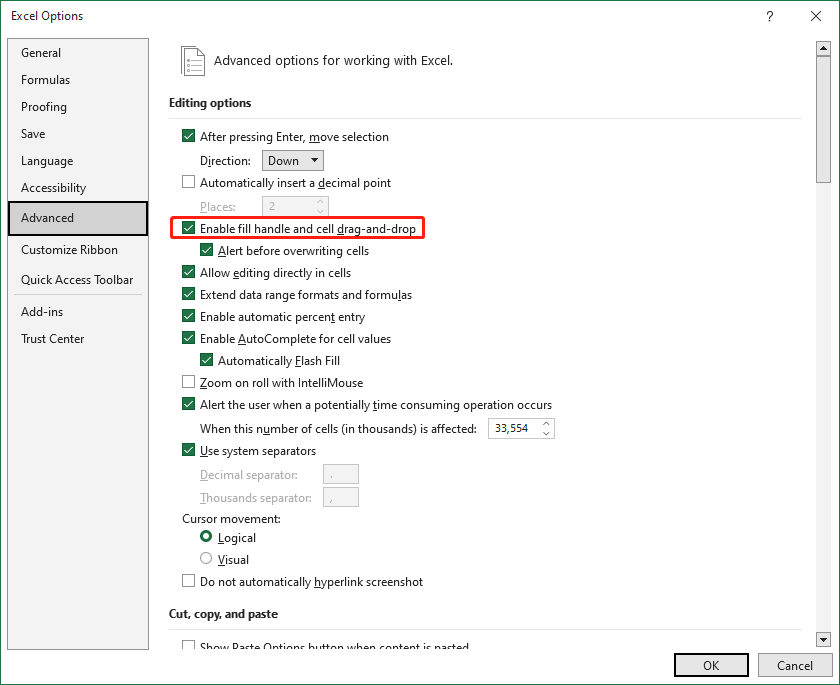
Step 1. Run Microsoft Excel and go to Files > Options > Advanced.
Step 2. Under Editing options, tick Enable fill handle and cell drag-and-drop and hit OK. Then, you can use the option to copy your formulas from one cell to another. Then put the cursor at the lower right corner of the cell you want to copy, and click & drag on the + icon the fill handle to the cells you want to copy the formula.
Fix 5: Disable Filter
It is reported that AutoFill is not working in some older versions of Microsoft Excel. In this case, removing the Filter option might be useful. To delete Filter from your table, just press Ctrl + Shift + L together. After using the file handle, you can hold the similar buttons on your keyboard again to reactive Filter for the headers in the Excel table.
Fix 6: Repair Office
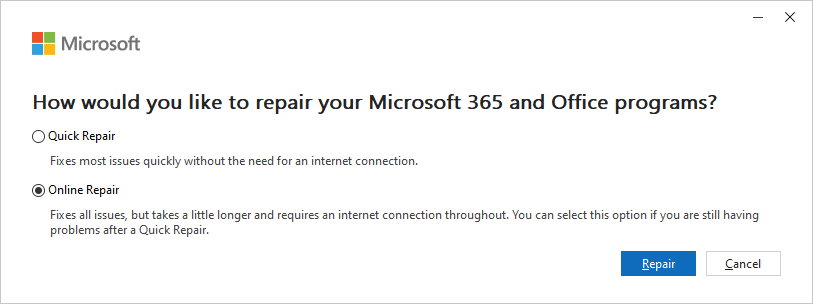
When there are some damaged files in Microsoft Office, you can also receive errors like AutoFill not working in Excel. To fix this issue, you can consider running an online repair.
Step 1. Press Win + R to open the Run dialog.
Step 2. Type appwiz.cpl and click on OK to open Programs and Features.
Step 3. Right-click on Microsoft Office and hit Change.
Step 4. Tick Online Repair and hit Repair to save the changes.
User Comments :