The deleted files on Windows are still existed in Recycle Bin and eat up your disk space. If you don’t want to trouble to clear the Recycle Bin manually each time, you can learn how to automatically empty Recycle Bin on a schedule on Windows 10. To recover permanently deleted files or lost files, you can turn to MiniTool Power Data Recovery.
After you delete a file on Windows computer, it will go into the Recycle Bin and still consume hard disk space. You can automatically empty Recycle Bin on a schedule on Windows 10 to permanently delete the files. You can check how to do it below.
How to Automatically Empty Recycle Bin on a Schedule on Windows 10 – 2 Ways
Way 1. Via Windows Storage Sense
Step 1. Click Start -> Settings -> System on Windows 10. And click Storage in the left panel.
Step 2. In the right window, you can turn on the switch under Storage. You can see the Storage Sense can automatically free up space by getting rid of files you don’t need, like temporary files and content in your Recycle Bin.
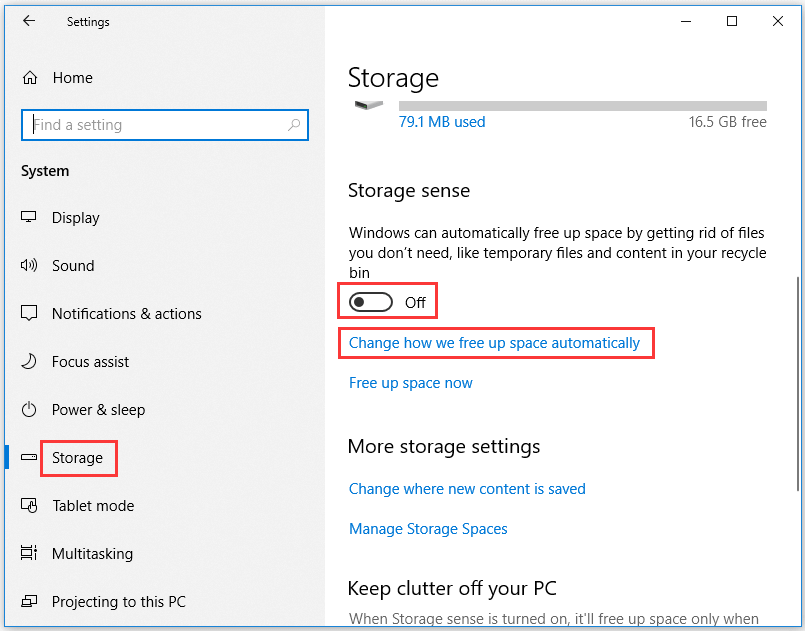
Step 3. Next you can click Change how we free up space automatically link to open Storage Sense settings.
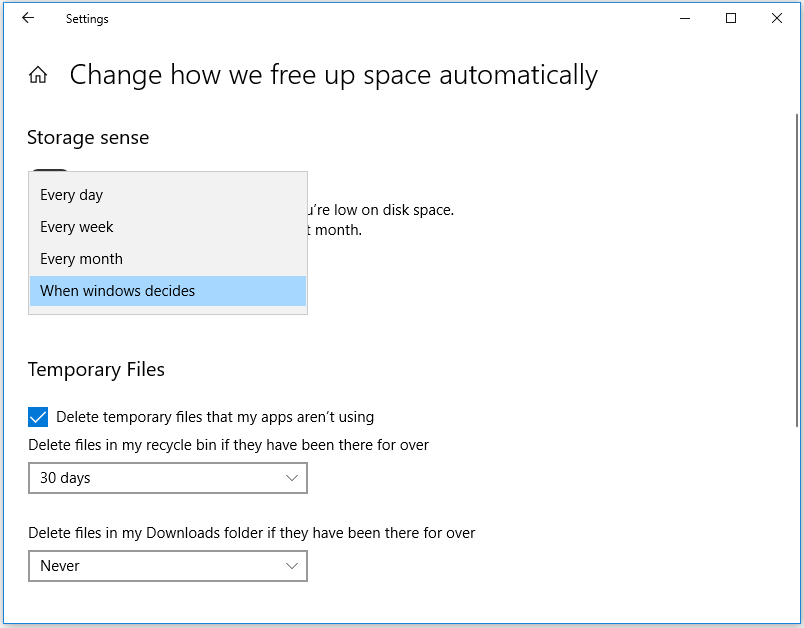
Under Storage Sense section, you can select how often you want to run this feature. You can choose every day, every week, every month, during low free disk space.
Step 4. Under Temporary Files, you can uncheck Delete temporary files that my apps aren’t using if you don’t want to delete temporary files, and choose Never under Delete files in my Downloads folder if they haven been there for over option.
Then you can choose how often you want to empty Recycle Bin automatically on Windows 10. You can click the drop-down icon and choose Never, 1 day, 14 days, 30 days, or 60 days.
If you want to turn off Storage Sense feature in future, you can go to Settings again to turn off Storage Sense.
Way 2. Through Windows Task Scheduler
Step 1. Click Start, type task scheduler, and press Enter to open Windows Task Scheduler app.
Step 2. Next right-click Task Scheduler Library in the left column and click New Folder and name the folder My Tasks.
Step 3. Right-click the created new folder and click Create task. In Create Task window, under General, you can input a name for the task. Here we input Empty Recycle Bin.
Step 4. Next you can click Triggers tab and click New button.
Step 5. In Edit Trigger window, you can select On a schedule next to Begin the task. Then you can choose Weekly or Monthly to schedule the task. Click OK.
Step 6. Click Actions tab in Create Task window, and click New. Type cmd.exe under Program/script. Next to Add arguments, enter /c “echo Y|PowerShell.exe -NoProfile -Command Clear-RecycleBin”. Click OK to save the settings.
After that, your Windows Recycle Bin will be automatically emptied on a schedule you configured in Task Scheduler.
How to Recover Files Deleted from Recycle Bin
If you want to permanently delete a file instead of leaving it in Recycle Bin, you should press Shift + Delete key at the same time when you delete a file.
After permanently deleting a file, you can’t find it in Recycle Bin. The way to get it back is to utilize a professional data recovery software.
MiniTool Power Data Recovery is the best free data recovery software for Windows 10. It lets you easily recover any deleted/lost files from PC, laptop, external hard drive, SD card, USB, etc.
User Comments :