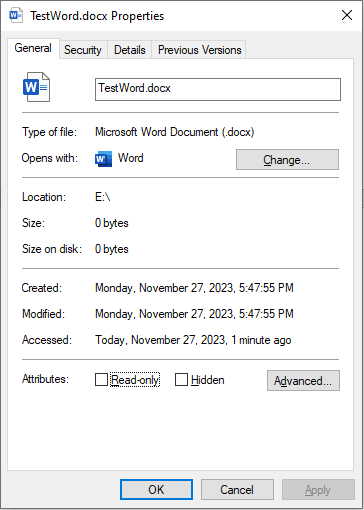
Windows records the created date, modified date, authors, and other attributes of a file to help people check the specific information if needed. You can change file attributes to avoid strangers getting the real information with the guidance in this MiniTool post.
Change File Attributes Using Windows PowerShell
Windows PowerShell, released by Microsoft, is a built-in Windows command line tool. You can use it to access the file system and change file attributes and other settings.
The following content will show you how to change file attributes by using Windows PowerShell. Take this document as an example.
MiniTool Power Data Recovery FreeClick to Download100%Clean & Safe
#1. Change the Created Date for a File
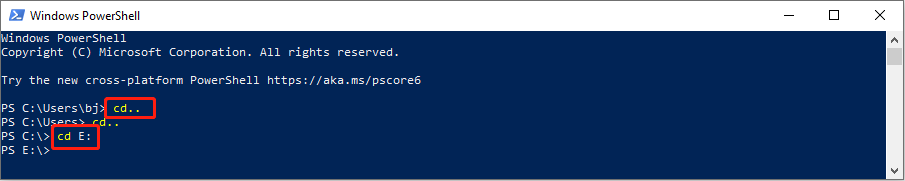
Step 1: Right-click on the Windows icon at the left bottom, then choose Windows PowerShell from the context menu.
Step 2: To find the target file, we need to change the directory. You can type cd.. to return to the last directory in the current path, then use cd folder-name to move to the directory where the target file is located.
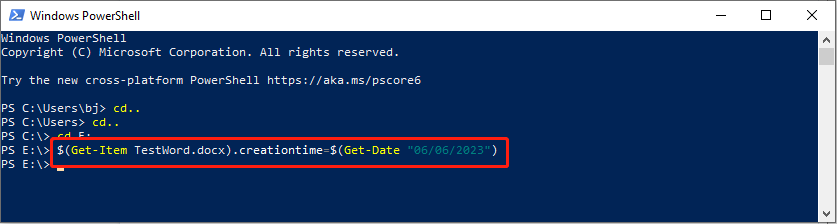
Step 3: Type $(Get-Item filename).creationtime=$(Get-Date “mm/dd/yyyy”) and hit Enter to change the created time of the file. The file extension is included in the filename.
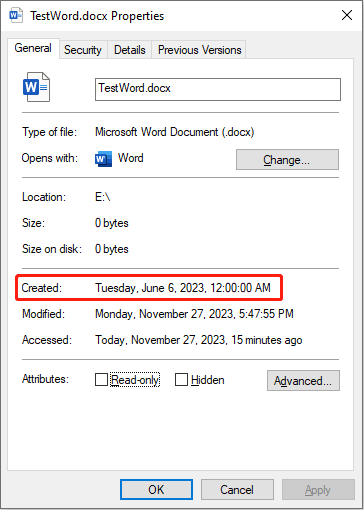
If there is no error reported and back to the directory, you have successfully changed the created date.
#2. Change the Modified Date for a File
If you have completed the above steps, changing the modified date will be a piece of cake for you.
Step 1: Type Windows PowerShell in the Windows search bar, and hit Enter to open the window.
Step 2: You need to use cd command lines to access the target file. Then, type $(Get-Item filename).lastwritetime=$(Get-Date “mm/dd/yyyy”) and press Enter.
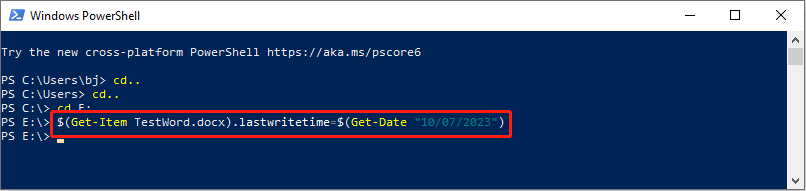
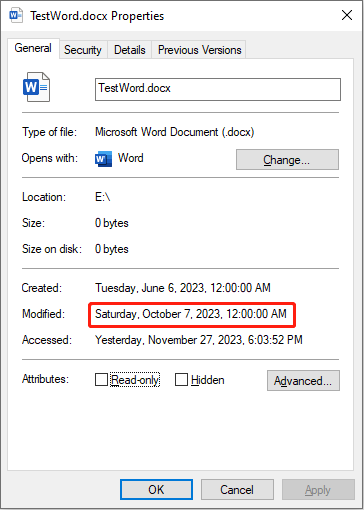
Here, you can see the last modified date has changed.
#3. Change the Access Time for a File
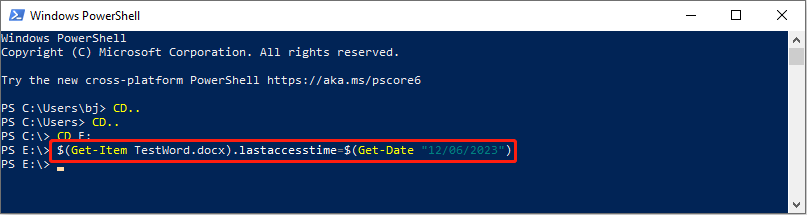
The last action is to change the access time. You can follow the steps above to find the target file, then type the command $(Get-Item filename).lastaccesstime=$(Get-Date “mm/dd/yyyy”) and hit Enter.
Note that if you write to or open a file after setting the time, the modified time and access time will change to the actual time.
Read this post to learn how to change file type: 2 Ways to Help You Change File Type on Windows 11 Easily.
Remove File Attributes Using File Explorer
If you think the above steps are complex and tedious, you can remove file attributes to hide information. File Explorer can help you achieve this goal.
Step 1: Press Win + E to open Windows Explorer.
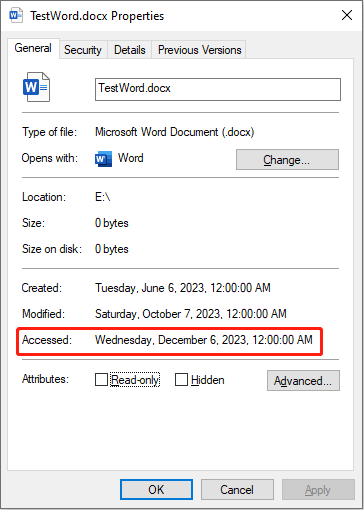
Step 2: Navigate to the target folder and right-click on it. You should choose Properties from the context menu.
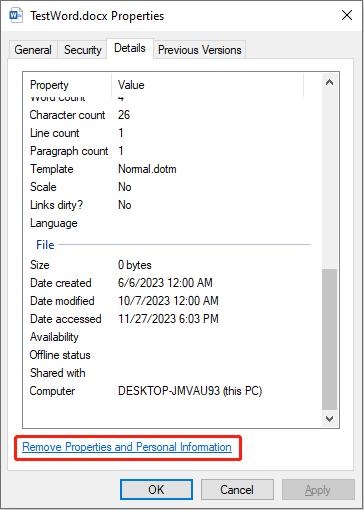
Step 3: Shift to the Detailed tab and click on Remove Properties and Personal Information at the bottom of this window.
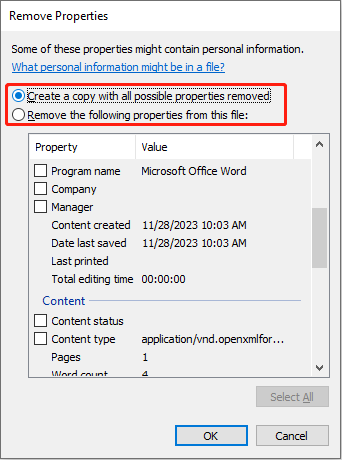
Step 4: If you choose the Create a copy with all possible properties removed option, you will get a duplicate file that removes all possible file attributes.
If you choose Remove the following properties from this file, you can choose the file attributes you want to remove from the following list.
Step 5: Click OK to confirm and apply your choice.
Bottom Line
This is all about how to change or remove file attributes on your computer. Steps are easy to complete but you need to be careful to avoid mistakes. Additionally, if you need to recover files, MiniTool Power Data Recovery is worth a try.
MiniTool Power Data Recovery FreeClick to Download100%Clean & Safe
Hope this post gives you some useful information.
User Comments :