What Is Windows Disk Write Caching?
Disk write caching allows the applications to run faster by temporarily storing the data Write-requests to RAM rather than the disk. It enables your computer to delay writing files to the hard disk hence improving file transfer speed.
Disk write caching doesn’t write the data to the disk and you can just regard it as a messenger. Without any delay, let’s see how to disable or enable write caching on Windows 10/11.
How to Enable/Disable Disk Write Caching?
By default, disk write caching is enabled in Windows 10 for internal drives. As for external drives, this feature is enabled. Here’s how to enable or disable Disk writing caching:
Step 1. Press Win + R to open the Run dialog.
Step 2. Type devmgmt.msc and hit Enter to launch Device Manager.
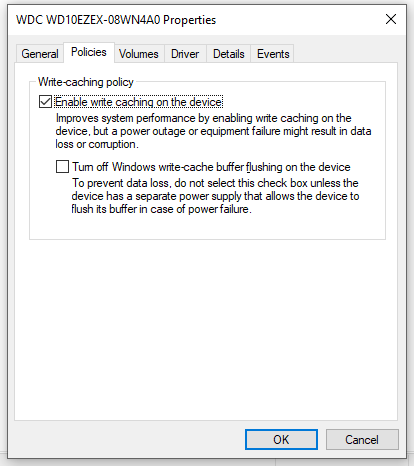
Step 3. Expand Disk drives and right-click on the disk drive you want to enable/disable disk write caching to choose Properties. Here, we select an internal storage drive.
Step 4. Under the Policies tab, choose from Enable write caching on the device or Turn off Windows write-cache buffer flushing on the device.
To prevent data loss, don’t check the second policy unless you have a separate power supply.
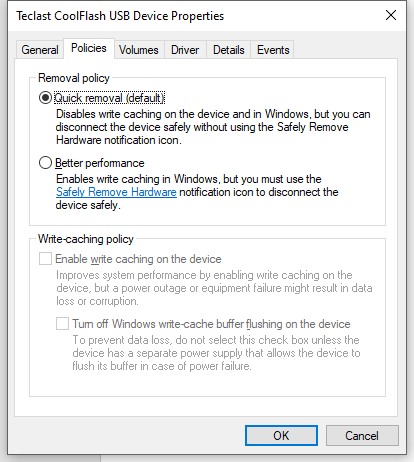
For an external storage drive, you can either choose Quick removal to disable write caching or Better performance to enable write caching on the device.
Step 5. Click on OK to save the changes.
Suggestion: Back up Your Data with MiniTool ShadowMaker
Although disk write caching improves system performance, it might result in data loss due to another hardware failure or sudden power outage. Therefore, you had better back up your data before making any changes. By doing so, you can restore your files within just a few steps.
If you need to create a backup for your important files, a professional backup software – MiniTool ShadowMaker might save your day! You can get a free trial for 30 days and enjoy almost all the features including backing up and restoring files, folders, systems, partitions and disks on Windows 11/10/8/7. Now, create a file backup with us step by step:
MiniTool ShadowMaker TrialClick to Download100%Clean & Safe
Step 1. Launch this program and hit Keep Trial.
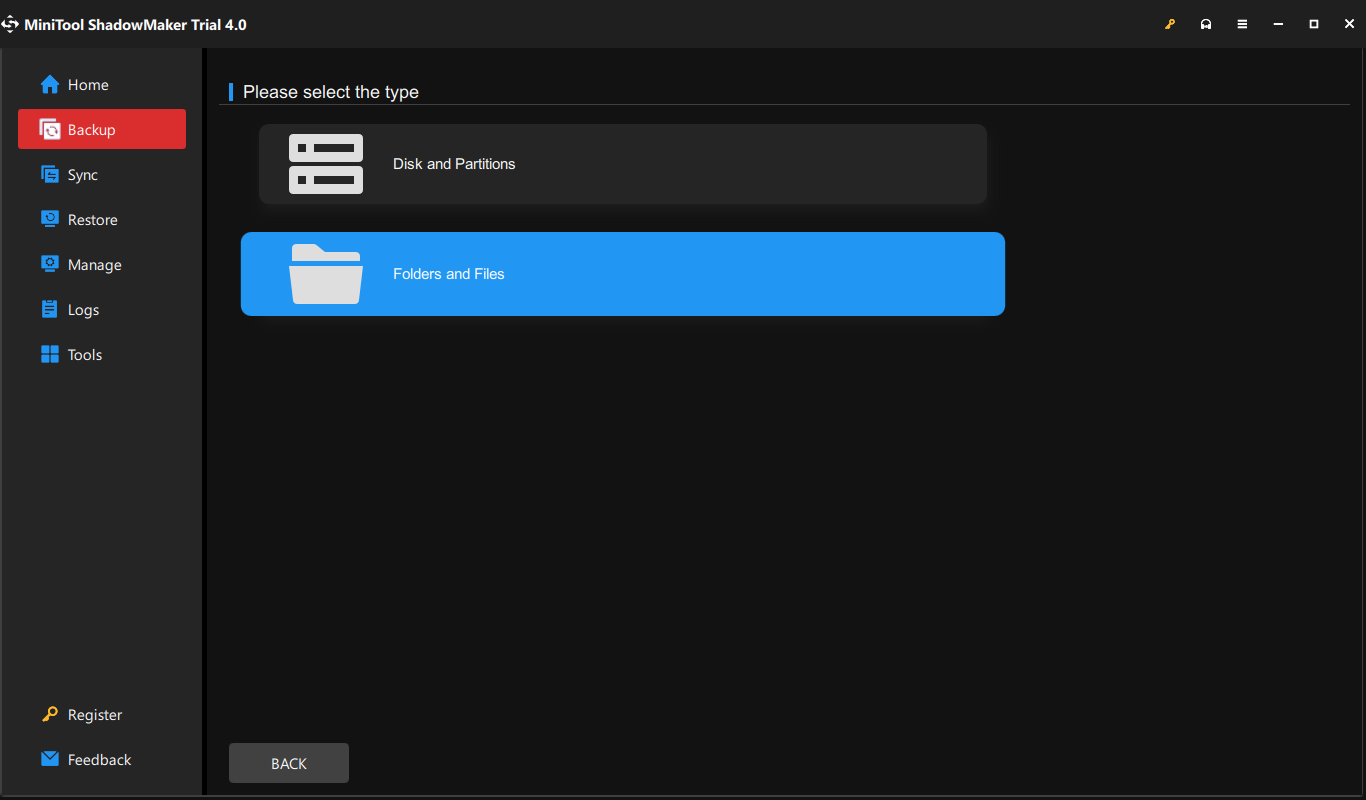
Step 2. In the Backup page, you can select file source and destination. Go to SOURCE > Folders and Files, and then you can tick the files that you want to protect. In DESTINATION, you can select a destination path for your backups.
Step 3. Click on Back Up Now to start the process.
Final Words
Now, you must be aware of the limitation and the advantages of disk write caching in Windows 10/11. On the one hand, enabling disk write caching might increase operating system performance. On the other hand, enabling this feature can lead to data loss or corruption. Therefore, you can try MiniTool ShadowMaker to secure your data.
User Comments :