Dolby Atmos not working in Windows 11/10 is a common issue on your computer. If you are encountering this issue, how can you get rid of the trouble? Don’t be panic and you can easily fix this issue if you try these methods in this post given by MiniTool Solution.
Dolby Atmos Windows 11/10 Not Working
Dolby Atmos is an advanced surround sound technology in Windows 10 and 11. It is designed to support height channels, which expands existing surround sound systems and enhances your audio listening experience on various devices.
To use it in Windows 10/11, you should install it on your PC. Here is a related article – How to Install Dolby Atmos in Windows 10/11 for Free.
Although Dolby Atmos improves audio listening quality, it doesn’t always run properly. According to some Windows 11 users, it is not working or crashes frequently. Besides, it also doesn’t work well in Windows 10. If you also find Dolby Atmos runs unusually, take it easy and you can go on reading to find useful methods.
Fixes for Dolby Atmos Not Working Windows 10/11
Run Windows Audio Troubleshooter
Windows is equipped with many troubleshooters that can be used to solve most problems (not all). If Windows 10/Windows 11 Dolby Atmos not working happens due to a minor glitch, running the audio troubleshooter can fix this issue.
Step 1: Press Win and I to launch the Settings app.
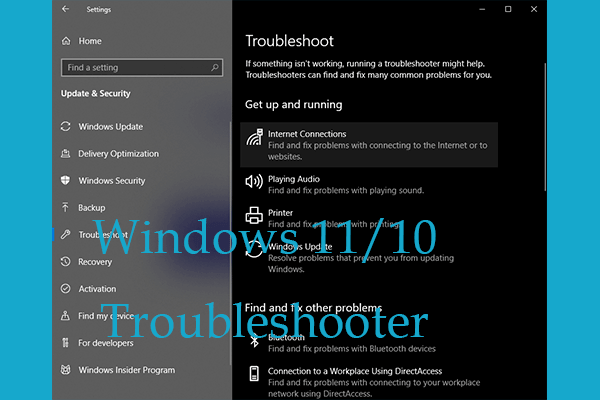
Step 2: In Windows 10, go to Update & Security > Troubleshoot > Additional troubleshooters. Then, locate Playing Audio and click Run the troubleshooter.
In Windows 11, go to System > Troubleshoot > Other troubleshooters. Then, locate Playing Audio and click the Run button.

Step 3: Wait for the troubleshooter to find the problem and fix it by following the wizards on the screen.
Update/Reinstall/Roll back Audio Driver
If the audio driver is outdated, Dolby Atmos crashing or not working may appear on your Windows 11/10 PC. To fix it, you can update the driver.
Step 1: Right-click on the Start button and choose Device Manager.
Step 2: Expand Sound, video and game controllers, right-click on the audio driver and choose Update driver.
Step 3: Click Search automatically for drivers to continue.
Step 4: Windows will download the driver and install it on your PC if there is an available one.
Or you can try to uninstall the audio driver and reinstall it on your PC.
Step 1: In Device Manager, right-click your sound driver and choose Uninstall device.
Step 2: Click Uninstall.
Step 3: Restart your PC and Windows will reinstall a new audio driver.
Sometimes you meet the issue of Dolby Atmos not working in Windows 11/10 after audio driver update. In this case, you need to roll back the driver to a previous version.
Step 1: In Device Manager, right-click on the sound driver and choose Properties.
Step 2: Under the Driver tab and click Roll Back Driver.
Update the Dolby Access App
The Dolby Access app helps you to enjoy Dolby Atmos on your Windows 11/10 PC. But according to reports, some incompatibility issues with the app can lead to Dolby Atmos crashing or not working. To fix it, you can try to update this app.
Step 1: Go to the search bar, type Dolby Access, and click the result.
Step 2: Go to Information > Dolby Access Support > Still Need Help > Contact Us > Submit.
Step 3: After receiving instructions in your email, follow the instructions. Then, check if the Dolby Access application update makes any difference.
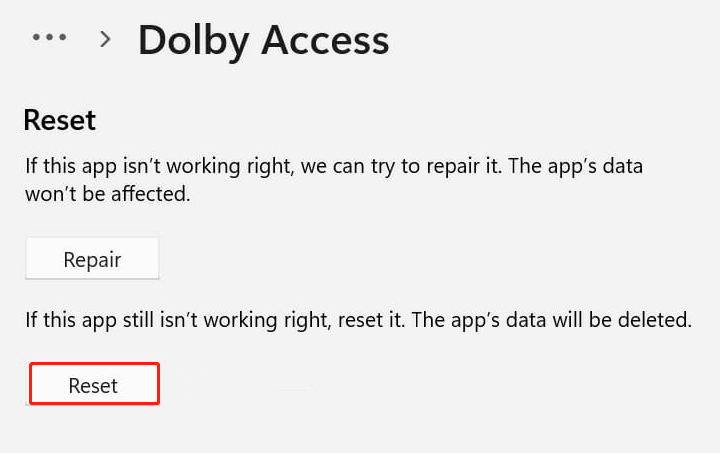
Reset Dolby Atmos App
Sometimes resetting the app can fix the issue of Dolby Atmos not working in Windows 11/10.
Step 1: Go to Windows Settings > Apps > App & features.
Step 2: Locate the Dolby Access app and click Advanced options.
Step 3: Click the Reset button.
Enable Exclusive Mode Options
This is another way to fix Dolby Atmos not working in Windows 10/11:
Step 1: Right-click the volume icon and choose Sound in Windows 10. In Windows 11, choose Sound settings from the context menu and click More sound settings.
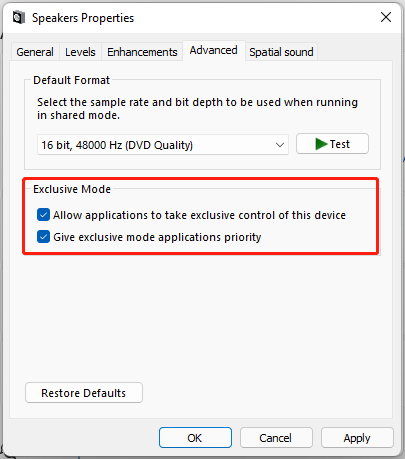
Step 2: Go to Playback, choose your default speaker, and click Properties.
Step 3: Under the Spatial sound tab, choose Dolby Atmos for Headphones from the drop-down menu.
Step 4: Go to Advanced and check the boxes of two options under the Exclusive Mode section – Allow applications to take exclusive control of this device and Give exclusive mode applications priority.
Step 5: Save the changes.
These are the common ways for Dolby Atmos not working in Windows 11/10. If you have any other solutions, tell us by leaving a comment below.
About The Author

Position: Columnist
Vera has been working at the MiniTool Team for over 10 years as a technical editor and content writer. She mainly focuses on disk and partition management, data recovery, Windows backup and restore, and PC troubleshooting. Through in-depth software testing and hands-on experience, she has helped users solve a wide range of computer problems and better protect their data on Windows devices.
User Comments :