You can pair two devices by using the Windows connect feature to cast the content from a phone, tablet, or another Windows computer to your screen, which is also known as screen mirroring. To protect your private information, the PIN is required to ensure your trusted identification. Some people find it troublesome to type PIN every time. Now, you can enable/disable Require PIN for pairing when projecting based on your situation with the following guidance.
How to Enable/Disable Require PIN for Pairing
Way 1: Turn on/off Require PIN for Pairing via Windows Settings
Using Windows Settings to modify computer features is the easiest way.
Step 1: Press Win + I to open the Settings window.
Step 2: Select System and scroll down to find the Projecting to this PC tab on the left sidebar.
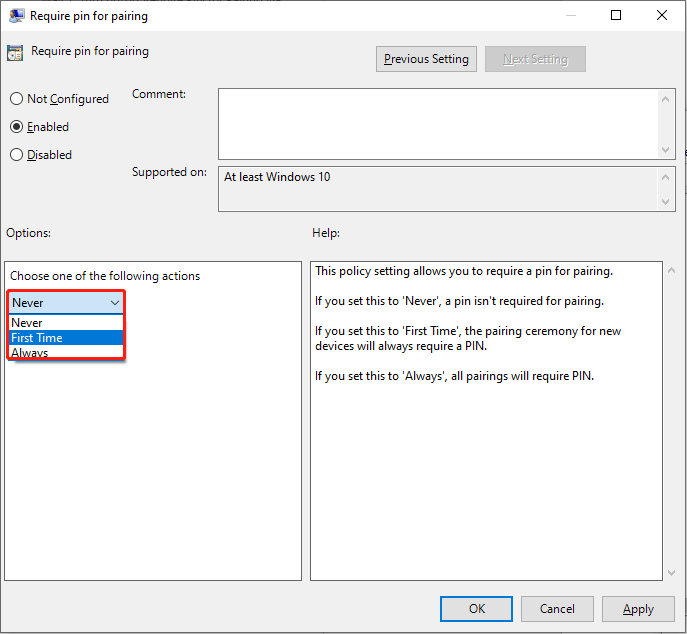
Step 3: You can change Require PIN for pairing by selecting options from the drop-down menu on the right pane.
There are three options:
- Never: disable Require PIN for paring directly.
- First Time: the computer will only ask for the PIN the first time you pair two devices.
- Always: every time you connect two devices, the computer needs the PIN.
Way 2: Enable/Disable Require PIN for Pairing by Local Group Policy Editor
The Local Group Policy Editor is another method to change computer settings. This is a Microsoft Management Console snap-in tool to configure group policy settings for the computer and user objects. You can change the settings with the next steps.
Step 1: Press Win + S and type Edit Group Policy into the search bar.
Step 2: Press Enter to open the Local Group Policy Editor window.
Step 3: Navigate to Computer Configuration > Administrative Templates > Windows Components > Connect. Then, you can find the Require pin for pairing policy on the right pane.

Step 4: Double-click to edit the settings. You can choose Not Configured or Disabled to disable Require PIN for pairing when projecting; select Enabled to set the specific settings.
Step 5: Click Apply and OK in sequence to save the change.

Way 3: Allow/Stop Windows from Asking PIN for Projecting with Windows Registry
Same as changing settings in Local Group Policy, you can change the value of corresponding keys to modify computer settings. But be careful when you change the registry keys. Changes will be applied to your computer immediately once you confirm them. To avoid irrecoverable damage to your computer, you can choose to back up registry keys before taking action.
Here is how to change the setting of requiring PIN for pairing.
Step 1: Press Win + R to open the Run window.
Step 2: Type regedit and hit Enter to open the Windows Registry window.
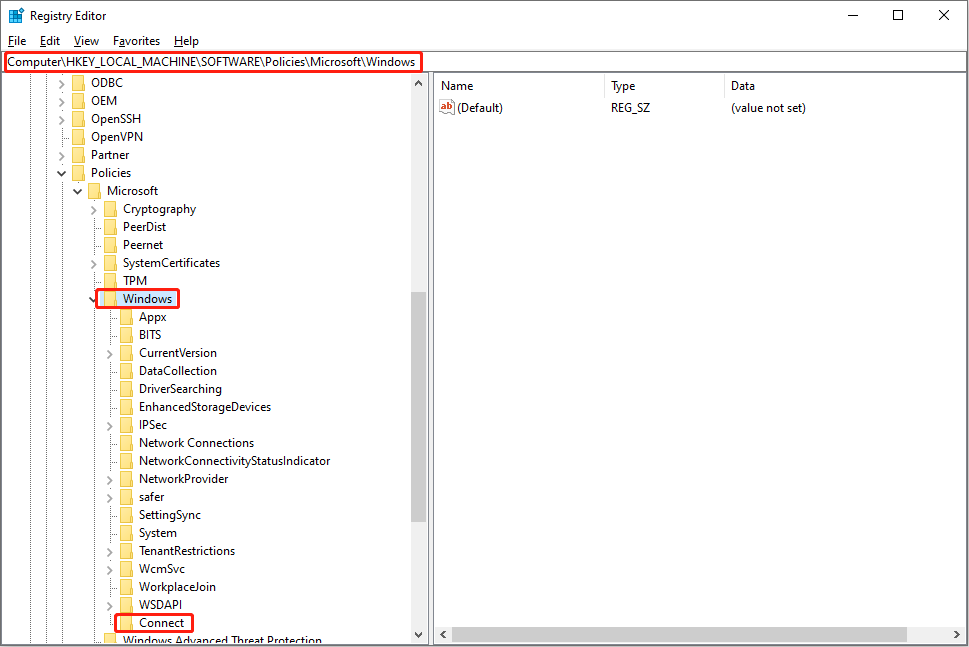
Step 3: Shift to HKEY_LOCAL_MACHINE > SOFTWARE > Policies > Microsoft > Windows. You can check whether there is a subfolder named Connect. If not, right-click on the Windows folder, then choose New > Key to create a new folder and rename it as Connect.
Step 4: Right-click on the blank space on the right pane, and select New > DWORD (32-bit) Value to create a new subkey.
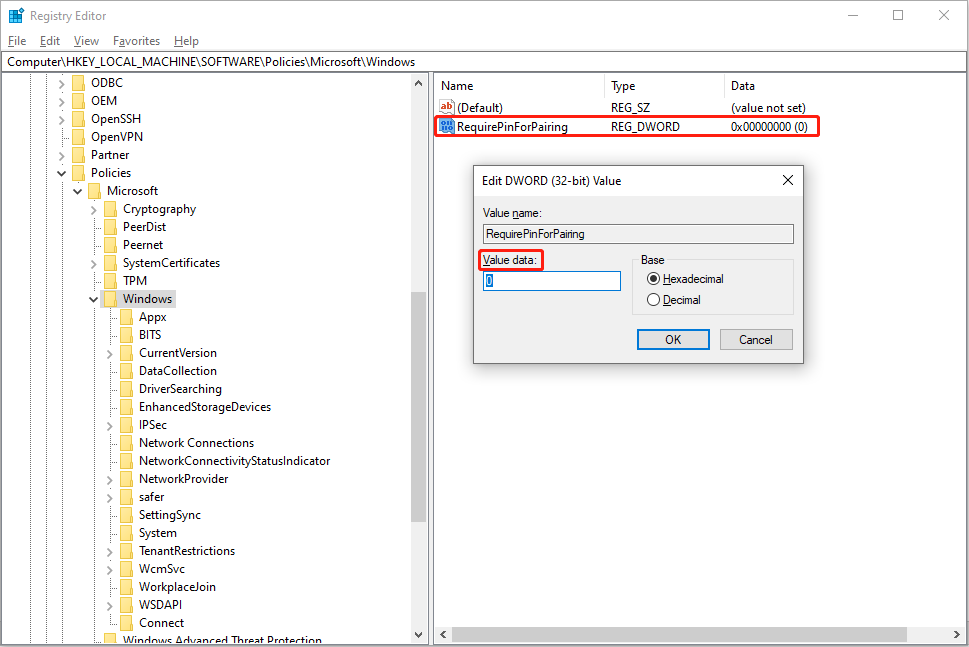
Step 5: Rename this key as RequirePinForPairing.
Step 6: Double-click to open the edit window. You can change the Value data of this subkey to modify the settings.
Set the data to 0 refers to Never requiring a PIN for pairing; the data 1 is for the First Time; the data 2 is for Always.
Step 7: Click on the OK button to save changes.
Afterward, you need to reboot the computer to fully apply the changes.
Bottom Line
This is the end of this post on how to enable/disable Require PIN for pairing by yourself. You can set the policies and subkeys by yourself but be careful in operation. If your data are deleted by mistake, please recover files in time.
MiniTool Power Data Recovery is the best free data recovery software for Windows users. No matter whether you want to recover deleted photos, missing documents, lost videos, or other types of files, this file recovery software is able to get them back safely. You can try the free edition to scan and recover up to 1GB of files for free.
MiniTool Power Data Recovery FreeClick to Download100%Clean & Safe

Any problems are welcome to share them with us via [email protected].
User Comments :