Windows update error code 0xC8000222 is a common issue in Windows 11. If you are encountering this error when performing Windows updates, how can you get rid of it? Go on reading this post and you can find some useful solutions offered by MiniTool Solution.
Windows 11 0xC8000222
Windows update issues always appear on Windows 7/8/10/11 with an error code, for example, 0xca00a009, 0x8030002F, 0x8007012a, 0x800f0905, and more. Today, we will introduce another error – 0xC8000222. When you try to install Windows updates but fail to do so, the error code will appear.
On the screen, you may get the error message saying “Windows could not search for new updates. An error occurred while checking for new updates for your computer. Error(s) found: Code 0xC8000222”.
![[SOLVED] Windows Update Cannot Currently Check for Updates](https://images.minitool.com/minitool.com/images/uploads/2018/11/windows-update-cannot-currently-check-for-updates-thumbnail.jpg)
This issue is triggered by some factors, for example, a faulty cache issue, a virus or malware infection, Windows update files, not running Windows service, and more. Well then, how to fix this error in Windows 11? Move to the next part to find solutions.
How to Fix Windows Update Error 0xC8000222
Run the Windows Update Troubleshooter
In Windows 11, there are some troubleshooters for you to fix some issues related to the internet connection, Bluetooth, audio, printer, keyboard, power, Windows update, and more. To fix Windows 11 0xC8000222, the first thing you can do is to run the Windows Update troubleshooter.
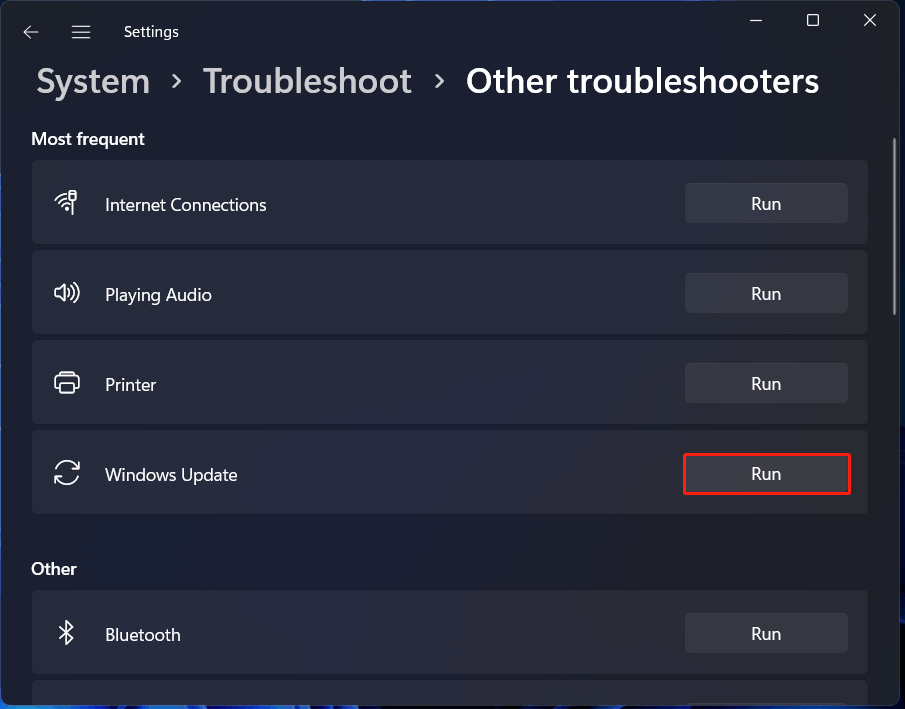
Step 1: Press Win + I to launch the Settings app.
Step 2: Under the System tab, click Troubleshoot > Other troubleshooters.
Step 3: Locate Windows Update and click the Run button to start the troubleshooting operation.
Run SFC and DISM
Corrupt system files may lead to error code 0xC8000222. To fix it, you can run an SFC by following the steps below.
Step 1: Type in cmd to the search bar, right-click Command Prompt and choose Run as administrator.
Step 2: In the CMD window, type in sfc /scannow and press Enter.
Step 3: After the scan finishes, you can execute another two commands.
DISM /online /Cleanup-Image / ScanHealth
DISM /Online /Cleanup-Image /RestoreHealth
Perform a Clean Boot
Some third-party programs may conflict with Windows, leading to Windows 11 update error 0xC8000222. To fix the issue, you can try to perform a clean boot.
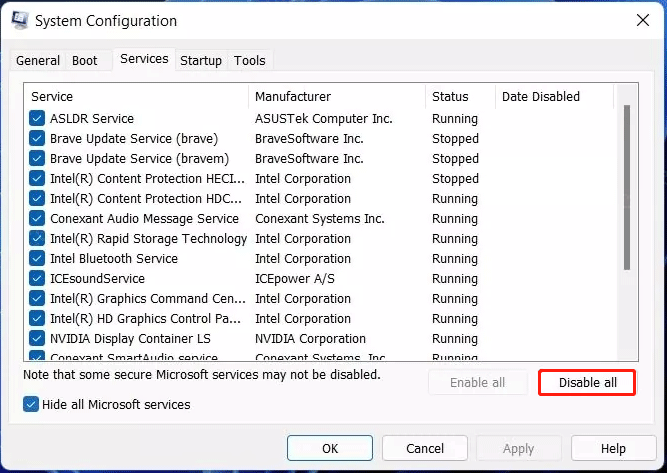
Step 1: Press Win + R to open the Run window, type msconfig in the text box and click OK.
Step 2: Under the General tab, uncheck the box of Load startup items and check Load system services.
Step 3: In the Services tab, check Hide all Microsoft services, and click Disable all to disable third-party services which might cause issues.
Step 4: Go to Startup > Open Task Manager and then disable all the startup items.
Restart Windows Update Services
Follow the instructions below:
Step 1: Open Command Prompt with admin privileges.
Step 2: Stop Windows Update services by typing in the following commands and then hitting Enter after each one:
net stop wuauserv
net stop cryptSvc
net stop bits
net stop msiserver
Step 3: Execute the following commands to rename the SoftwareDistribution and Catroot2 Folder:
ren C:\Windows\SoftwareDistribution SoftwareDistribution.old
ren C:\Windows\System32\catroot2 catroot2.old
Step 4: Run these commands to restart Windows Update services:
net start wuauserv
net start cryptSvc
net start bits
net start msiserver
Perform a Disk Check
If there is something wrong with the hard drive, the error code 0xC8000222 may appear. You can perform a disk check by using the command – chkdsk C: / f / r / x.
These are the common ways to fix Windows 11 error 0xC8000222. In addition, you can run an antivirus program like Malwarebytes to scan and remove viruses or reset Windows Update components to fix this update issue.
About The Author

Position: Columnist
Vera has been working at the MiniTool Team for over 10 years as a technical editor and content writer. She mainly focuses on disk and partition management, data recovery, Windows backup and restore, and PC troubleshooting. Through in-depth software testing and hands-on experience, she has helped users solve a wide range of computer problems and better protect their data on Windows devices.
User Comments :