Sign-in is a fundamental feature for Windows users to protect their accounts and private information. But some of you might encounter the this sign-in option is disabled problem, which might cause you to fail to run the computer. This post on MiniTool provides you with several fixes to resolve this issue.
It is common for you to use PIN codes or passwords to log in to your computer. However, you might receive the error message “This sign-in option is disabled because of failed sign-in attempts” by accident when you try to sign in normally. This error happens to many other people as well:
I switch on the computer and put in my PIN code. I get the message ' This sign-in option is disabled because of failed sign-in attempts or repeated shutdowns. Use a different sign-in option or keep your device powered on for at least two hours and then try again'. The computer uses Windows 11. I've spoken to Dell who say it is a Microsoft issue, but I don't know who to contact and the troubleshooting page on Microsoft doesn't help either. This first happened two days ago. After keeping the computer powered on for two hours I was able to sign in. Having switched off the computer at the mains, I am now unable to sign in again today. Any suggestions would be greatly appreciated. - Christopher Wheeler1 answers.microsoft.com
You can keep reading and try the following methods to resolve the problem.
How to Fix the Sign-in Option Is Disabled Error
Fix 1: Keep the Computer on for Hours
As the error message said, you can just keep your computer on for several hours, then try to log in to the computer with the correct PIN or password. If you still receive the sign-in option is disabled error message, please move on to the next method.
Fix 2: Reset PIN/Password
You can also use the forgetting PIN function to unblock your computer. You should make sure your computer connects network when using this method.
Step 1: On the sign-in interface, click on the I forget my PIN option.
Step 2: Type the Microsoft account password in the following window, then click on the Sign in button.
Step 3: Click on Continue to reset the PIN.
After setting a new PIN, click on OK to save. Now, you can try to access your computer with the new PIN.
Fix 3: Boot the Computer into Safe Mode
Safe Mode allows you to access your computer without any restrictions. You can boot your computer into Safe Mode to fix the this sign-in option is disabled issue.
Step 1: Click on the Power button on the right corner of the sign-in interface.
Step 2: Choose Restart and press the Shift key until the computer enters the Choose an Option window.
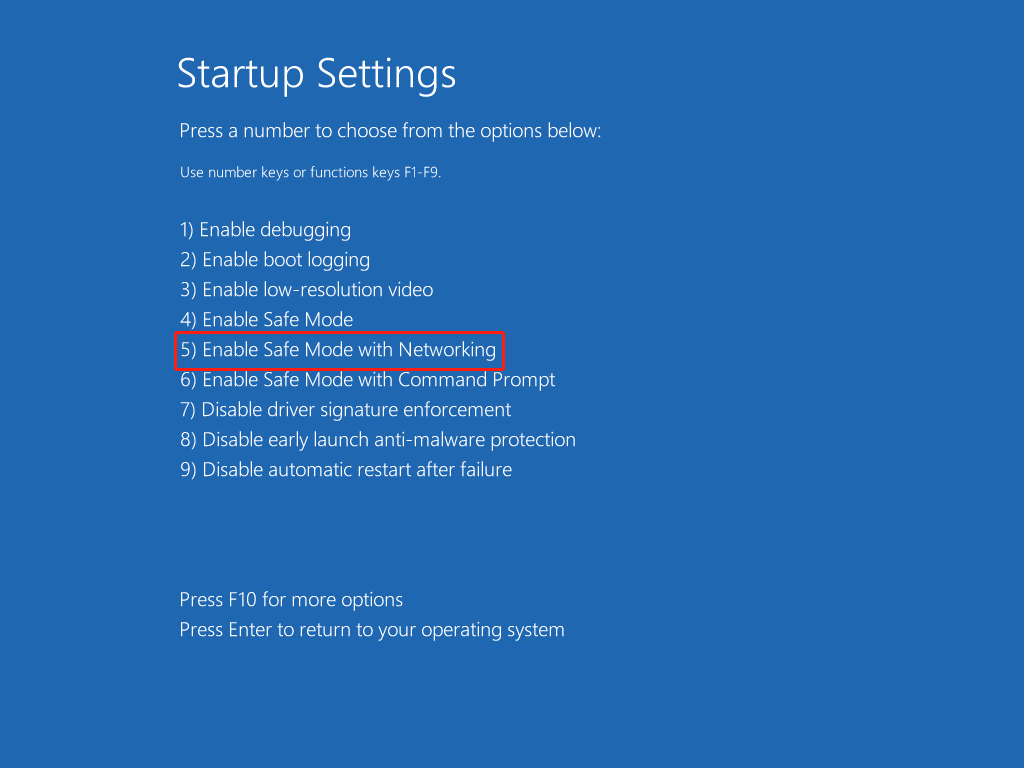
Step 3: Select Troubleshoot > Advanced option > Startup settings.
Step 4: Click on the Restart button.
Step 5: Press the F5 key to boot your computer into Safe Mode.
After this, you can restart your computer and try to log in again.

If you enter the computer successfully with the above methods, you can follow the next methods to avoid this issue happening again. If you are still struggling with the error message, please repeat the steps in Fix 3 to enter the Safe Mode and then try the next methods.
Fix 4: Run Command Lines
Here are several command lines to help you find and repair corrupted system files to fix computer issues such as this sign-in option is disabled.
>>Run the SFC Command Line
Step 1: Press Win + S and type Command Prompt into the search bar.
Step 2: Choose Run as administrator on the right pane.
Step 3: Type sfc /scannow and hit Enter to execute this command.

>>Run the DISM Command Lines
Step 1: Press Win + R to open the Run window.
Step 2: Type cmd into the text box and press Shift + Ctrl + Enter to run Command Prompt as administrator.
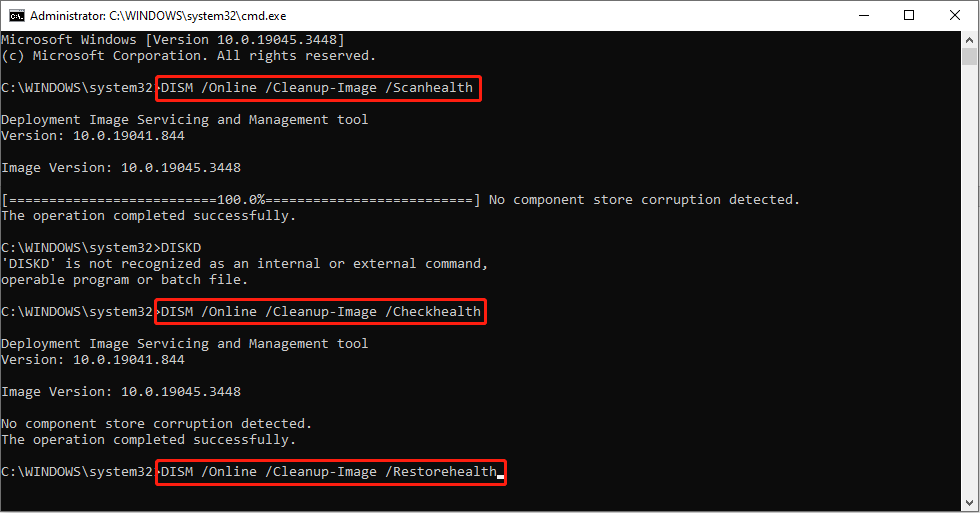
Step 3: Type the following command lines and press Enter after each of them.
DISM /Online /Cleanup-Image /Scanhealth
DISM /Online /Cleanup-Image /Checkhealth
DISM /Online /Cleanup-Image /Restorehealth
>>Run the CHKDSK Command Line
Step 1: Run the Command Prompt as administrator in the way you like.
Step 2: Type CHKDSK X /f /r /x and hit Enter. Please replace the X with the drive letter of the hard drive you need to scan, usually the C drive.

If you get a message that tells you the command line can’t run because it is in use, you can press Y to allow it to run the next time you start the computer.
MiniTool Power Data Recovery FreeClick to Download100%Clean & Safe
Fix 5: Change the Account Lockout Policy Using the Local Group Policy Editor
Local Group Policy Editor allows you to modify the information of policies to resolve errors. Please note this tool is not available to Windows Home.
Step 1: Press Win + R to open the Run window.
Step 2: Type gpedit.msc into the text bar and hit Enter to open Local Group Policy Editor.
Step 3: Navigate to Computer Configuration > Windows Settings > Security Settings > Account Policies > Account Lockout Policy.
Step 4: Double-click on the Account lockout threshold option.
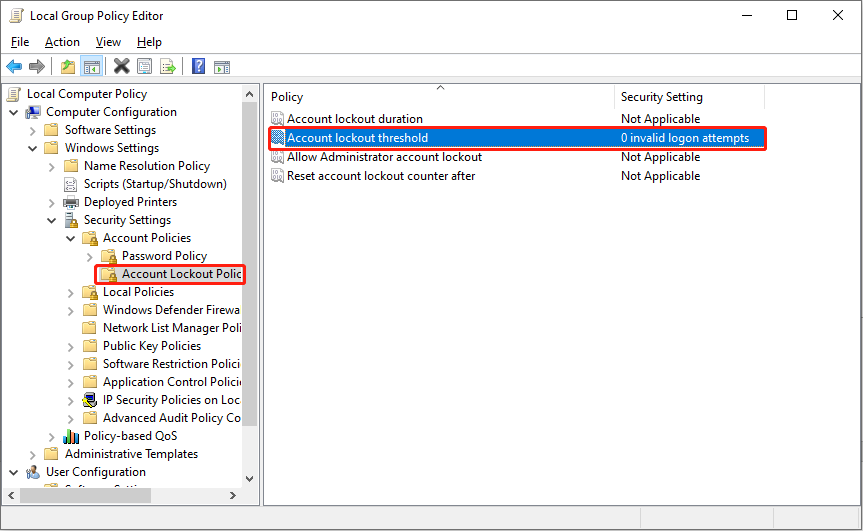
Step 5: Change the value to 0 and click Apply > OK to save the change.
Bottom Line
It is annoying if you input the correct PIN/password but continuously get the this sign-in option is disabled error message. Hope one of the above methods can help you resolve the problem timely.
User Comments :