GTA 5 Online Not Working
GTA 5 is one of the most popular GTA games in the whole GTA series. It is a multi-player and action-adventure game available for Windows 10/11. However, it is reported that some players encounter GTA 5 online not working. To fix this issue, we have come up with 5 workable solutions for you!
How to Fix GTA 5 Online Not Working on Windows 10/11?
Fix 1: Check Server Status
Before troubleshooting GTA 5 online not working, the first thing you should do is to check GTA 5 online server status because all the fixes will not useful when the server is down. You can go to Rockstar Games to check it online. If Rockstar Game services are unavailable now, you can try the following fixes.
Fix 2: Disable GTA 5 Resources
It might be the system issue which causes GTA 5 online not working. In this case, you had better end all the GTA 5 associated services to fix it.
Step 1. Do a right-click on the taskbar and choose Task Manager in the drop-down window.
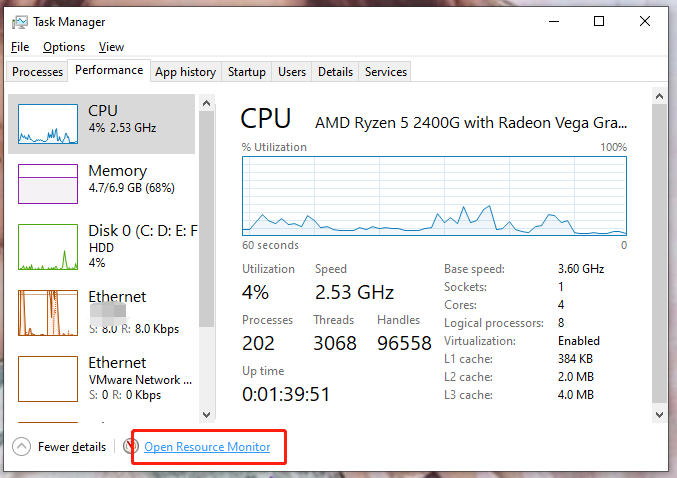
Step 2. In the Performance tab, hit the blue font Open Resource Monitor.

Step 3. Locate gtav.exe and right-click on it.
Step 4. In the drop-down menu, highlight Suspend Process.
Step 5. Wait for a while, right-click on this process again to choose Resume Process.
Step 6. Relaunch GTA 5 again to see if GTA 5 online not working continues.
Fix 3: Update Network Driver
Like any other online game, GTA 5 requires you to update your network driver to the latest version. Here’s how to do it:
Step 1. Press Win + S at the same time to launch the search bar.
Step 2. Type device manager in the box and hit Enter o open Device Manager.
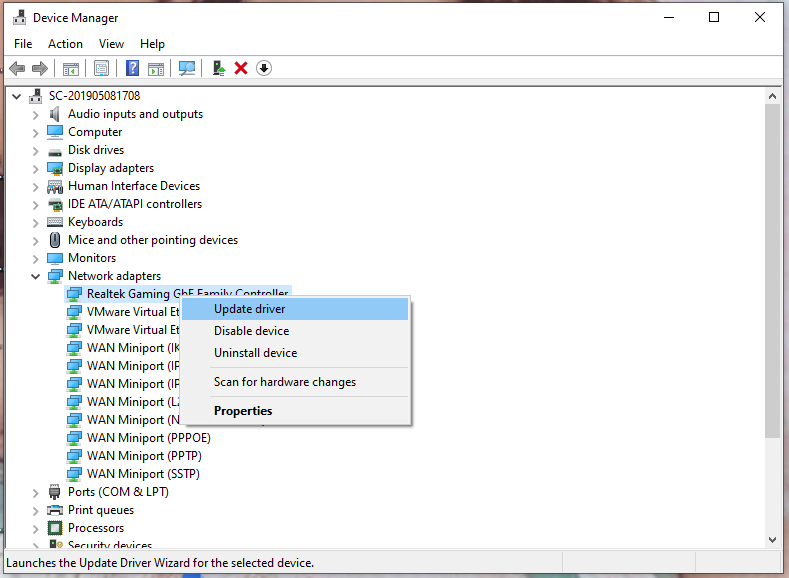
Step 3. Expand Network adapter to show all your network drivers, right-click on the one you need to use when gaming and hit Update driver.

Step 4. Follow the on-screen instructions to download and install the latest network driver.
Fix 4: Check Internet Connection
Another culprit might be your internet connection. You should check if the error lies in your network by the following guidelines.
Step 1. First, you can reboot your routers, to see if it works. If not, press Win + I to open Windows Settings.
Step 2. In the Settings menu, scroll down to find Update & Security.
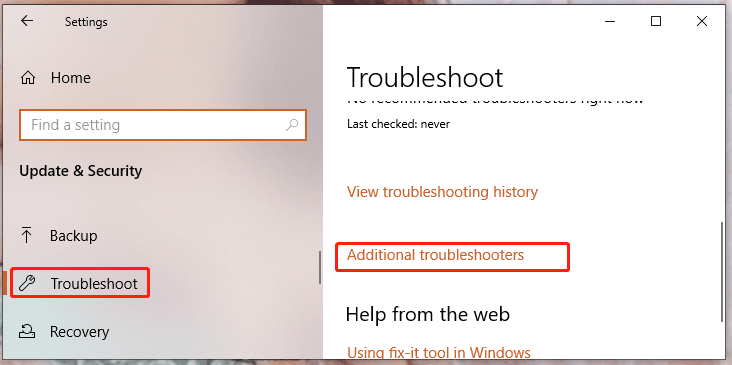
Step 3. Under the Troubleshoot tab, tap on Additional troubleshooters.

Step 4. Click on Internet Connections & Run the troubleshooter and then the system will look for and fix your internet connection issue for you automatically.
Fix 5: Change DNS Server
The chances are that there are some problems in your DNS server, so you need to change it.
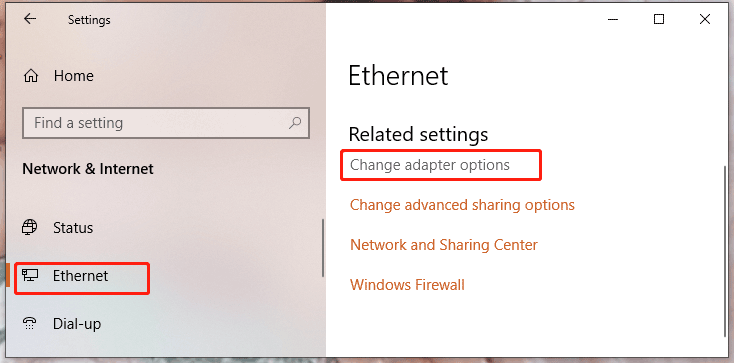
Step 1. Go to Settings > Network & Internet > Ethernet > Change adapter options.

Step 2. Right-click on your Ethernet or Wi-Fi connection and choose Properties.
Step 3. Under the Networking tab, double-click on Internet Protocol Version 4 (TCP/IPv4) and make sure the box is ticked.
Step 4. Change Preferred DNS server address into 8.8.8.8 and Alternate DNS server address into 8.8.4.4.
Step 5. Check Validate settings upon exit and hit OK.
Step 6. Go back to the Networking tab, check Internet Protocol Version 6 (TCP/IPv6) and double-click on it.
Step 7. Tick Use the following DNS address automatically. Enter Preferred DNS server into 2001:4860:4860::8888 and Alternate DNS server into 2001:4860:4860::8844.
Step 8. Check Validate settings upon exit and choose OK.

User Comments :