How do I change my name on Facebook? In this tutorial from MiniTool Software, you will learn how to change your name on Facebook in 5 simple steps. It also provides a step-by-step guide for how to add/edit/delete another name on Facebook, how to change Facebook Page name.
How to Change Your Name on Facebook – 5 Steps
Step 1. Open Facebook website in your browser and log into your Facebook account.
Step 2. Click the down-arrow icon at the top-right corner of Facebook page. Click Settings & Privacy and click Settings.
Step 3. Click your name under General Account Settings or click Edit icon next to your name to access the name editing window.
Step 4. Enter a new name for your Facebook account. After that, click Review Change button.
Step 5. Enter the password of your Facebook account and click Save Changes to change name on Facebook.

Note: Once you change your name on Facebook, you can’t change it again within 60 days. You can only change the name again after 60 days.
How to Add, Edit, Delete another Name on Facebook
If you want to add other names like a nickname for your Facebook account, you can check the guide below.
- Log into your Facebook account in your browser.
- Click your Facebook profile picture at the top-right corner of Facebook.
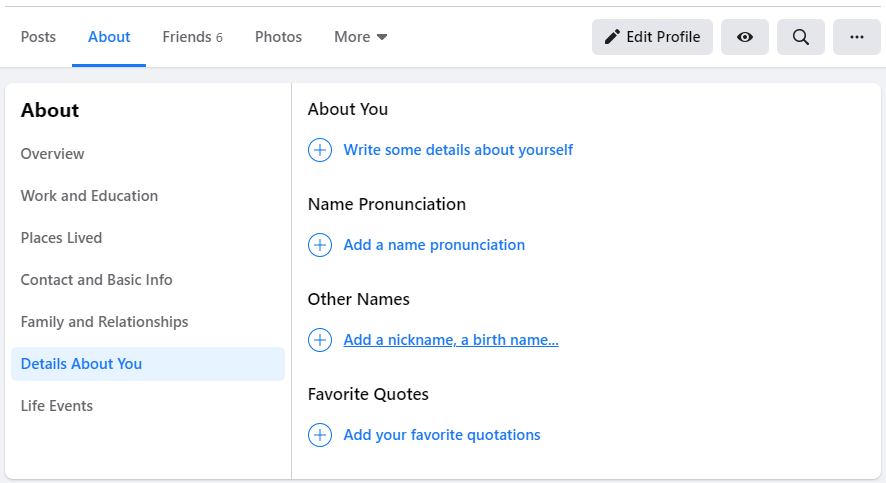
- Click About -> Details About You.
- Under Other Names, you can click Add a nickname, a birth name.
- Click the down-arrow icon next to Name Type to choose a name type you want to add.
- Enter the preferred name.
- Check the “Show at top of profile” option to let the name display next to your Facebook account name. Click Save button to add another name on Facebook.
If you want to edit or delete the name you added on Facebook, follow the steps below.
- Click your Facebook profile again and click About -> Details About You.
- Click the three-dot icon next to the name you want to edit or delete, and click Edit name or Delete name to edit or delete the Facebook name you added before.
How to Change Your Name on Facebook on iPhone
If you use the Facebook app on your iOS or Android device, you can follow the steps below to change name on Facebook.
- Open Facebook app and log into your account.
- Tap the three-line menu icon at the top-right corner of Facebook app.
- Tap Settings & Privacy -> Settings -> Personal information.
- Tap your name and enter the new name you want to change.
- Tap Review Changes, enter your Facebook password, and tap Save Changes.

Fix Can’t Change Name on Facebook – 3 Tips
If you can’t change your name on Facebook, you can try the 3 tips to fix this.
Fix 1. Check Facebook name policy to make sure the name you input follows its name policy.
Fix 2. If you have changed the name once in the last 60 days, then you can’t change it again.
Fix 3. Try to use your real name. Do not use nonsense names.
How to Change Facebook Page Name
- Open Facebook and log into your account.
- Click Pages in the left column.
- Click your page and click Page Settings at the bottom-left.
- Click Page Info.
- Click Edit next to your Page Name.
- Type a new Page name and press Enter.
- Click Request Change.
Note: Only the Facebook account administrator can request a change to the Page name. If you can’t change your Facebook Page name, it might because you don’t have the right Page role or another administrator has changed your Page name recently.
Conclusion
How to change your name on Facebook? How to change Facebook page name? Hope this tutorial explains it clearly. Now you can go to change your name or Facebook page name by yourself.
User Comments :