What Is Incognito Mode
Incognito mode is a feature in web browsers that prevents your computer from saving local data, such as browsing history, cookies, and form information, once the session is closed.
This mode keeps other users on the same device from seeing your activity. However, the Incognito mode does not hide your activity from:
- Internet Service Providers (ISPs): They are capable of logging all internet traffic, including the websites that are visited.
- Employers or Schools: Network administrators can monitor activity on Wi-Fi networks in companies or schools.
- Websites You Visit: Websites can still track your activity, use cookies, or require you to log in.
- Search Engines: Searches are not anonymous.
- Government Agencies: Law enforcement has the authority to request browsing records from your Internet Service Provider (ISP).
Why Need to Go Incognito in Windows 11
Windows 11 comes with several default settings to enhance user experience, which actively track user activity, share data with Microsoft, and permit third-party access. These settings include features like location tracking, diagnostic data collection, and personalized ad IDs.
Even so, they can pose privacy risks.
For example, the collected data could potentially be intercepted or misused by cybercriminals or insiders, leading to the identification of system vulnerabilities and the possibility of targeted attacks.
How to Go Incognito in Windows 11
To go Incognito in Windows 11, use a local Windows account, avoid Cloud Sync, disable telemetry and diagnostic data, manage app permissions, and use a private browsing mode.
Here’s the tutorial:
# 1. Use a Local Windows Account
Using a local Windows account enhances privacy by minimizing data sharing with Microsoft. It allows for offline operation, enabling users to log in without an internet connection, and it gives greater control over user data on an individual device.
When you are using a local Windows account, all user data, files, and settings are stored solely on that specific machine’s hard drive. This setup is ideal for users who prefer distinct, independent environments across different devices.
Furthermore, without background syncing, local accounts provide a more responsive experience, particularly on older hardware.
To switch to a local Windows account, do the following steps:
- Go to Settings > Accounts > Your info.
- Select Sign in with a local account instead.
- Click Next in the prompted window.
- Enter the PIN.
- Set User name, New password, Confirm password, and Password hint.
- Click Next, then Sign out and finish to complete the switch.
# 2. Avoid Using Cloud Sync Software
Avoiding cloud sync software can strengthen privacy by reducing the risk of third-party access or data compromise. Here are the specific benefits:
- Complete control over data and data sovereignty.
- Reduced risks of accidental data exposure or large-scale data breaches.
- Elimination of third-party access to data.
- Protection against harmful data synchronization.
- Improved compliance with privacy regulations.
# 3. Disable Privacy-Related Features
Windows 11 has various features that may leak your data and privacy. Disabling them one by one is a good choice to protect privacy. Here’s how to do that:
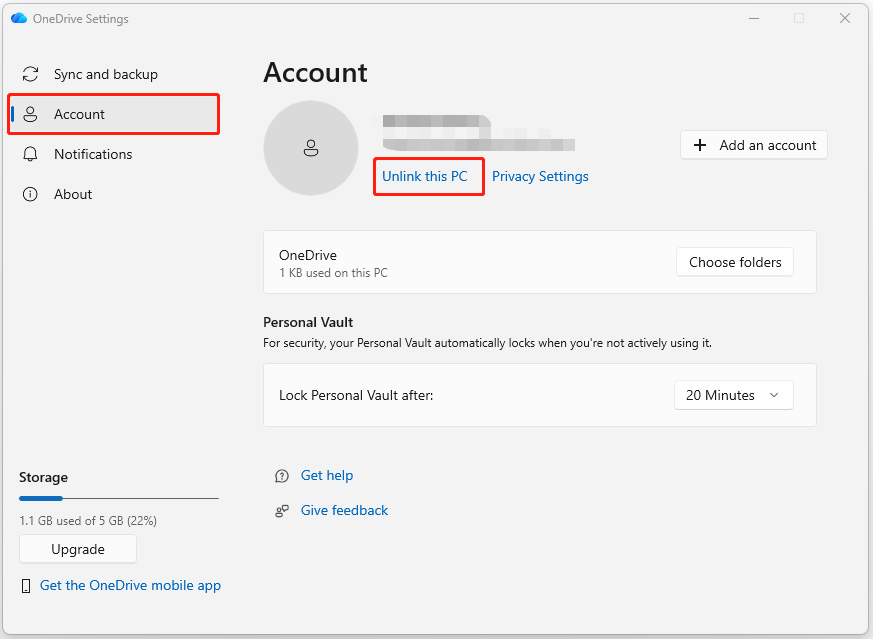
Disable OneDrive
OneDrive is Microsoft’s cloud storage service for saving, syncing, accessing, and sharing files and photos across all devices.
If you do not need OneDrive, click the icon in the taskbar, choose the gear icon, select Settings, and go to the Account tab. Then, select Unlink this PC to stop file syncing.
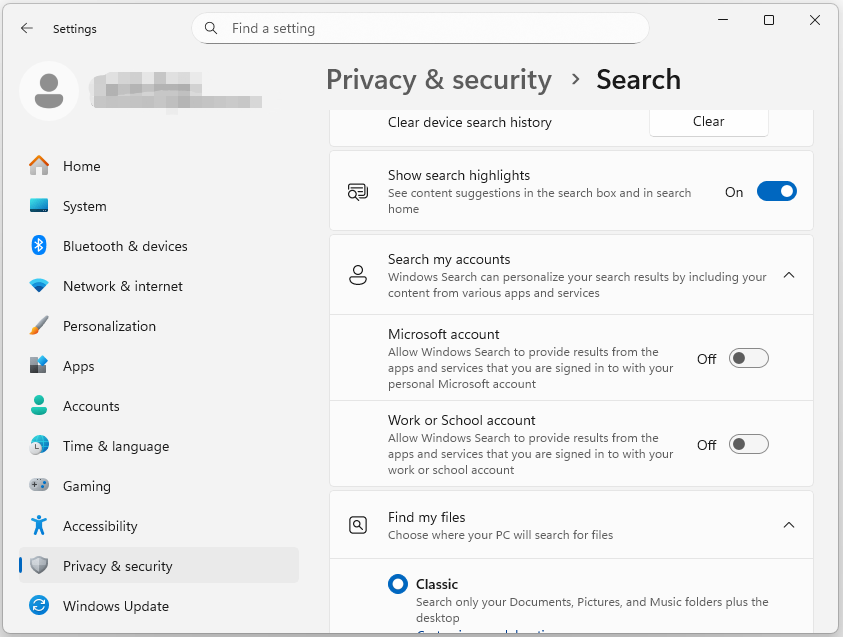
Disable Search Cloud Content
If you have enabled the search cloud content, it can lead to a data leak sometimes. To avoid this, disabling the related features is necessary. Follow these steps:
Step 1. Press Win + I to open Settings.
Step 2. Select Privacy & security from the left panel.
Step 3. Find the Windows permissions section.
Step 4. Select Search and locate the Search my account section. Then, turn off the following options to stop personal data from appearing in search results.
- Microsoft account (It allows Windows Search to integrate data from your personal Microsoft services directly into the local desktop search results.)
- Work or School account (It syncs your organizational account with Windows Search, providing easy access to resources, but shares some device data with your organization.)
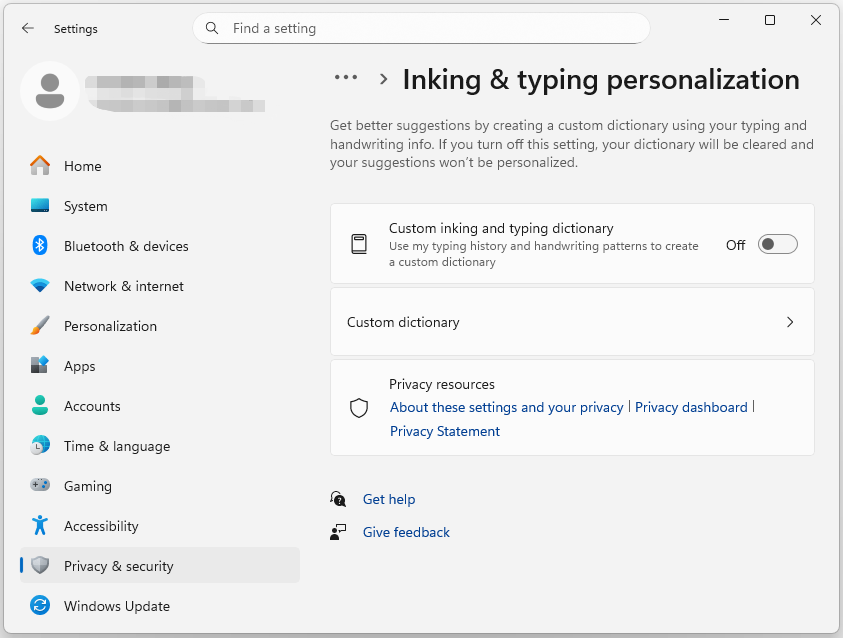
Stop Sending Inking & Typing to Microsoft
Step 1. Go to the Privacy & security tab.
Step 2. Select Inking & typing personalization.
Step 3. Turn off Custom inking and typing dictionary to stop sending your writing/typing to Microsoft.
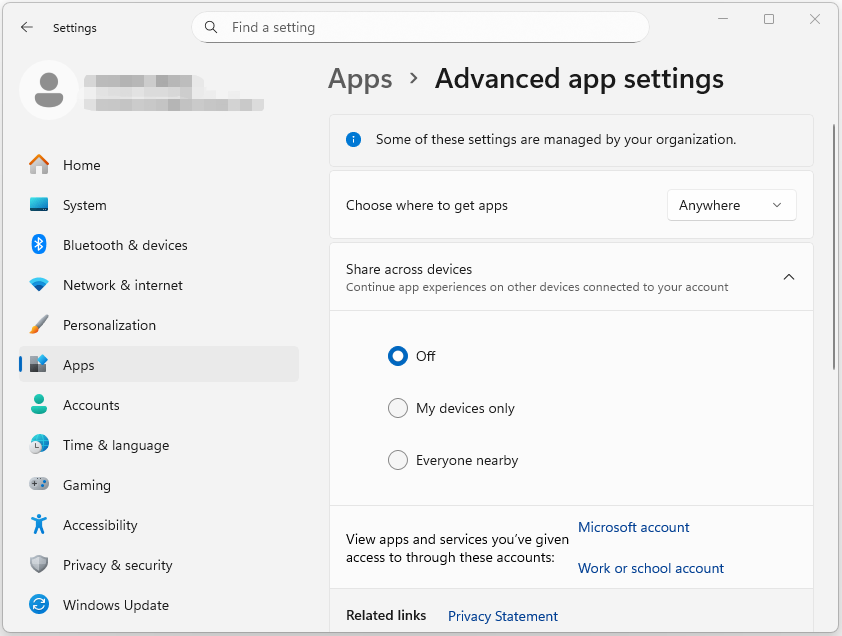
Disable Shared Experiences
Windows 11 has a feature that lets you continue app experiences on other devices connected to your account. If you want to go completely Incognito in Windows 11, turning off this feature is essential. Here’s the guide:
Step 1. Open Settings.
Step 2. Go to Apps > Advanced app settings.
Step 3. Turn off Share across devices.
Turn off Background Apps
Some apps run in the background, consuming resources and collecting data. Disabling unnecessary apps can help you go completely Incognito. To do that, please do the following steps:
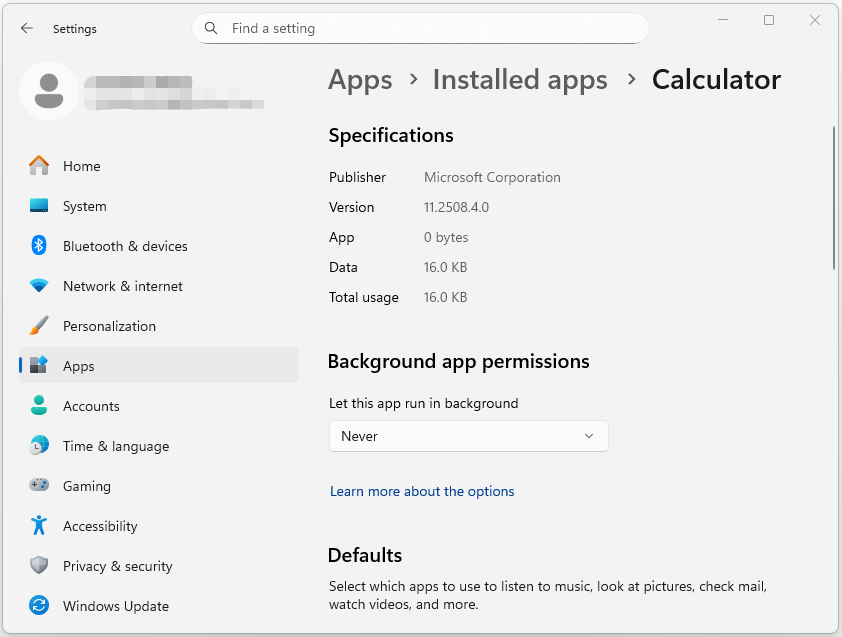
Step 1. Go to the Apps tab and select Installed apps.
Step 2. Click the three dots next to the app and choose Advanced options.
Step 3. Find and locate the Background apps permissions section. Then, select Never from its drop-down menu.
# 4. Disable Telemetry and Diagnostic Data
Disabling telemetry and diagnostic data improves user privacy. This is because it prevents the automatic collection and transmission of personal usage patterns, system configurations, and app activity data to Microsoft.
This action reduces the risk of data leaks, decreases network traffic, and prevents the profiling of user behavior, thereby providing greater control over personal information.
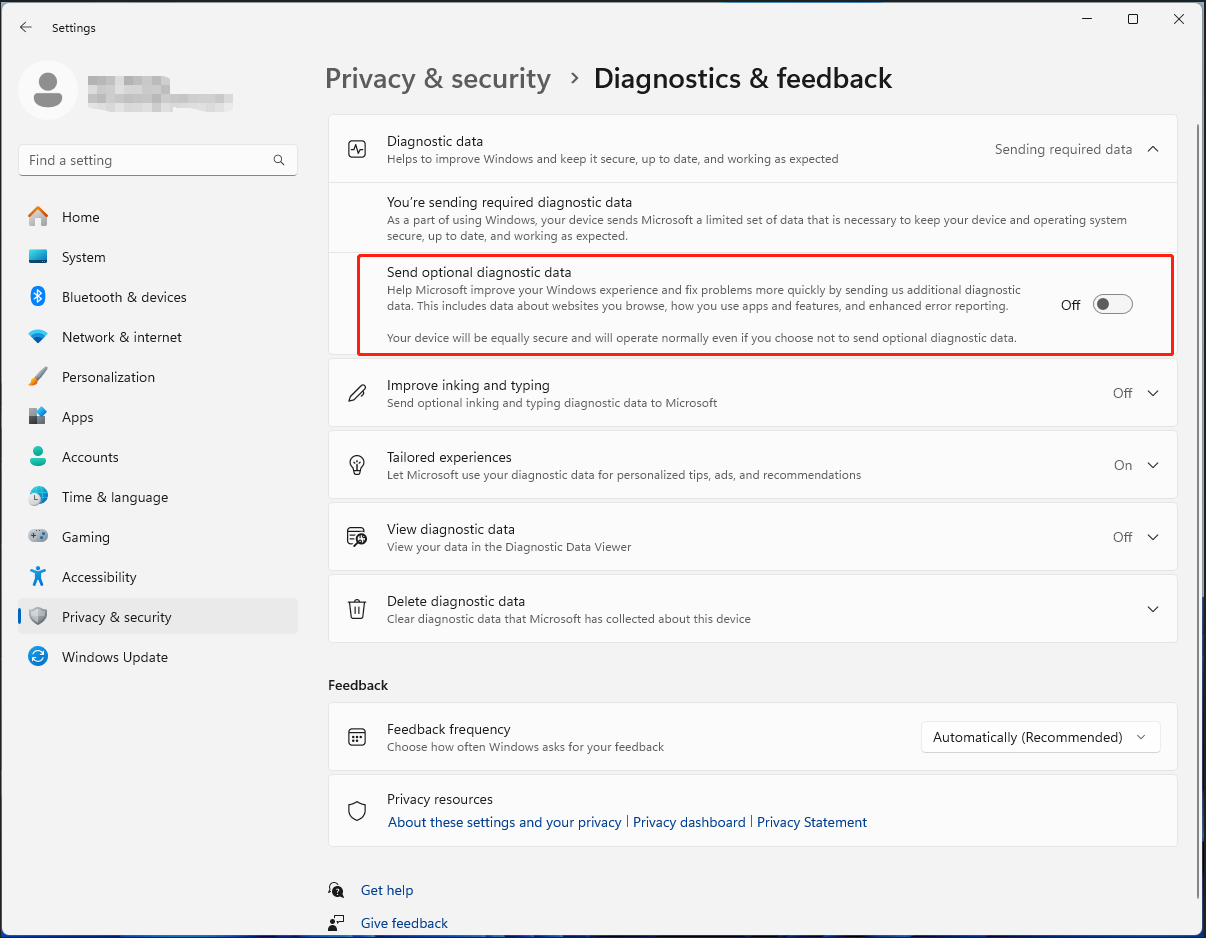
To do that, go to the Privacy & security tab and toggle off the Send optional diagnostic data option.
If you want to disable the telemetry service completely in Windows 11 Pro or above, please do as follows:
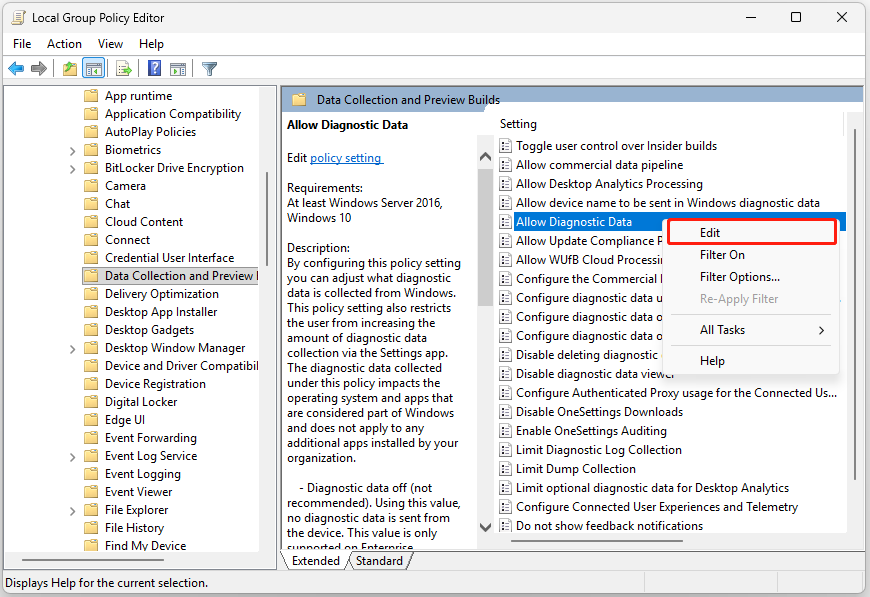
Step 1. Press Win + R to open Run, type gpedit.msc, and press Enter to open Local Group Policy Editor.
Step 2. Navigate to the following path:
Computer Configuration > Administrative Templates > Windows Components > Data Collection and Preview Builds
Step 3. Find and locate the Allow Diagnostic Data entry in the right panel. Then, right-click it and select Edit.
Step 4. In the prompted window, choose the Enabled option and select Diagnostic data off (not recommended) from the Options drop-down menu.
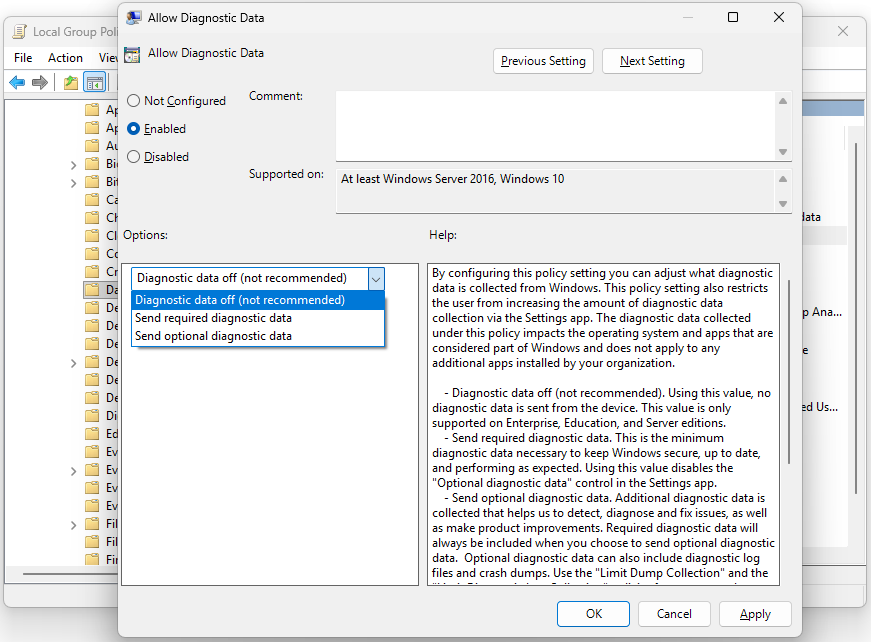
Step 5. Click Apply and OK to save the changes. Now, no diagnostic data will be sent by the device.
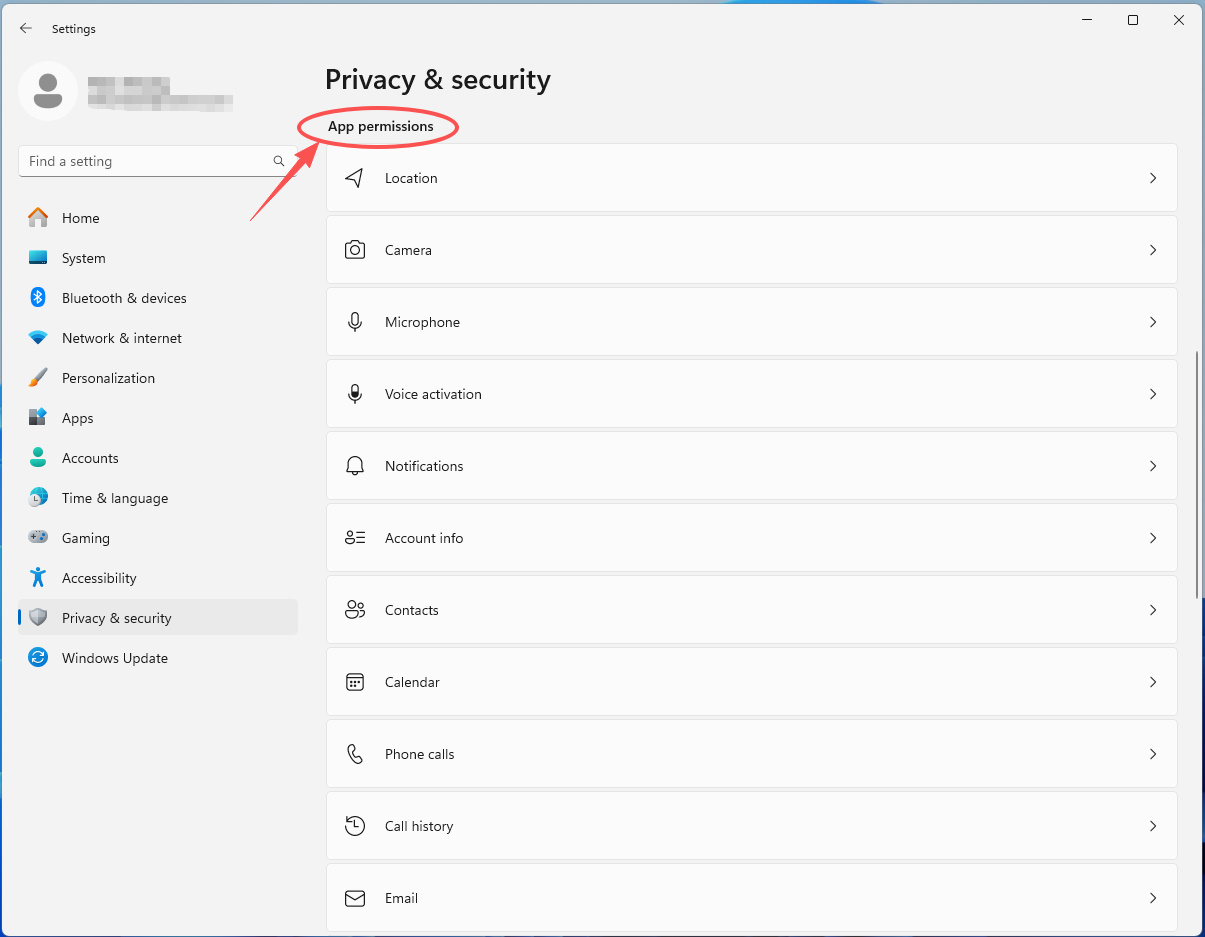
# 5. Manage App Permissions
To go Incognito in Windows 11, you should also manage app permissions with the following steps.
Step 1. Go to the Privacy & security tab.
Step 2. Find the Windows permissions section in the right panel.
Step 3. Disable Location tracking.
- Select Location.
- Toggle off Location services to stop Windows and apps from tracking your physical location.
Step 4. Disable Camera and Microphone access.
- Select Camera.
- Turn off the option of Camera access to deny all camera permissions or disable access to any apps that don’t require them.
- Back to the preview page and select Microphone.
- Disable Microphone access to deny permissions to all apps or restrict access to those that don’t need it.
Step 5. Disable File system access to prevent unauthorized access to your files.
- Select File system.
- Toggle off the File system access option that allows apps to access your file system.
Step 6. Review the permissions for Contacts, Calendar, Phone calls, and Email. Deny access to any non-essential apps.
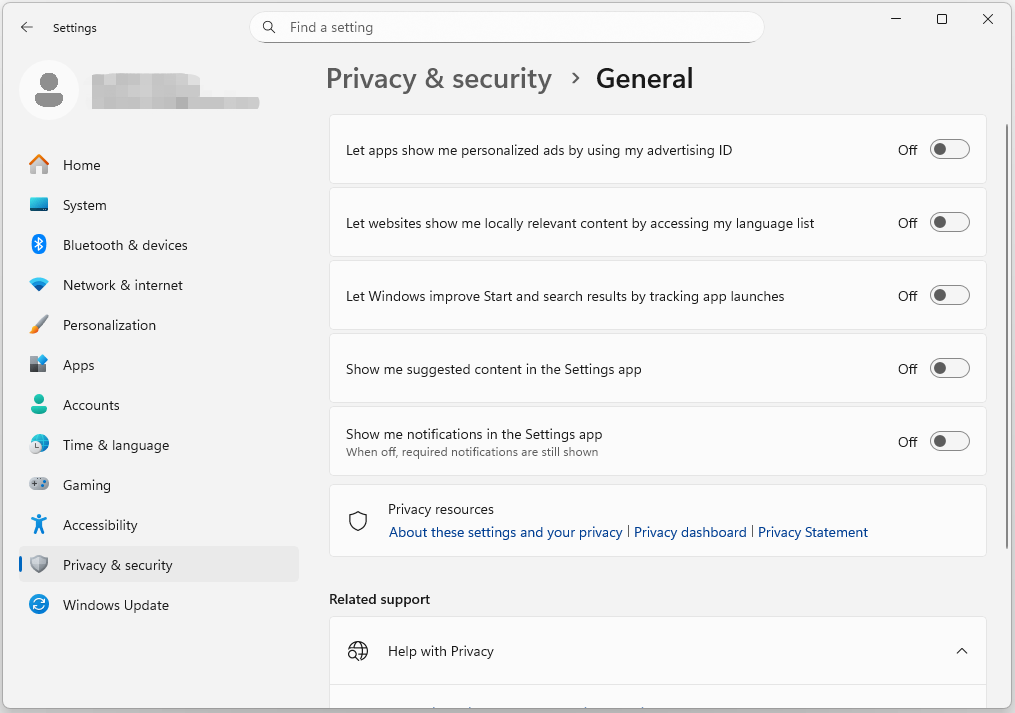
# 6. Manage Windows General Permissions
In addition to adjusting app permissions, managing Windows permissions can also help you go Incognito in Windows 11. To perform that, go to the Privacy & security tab, select General, and toggle off the following five options:
- Let apps show me personalized ads by using my advertising ID.
- Let websites show me locally relevant content by accessing my language list.
- Let Windows improve Start and search results by tracking app launches.
- Show me suggested content in the Settings app.
- Show me notifications in the Settings app.
# 7. Use Private Browsing Mode
Many browsers offer a private browsing mode to help you go Incognito in Windows, including Microsoft Edge and Chrome. This mode stops the browser from saving history, cookies, and form data.
Follow the steps to turn on Microsoft Edge Incognito mode or open Incognito tab in Chrome.
- Open Microsoft Edge/Chrome on your PC.
- Click the three dots at the top right corner.
- Select New Incognito window.
- An Incognito window will open.

# 8. Use Privacy-Centric Browsers and Extensions
Additionally, you can switch to a privacy-focused browser and use extensions to protect your privacy.
These approaches can block trackers, ads, and malicious scripts. What’s more, they can boost browsing speeds, reduce data usage, and prevent invasive, personalized tracking.
With them, you can enjoy a worry-free browsing experience, as they minimize personal data exposure to advertisers and third parties.
- Privacy-centric browsers: Brave, Tor, LibreWolf, DuckDuckGo, Epic Privacy browser, Firefox, etc.
- Privacy-centric extensions: uBlock Origin, Privacy Badger, DuckDuckGo, Ghostery, Bitwarden, etc.
In Conclusion
This post explains how to go into Incognito mode in Windows 11 and how to turn on Incognito mode in a browser. If necessary, follow the comprehensive guide to strengthen privacy.
To ensure your data remains secure, it’s crucial to back it up regularly. We highly recommend using MiniTool ShadowMaker for this purpose. If you experience any issues or have suggestions while using the software, please reach out to us at [email protected].
MiniTool ShadowMaker TrialClick to Download100%Clean & Safe
How to Go Incognito FAQ
Normally, a PC cannot be tracked if it's fully powered off or disconnected from all networks. However, if it’s only offline (disconnected from Wi-Fi) but still on, it may still be trackable through hidden technologies like cellular, Bluetooth, or its last known location.
About The Author

Position: Columnist
Charlotte is a technology columnist with a strong focus on the Windows operating system, specializing in disk management, backup, and data recovery. She is passionate about analyzing computer errors, identifying root causes, and delivering practical solutions. In her free time, she stays updated on the latest developments in computer systems and hardware while continuously learning new technologies to broaden her expertise. Her writing style is clear and easy to understand, making complex technical topics accessible even to users with limited computer knowledge.
User Comments :