Gallery is a new folder in Windows 11 which is available starting in the October 2023 update. However, some users think it is useless and want to remove it. This post from MiniTool tells you how to remove Gallery from File Explorer.
Starting with KB5030310 Build 22621.2361, Microsoft introduces Gallery, a new feature designed in File Explorer for easy access to your photo collection. The content in the gallery is the same as what you see in all pictures viewed in the Photos app. Your most recent photos appear at the top of the gallery. If you set up a OneDrive camera roll backup, this includes photos from your phone.
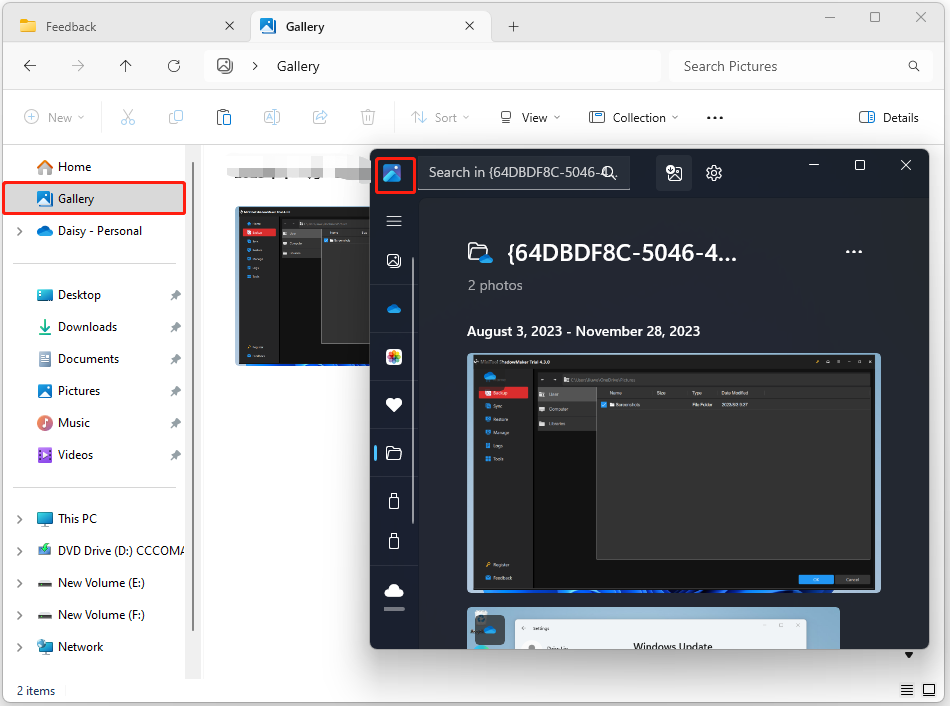
Some users may want to get rid of the Gallery entry. When you don’t use it frequently, it just takes space in the navigation pane. So here’s how to remove Gallery from File Explorer.
MiniTool ShadowMaker TrialClick to Download100%Clean & Safe
How to Remove Gallery from File Explorer
Way 1: Via Registry Editor
How to remove Gallery from File Explorer? You can do that via Registry Editor. Follow the guide below:
Step 1: Press the Windows key and the R key at the same time to open the Run dialog.
Step 2: Type regedit and then press Enter to open Registry Editor. You’ll be prompted for permission and please click Yes to open it.
Step 3: Go to the following path:
Computer\HKEY_LOCAL_MACHINE\SOFTWARE\Microsoft\Windows\CurrentVersion\Explorer\Desktop\NameSpace_41040327\{e88865ea-0e1c-4e20-9aa6-edcd0212c87c}
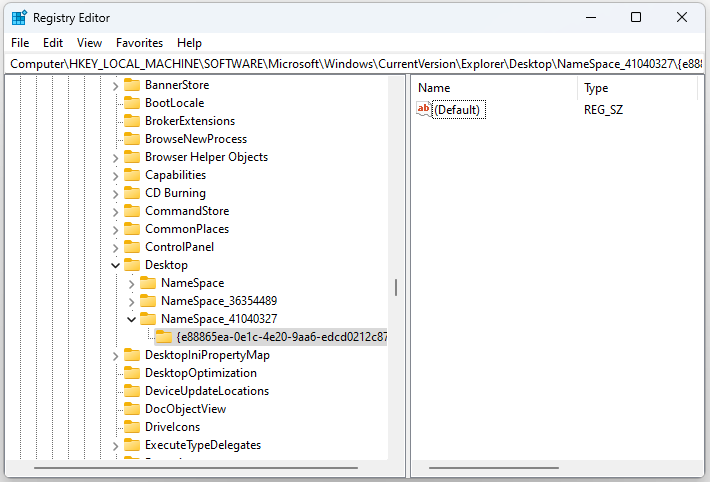
Step 4: Right-click it to choose Delete. Then, the Gallery folder will disappear from your File Explorer.
Way 2: Via Command Prompt
How to remove Gallery from File Explorer on Windows 11? You can also do that via Command Prompt. Here is how to do that:
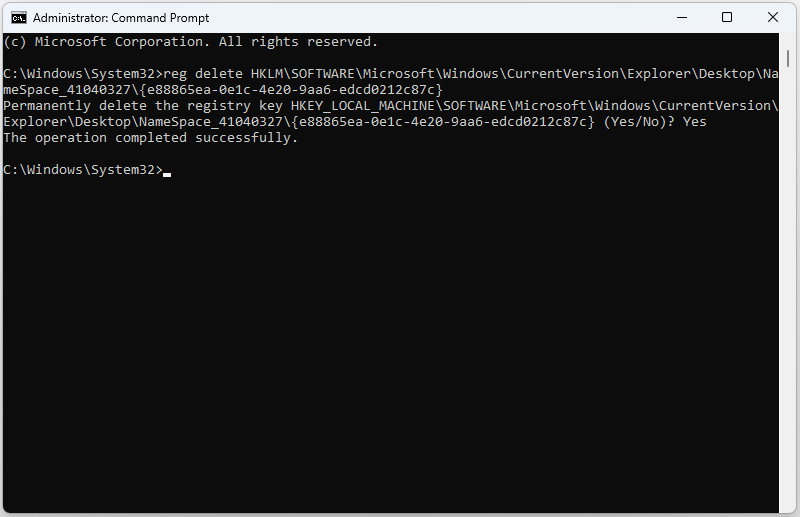
Step 1: Type cmd in the Search box and choose Run as administrator.
Step 2: Type the following command and press the Enter key.
reg delete HKLM\SOFTWARE\Microsoft\Windows\CurrentVersion\Explorer\Desktop\NameSpace_41040327\{e88865ea-0e1c-4e20-9aa6-edcd0212c87c}
How to Add or Remove Folders in Gallery
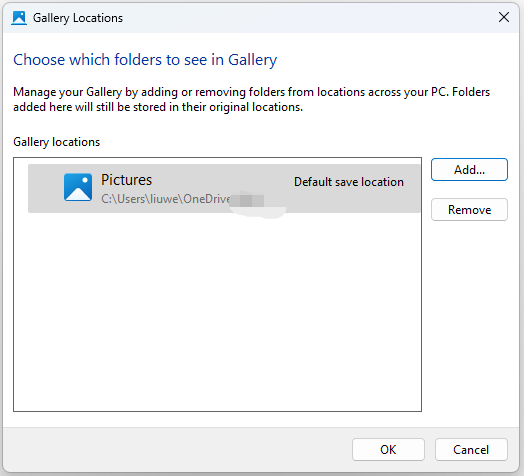
In File Explorer, you can add and remove folder locations in the Gallery view.
Step 1: Open File Explorer on Windows 11. Click Gallery.
Step 2: Click the Collection button and choose the Manage collection option.
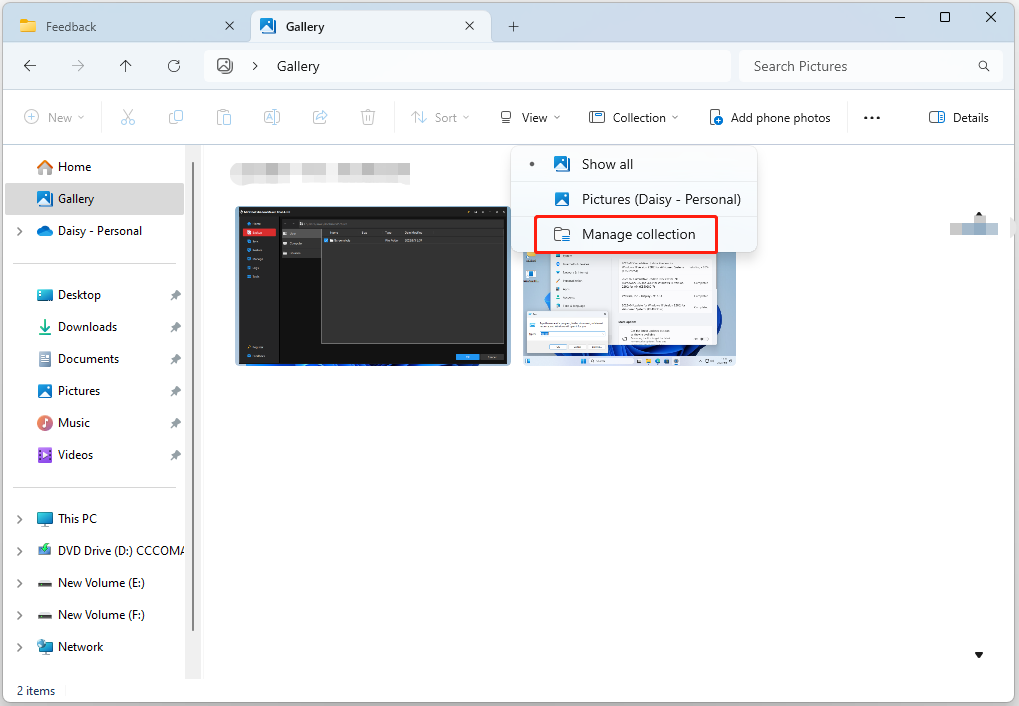
Step 3: Click the Add… button. Select the folder location. Click the Include folder button. Click the OK button. If you want to remove a picture, you need to select it and choose Remove.
Exclusive 10% OFF Stellar Repair for Photo
Final Words
This post has introduced how to remove Gallery from File Explorer. You can also know how to add or remove folders to Gallery.

User Comments :