If you have more than one account on your computer, you might experience one situation in which you have to download applications on each account separately. Do you have solutions that can make a program available to all users to get rid of the repeated operations? The answer is positive. Read this MiniTool post to do it.
Generally, if one computer is used by several people, there will be more than one account in order to protect private information. However, things become different if you have several accounts and need to share some common materials and applications. It is inconvenient to get these programs again and again on different accounts. Here are some useful methods to help you make a program available to all users on Windows 10/11.
Hello. I have a question for you. Today I installed Windows 11. Following the instructions on the internet, I created two accounts. One for me, where I keep all my programs, games, and tools. The other account is for my girlfriend, where she has her programs for the school. But I found out that the programs I have installed, she doesn't have them. I don't like to install everything twice, even games. How could I allow all the programs and games to be seen and used by her on her account? Thank you all! – homelessdropreddit.com
MiniTool Power Data Recovery FreeClick to Download100%Clean & Safe
How to Make a Program Accessible to All Users
Way 1: Configure Program Permissions
Step 1: Change the Location of the Program
1. Press Win + E to open File Explorer.
2. Copy and paste the path: %APPDATA%\Microsoft\Windows\Start Menu\Programs into the address bar and hit Enter.
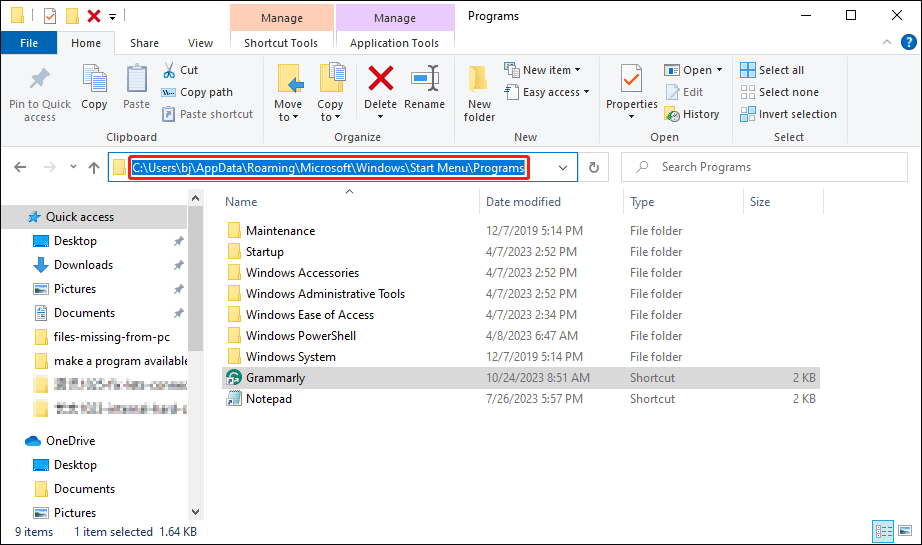
3. Find the application you want to move and copy its shortcut.
4. Go to the C:\User\Public\Public Desktop destination and paste to shortcut here.
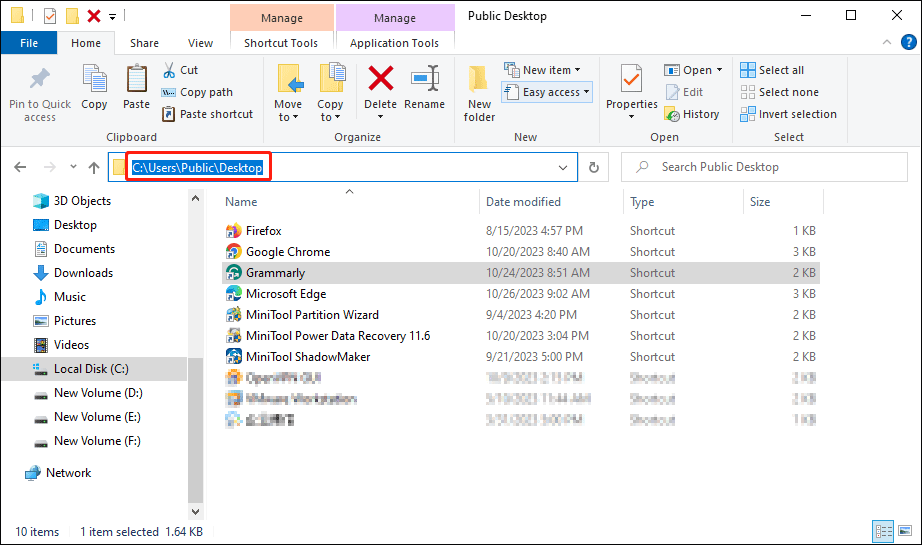
If you can’t find the Public Desktop folder, click on the View tab on the top toolbar and check the Hidden items option to show the hidden folders.

Step 2: Configure the Program Permissions
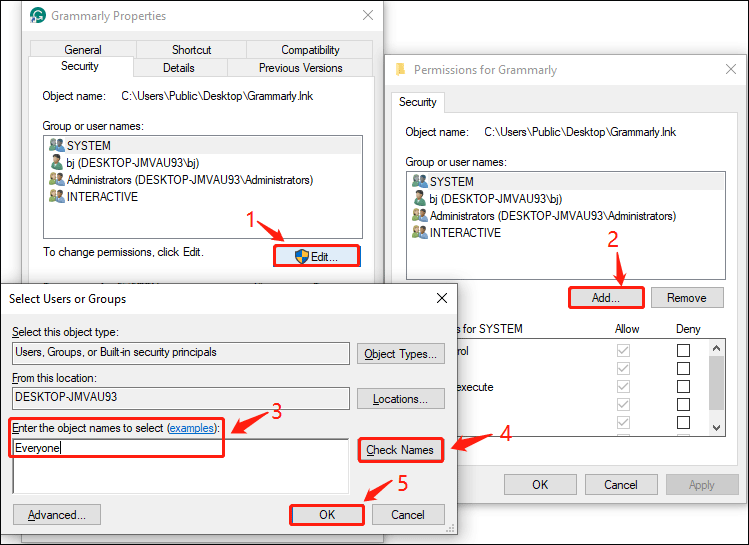
Right-click on the shortcut and choose Properties from the context menu.
1. Change to the Security tab and click on the Advanced tab at the bottom of this window.
2. Click on the Change button next to the Owner section, then type Everyone into the Box.
3. Click on Check Names and click OK to confirm.
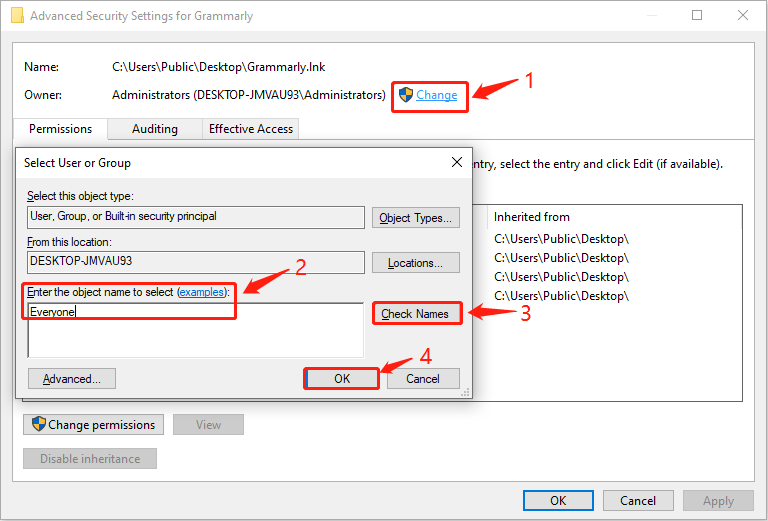
4. Return to the Advanced Security Settings window, and click on Apply to confirm the change.
5. Choose the Edit button and click Add in the prompt window.
6. Type Everyone again into the box, then click Check Names > OK to add a user.
7. Choose Full control in the Permissions for Everyone section.
8. Click Apply > OK in sequence to save the changes.
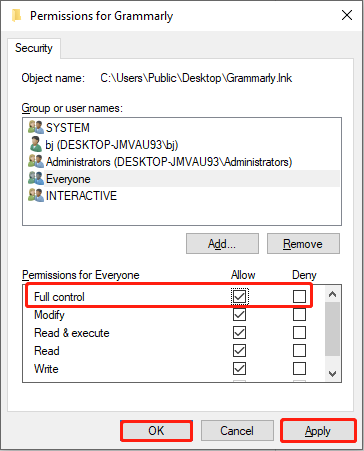
After all these settings, you can successfully make a program available to all users.

Way 2: Install a Program for All Users
Another method is easier but you should pay more attention before installing it.
Whether an app can be installed for all users or not depends on the app developers. To distinguish whether the installed software is for the current account or all users, you can check its file path. If the file is stored in the Program Files/Program Files (x86) folder, it is accessible to all users. Otherwise, you can only find the program under the current account.
Some programs are designed to be installed for the current user. You can change its download path to the Program Files or Program Files (x86) folder to install a program for all users.
Bonus Tip
The steps are more concise if you want to make files available to all users.
Step 1: Click on the folder icon on the taskbar to open File Explorer.
Step 2: Navigate to C:\Users\Public\Public Documents to find the file.
Step 3: Change the shortcut to the C:\Users\Public\Public Desktop path, then you can find the file in different accounts.
Bottom Line
This is all about how to make programs available to all users on Windows. Hope they are specific enough to help you solve your issue.
User Comments :