The Downloads folder is a default location for files downloaded from browsers, email clients, and online platforms on Windows.
However, sometimes you may encounter a frustrating issue: files in the Downloads folder keep disappearing without any warning or deletion prompts.
If you’re stuck with this problem and are unsure about how to recover missing downloaded files or fix the issue, this detailed guide is for you.
Before exploring recovery methods and solutions, it’s essential to comprehend the main reasons for files disappearing from the Downloads folder.
Why Do Downloaded Files Keep Disappearing in the Downloads Folder
Knowing the root cause will help you choose the right recovery method and prevent the problem from recurring.
Below are the most common reasons for the “files in the Downloads folder keep missing” problem:
- Automatic System Cleanup by Windows Storage Sense: Windows Storage Sense automatically frees up disk space by deleting temporary files or downloaded files.
- Third-Party Antivirus or Windows Security False Positives: Windows Security may block or delete files it deems malicious or suspicious, even though they are legitimate downloaded files.
- Accidental Deletion: Sometimes, you may accidentally delete files in a cluttered Downloads folder.
- Hidden File Settings: Some downloaded files may be hidden in File Explorer, making them seem invisible even if they still exist in the folder.
- Browser Download Location Misconfiguration: Changing the download location in web browsers can result in files saving elsewhere, making it appear as if they’re missing from the Downloads folder.
- Malware or Virus Attacks: Malware and viruses disrupt system functions by hiding or deleting user files, including those in the Downloads folder.
- OneDrive Sync Issue: When enabled, Microsoft OneDrive syncs local folders, including Downloads, to the cloud. Incorrect settings can lead to files being cloud-only or cause sync issues.
Regardless of the reason, the top priority is to recover lost files from the Downloads folder before making any fixes.
How to Recover Missing Files in the Downloads Folder
There are various methods to recover deleted/lost downloaded files, ranging from quick built-in Windows tools to professional data recovery software.
We’ve listed five useful solutions, arranged from the easiest to the most thorough, allowing you to try them one by one until your files are recovered.
Solution 1. Use File Search
Before concluding that files have been deleted, first verify if they are saved to an incorrect location.
Windows’ built-in File Search provides a quick and free method to locate missing downloads in just a few seconds.
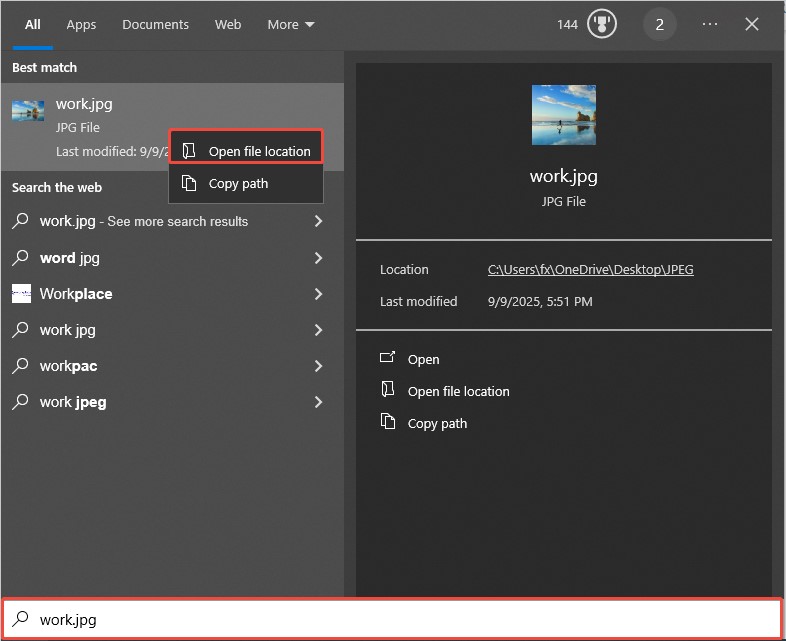
Step 1. Press Win + S to access the search bar.
Step 2. Type the exact file name, file extension, or keyword into the search field. Windows will search through all local drives and show any files that match.
Step 3. If the file is shown, right-click the file and choose Open file location. You can transfer it back to the Downloads folder, or simply copy it to a secure location.
If it doesn’t find any related files, continue to the next solution.
Solution 2. Check the Recycle Bin
Most temporary file deletions on Windows direct files to the Recycle Bin instead of permanently deleting them.
If you have mistakenly deleted files from the Downloads folder, the first place to look is the Recycle Bin.
Step 1. Double-click the Recycle Bin icon located on your Windows desktop to access it.
Step 2. Use the search bar in the upper-right corner to look for the name of the missing file.
Step 3. Once you locate the missing Downloads files, select them, right-click, and choose Restore.

The files will be returned to their original location (the Downloads folder) immediately.
If the files aren’t found in the Recycle Bin, proceed to the next solution.
Solution 3. Use MiniTool Power Data Recovery
When files are permanently deleted, emptied from the Recycle Bin, or deleted through Storage Sense, MiniTool Power Data Recovery is the most reliable solution.
This professional and user-friendly software is specifically designed to recover deleted/lost files from Windows PCs, hard drives, USB drives, and other storage devices.
It can recover files lost for any reason: automatic system cleanups, deletions by antivirus programs, malware attacks, or hard drive errors.
It supports a wide range of common file types, including documents, images, videos, software installers, and archives, and is compatible with Windows 11/10/8/8.1.
Now, download and install this free data recovery software to recover 1GB of files for free.
MiniTool Power Data Recovery FreeClick to Download100%Clean & Safe
Follow the step-by-step guide to recover the downloads with MiniTool Power Data Recovery:
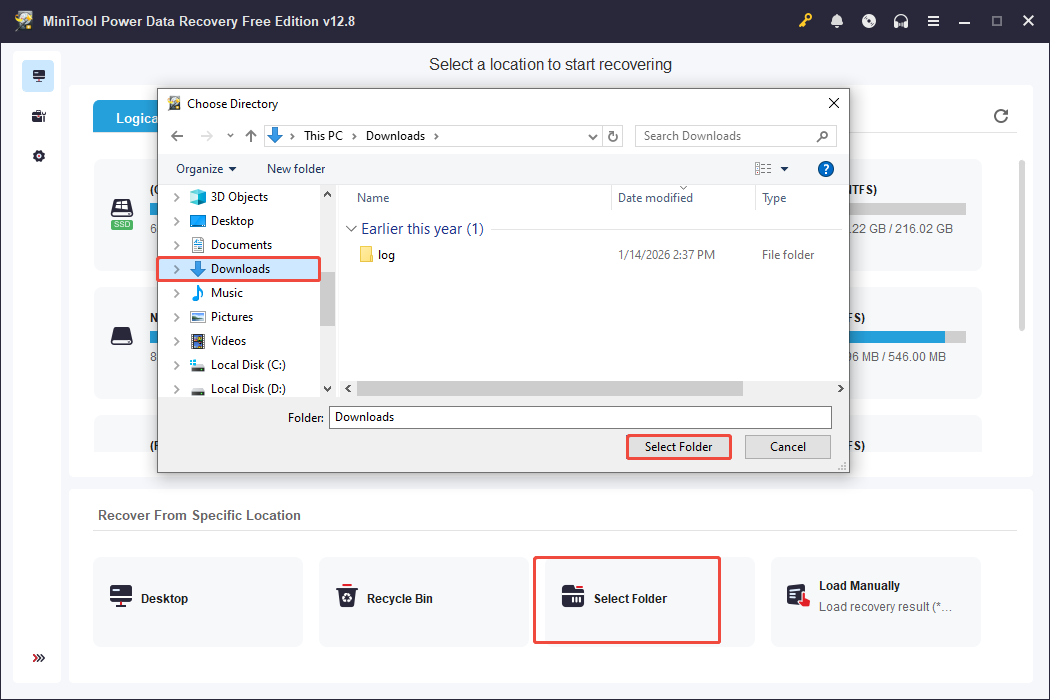
Step 1. Launch the MiniTool data recovery tool to access its main interface. Navigate to the Recover From Specific Location section, choose Select Folder, and click Browse.
In the pop-up window, select the Downloads directory and click the Select Folder button.
Step 2. Once the scanning process is complete, use Path, Type, Filter, and Search to locate the files you need.
- Path: Allows you to view recovered files organized according to their original folder layout.
- Type: Sorts the scanned results based on file type, such as documents, images, and videos.
- Filter: Allows you to swiftly narrow down files by file type, date modified, file size, and file category.
- Search: Allows you to find specific files by typing in keywords related to file names.
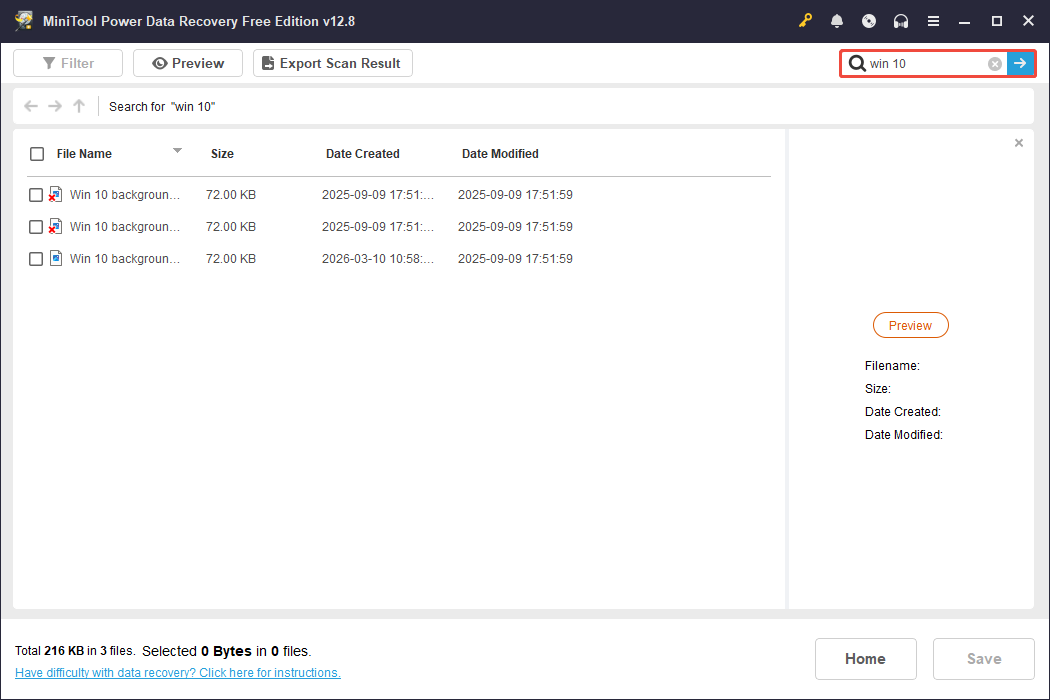
When you find the file, double-click it to preview its content.

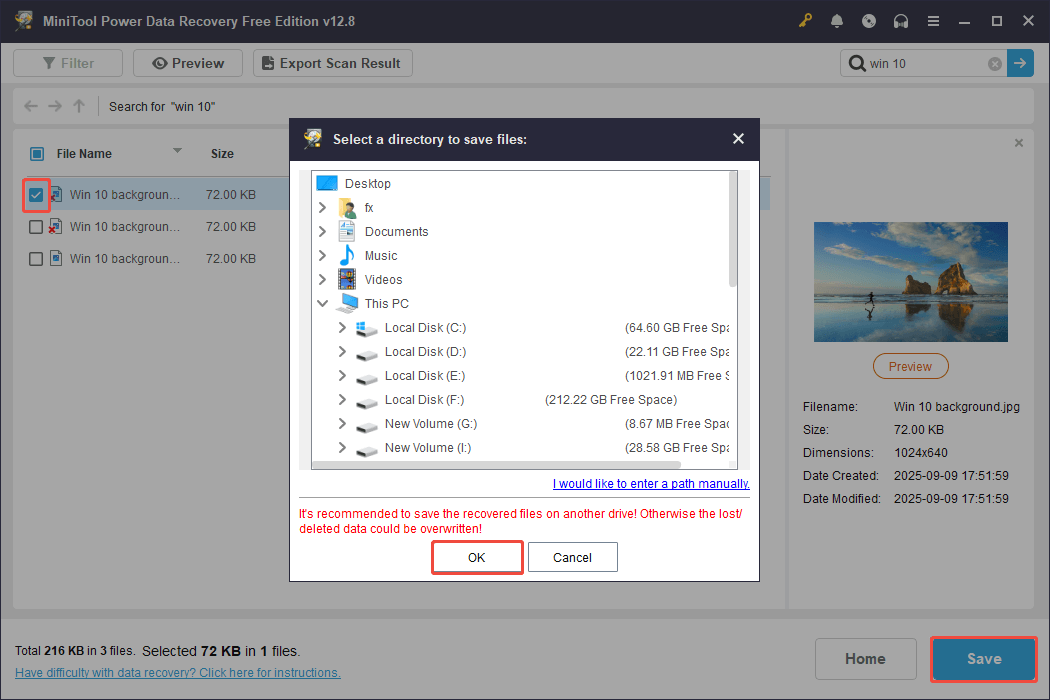
Step 3. Select all the files you wish to recover and click Save. In the following window, choose a different safe location and click OK.
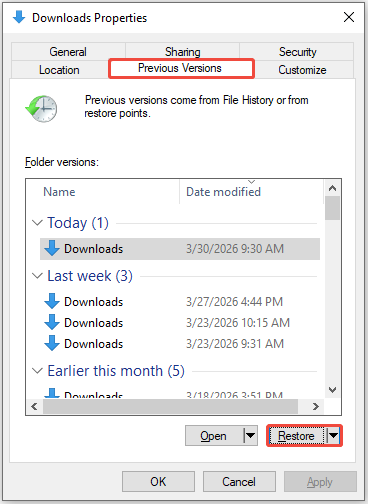
Solution 4. Restore the Previous Version
Windows automatically creates previous versions of folders, including the Downloads folder, as part of System Restore or File History.
If you have enabled File History or System Restore, this built-in feature allows you to restore the folder to a state before files disappeared.
Here’s how to do it:
Step 1. Press Win + E to open File Explorer and navigate to the Downloads folder (usually located at C:\Users\Username\Downloads).
Step 2. Right-click the Downloads folder and select Properties from the dropdown menu.
Step 3. In the pop-up window, go to the Previous Versions tab, select the most recent previous version before the files disappeared, then click Restore.
Confirm the restoration when prompted. Windows will overwrite the current Downloads folder with the previous version, restoring all missing files.
If no previous versions are available, move to the next method.
Solution 5. Check the Backup
If you regularly back up your Windows system or use cloud backup services like OneDrive or Dropbox, missing downloads can be easily restored from backups.
Follow these steps to recover files from backups:
- Check external hard drives where you store manual backups. Locate the Downloads folder backup and copy the missing files back to the original location.
- For cloud backups, open your cloud storage app and navigate to the Downloads folder. Find the missing files and download them to your local Downloads folder.
- If you use professional backup software like MiniTool ShadowMaker, launch the software and restore the backup image containing the Downloads folder.
MiniTool ShadowMaker TrialClick to Download100%Clean & Safe
How to Fix Files in the Downloads Folder Keep Disappearing
After recovering lost files, you need to address the root cause to stop downloaded files from disappearing.
Here are six effective methods to resolve the problem and ensure your Downloads folder files remain safe permanently.
Method 1. Disable Windows Storage Sense
The primary reason for the automatic deletion of files in the Downloads folder is Windows Storage Sense, so this is the first setting to modify:
Step 1. Press Win + I to launch Windows Settings, and then navigate to System > Storage.
Step 2. Under the Storage Sense section, switch the toggle to Off to disable this feature.
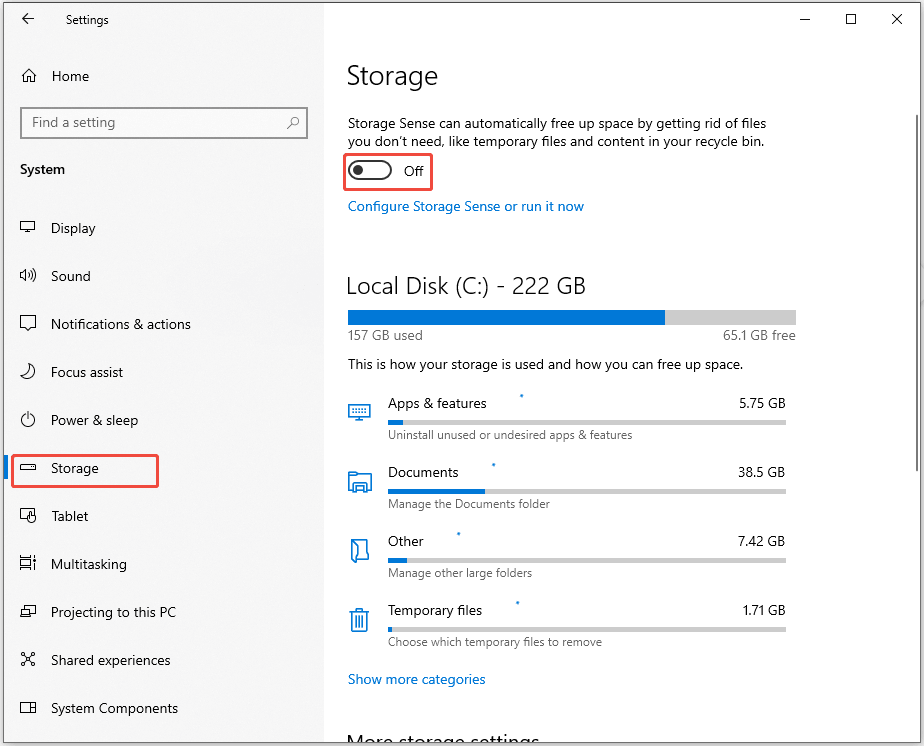
Step 3. If you prefer to keep Storage Sense for other cleaning tasks but want to safeguard your Downloads files, click Configure Storage Sense or run it now.
Step 4. In the dropdown menu for Delete files in my Downloads folder if they haven’t been opened for more than, choose Never.
This will prevent Storage Sense from removing any files in your Downloads folder while still allowing other cleaning functions to operate.
Method 2. Check Antivirus Settings
False positives from antivirus programs are a frequent issue. Therefore, consider modifying your security settings to stop legitimate downloads from being deleted.
>> For Windows Security:
Step 1. Navigate to Windows Settings > Update & Security > Windows Security > Virus & threat protection > Protection history.
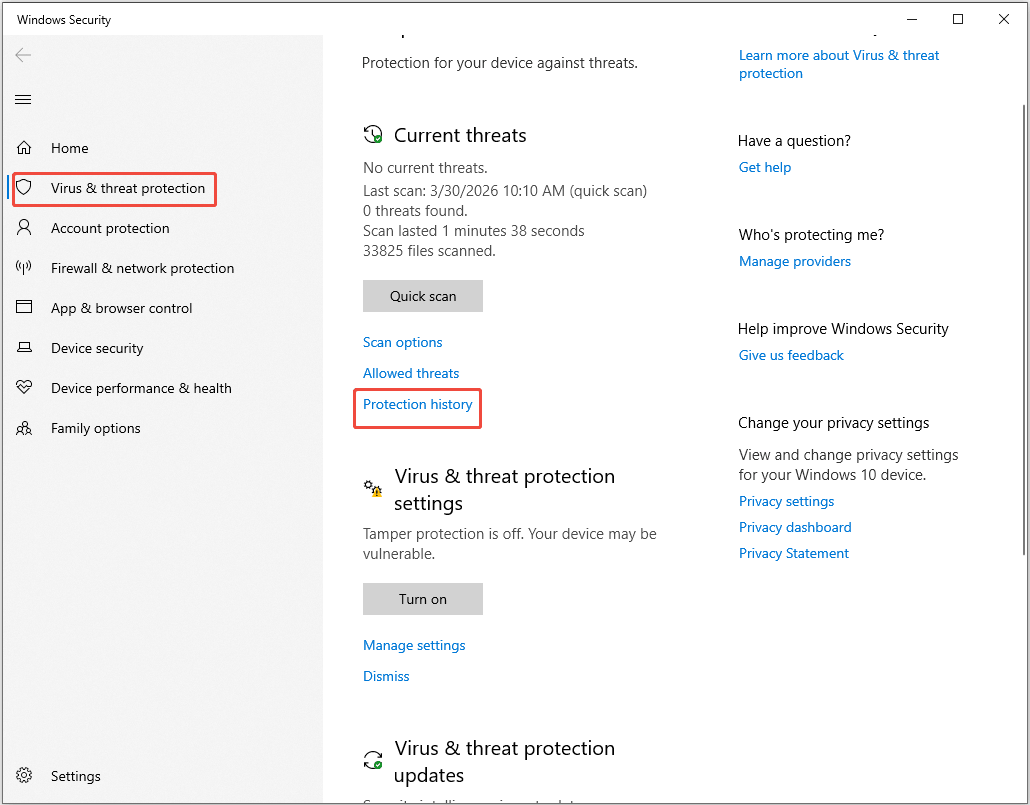
Step 2. Select Quarantined Items from the drop-down menu next to All recent items. Look for files that have been quarantined or deleted from the Downloads folder.
Step 3. Select the legitimate downloaded files and choose Restore or Allow.
Step 4. To prevent your downloads from being blocked again, go back to the Virus & threat protection interface. Then click Manage settings under the Virus & threat protection settings section.
Step 5. In the following window, scroll down and click Add or remove exclusions under the Exclusions section.
Step 6. Click Yes in the UAC interface.
Step 7. Click the + Add an exclusion button and select File, Folder, File type, or Process to specify what to skip.
>> For third-party antivirus solutions:
Access the antivirus dashboard, go to Quarantine/Threat History, check for any missing files from the Downloads, and restore any safe files.
To avoid future false positives, add the Downloads folder to the antivirus Exclusion List.
Make sure your antivirus software is updated to its latest version to lower the rate of false positives.
Method 3. Check OneDrive Settings
OneDrive sync problems may lead to the disappearance of local files in the Downloads folder. Therefore, consider adjusting the sync settings.
Step 1. Launch the OneDrive app on your computer in the notification area of the taskbar.
Step 2. Navigate to Settings > Account > Choose folders.
Step 3. Uncheck the Downloads folder if you don’t want it synced to OneDrive, or select Always keep on this device for the Downloads folder to ensure local files remain intact.
Step 4. If Files On-Demand is enabled, turn it off because this feature maintains only cloud copies and removes local files to conserve storage space.
Afterwards, temporarily pause the OneDrive sync to see if files stop disappearing. If they do, this confirms the sync issue, and modifying the folder settings will fix it.
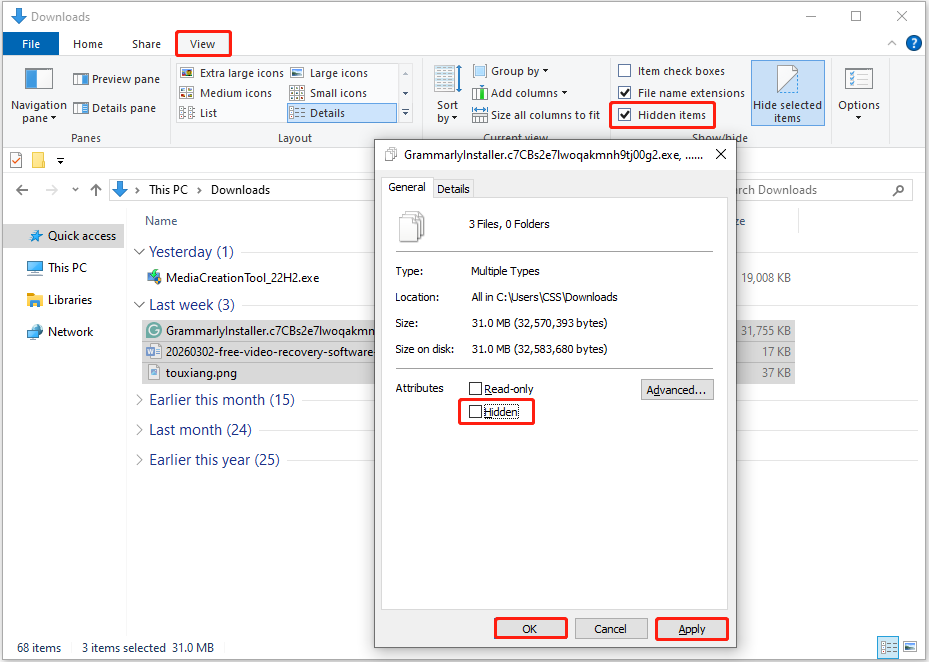
Method 4. Check for Hidden Files
The hidden file feature makes files invisible in File Explorer, including the downloaded files. In this case, enable the viewing of hidden files to locate them.
Step 1. Launch File Explorer and navigate to the Downloads folder.
Step 2. Select the View tab at the top, then check the box for Hidden items. Hidden files will show up as greyed-out icons in the Downloads folder.
Step 3. Right-click on these hidden files, choose Properties, and uncheck the Hidden box next tothe Attributes section.
Step 4. Click Apply > OK to make them visible permanently.
Method 5. Verify Browser Download Location
Make sure that all web browsers save downloaded files in the correct Downloads folder to prevent any misplaced downloads.
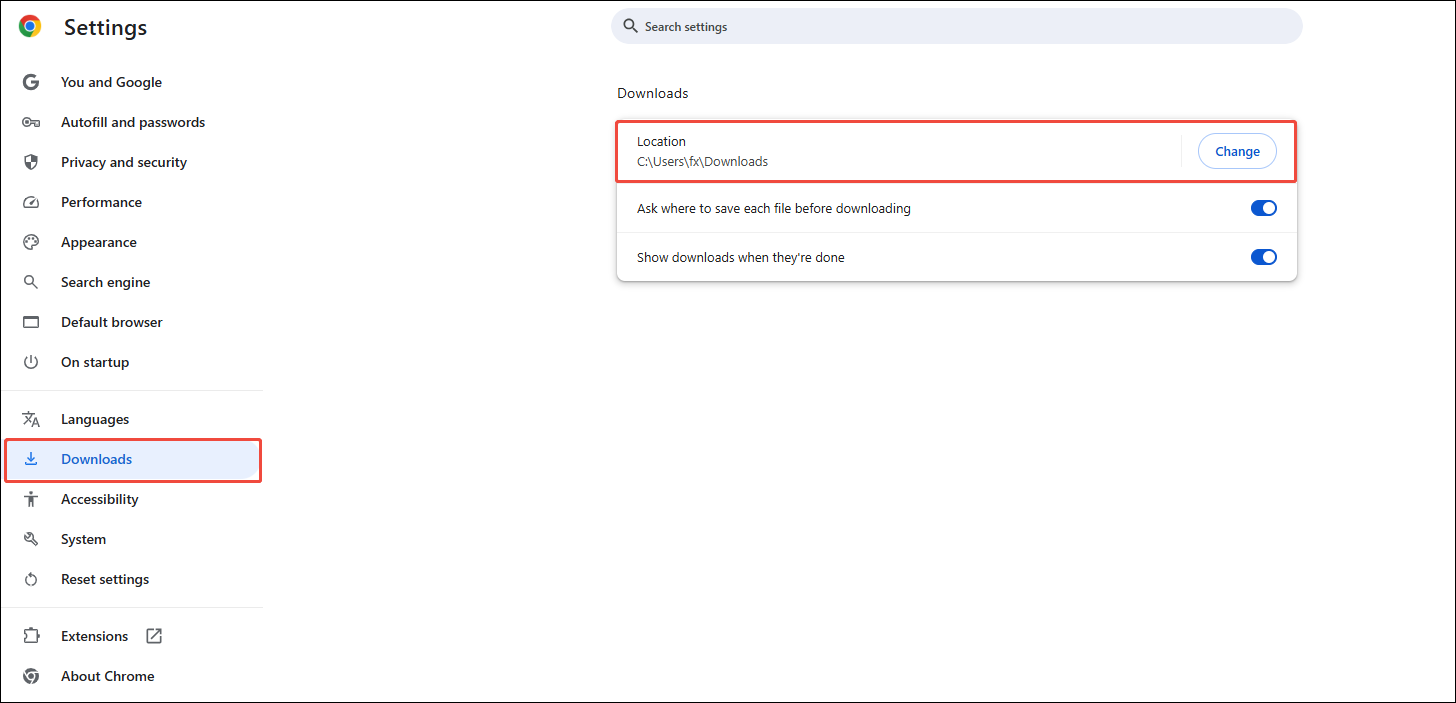
- For Google Chrome/Edge: Launch the browser and go to Settings > Downloads. Verify the Location field. Ensure it’s set to C:\Users\Username\Downloads. If it’s not, click Change and select the default Downloads folder.
- For Mozilla Firefox: Open Firefox, navigate to Settings > General > Downloads. Choose Save files to and set the Downloads folder as the default location.
Method 6. Disable Browser Protection Temporarily
Some web browsers have built-in protection features that may block or remove questionable downloads.
To determine if these features caused files to disappear, opt for disabling them temporarily:
Step 1. Access your browser and go to Settings > Privacy and security > Security.
Step 2. Temporarily turn off Safe Browsing, Download Protection, or Malware Protection (only do this for downloads you trust).
Step 3. Download a test file to your Downloads folder and see if it remains. If the file does not vanish, the browser’s protection settings were the cause.
Next, add trusted sites to the browser’s safe list instead of leaving the protection disabled permanently.
Bottom Line
To sum up, this post introduces five solutions to recover missing downloads and six fixes to resolve the issue where files in the Downloads folder keep disappearing.
If you have any issues with MiniTool Power Data Recovery, contact us at [email protected].
About The Author

Position: Columnist
Sandy became an English editor after graduation. She is devoted to finding effective solutions for diverse IT problems and provides articles on data recovery, data backup, and computer partitions and drives. In her spare time, she likes listening to music and playing games.
User Comments :