AutoPlay is a handy feature to quickly handle different devices connected to the operating system or media automatically, but if you don't find this feature useful or you want to modify AutoPlay settings, you can manage this feature with the Settings app or Control Panel. You can get more information from the MiniTool website.
When you connect a memory card, USB drive, and other device or media to your computer, a feature in Windows 10 – AutoPlay allows you to choose a default action.
When you turn on this feature and then connect a removable device, Windows 10 will detect this device and AutoPlay will launch it with a default action, for example, open the folder, import images, configure the storage, etc.
If you find this feature is not useful for you, or you want to take a different action by changing the default settings of this feature when you connect a memory card, USB drive, or another device or media, you can easily go to the Settings app or Control Panel to manage AutoPlay settings.
The following part will show you how to enable, disable, and customize the AutoPlay defaults settings for removable media.
Manage AutoPlay Settings with Settings App
Using the Settings app to enable, disable, and customize AutoPlay in Windows 10 is the easiest way for you.
Enable and Disable AutoPlay with Settings App
Follow the steps below to enable or disable AutoPlay with the Settings app.
Step 1: Click Start and then select Settings to open it.
Step 2: Choose Devices and click AutoPlay.
Step 3: Under the AutoPlay section, toggle switch to turn on or turn off AutoPlay for all media and devices.

After you complete all the steps above, you can successfully enable or disable AutoPlay in Windows 10 according to your configuration.
Customize the AutoPlay Defaults Settings with Settings App
The following steps will show you how to set a different default action when you connect a USB drive or another storage media.
Step 1: Click Start and then select Settings to open it.
Step 2: Choose Devices and click AutoPlay.
Step 3: Under the Choose AutoPlay defaults section, select a new default action for Removable drive when you connect a USB drive:
- Take no action
- Open folder to view files (File Explorer)
- Ask me every time
- Configure storage settings (Settings)
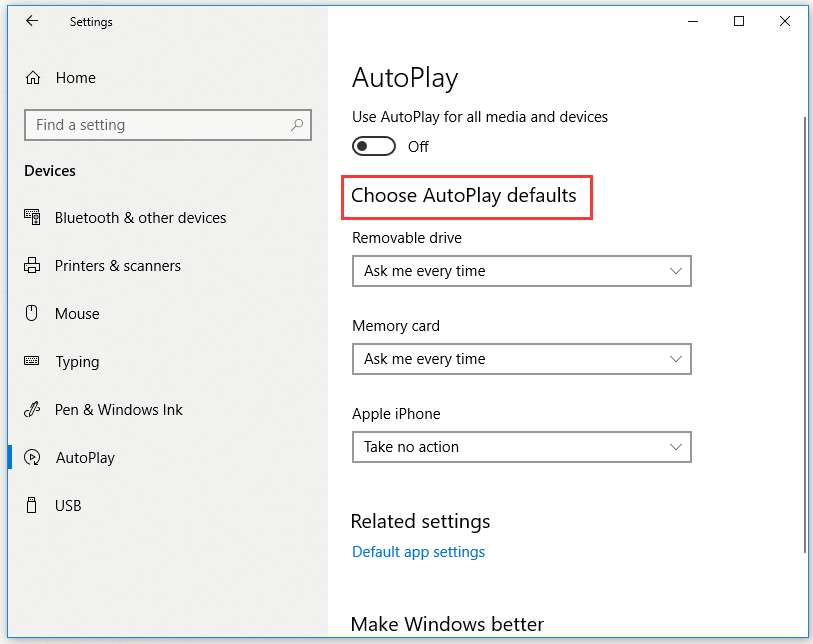
Step 4: Under the Choose AutoPlay defaults section, select a new default action for Memory card when you connect a memory card:
- Import photos and videos (OneDrive)
- Import photos and videos (Photos
- Play (Windows Media Player)
- Take no action
- Open folder to view files (File Explorer)
- Ask me every time
After you complete all the steps above, AutoPlay will automatically play depending on your new configuration every time connecting a removable drive or a memory card.
Manage AutoPlay Settings with Control Panel
Alternatively, you can manage the AutoPlay settings by using Control Panel.
Enable and Disable AutoPlay with Control Panel
Follow the steps below to enable or disable AutoPlay in Windows 10 by using Control Panel.
Step 1: Type control panel in the search bar and then click Control Panel to open it.
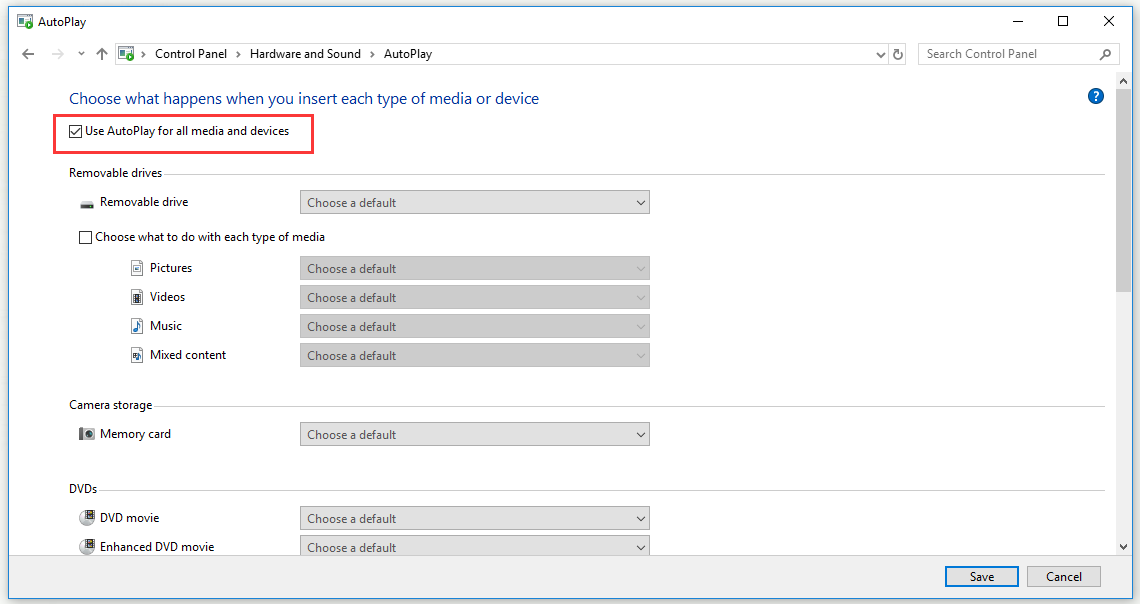
Step 2: Select Hardware and Sound and then choose AutoPlay.
Step 3: Check the Use AutoPlay for all media and devices option to enable AutoPlay, or clear the option to disable AutoPlay. Click Save to keep your settings.
After you finish all the steps above, AutoPlay in Windows 10 will be enabled or disabled depending on your choice.
Customize the AutoPlay Defaults Settings with Control Panel
You can also specify a new default action with Control Panel when you connect a USB drive, memory card, or another media or device.
Step 1: Type control panel in the search bar and then click Control Panel to open it.
Step 2: Select Hardware and Sound and then choose AutoPlay.
Step 3: Under the Removable drives section, select a new default action when you connect a USB flash drive or another storage media:
- Take no action
- Open folder to view files (File Explorer)
- Ask me every time
- Configure storage settings (Settings)
Step 4: Optional: Check the Choose what to do with each type of media option, which will override the Removable drive setting.
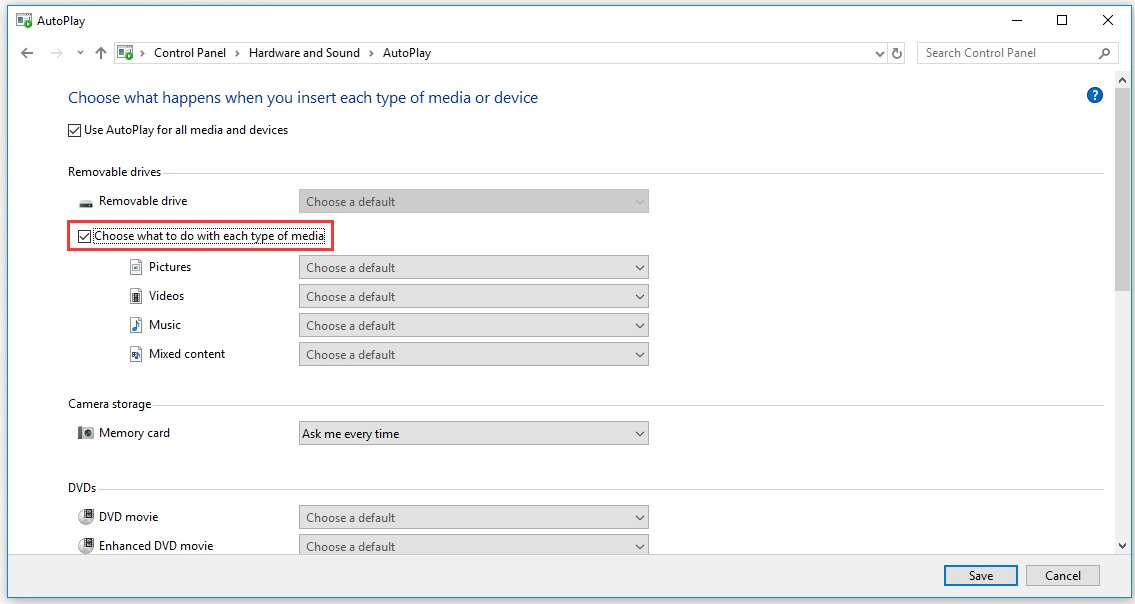
Step 5: Select a new action for each type of media – Pictures, Videos, Music, and Mixed content.
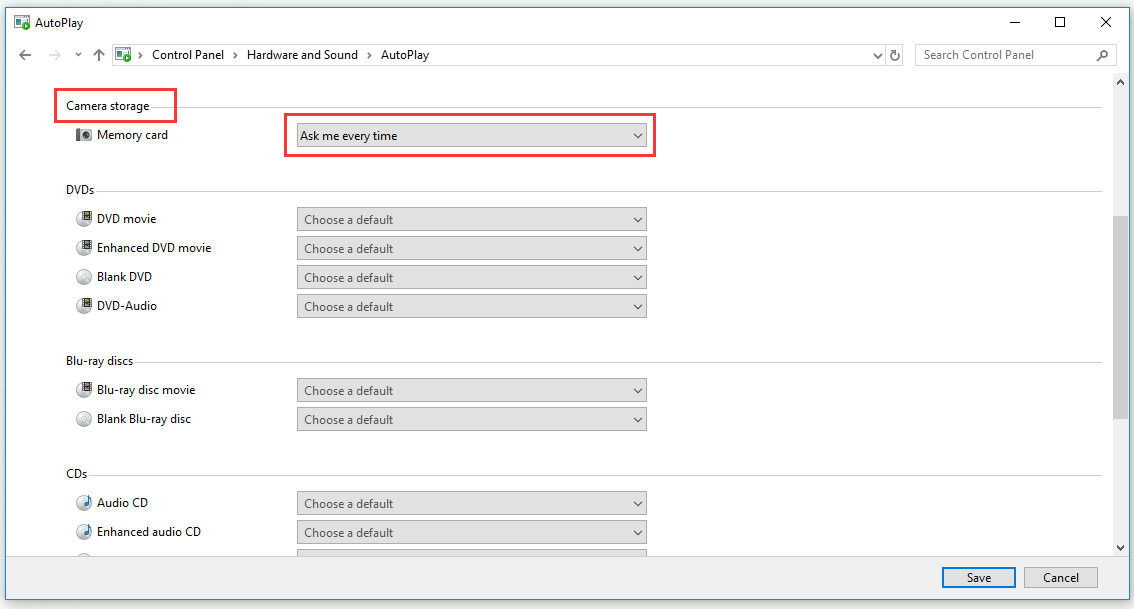
Step 6: Optional: Under the Camera storage section, select a new automatic action when you connect a memory card to your computer:
- Import photos and videos (OneDrive)
- Import photos and videos (Photos
- Play (Windows Media Player)
- Take no action
- Open folder to view files (File Explorer)
- Ask me every time
Step 7: Optional: Under the Software section, select a new automatic action when you connect a media with installation files:
- Install or run a program from your media
- Take no action
- Open folder to view files (File Explorer)
- Ask me every time

Step 8: Click the Save button.
After you finish all the steps above, according to your settings, Windows 10 will start USB drives, other media, and devices automatically when you connect them to your computer.
Bottom Line
In conclusion, this post has shown you how to enable, disable, and customize the AutoPlay defaults settings in Windows 10 with 2 useful methods. By using these 2 methods, you can quickly manage AutoPlay settings.
User Comments :