Overclocking is a great way to go if you plan to get the most out of your system. To do this, we'll show you how to download and use MSI Afterburner. Now, continue to read this post from MiniTool to get more details.
What Is MSI Afterburner
MSI Afterburner is a popular GPU monitoring and benchmarking tool. In addition to monitoring, it’s the perfect tool for overclocking and underclocking your GPU. Although it is developed by MSI, this software can be used on all graphics cards including AMD, NVIDIA, Intel, etc.
How to Download and Install MSI Afterburner
How to get MSI Afterburner download? Follow the guide below:
Step 1: Go to the MSI Afterburner official website.
Step 2: On the page, click the Download Afterburner button to start the download process.

Step 3: Then, choose a path to store the zip file and click Save.
Step 4: Extract the downloaded zip file and you can start to install it.
Step 5: Choose the language and click the Next button. Then, read the license agreement and click the I accept the terms of the License Agreement option, and click Next.
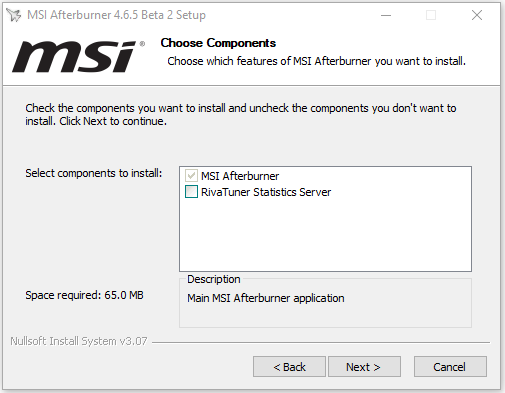
Step 6: Check the components you want to install and uncheck the components you don’t want to install. Then, click Next.
Step 7: Choose the destination and click the Next button. Then, click the Install button.
How to Use MSI Afterburner
After downloading and installing MSI Afterburner, you can start to use it. Then, we will introduce how to use MSI Afterburner.
1. Enable Screen Display
On-screen benchmarks with MSI Afterburner are a great way to show how good or bad your GPU is. You can easily set up the software to display temperatures, workloads, memory clocks, clock speeds, and everything else that comes with your GPU.
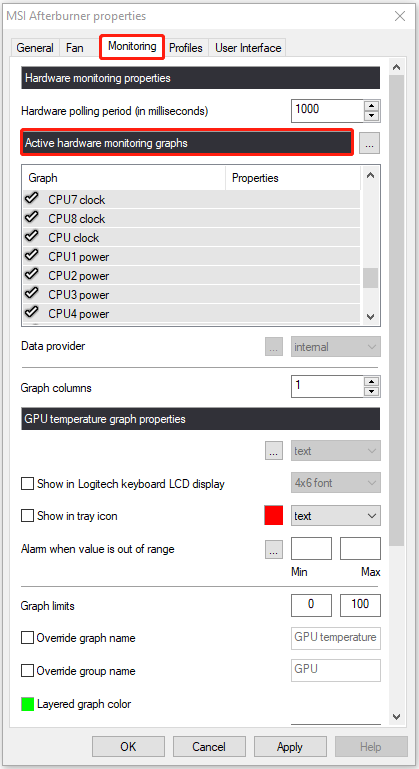
Click the Settings icon and find the Monitoring tab. Under the Active hardware monitoring graphs part, select the information you would like to display on-screen by clicking the desired fields. You can assign in-game hotkeys to toggle the OSD on and off which is ideal for everyday use.
2. Set Fan Profile
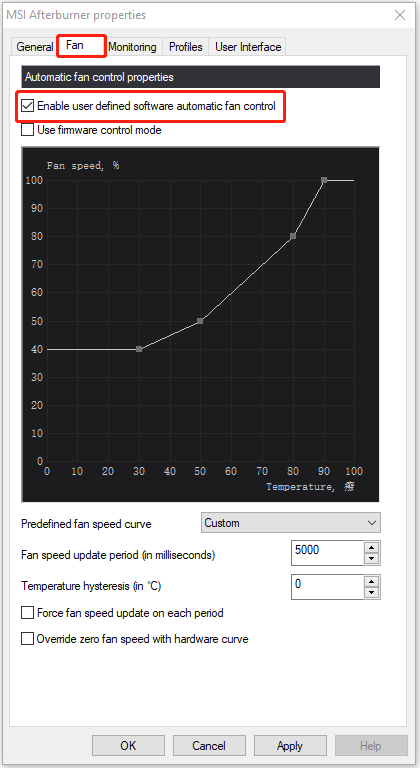
Click the Settings icon and locate the Fan tab in the menu bar at the top. Check the Enable user-defined software automatic fan control option. Then, you can start to customize the fan profile.
You will see a curve chart that has both “fan speed %” and “temperature” as values. You can change the curves to suit your specific needs. Once you have designed your ideal fan profile, click Apply and close the window. Your new fan settings will be fully in effect.
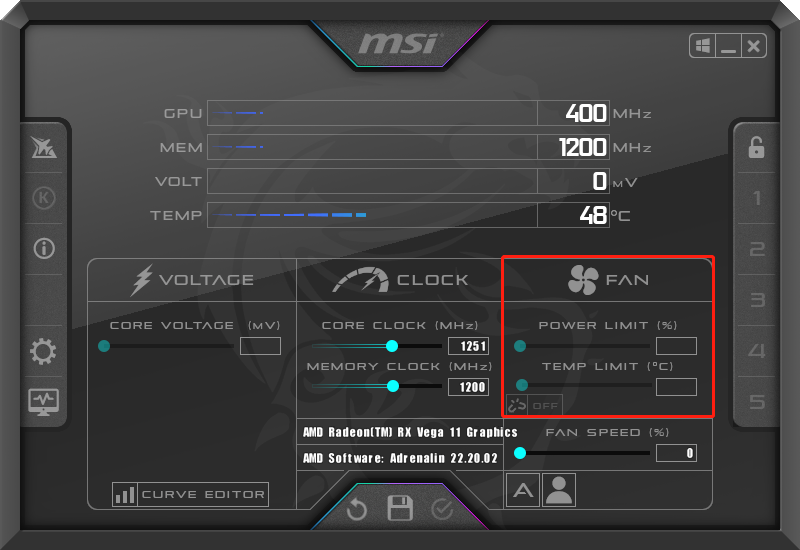
3. Limit Your GPU
You can overclock with the power limit/temperature slider. But you can also use it to control power consumption or temperature without losing too much performance. To do this, you need to move the slider down, not up. For example, if you don’t want your graphics card to consume a lot of power, you can move the power limit slider down to around 75% so the graphics card won’t exceed any limits you set.

Final Words
Here are all the details about MSI afterburner. Now, you have known how to free download MSI afterburner and how to use it. I hope that this post can be helpful to you.
User Comments :