If you encounter Outlook error 0x80040119 when you are setting up an account in Outlook or after the sending of an email fails, don’t worry too much, you can read this post written by MiniTool. It will show you some possible fixes to solve this issue.
When you try to set up an account in Outlook or after the sending of an email fails, you may get the Outlook error 0x80040119 on Windows. Here are some possible reasons: corrupted .PST file, corrupted Office installation, malfunctioning email account or third-party AV interference.

If you want to find some useful methods to fix this issue, keep reading.
Method 1: Fix the .PST File with the Inbox Repair Tool
An inconsistency with your Outlook (.PST) file is the most common cause of triggering the Outlook error 0x80040119.
Thus, to resolve the issue, you can try to fix the .PST file using the Inbox Repair Tool. Depending on the version you have installed, the location of this tool in Outlook will be different.
The following part will show you a way to repair the .PST file with the Inbox Repair Tool that works universally.
Step 1: Make sure Outlook and all associated applications are closed completely.
Step 2: Click this link to download the Inbox Repair Tool.
Step 3: Double-click the installation file to open it. Click Advanced, then check Apply repairs automatically and click Next to move over to the next screen.
Step 4: After the scan finishes to detect the problems with your Outlook .PST file. If any inconsistencies are found, the tool can automatically recommend viable repair strategies.
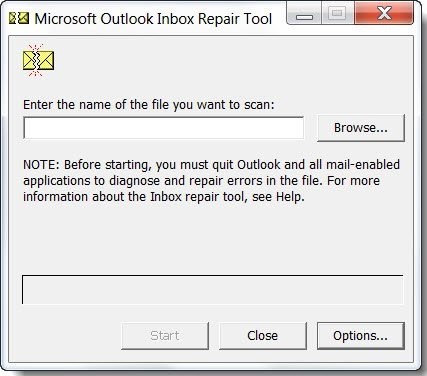
Step 5: When the Microsoft Outlook Inbox Repair Tool window pops up, click Browse…, then select your .PST file and click Start.
Step 6: When the process is complete, restart your computer and run Outlook again. Now check if the Outlook error 0x80040119 is now resolved.
If you’re still encountering the same error, move down to the next method below.
Method 2: Repair the Entire Office Installation
If you have confirmed that the problem is not caused by a corrupted .PST file, you are probably dealing with some kind of file corruption in your Office installation, which limits the functionality of your Outlook application.
You can try to repair the entire Office installation to solve the Outlook error 0x80040119.
Here’s a quick guide.
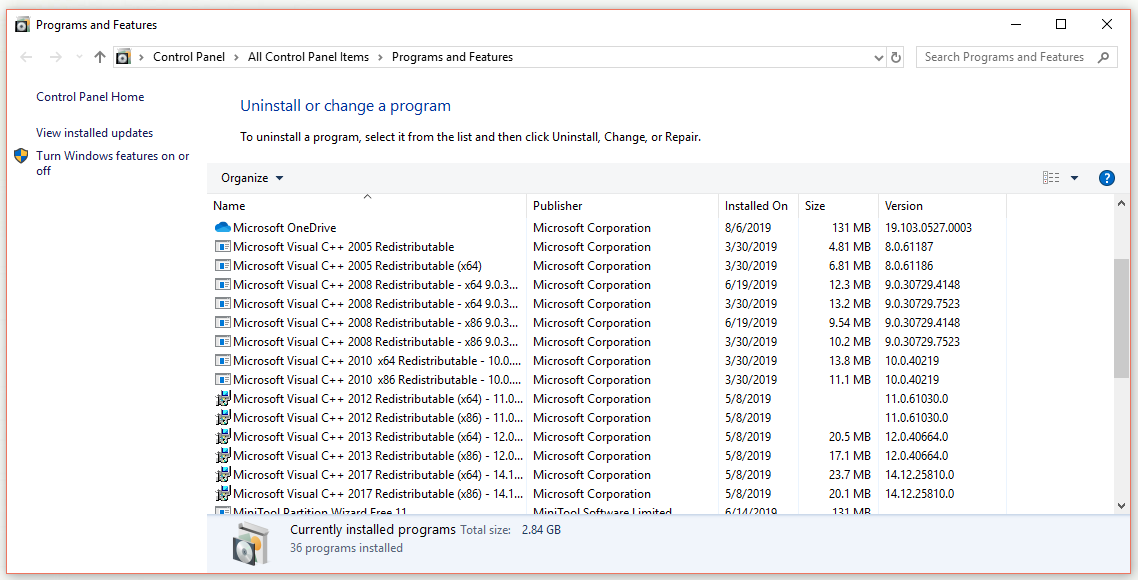
Step 1: Press the Windows + R keys to open the Run dialog box. Next, type appwiz.cpl and press Enter to open the Programs and Features window.
Step 2: Right-click your Office installation through the list of applications and choose Change.
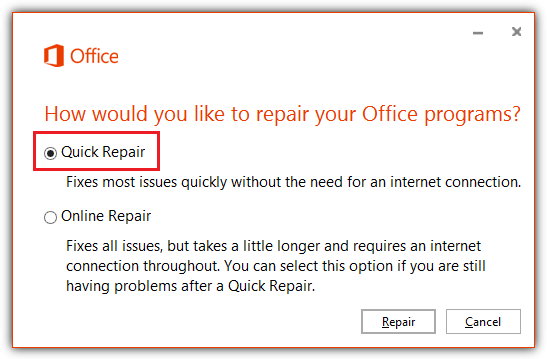
Step 3: Choose Quick Repair and then click Repair.
Step 4: When the process is complete, restart your computer and check if the Outlook error 0x80040119 disappears.
If you’re still seeing the Outlook error 0x80040119, move down to the next method below.
Method 3: Repair the Account with Account Settings
If you are using a third-party email client with Outlook such as Yahoo or Gmail, you may encounter the Outlook error 0x80040119.
You can try to repair the affected account with the Account Settings menu to fix this problem.
Step 1: Open Outlook and click File at the top.
Step 2: At the left side, click Account Settings > Account Settings.
Step 3: In the Account Settings menu, select the E-mail tab, then select the email that’s causing the error and click the Repair button.
Step 4: Follow the instructions on the screen to finish the repairing process, then restart your computer and check if the Outlook error 0x80040119 still exists.
If you’re still struggling with the Outlook error 0x80040119, move down to the next method below.
Method 4: Uninstall the Third-Party AV
Sometimes this problem can also be caused by over-protected third-party suites. McAfee and Kaspersky are among the most blamed 3rd party security suites.
In order to fix this issue, you can try to uninstall the third-party security suite and remove all remnant files that might interfere with your email client.
Uninstall the Third-Party Security Suite
Step 1: Press the Windows + R keys to open the Run dialog box. Next, type appwiz.cpl and press Enter to open the Programs and Features window.
Step 2: Find the security suite that you think it’s causing the problem, right-click it and choose Uninstall.
Step 3: Follow the uninstallation instruction to uninstall the application.
Step 3: After the uninstallation is complete, restart your computer.
Remove All Remnant Files
Step 1: Click here to find the removal tool for the security program you want to uninstall from your computer.
Step 2: Click the provided link to download the removal tool and then launch it.
Step 3: Follow the instructions on the screen and get rid of everything left behind by the uninstalled application with the removal tool.
Repeat the previous operation that triggered the 0x80040119 error, and then see if the problem has been resolved.
Bottom Line
That’s all the information about how to fix the Outlook error 0x80040119 on Windows. If you encounter the same error, try the methods mentioned in this post.
User Comments :