When the Poppy Playtime fatal error message pops up on your Windows PC, you may no longer be able to enter your game until this vexing issue is fixed. How can you solve this issue and play the game smoothly? Let’s explore some effective solutions with MiniTool to get rid of the problem efficiently.
Basic Troubleshooting Steps to Fix Poppy Playtime Fatal Error
It is really frustrating and annoying to meet issues while playing a game, right? Recently, Poppy Playtime Chapter 4 is released and it’s time to go back to this exciting and fun game. You may encounter the Poppy Playtime fatal error upon launch or the fatal error message pops up while gaming, leading to the game crashing. What should you do? You can attempt the following common solutions for the Poppy Playtime LowLevelFatalError:
- Restart both the game and your computer: Although it may seem simple, restarting can resolve various issues caused by glitches in either the software or the system.
- Update your graphics driver: Problems with outdated or damaged graphics drivers can affect the performance of any program. You can check the Device Manager utility to see if you need to upgrade the graphics driver.
- Run Poppy Playtime as an administrator: Right-click on the game’s executable file or shortcut and select the Run as administrator option. By doing so, you grant the game the necessary access to system resources, which can enhance gameplay stability and mitigate any glitches or crashes that may occur.
- Run Poppy Playtime in compatibility mode: Mismatched graphics settings can lead to frequent crashes. Access the Properties window of the game, navigate to the Compatibility tab, check the box for the option to Run this program in compatibility mode for, and select either Windows 8 or Windows 7 depending on what fits your case.
If Poppy Playtime crashes with a fatal error still here after trying these straightforward fixes, consider the next three methods that may provide immediate solutions.
MiniTool ShadowMaker TrialClick to Download100%Clean & Safe
How to Fix Poppy Playtime Fatal Error
Method 1. Modify the Game Launch Option
To resolve Poppy Playtime fatal error, modifying the launch option often helps mitigate startup issues and ensure a smoother gaming experience. Here’s how to do it:
Step 1. Open Steam and go to Library.
Step 2. Right-click on Poppy Playtime and select Properties.
Step 3. In the General tab, type -dx11 in the Launch Options and close the tab.
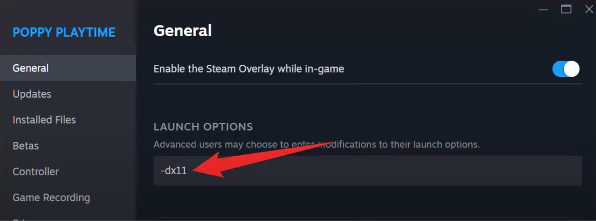
Step 4. Now, launch the game and check if it solves your issue or not. If not, then type “-dx12” or “-windowed” in Launch Options.
Method 2. Verify the Integrity of Game Files
Missing, corrupted, or incompatible game files may trigger the Poppy Playtime fatal error. Therefore, you don’t need to check which files are missing or corrupted but just use the built-in feature in Steam to verify the integrity of the game files.
Step 1. Launch Steam and navigate to the Library section. Locate Poppy Playtime, right-click on it, and select Properties.
Step 2. Click on the Installed Files tab and choose Verify integrity of game files. Steam will begin to check the game data, and this may take a few minutes.
Method 3. Install Microsoft Visual C++ Redistributable
The absence of necessary files is another reason for the Poppy Playtime fatal error, particularly the missing essential Microsoft Visual C++ Distributable. You might want to manually download the most recent version of the Visual C++ packages from the Microsoft official website. After that, start the game to check if it functions correctly.
Method 4. Allow Poppy Playtime Through Firewall
Sometimes, the Firewall might block a program from running because it identifies it as malware. As a result, allow Poppy Playtime to pass through the firewall to guarantee seamless connectivity and operation, which could resolve the fatal error.
Step 1. Press Win + S to open the Windows Search bar, type Windows Defender Firewall in the box, and then press Enter.
Step 2. In the following window, click Allow an app or feature through Windows Defender Firewall.
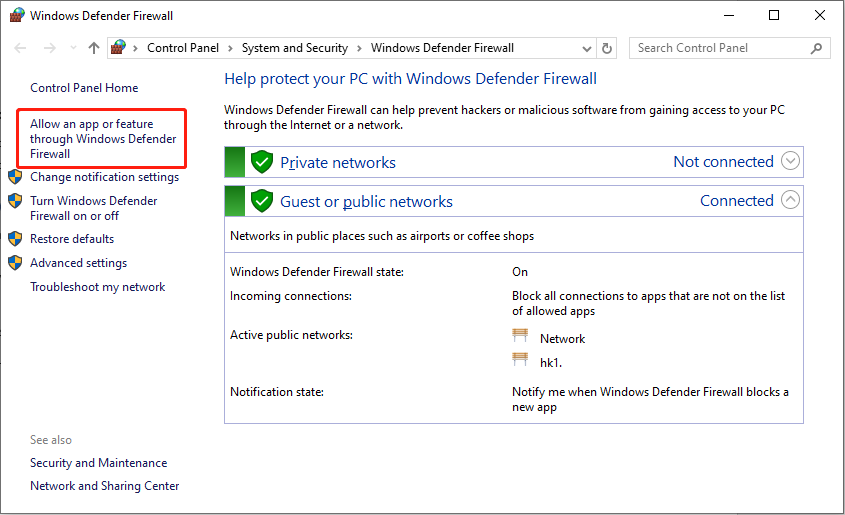
Step 3. Click the Change settings button on the top-right side and then check the Private and Public boxes of Poppy Playtime.
Step 4. Click OK to save the change.
Method 5. Increase Virtual Memory
For many players, increasing virtual memory can be effective in resolving the issue of Poppy Playtime LowLevelFatalError. Virtual memory allows data to be temporarily moved from RAM to disk storage, helping to alleviate a shortage of physical memory.
Step 1. Type advanced system settings into Windows Search and select the correct result to access System Properties.
Step 2. Navigate to the Settings under Performance.
Step 3. In the Advanced tab, click on Change under Virtual memory.
Step 4. Make sure to uncheck the box that says Automatically manage paging file size for all drives, select the drive where Poppy Playtime is installed, and choose Custom size.
Step 5. Input the initial size as 16384 MB and the maximum size as 65536 MB.
Method 6. Update BIOS
Based on the experiences of numerous users, some Intel processor modules might contain bugs that could cause the Poppy Playtime fatal error. In this situation, updating the BIOS could be beneficial.
Step 1. Go to the official website of your motherboard manufacturer and download the BIOS update files.
Step 2. Transfer the downloaded files to a blank USB drive.
Step 3. Start your computer and press Esc, Delete, F8, or similar keys during the boot sequence to enter BIOS.
Step 4. Locate the option related to updating the BIOS, and then utilize the files on the USB drive to perform the BIOS update.
MiniTool Power Data Recovery FreeClick to Download100%Clean & Safe
Verdict
This tutorial focuses on how to fix the Poppy Playtime fatal error on PC and provides you with several proven fixes. You can feel free to try them to get the issue repaired. Hope you can get back to your game.
About The Author

Position: Columnist
Sandy became an English editor after graduation. She is devoted to finding effective solutions for diverse IT problems and provides articles on data recovery, data backup, and computer partitions and drives. In her spare time, she likes listening to music and playing games.
User Comments :