Quick access is a good feature that can help you access the files or folder you recently opened. But if you want to remove Quick access Windows 10 from File Explorer, this post from MiniTool will show you how to remove Quick access Windows 10.
Quick access is a Windows built-in feature that allows you to access the frequently used files and folders when you open the File Explorer window in Windows 10.
For most users, Quick access would be a good feature since it helps to access the file you need quickly and save your time. However, for some users, they don’t want to use the Quick access feature and want to view the customized folders or files as they open File Explorer. So, they wonder whether there is a way to disable or remove Quick access Windows 10.
There is no doubt that you can choose to remove Quick access Windows 10. So, in the following part, we will show you how to remove Quick access Windows 10. To remove Quick access, here are two different ways.
Way 1. Remove Quick Access Windows 10 via File Explorer
To remove Quick access Windows 10, you can choose to remove it from File Explorer. So, at first, we will show you how to remove Quick access Windows 10 via File Explorer.
Now, here is the tutorial.
- Open File Explorer.
- Then navigate to View tab and choose Options.
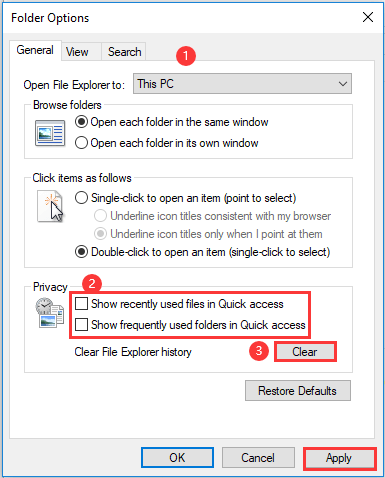
- Under General tab, you can see the default option for the Open File Explorer to: is Quick access. Then change it to This PC.
- Under the Privacy section, uncheck the options Show recently used files in Quick access and Show frequently used folders in Quick access.
- In addition, some folders or files may be still visible in Quick access. To remove that, click the Clear button to continue.
- Then click Apply and OK to save the changes.
When all steps are finished, you have successfully removed Quick access Windows 10 from File Explorer.
Way 2. Remove Quick Access Windows 10 via Registry
From the above part, we have shown you the first way for Windows 10 remove from Quick access. At this part, we will show you how to remove Quick Access Windows 10 registry.
Now, here is the tutorial.
2. Type regedit in the box and click OK to continue.
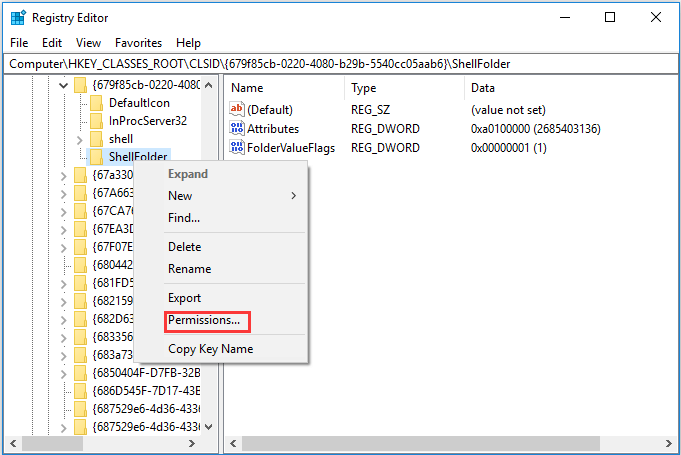
3. Then navigate to the following folder HKEY_CLASSES_ROOT > CLSID > {679f85cb-0220-4080-b29b-5540cc05aab6} > ShellFolder.
4. Then right-click it to choose Permissions.
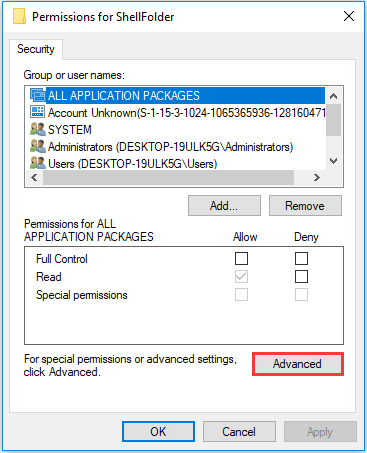
5. In the pop-up window, choose Advanced.
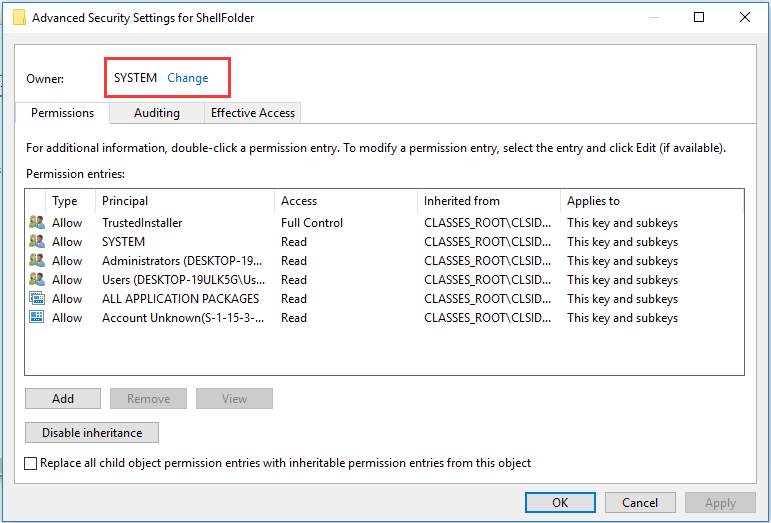
6. Then click Change next to System.
7. In the pop-up window, click Advanced.
8. Then click Find Now.
9. There will list many usernames. Administrator will be one of them, select it and click OK to continue.
10. Then go back to ShellFolder again. Select Attributes on the right side and double-click it.
11.Then change its value data to a0600000.
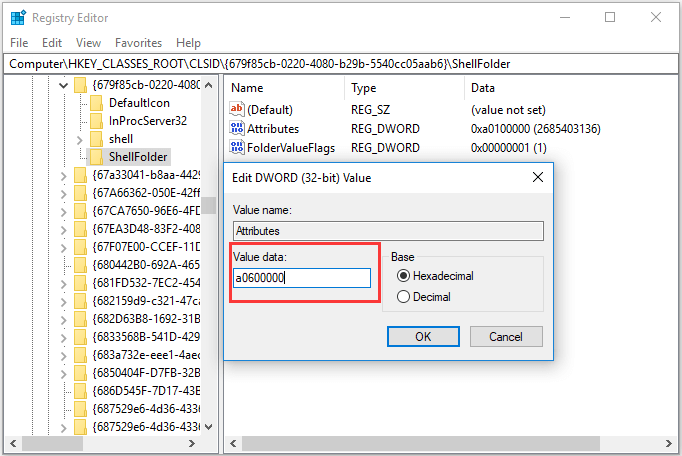
After all steps are finished, you have removed Quick access Windows 10. If you want to enable Quick access again, refer to the above and change its value data to a0100000.
Final Words
To sum up, this post introduces 2 ways to remove Quick access Windows 10. If you have any better idea to disable Quick access, share it in the comment zone.
User Comments :