What Are Batch Files?
Batch files can be used to automatically create and run one or more commands in sequence to do some tasks. In some cases, you need to run a batch file with administrative privileges to complete the task.
You might know that there is the Run as administrator option on the properties page for some applications and file types. But the batch files are exceptions. When you want to run a batch file as administrator, you need to run Command Prompt as administrator, then run the script or select that option from the context menu. The process needs some extra steps and it seems complex for non-technical users.
Is it possible to make a batch file run as administrator with a simple double-click? You can create a shortcut to do this. Here in this post, MiniTool Software will show you how to auto run batch file as administrator: that is, how to always run a batch file as administrator.
How to Always Run a Batch File as Administrator on Windows 11?
We run a batch file as administrator on Windows in this part. But these steps are also available on the previous Windows versions like Windows 10, 8.1, and 7.
Move 1: Create a batch file
You can create a PowerShell script using Notepad using these steps:
Step 1: Open Notepad. You can click the search icon or bar from the taskbar and search for Notepad and select Notepad from the search result to open it.
Step 2: Copy and paste the following text to Notepad to create a batch file:
@ECHO OFF
ECHO Hello World! This batch file always runs as admin.
PAUSE
Step 3: Go to File > Save as.
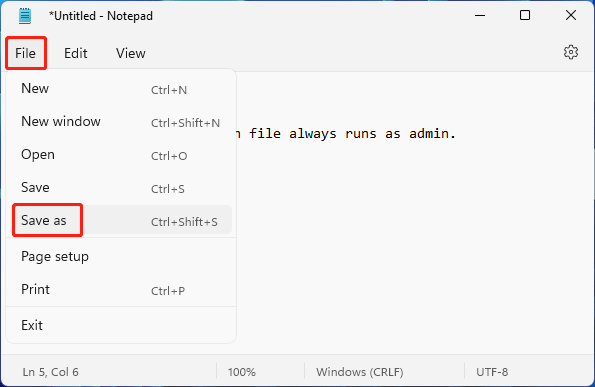
Step 4: Create a descriptive name for the batch file using the .bat extension. For instance, you can name it StellaBatch.bat.
Step 5: Click Save to save it to your specified location.
Now, a batch file is created. Then, it’s time to configure the batch file to run as administrator after you double-click it.
How to Always Run a Batch File as Administrator on Windows 11?
Step 1: Press Windows + E to open File Explorer.
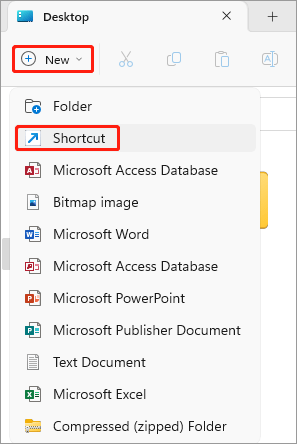
Step 2: Create a new folder or click Desktop from the left Quick Access.
Step 3: Click New and select Shortcut.
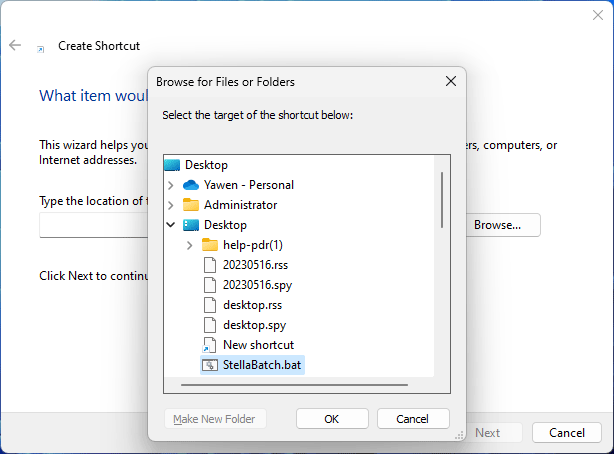
Step 4: Click Browse.
Step 5: Navigate to the location of the created batch file and select it.
Step 6: Click OK.
Step 7: Click Next.
Step 8: Create a name for the shortcut like stellabatch-admin.bat.
Step 9: Click Finish.
Step 10: Right-click the newly-created shortcut and select Properties.
Step 11: Click Advanced under Shortcut.
Step 12: Select the checkbox next to Run as administrator.
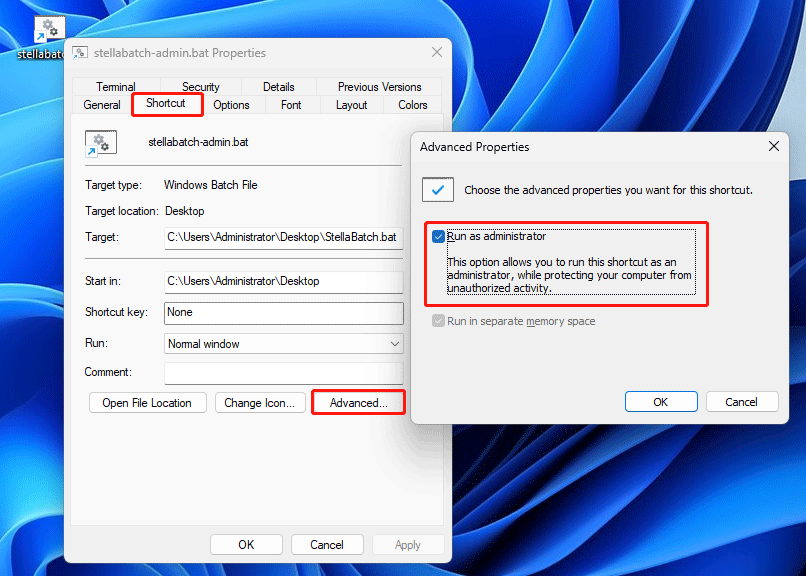
Step 13: Click OK.
Step 14: Click Apply.
Step 15: Click OK.
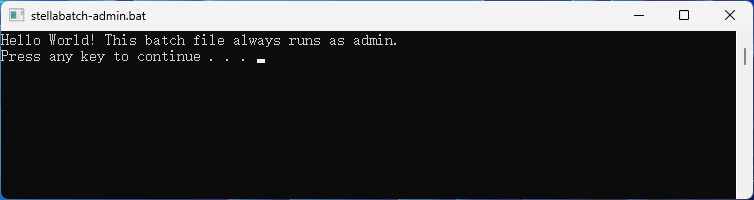
Now, you can double-click the shortcut, then you can find the batch file will run elevated on Command Prompt.
You see, it is not difficult to do this.
How to Always Run a Program as Administrator on Windows?
Well then, how to always run a program as administrator?
MiniTool Power Data Recovery is a professional data recovery software that can help you recover data from storage devices like hard drives, SSDs, and USB flash drives. You can download and install the free edition of this software and experience its data recovery function when needed.
MiniTool Power Data Recovery FreeClick to Download100%Clean & Safe
It is not necessary to run this file recovery tool with administrative privileges to recover deleted files. We just run it as administrator to show you how to always run a program as administrator on Windows PC.
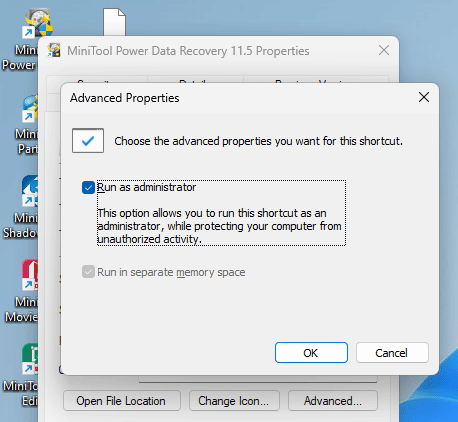
Step 1: Right-click the shortcut of MiniTool Power Data Recovery and select Properties.
Step 2: Click Advanced under Shortcut.
Step 3: Select Run as administrator on the pop-up window.
Step 4: Click OK.
Step 5: Click Apply.
Step 6: Click OK.
Bottom Line
Here is the way to run a batch file as administrator on your Windows PC. You should strictly follow the steps to make the operation successful. In addition, you can find useful data recovery software to help you get your missing files back. We hope this post is useful for you.
About The Author

Position: Columnist
Stella has been working in MiniTool Software as an English Editor for more than 8 years. Her articles mainly cover the fields of data recovery including storage media data recovery, phone data recovery, and photo recovery, videos download, partition management, and video & audio format conversions.
User Comments :