In your Task Manager, you may notice that Service Host UtcSvc can take up much CPU and disk usage. This issue will make your computer slow down so to resolve this issue, there are some fixes for you. In this article on MiniTool Website, you can learn what utcsvc is and how to disable utcsvc.exe.
What Is Service Host UtcSvc?
Many people will doubt Service Host UtcSvc as a virus when they find too much CPU consumed for it. But actually, utcsvc.exe (Universal Telemetry Client), also named Diagnostic Tracking Service or DiagTrack, is an executable file that comes as an integral part of the Microsoft Windows OS.

This service can be translated to Service Host. It can help collect information and customer feedback for Microsoft to analyze their problems and troubleshoot the operating system.
Although utcsvc.exe is a legitimate system component, it still can be used to disguise malicious programs. And if you find the CPU consumption is higher than 30% and the file size is bigger than 53KB, there is a high risk of virus infection.
Therefore, you’d better disable utcsvc.exe when it results in high resource utilization. The next part will show you the methods.

Fix the UtcSvc High CPU – Disable UtcSvc.exe
To disable utcsvc.exe, you can choose to disable the Connected User Experience & Telemetry service. There are three channels you can use and if one of them could resolve your problem.
Method 1: Use Service Manager
Go to disable utcsvc.exe via your Service Manager.
Step 1: Open your Run dialog box by pressing the Win + R key and input services.msc to enter Services.
Step 2: After that, scroll down to locate and double-click on the Connected User Experience… option.
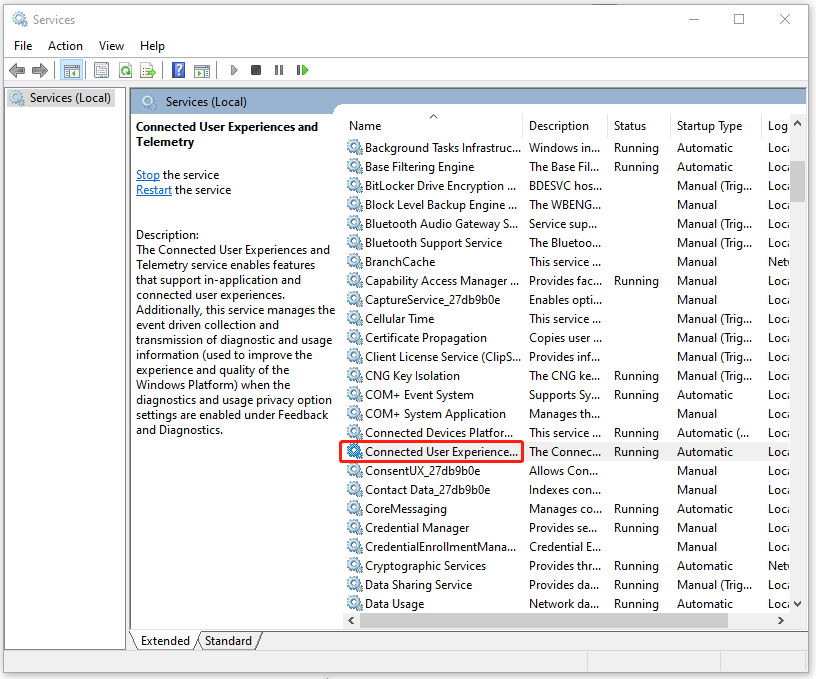
Step 3: When the Properties window pop up, please click Stop under Service status and expand Startup type to choose Disabled.

Step 4: When you finish, click Apply and OK to save your choice and restart your computer to see if the program still runs.
Method 2: Use Group Policy Editor
If the last method can’t work, you can use Group Policy Editor to disable utcsvc.exe.
Step 1: Input gpedit.msc in your Run dialog box and press Enter.
Step 2: Navigate to the following path from the left panel.
Computer Configuration/Administrative Templates/Windows Components/Data Collection and Preview Build
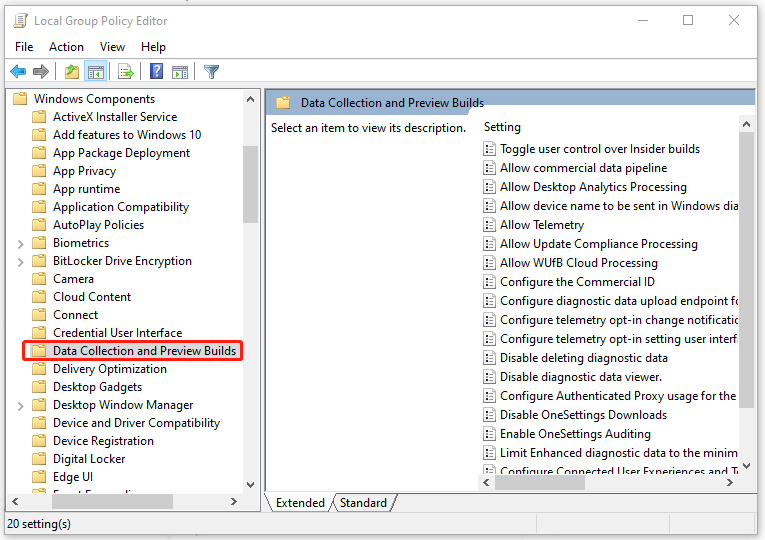
Step 3: From the right panel, locate and double-click on Allow Telemetry; check the Disabled option under Allow Telemetry and click Apply and OK to save your changes.
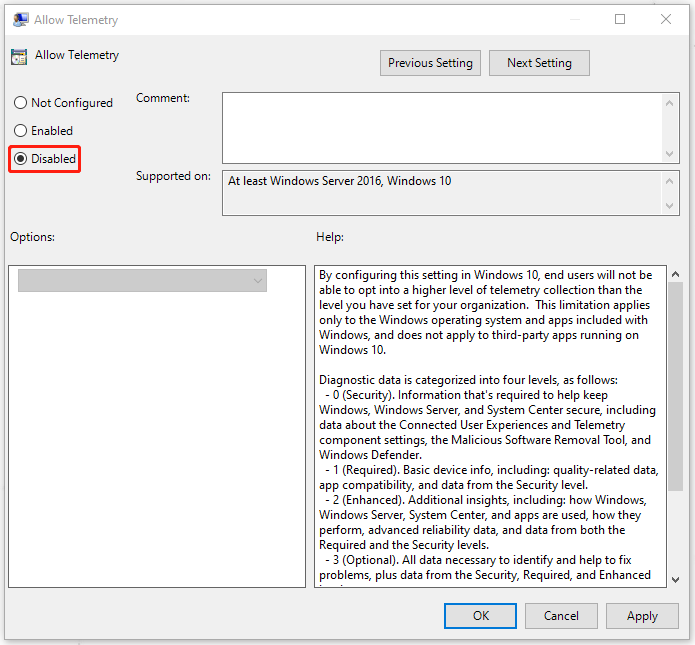
Restart your computer and check if the CPU usage gets solved.
Method 3: Use the Registry Editor
The last method to disable utcsvc.exe is using the Registry Editor.
Step 1: Input regedit in your Run dialog box to enter.
Step 2: Navigate to the following path from the left panel.
HKEY_LOCAL_MACHINE\SOFTWARE\Policies\Microsoft\Windows\DataCollection
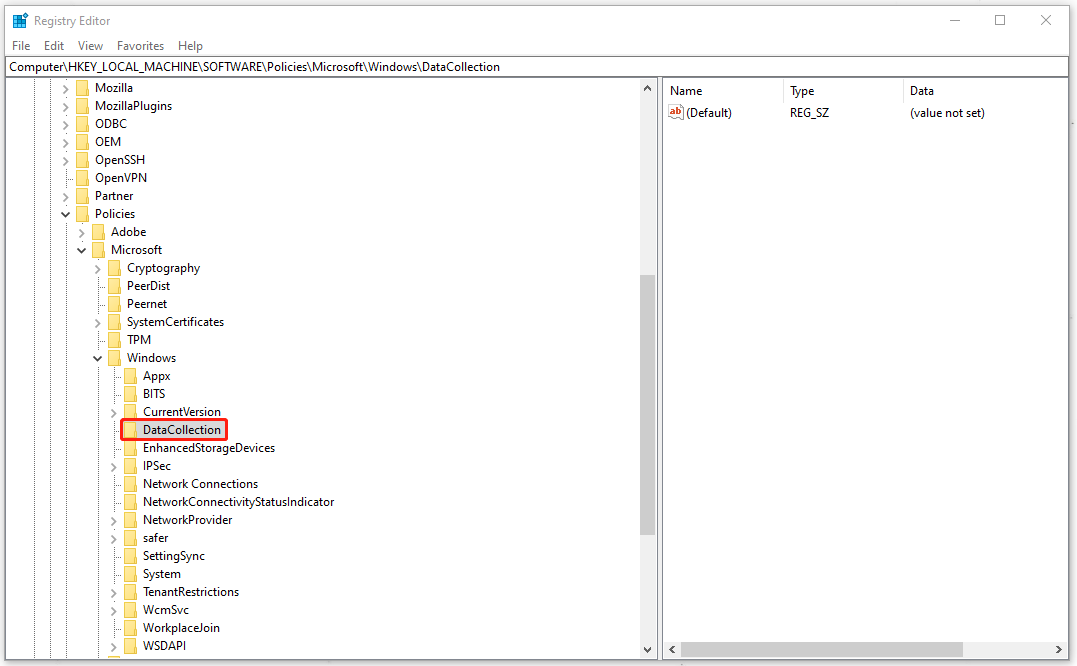
Step 3: Right-click on DataCollection and choose New and then DWORD (32-bit) Value.
Step 4: Name the new value AllowTelemetry. After that, right-click on it to choose Modify… and make sure its Value data is 0.
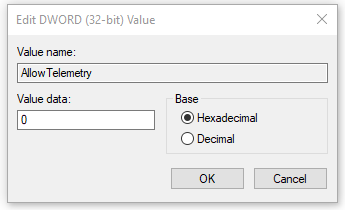
Click on OK to save the settings and restart the system.

Bottom Line:
To fix the UtcSvc high CPU and disk usage, you can disable UtcSvc.exe. There are multiple methods for that displayed in this article. Hope your issue has been fixed.
User Comments :