If network discovery is turned off on your computer, you will be unable to see other computers and devices on the same network. When you are on a home or workplace network, you may want to enable it. In this MiniTool post, we will show you how to turn on network discovery on Windows 10.
What Is Network Discovery on Windows 10?
Network discovery is a Windows feature. When it is turned on, you can see and communicate with other computers and devices that are connected to the same network. Others on the same network can also see you. You can even share files, folders, and devices.
This feature is turned on by default when your computer is connected to private networks (like your home or workplace). It is turned off when your machine is connected to public networks that are not trusted.
If you can’t see other computers and devices on the same network, the possibility is that network discovery is turned off on your computer by mistake. You can enable it and then configure sharing options on your computer.
How to Turn on Network Discovery on Windows 10?
1. Click Start.
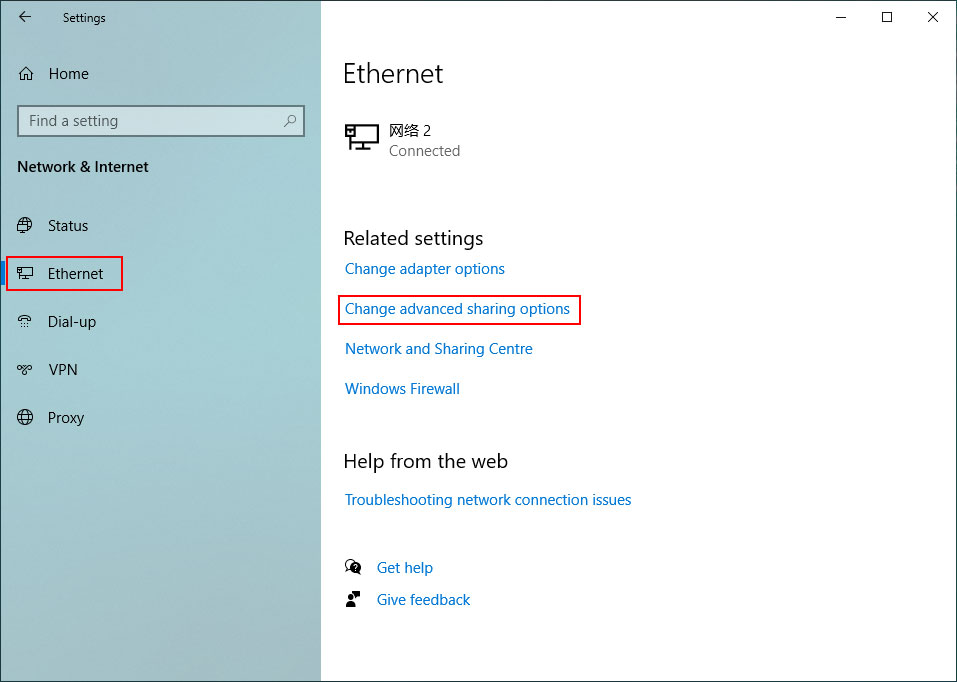
2. Go to Settings > Network & Internet.
3. If you are using a Wi-Fi network connection, you need to click Wi-Fi from the left menu. While, if you are using a network cable, you need to select Ethernet.
4. Select the Change advanced sharing options link under Related settings.
5. Under Private (current profile), check Turn on network discovery and also check Turn on automatic setup of network-connected devices.
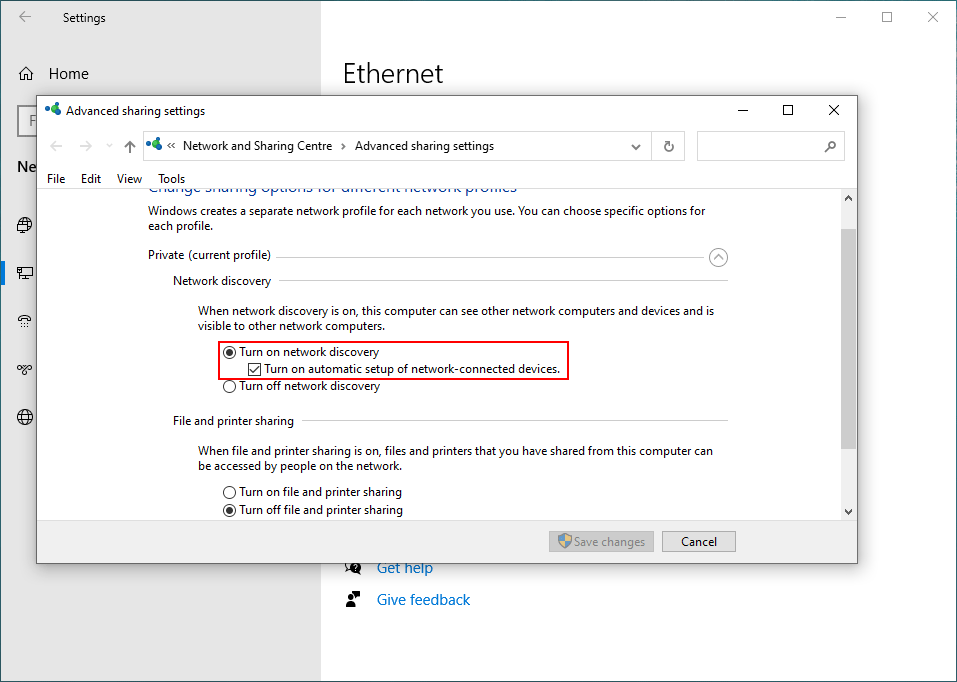
6. Click Save changes.
Now, network discovery is enabled on your computer.

How to Enable File and Printer Sharing?
If your computer is connected to a private network, the File and Printer Sharing feature is enabled by default. You can share files, folders, and printers with other computers and devices in the same network. While, if you can’t do this, you may need to manually enable this feature.
- Click Start.
- Go to Settings > Network & Internet.
- If you are using a Wi-Fi network connection, you need to click Wi-Fi from the left menu. While, if you are using a network cable, you need to select Ethernet.
- Select the Change advanced sharing options link under Related settings.
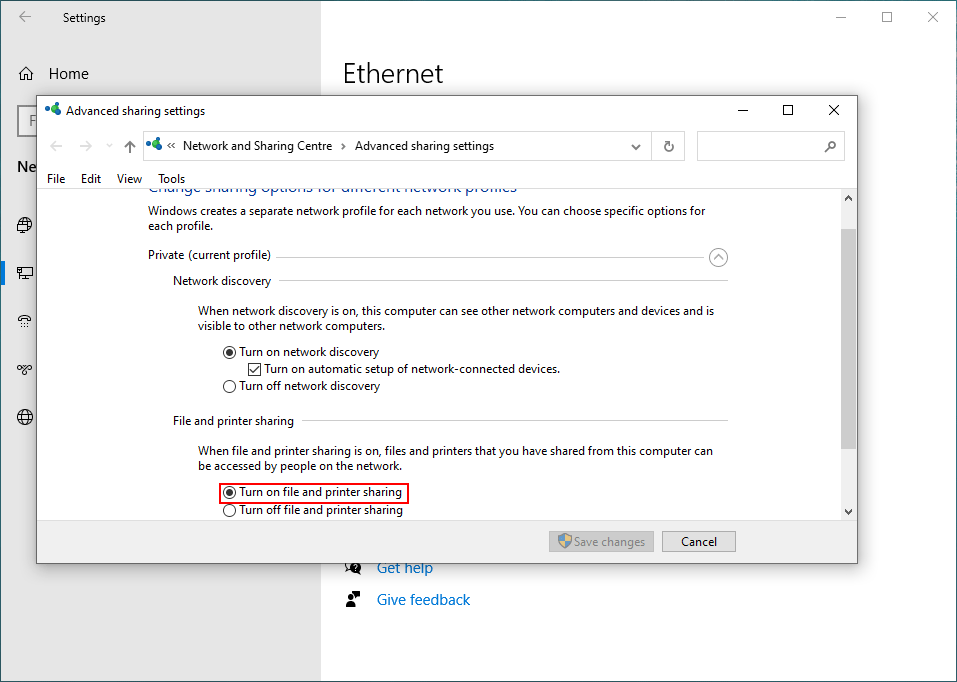
- Expand Private (current profile).
- Check Turn on file and printer sharing under File and printer sharing.
- Click the Save changes button.
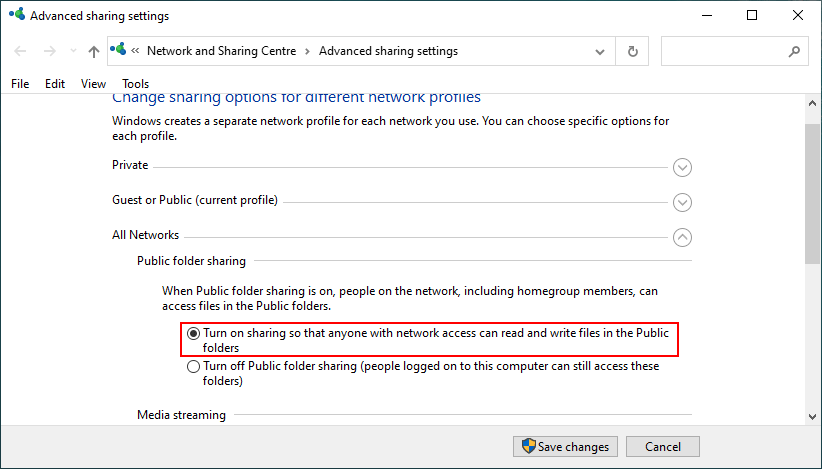
How to Enable Public Folder Sharing?
The UsersPublic folder in the C drive is the Public folder we mentioned in this post. All user accounts registered in Windows can access it. If you want other computers and devices on the same network to see this folder, you can turn on public folder sharing on your computer.
- Go to Start > Settings > Network & Internet.
- Click Wi-Fi or Ethernet according to the network connection you are using.
- Click Change advanced sharing settings under Related settings.
- Scroll down and expand All Networks.
- Check Turn on sharing so that everyone with network access can read and write files in the Public folders under Public folder sharing.
- Click Save changes.
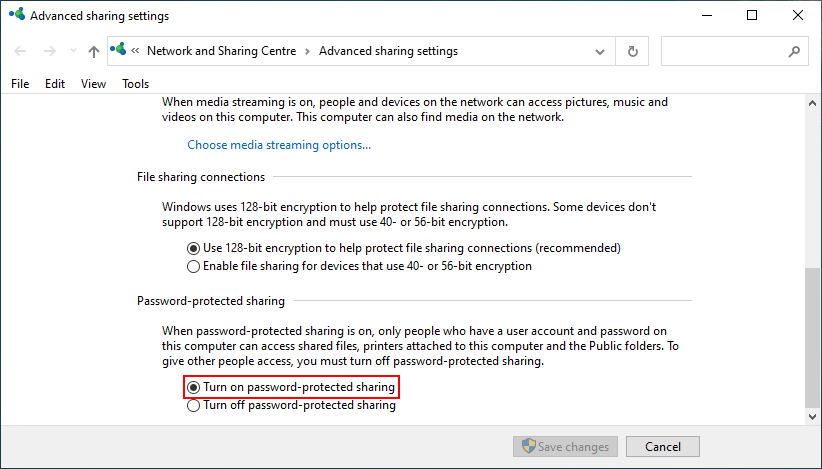
How to Enable Password-Protected Sharing?
When Password Protected Sharing is enabled on your computer, only users who have your user account and password on your computer or network domain can open the shared files, folders, and printers that are attached to your computer or device. It is recommended to enable this feature on your computer.
Here is how to turn on password-protected sharing.
- Go to Start > Settings > Network & Internet.
- Click Wi-Fi or Ethernet according to your situation.
- Select Change advanced sharing settings under Related settings.
- Expand All Networks.
- Check Turn on password-protected sharing under Password-protected sharing.
- Click Save changes.
What is network discovery? How to enable it and configure sharing options on your Windows computer? After reading this post, you should know the answers.
About The Author

Position: Columnist
Stella has been working in MiniTool Software as an English Editor for more than 8 years. Her articles mainly cover the fields of data recovery including storage media data recovery, phone data recovery, and photo recovery, videos download, partition management, and video & audio format conversions.
User Comments :