Unable to Change Priority in Task Manager
In general, having a PC or laptop that does not have a fairly high specification can result in the performance of many intensive games below standard. If the game is very demanding, you may get low frame rate and crash.
One of the solutions is to change the game or program’s process’ priority to high from the Task Manager, which tells Windows that process should be reserved a bigger part of its power by it.
However, sometimes you are unable to change priority in Task Manager. You will receive a message saying Access Denied, or the priority simply won’t change. This can either happen with all processes on your system or with a certain process on all systems.
Next, I will introduce 3 useful methods to help you fix the priority simply won’t change error.
How to Fix “Unable to Change Priority” in Task Manager
Method 1: Select Show Processes from All Users in the Task Manager
Since changing the priority in the Task Manager may not leave enough CPU power for other processes on your system, it can do more harm than good. If you upgrade your system to support the demanding games you’re trying to play, you would be much better off.
However, if you still want to use your current system, you can use the following steps to change the priority of the game you’re playing.
Step 1: Make sure you’re logged in Admin.
Step 2: Start your program and open the Task Manager.
Step 3: Check Show processes from all users to make sure processes are running as Admin.
Step 4: Then right-click the program and click Set priority, then change the priority.
Method 2: Use the User Account Control Settings
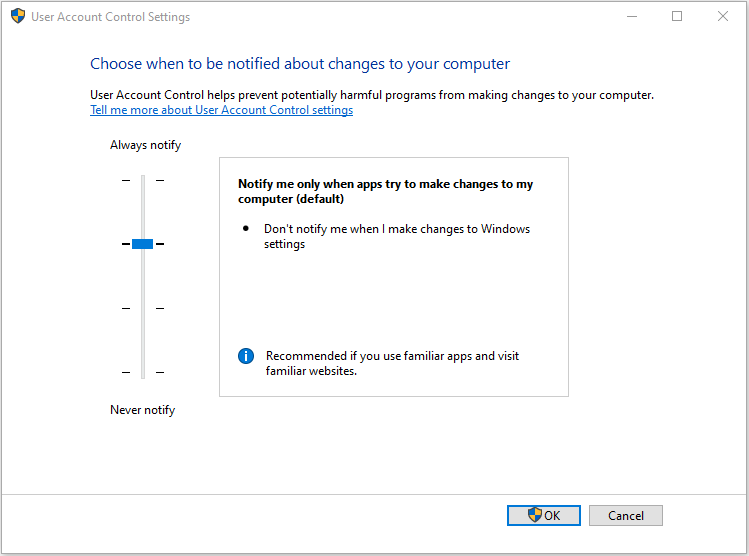
User Account Control can make sure programs don’t do any damage to your system. When you’re trying to install something or make a modification to your system, it will give you a number of prompts at times to prevent you from accidentally doing something wrong.
Step 1: Type User Account Control in the Search menu to open the User Account Control Settings.

Step 2: Set the bar to Never Notify to turn off the prompts.
Then you can have more control over your system and you will be able to change the priority of your game.
Method 3: Boot into Safe Mode
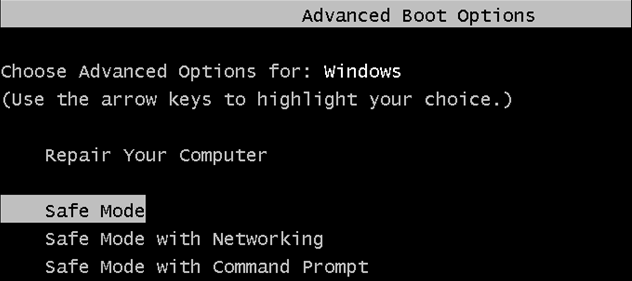
Although many Windows services and features will be disabled when booting into safe mode, it will give you a clean slate that can help you get to the root of the problem more easily.
Step 1: Reboot your device.
Step 2: Press F8 to boot into Safe Mode before your Windows boots.
Step 3: Choose Safe Boot and let Windows boot up.

Step 4: Try to switch the priority in the Task Manager.
Then, you can reboot your computer and test if you still can’t change priority in Task Manager.
Final Words
Here are all the methods to fix the unable to change priority in Task Manager error. If you encounter such an error, these methods can be useful and effective for you.

User Comments :