How to update Visual Studio 2022/2019/2017/2015/2013 to a new version to gain a better experience? It is a simple way and you can follow some ways given by MiniTool to easily do the update operation.
Visual Studio is an integrated development environment (IDE) designed by Microsoft and it is used to help develop PC programs including mobile apps, web services, web apps, and websites. For .NET and C++ developers, it is a comprehensive IDE. It is also a standalone source code editor that can work on Windows, macOS, and Linux. If you want to edit, debug, and build code, and then publish an app, Visual Studio is a good option.
Related article: Visual Studio vs Visual Studio Code: Which One to Use
Currently, Visual Studio 2022 is the latest product and old products like Visual Studio 2013, 2015, 2017, and 2019 are also available to download via Microsoft’s official website.
If you are using one of them with an old version, you can choose to upgrade Visual Studio to the latest version to enjoy more features, security fixes, and improvements for a better experience. For Visual Studio 2022 Community/Professional/Enterprise, the latest version is 17.4 when we write this post.
Visual Studio update is a simple thing and you can follow several ways below to do this task if you need. Let’s move to the next part to find what you need.
How to Update Visual Studio
Make sure you have administrative permissions on the machine and the place where the product updates are located before you do.
Use Visual Studio Installer to Update VS
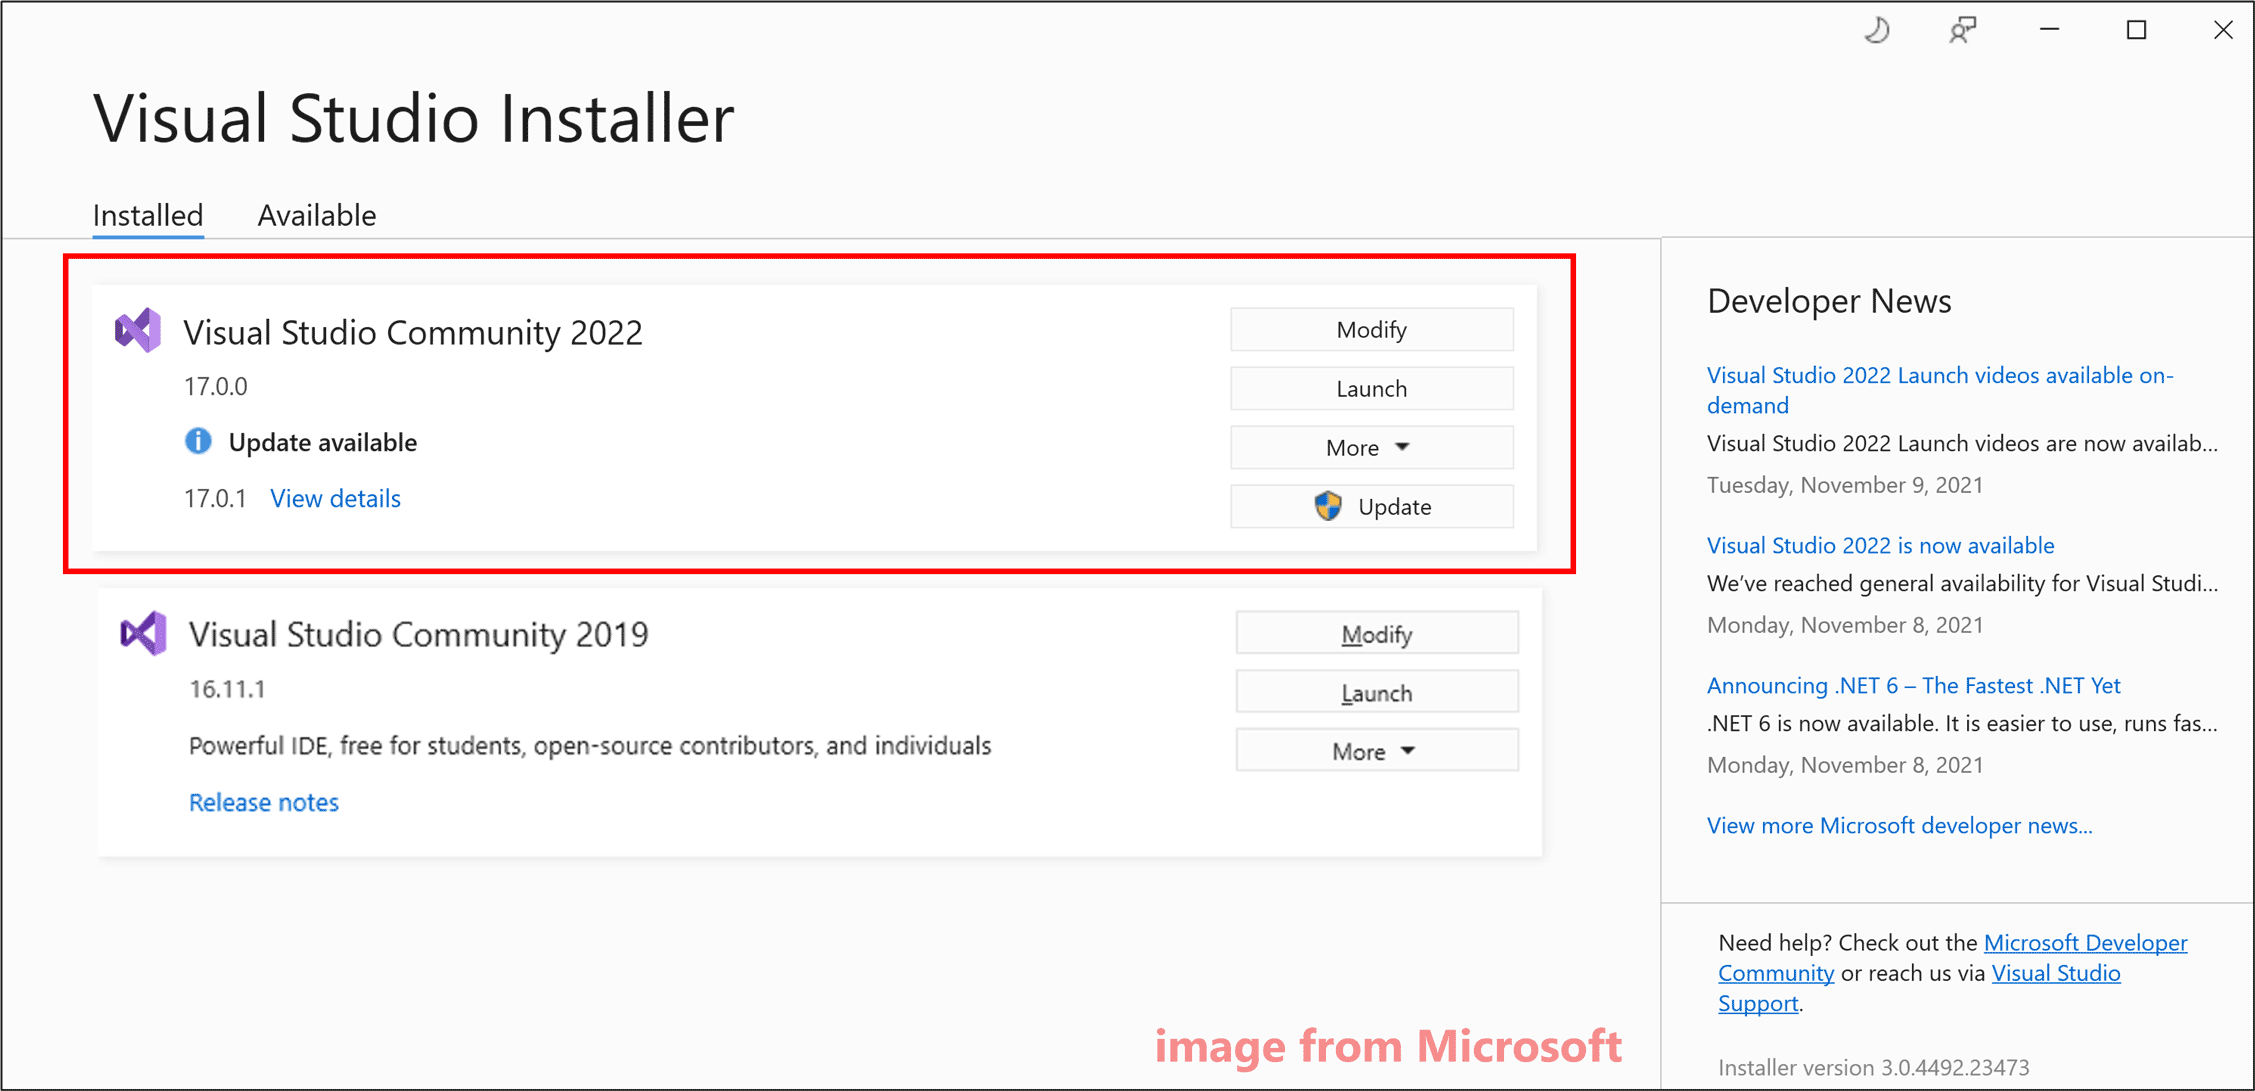
Step 1: Go to the Windows Start Menu, type Visual Studio Installer into the search bar, and click the result to open this app.
Step 2: Under the Installed tab, you can see the installation of Visual Studio you previously installed. Go to the version where an Update available message appears and click the Update button to install the update.
After finishing the update, the installer may ask you to restart your computer and do this, then launch VS as you typically do. If not, you can click the Launch button to open Visual Studio from Visual Studio Installer.
Manually Check for Updates
In addition to Visual Studio Installer, you can update Visual Studio by manually checking for updates in the app itself. See how to do it:
Step 1: Open Visual Studio in Windows.
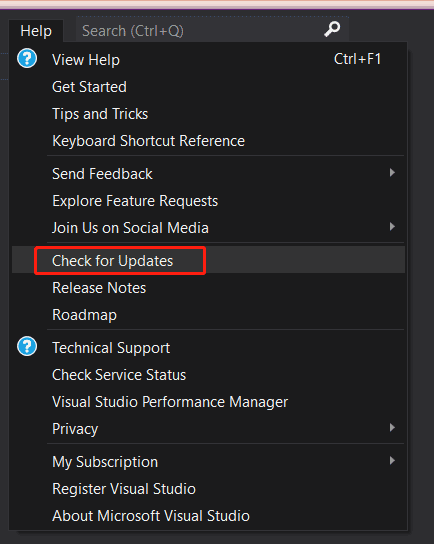
Step 2: Go to Help > Check for Updates. Then, the tool will start checking for an available update.
Step 3: In the Update available window, click the Update button.
Update Visual Studio via the Notification Hub
Step 1: Open Visual Studio.
Step 2: Go to the lower-right corner to click the notification icon.
Step 3: Click View details next to the update message and click Update. Or you can choose Update on close to defer the update until you close this app.
Update Visual Studio via a Message Box in the IDE
When you open Visual Studio, the IDE can check if there is an available update. For Visual Studio 2022, an update message can appear briefly. You can click View details to update now or defer the update by choosing Update on close.
Related FAQs
Visual Studio 2019 and Visual Studio 2022 can run either individually or both on your Windows PC. You won’t upgrade VS 2019 but just install VS 2022. You can only upgrade Visual Studio 2019/2022 to its latest version.
You can update your Visual Studio 2019/2017/2015 to its latest version in four ways – use Visual Studio Installer, manually check for updates, and use the notification hub & a message box in the IDE.
You can open the Visual Studio for Mac app and go to check for updates. If there is an available new update, it will start downloading. Click Restart and Install Updates to install the update.
Bottom Line
These are four simple ways to update Visual Studio to its latest version. If you have any idea on how to update Visual Studio, you can leave a comment below to tell us. Thanks.
About The Author

Position: Columnist
Vera has been working at the MiniTool Team for over 10 years as a technical editor and content writer. She mainly focuses on disk and partition management, data recovery, Windows backup and restore, and PC troubleshooting. Through in-depth software testing and hands-on experience, she has helped users solve a wide range of computer problems and better protect their data on Windows devices.
User Comments :