This post gives you some ways to check your Wi-Fi password on a computer. If you want to view saved Wi-Fi password in Windows 11, try these methods offered by MiniTool. Then, you can share it with others or connect your other devices to the same network.
For some reason, you may want to find the Wi-Fi password that is saved to your Windows 11 computer. For example, you need to connect your new device to the internet or send the saved network connection to a new computer.
But unfortunately, you forget the Wi-Fi password. Many Wi-Fi devices developed by service providers offer a Wi-Fi password on the back of the device. If you haven’t changed the default password, you can get it from the device’s back. However, if you have modified the password and forget it, what should you do?
Windows 11 allows you to easily see the Wi-Fi password and the following are simple ways.
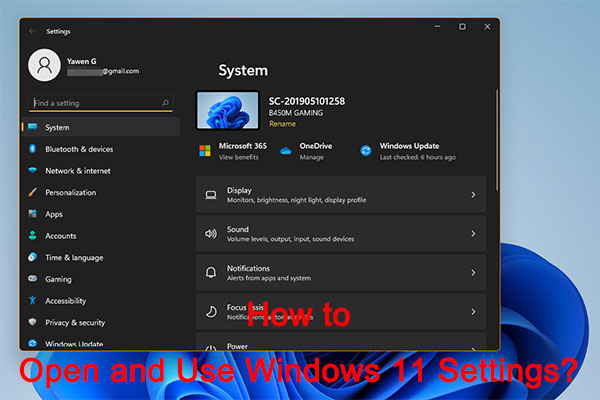
How to Find Wi-Fi Password on Windows 11?
View Saved Wi-Fi Password Windows 11 via Settings
Step 1: Click the Start icon and choose Settings. Or you can directly press Win + I to get the Settings interface.
Step 2: Go to the Network & internet tab, click Advanced network settings.
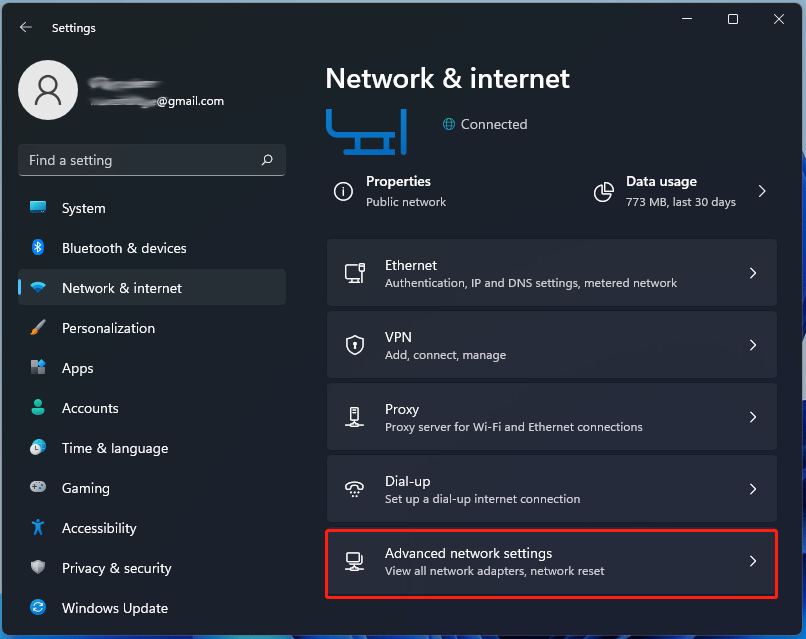
Step 3: Click More network adapter options. This will open the Network Connections control panel. Alternatively, you can go to this interface by going to Control Panel > Network and Sharing Center > Change adapter settings.
Step 4: Right-click your Wi-Fi connection and choose Status.
Step 5: Click Wireless Properties to get a new pop-up window and check the box of Show characters under the Security tab. Then, you can see the Wi-Fi password from the Network security key field.
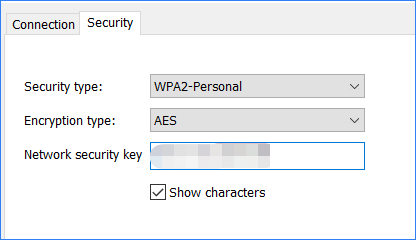
This way can help you to only see the password of the currently connected Wi-Fi network.
View Saved Wi-Fi Password Windows 11 via Command Prompt
If you want to view the password of the networks you have connected to previously (it may be a disconnected network or an out-of-range Wi-Fi network), what should you do? Command Prompt is useful.
Here is how to see Wi-Fi password Windows 11 CMD:
Step 1: Launch Command Prompt in Windows 11.
Step 2: Type netsh wlan show profile and press Enter. This can list all the wireless network profiles on your computer.
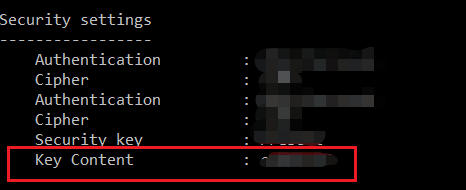
Step 3: Type netsh wlan show profile “Wi-Fi NAME” key=clear and press Enter. Replace “Wi-Fi NAME” with your Wi-Fi name that you want to see the saved password.
This command can display all the information including the password about the internet connection. Go to check the Wi-Fi password under the Security settings section next to Key Content.
View Saved Wi-Fi Password Windows 11 via PowerShell
These two ways above can only help you find the Wi-Fi password of one network at a time. If you want to find all the passwords of the internet networks one time, you can run PowerShell.
Here is how to find Wi-Fi password on computer via PowerShell:
Step 1: Type powershell to the search box in Windows 11 and click Windows PowerShell.
Step 2: Copy & paste the following command to the PowerShell window and press Enter.
(netsh wlan show profiles) | Select-String “\:(.+)$” | %{$name=$_.Matches.Groups[1].Value.Trim(); $_} | %{(netsh wlan show profile name=”$name” key=clear)} | Select-String “Key Content\W+\:(.+)$” | %{$pass=$_.Matches.Groups[1].Value.Trim(); $_} | %{[PSCustomObject]@{ PROFILE_NAME=$name;PASSWORD=$pass }} | Format-Table -AutoSize
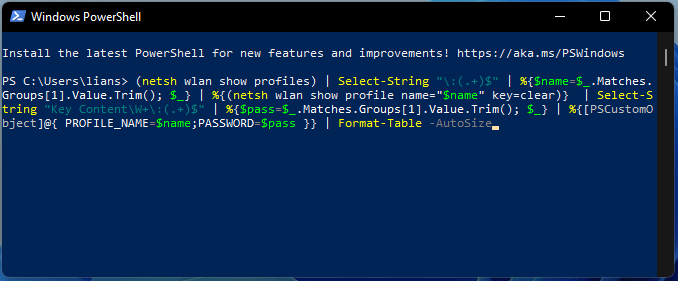
Then, all the known networks and passwords are displayed on the screen.
Final Words
How to check Wi-Fi password on Windows 11? After reading this post, you know three ways and just try one to view the saved Wi-Fi password on your computer.
About The Author

Position: Columnist
Vera has been working at the MiniTool Team for over 10 years as a technical editor and content writer. She mainly focuses on disk and partition management, data recovery, Windows backup and restore, and PC troubleshooting. Through in-depth software testing and hands-on experience, she has helped users solve a wide range of computer problems and better protect their data on Windows devices.
User Comments :