When using a PC, you may be bothered by the issue: Windows 10 time keeps changing. What should you do to fix the problem? It is easy and you can follow the solutions mentioned by MiniTool Solution in this post to easily get rid of the trouble.
Computer Time Keeps Changing Windows 10
When using a computer, you may find the date and time shows at the right bottom of the computer screen. Although in most cases, the function is unnoticeable, several issues on your device may appear is it goes wrong.
For example, you may always encounter the issue of Windows 10 time wrong. Besides, time may keep changing. The main reasons for this may be the issue with CMOS battery, Time Zone, malware attack or poor synchronization settings.
Fortunately, you can easily get rid of the issue by following these solutions below. Now let’s see them.
Fixes: Windows 10 Time Keeps Changing
Chang CMOS Battery
One of the causes that Windows 10 cannot show a stable time is the CMOS battery. The battery is located on the motherboard of your computer and provides power to CMOS (Complementary Metal Oxide Semiconductor) chip that is also on the motherboard.
Information about system configuration including date and time is saved on the chip. The CMOS battery can make sure the chip can still save the data when the PC is powered off or not connected to power. However, if the battery is damaged, Windows may show the wrong time.
If your computer time keeps changing in Windows 10, you need to change the CMOS battery. You can ask your local hardware expert for help or contact with the company support staff.
Set the Time Zone
When Windows 10 time keeps changing, perhaps you choose the wrong time zone. To fix the issue, you need to set the time zone manually by following these steps:
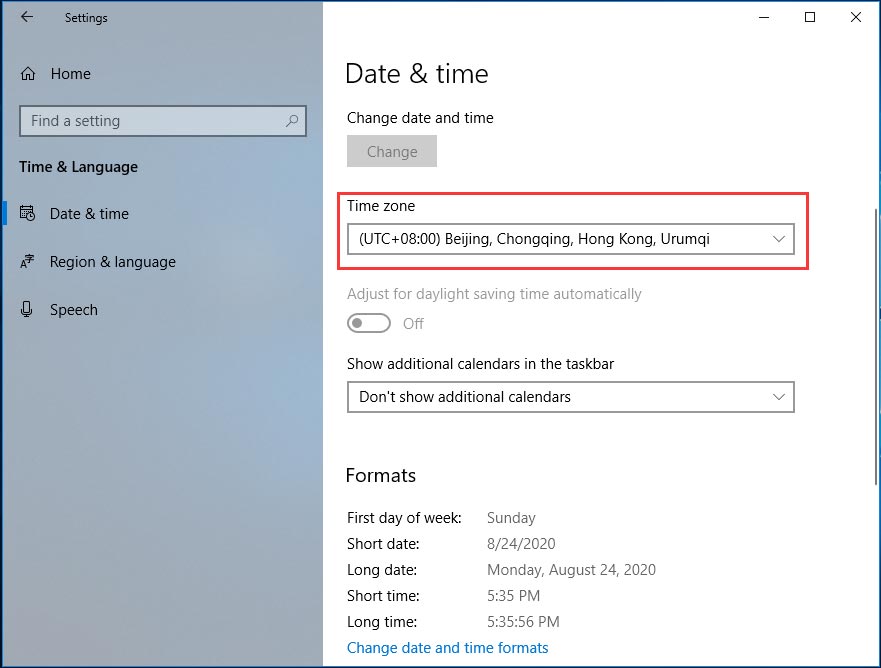
Step 1: Go to Start > Settings > Time & Language.
Step 2: Go to Date & time, choose a correct time zone based on your region.
Besides, you should check if your computer is set to automatically synced with time.windows.com internet time server since sometimes Windows 10 time synchronization failed.
Step 1: Scroll down the Date & time window to click Additional data, time & regional settings to open Clock and Region in Control Panel.
Step 2: Click Date and Time and go to Internet Time.
Step 3: You should see the message “This computer is set to automatically synchronize with ‘time.windows.com’.” If it doesn’t appear, click Change settings.
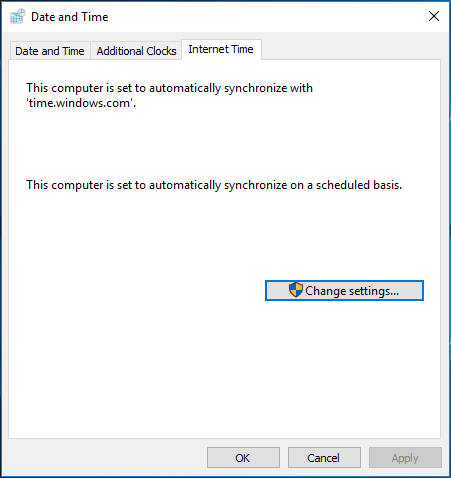
Step 4: Choose time.windows.com as the server and click Update now.
Step 5: Save the change.
If the time also keeps changing, try another solution.
Tweak Service Setting
If Windows 10 clock keeps changing, you can make Windows Time to start up automatically each time your computer starts.
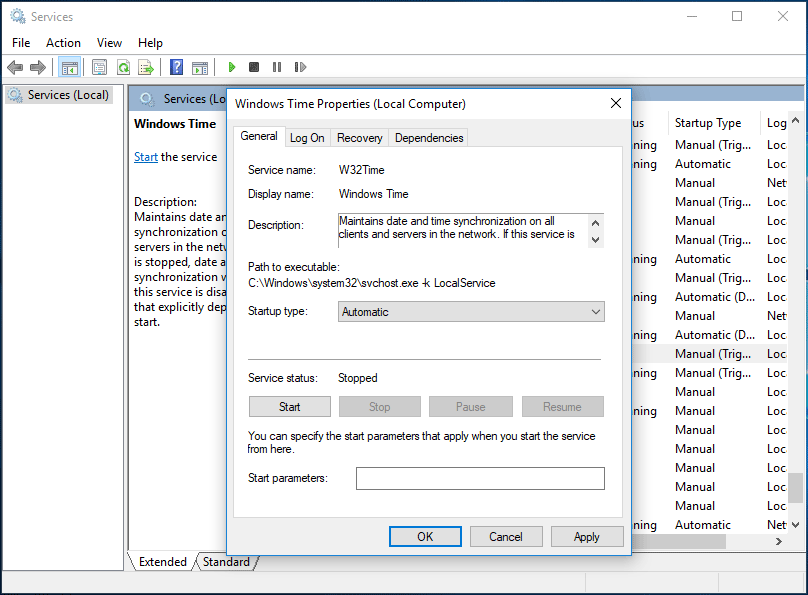
Step 1: Open the Run window in Windows 10, type services.msc and click OK.
Step 2: Find and double-click Windows Time, then change the startup type to Automatic.
Step 3: Click Apply > On.
Delete Malware
If Windows 10 time keeps changing, another reason is the malware. It hides in your computer and remains undetected for long until some changes are evident. To fix the issue, run your antimalware to perform a scan and deletion.
The built-in tool – Windows Defender is recommended. Or, you can use a professional antimalware like Malwarebytes.
Final Words
Windows 10 time keeps changing? Don’t worry and you can easily get rid of the issue by following these four methods mentioned above. Just have a try!
About The Author

Position: Columnist
Vera has been working at the MiniTool Team for over 10 years as a technical editor and content writer. She mainly focuses on disk and partition management, data recovery, Windows backup and restore, and PC troubleshooting. Through in-depth software testing and hands-on experience, she has helped users solve a wide range of computer problems and better protect their data on Windows devices.
User Comments :