It’s annoying to meet the “Windows 11 cannot access shared folder” issue. There are many reasons for the “cannot access shared folder Windows 11” issue. There may be a misconfigured network, incorrect drive settings, and misspellings of the folder names mentioned above. And in some cases, the user account behind the folder has inappropriate permissions settings.
Then, let’s see how to get rid of the “Windows cannot access shared folder on Windows 11” issue.
Fix 1: Turn on Network Sharing Permission
First, you can try to turn on network sharing permission on Windows 11 to fix the issue. Here is how to do that:
Step 1: Right-click the shared folder to choose Properties. Then, click the Sharing tab and click Share….
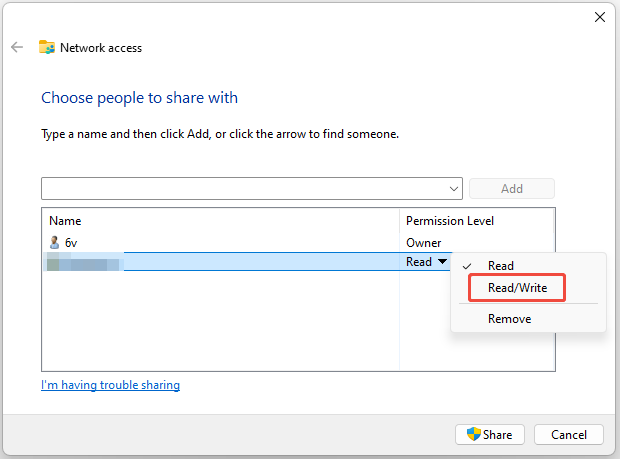
Step 2: Click the arrow to choose the user you want to share files and click Add. Choose Read/Write under Permission Level and click Share.
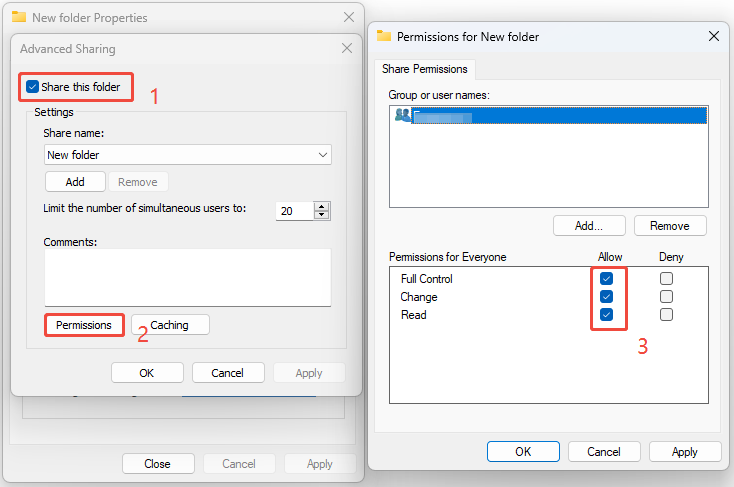
Step 3: Go to the Sharing tab again. Click Advanced Sharing… and check the Share this folder option. In the same window, click the Permissions button and check the Allow box next to the Full Control option.
Fix 2: Enable File and Printer Sharing
Then, you can try to enable file and printer sharing settings. Follow the guide below:
Step 1: Type Control Panel in the Search box to open it.
Step 2: Go to Network and Internet > Network and Sharing Center > Change advanced sharing settings.
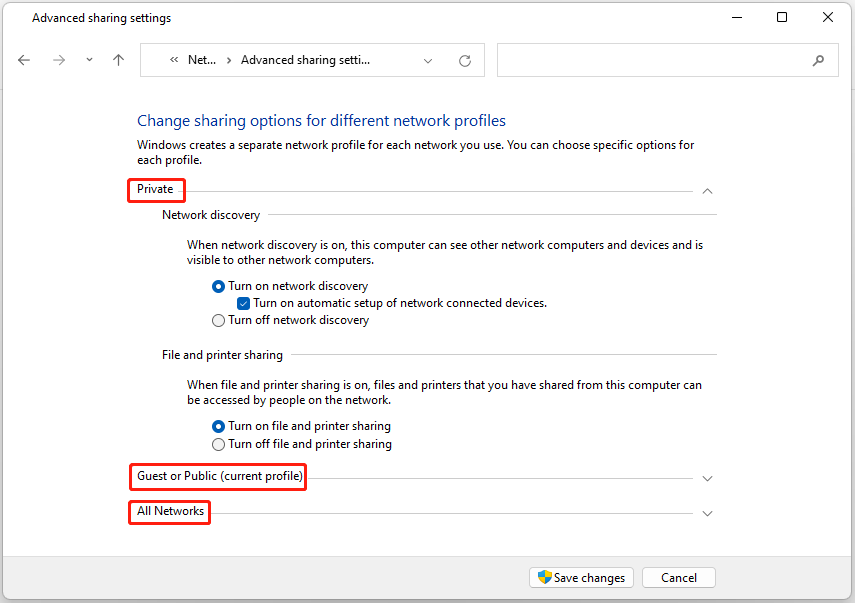
Step 3: You need to turn on file sharing under Private, Public, and All networks.
1. Private
Network discovery: Check Turn on network discovery and also check Turn on automatic setup of network-connected devices.
File and printer sharing: Check Turn on file and printer sharing.
2. Guest or Public (current profile)
Check Turn on file and printer sharing under Network discovery and File and printer sharing.
3. All Networks
Turn on public file sharing and turn on password-protected sharing.
Fix 3: Give Security Permission
If you don’t have the correct security permission, you can also encounter the Windows 11 cannot access shared folder issue.
Step 1: Right-click the shared folder to choose Properties.
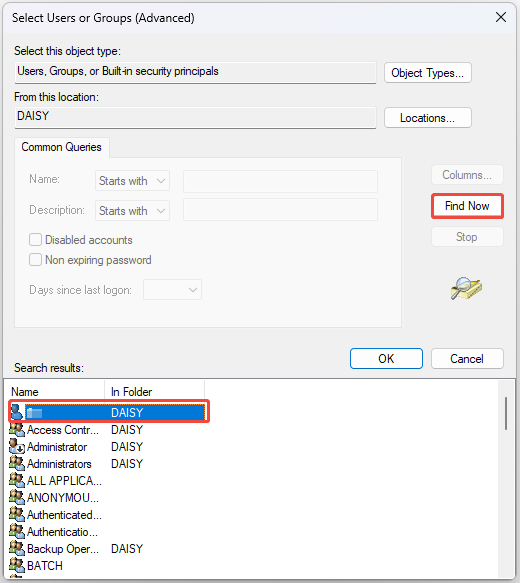
Step 2: Go to the Security tab and click Edit…. Then, click Add… and click Advanced….
Step 3: Click Find Now and select the user you want to share files. Then, click OK.
Fix 4: Run Shared Folder Troubleshooter
A Shared Folder troubleshooter can be helpful for you to get rid of the sharing issue.
Step 1: Press the Windows + I keys together to open the Settings application.
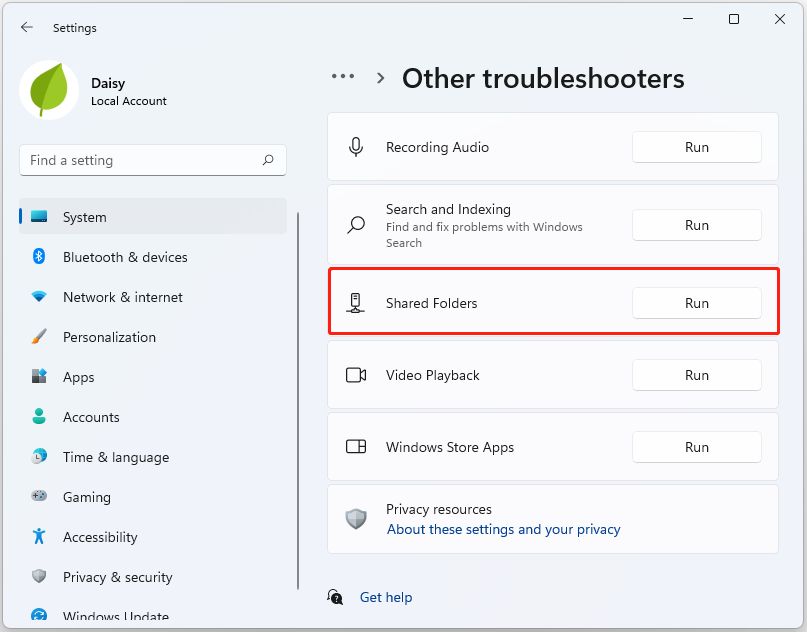
Step 2: Go to System > Troubleshoot > Other Troubleshooters.
Step 3: Find Shared Folders and click Run. Then, you just need to wait for the process to finish.

Fix 5: Check File Share Service
If you still can’t access the shared folder on Windows, you need to verify if the network and sharing services on your PC are running.
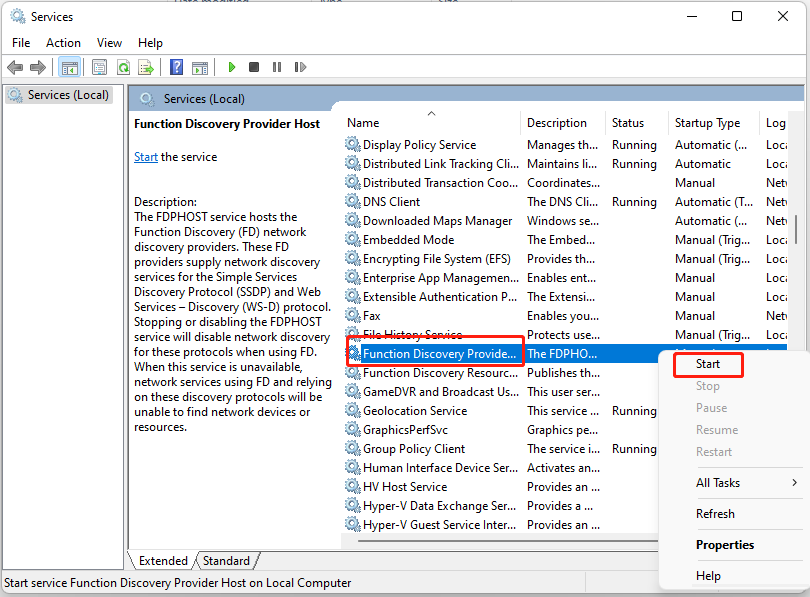
Step 1: Press the Windows + R keys to open the Run box. Type services.msc and press Enter.
Step 2: Right-click Function Discovery Provider Host and select Start.
Fix 6: Use Registry Editor
If the above solutions are not working, try to use Registry Editor to fix the issue.
Step 1: Open the Run box, type regedit, and press Enter.
Step 2: Go to the below path:
Computer\HKEY_LOCAL_MACHINE\SOFTWARE\Policies\Microsoft\Windows\LanmanWorkstation
Step 3: If you can’t find the LanmanWorkstation key, right-click the Windows key to select New > Key. Name it LanmanWorkstation.
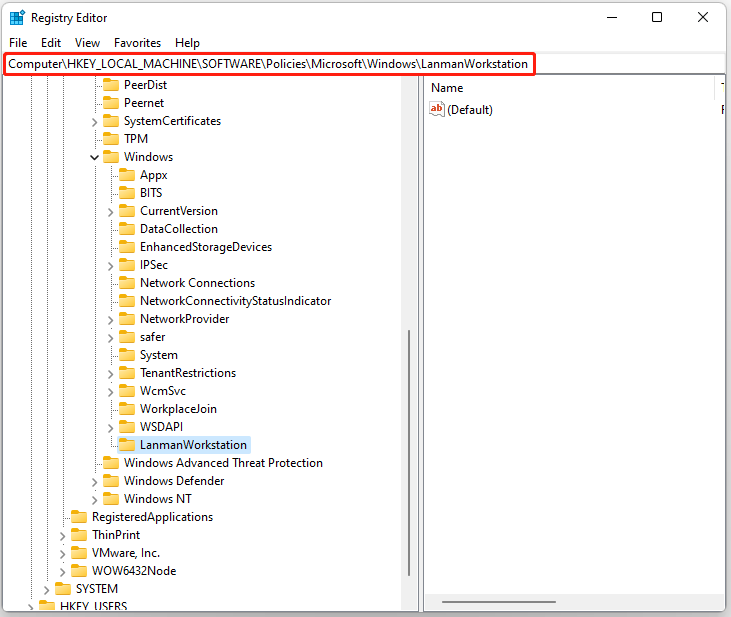
Step 4: Then right-click the right pane, and select New > DWORD (32-bit) Value. Name it AllowInsecureGuestAuth.
Step 5: Double-click on this key. Then change the Value data to 1.
Final Words
This post provides 6 ways to get rid of the “Windows 11 cannot access shared folder” issue. You can try them to fix the issue.
User Comments :