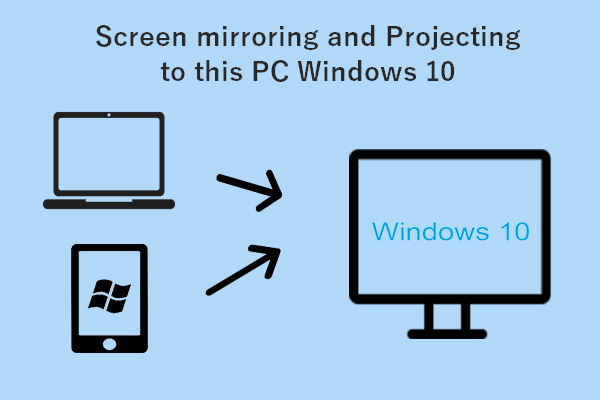
If you want to project your PC’s screen to wireless TVs, projectors, and other streaming media players in Windows 11, what should you do? MiniTool gives you detailed instructions on this guide - Windows 11 connect to wireless display. Follow one way to easily connect to a wireless display on your Windows 11 computer.
Necessity – Windows 11 Connect to Wireless Display
In Windows 11, the new operating system supports two technologies that allow you to connect to a wireless display and they are Miracast and WiGig.
To be specific, you can wirelessly connect your PC to a TV, projector, or other external displays that supports Miracast or connect your computer to TVs, projectors, or others that have been connected to a WiGig dock.
After the connection, you can share content on your PC to external displays, play a game on a larger screen, and more. Three modes are available, including Working, Gaming, and Watching videos. Well then, how to connect to a wireless display in Windows 11? The operation is easy if you follow the methods below.
How to Connect to Wireless Display Windows 11 (2 Ways)
Install Wireless Display in Windows 11
Before connecting to a wireless display, you are required to install Wireless Display on your Windows 11 PC. So, how to install Wireless Display in Windows 11? Follow the steps below on Wireless Display Windows 11 download & install.
Step 1: Go to Settings by pressing Win + I.
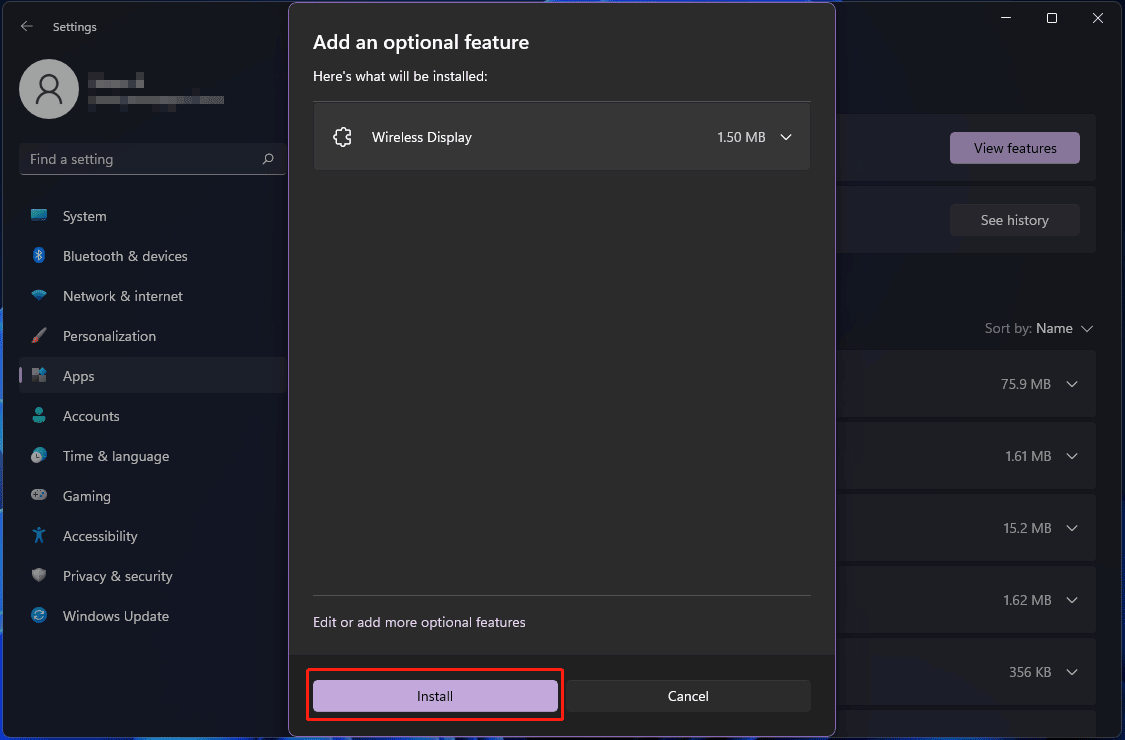
Step 2: Click Apps > Optional features > View features.
Step 3: Type Wireless Display to the search box, choose it and click Next > Install to install this app on your PC.
In addition, you can install Wireless Display via Command Prompt. Just run CMD with admin rights, type in DISM /Online /Add-Capability /CapabilityName:App.WirelessDisplay.Connect~~~~0.0 .1.0 and press Enter.
Next, try one way to connect to a wireless display like a TV, projector, another PC, etc. Then, launch the Wireless Display app. Make sure all the devices are connected to the same Wi-Fi network.
Windows 11 Connect to Wireless Display via Cast in Quick Settings
Below is a guide on Windows 11 project to wireless display:
Step 1: Turn on your TV, projector, or another external display.
If you are using a Miracast dongle or adapter, make sure it is connected to the display.
If you are using a WiGig dock, ensure it is also plugged into the display. Also, turn on WiGig. To check if the PC supports WiGig, go to Settings > Network & internet > Airplane mode and you can see a WiGig control.
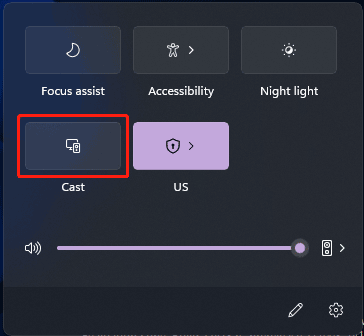
Step 2: Click the Network icon on the right side of Taskbar and click Cast.
Step 3: Choose the TV, projector, or another external display.
Step 4: Allow the connection. Then, you can check the option – Allow mouse, keyboard, touch, and pen input from this device. Sometimes, you can decide how you want to project this display – Duplicate, Extend, or Second screen only.
Connect to Wireless Display Windows 11 in Settings
See what you should do:
Step 1: Go to Settings > System > Display.
Step 2: Click Multiple displays and tap on the Connect button from the Connect to a wireless display section.
Step 3: Choose the display you want to cast to and finish the connection by following the on-screen wizards.
Bottom Line
How to connect to a wireless display in Windows 11? The operations can be easily done. Just follow the instructions above to connect your PC to another PC, TV, projector, etc.
About The Author

Position: Columnist
Vera has been working at the MiniTool Team for over 10 years as a technical editor and content writer. She mainly focuses on disk and partition management, data recovery, Windows backup and restore, and PC troubleshooting. Through in-depth software testing and hands-on experience, she has helped users solve a wide range of computer problems and better protect their data on Windows devices.
User Comments :