What is the error that Windows could not start the Windows audio service on local computer? How to fix this Windows audio services error? This post from MiniTool will show you how to solve fix this audio service error.
Some users reported that they come across the error that Windows could not start the Windows audio service on local computer when they tried to open the Windows audio services. In general, the status of Windows audio services is set to automatic by default so that Windows Audio will be opened as long as you boot the computer.
However, some users say that their Windows audio does not start automatically or the Audio Service does not respond. When they are trying to start the Windows audio service, they come across the error that Windows could not start the Windows audio services on local computer.
So, what would you do if you come across the error that Windows could not start the audio services on local computer? If not, keep on your reading and find solutions in the following part.
3 Ways – Windows Could Not Start the Windows Audio Service on Local Computer
In this section, we will show you how to fix the error that Windows could not start the Windows audio endpoint builder service on local computer.
Way 1. Run System File Checker
Usually, the error that Windows could not start the Windows audio services on local computer may due to the usage of third-party antivirus on the system. Usually, the antivirus program marks the file as a virus and puts them into the quarantined items, and thus the associated services with these files get affected. Hence, in order to fix the error that Windows could not start the Windows audio service on local computer, you can choose to run System File Checker to check and repair the corrupted system files.
Now, here is the tutorial.
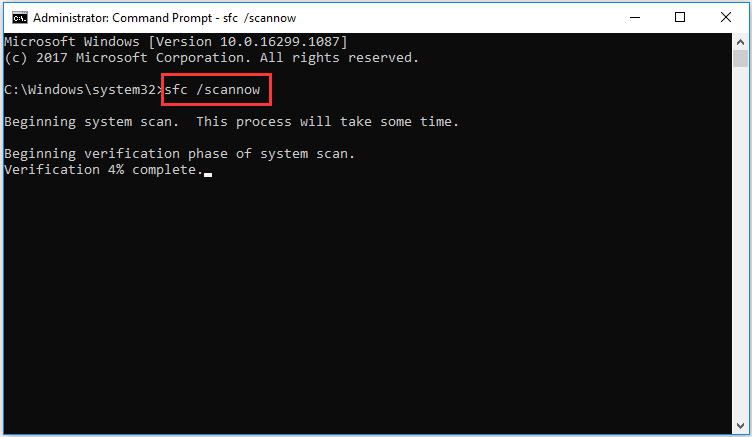
- Open Command Prompt as administrator.
- In the command line window, type the command sfc /scannow and hit Enter to continue.
- Please do not close the command line window until you see the message verification 100% complete.
When all steps are finished, reboot your computer and check whether the error that Windows could not start the Windows audio services on local computer is fixed.
Related article: Quickly Fix – SFC Scannow Not Working (Focus on 2 Cases)
Way 2. Copy the Registry Key
In order to fix the issue that Windows could not start the Windows audio service on local computer, you can choose to copy the registry key from another normal computer.
Now, here is the tutorial.
1. Press Windows key and R key together to open Run dialog.
2. Then type regedit in the box and click OK to continue.
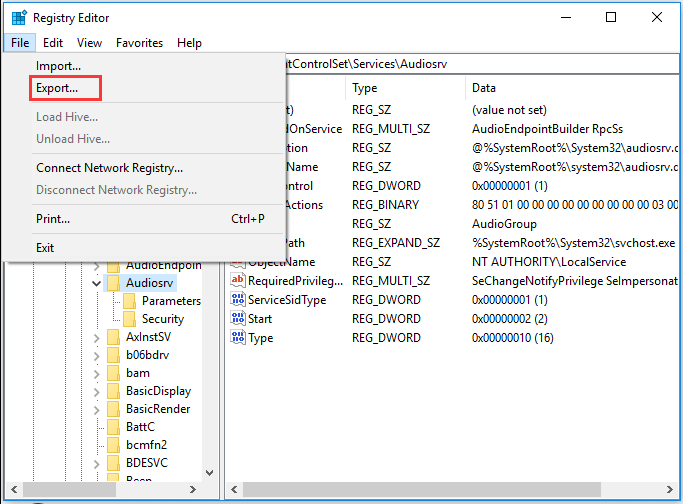
3. In the Registry Editor window, navigate to the HKEY_LOCAL_MACHINE\SYSTEM\CurrentControlSet\Services\Audiosrv path.
4. Then click File and choose Export to continue.
5. Copy the registry key to the affected computer.
6. Right-click the registry key on the affected computer and choose Merge to continue.
After all steps are finished, reboot your computer and check whether the error that Windows could not start the Windows audio services on local computer is fixed.
Way 3. Add Windows Audio Service to Safe List
Another way to fix the error that Windows could not start the audio services on local computer is by adding Windows Audio Services to the safe list. To do that, open the antivirus program and find the Windows audio service related files and add it to the safe list.
After that, reboot your computer and check whether the error that Windows could not start the Windows audio services on local computer is fixed.
Final Words
To sum up, this post has introduced 3 ways to fix the error that Windows could not start the Windows audio service on local computer. If you have the same problem, try these solutions. If you have any better solution to fix it, you can share it in the comment zone.
User Comments :