As a core component of the Riot Vanguard anti-cheat system, the VGC service is vital for playing video games like Valorant. What can you do if Windows could not start VGC service on local computer? Don’t worry. You’re not alone. In this post from MiniTool, we will provide several available solutions for you.
Windows Could Not Start the VGC Service on Local Computer
The VGC service, also known as Vanguard, indicates an anti-cheat service for video games. Before playing all Riot titles like Leagues or Legends or Valorant, you must run Vanguard to ensure competitive integrity and security. However, sometimes, you might fail to start the VGC service and receive one of the error messages below:
Windows could not start the vgc service on Local Computer.
Error 1: incorrect function.
Error 1053: The service did not respond to the start or control request in a timely fashion.
Error 109: The pipe has been ended.
MiniTool ShadowMaker TrialClick to Download100%Clean & Safe
Solution 1: Reinstall Riot Vanguard
Since Windows could not start VGC service on local computer is related the vgc service, a fresh install of Vanguard might help you out. Here’s how to do it:
Step 1. Open Control Panel.
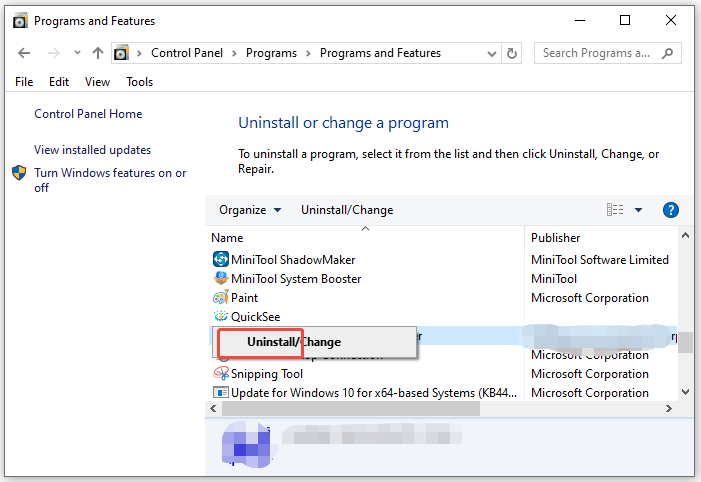
Step 2. Under Programs, click on Uninstall a program.
Step 3. Now, you can see a list of programs installed on your computer. Locate Riot Vanguard and right-click on it to choose Uninstall.
Step 4. In the confirmation window, hit Yes to confirm this operation.
Step 5. Once done, launch Riot Games and then Vanguard will reinstall automatically.
Step 6. Restart your computer.
Solution 2: Reinstall Realtek Audio Driver
Some users reported that the Windows Could not start VGC service on local computer error message doesn’t pop up after they reinstall the Realtek Audio driver, so this method is also worth a shot. Follow these steps:
Step 1. Type device manager in the search bar and hit Enter.
Step 2. Expand Sound video, and controllers to show your Realtek Audio driver.
Step 3. Right-click on it to select Uninstall device from the context menu.

Step 5. Once done, restart your computer and then it will automatically reinstall the latest Realtek Audio driver for you. Alternatively, updating Realtek driver might also work wonders.
Solution 3: Disable Test Mode
Another feasible solution is to disable Test Mode via CMD. This mode enables you to run drivers that are not unverified, leading to Windows fail to start VGC service. Follow these steps:
Step 1. Launch Command Prompt as an administrator.
Step 2. In the command window, run the commands below in order and don’t forget to hit Enter after each command.
bcdedit -set TESTSIGNING OFF
bcdedit -set NOINTEGRITYCHECKS OFF
Step 3. After completion, restart the VGC service.
Solution 4: Verify Unsigned Drivers
Unsigned drivers can also cause Windows could not start VGC service on local computer. To specify what drivers are unsigned, follow these steps:
Step 1. Open the Run dialog.
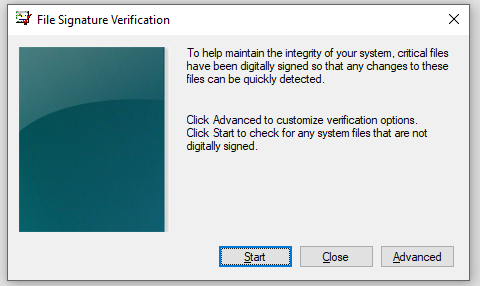
Step 2. Type sigverif and hit Enter.
Step 3. In the File Signature Verification window, click on Start.
Step 4. If this tool detects any unsigned driver, search it on Google to check its origin. If it is outdated, update it to see if it will make a difference.
Solution 5: Perform System Restore
There is a possibility that certain drivers or the latest Windows update might be the culprit of Windows could not start VGC service on local computer. In this instance, performing system restore can cancel these changes and return your computer to a healthy state. In this
Step 1. Press Win + R to open the Run dialog.
Step 2. Type rstrui and click on OK to launch System Restore.
Step 3. Click on Next to continue.
Step 4. Select a restore point according to your need and hit Next.
Step 5. After making your choice, click on Finish to start the process.
Final Words
Now, you won’t be bothered by Windows could not start VGC service on local computer anymore. Last but not least, don’t ignore the importance of backup to minimize the chance of data loss.
User Comments :