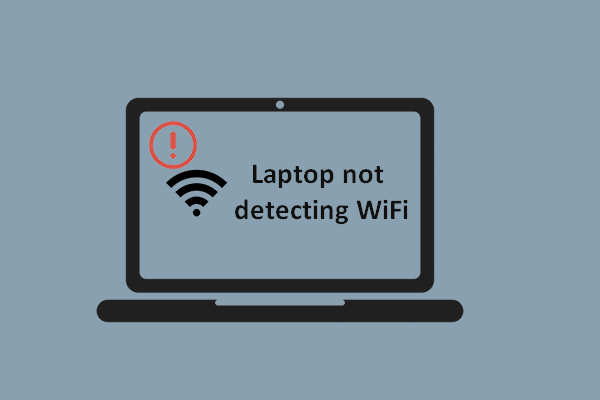
“Windows could not start the WLAN AutoConfig service on Local Computer” is a common error if your PC cannot detect your Wi-Fi connection. On the screen, you can see an error like 1068/122/1023/1747/999/126, etc. To fix this network error, try solutions given by MiniTool Solution.
WLAN AutoConfig Error 1068/122/1023/1747/999/126, etc.
Wi-Fi connection issues always happen on your computer and we have introduced some for you in our previous posts, for example, Windows wireless service is not running, Surface not connecting to Wi-Fi, Wi-Fi connected but has no internet, Xfinity WiFi connected but no Internet access, laptop keeps disconnecting from Wi-Fi, and more.
Today, we will show you another issue. If your laptop or desktop cannot detect your Wi-Fi, you may try to manually start the WLAN AutoConfig service. Subsequently, an error message appears saying “Windows could not start the WLAN AutoConfig service on Local Computer” followed by error 1068/122/126/999/1747/1053/, etc.
The WLAN AutoConfig service is used to let your computer connect to a WLAN. If it isn’t working, you cannot connect the PC to the network. What should you do to fix the issue? Solutions are introduced below and try them to get out of the trouble.
Windows Could Not Start the WLAN AutoConfig Service on Local Computer Error 1068/122/, etc.
Ensure WLAN AutoConfig Service Is Running
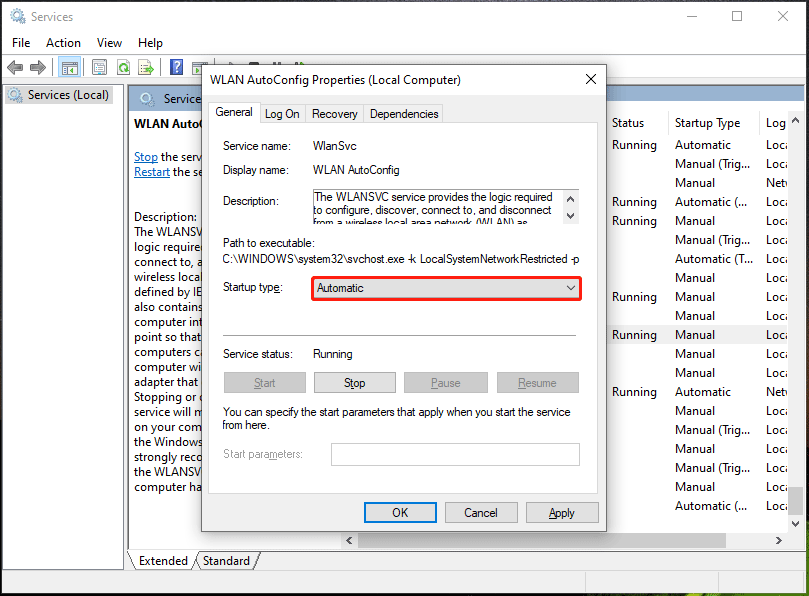
If this service is disabled, your computer cannot detect your Wi-Fi with the WLAN AutoConfig error. SO, go to check if it is running.
Step 1: Type services.msc to the search box and click Services to open this app.
Step 2: Locate WLAN AutoConfig, double-click it, and make sure its Startup type is Automatic.
Step 3: Click Apply > OK.
Restart Your Router
Although restarting a router doesn’t always solve the connection issue, sometimes it is useful and you can have a try. If you don’t know how to do this, here is a related article for you to follow – How to Restart a Router and Modem Properly.
Run Network Troubleshooter
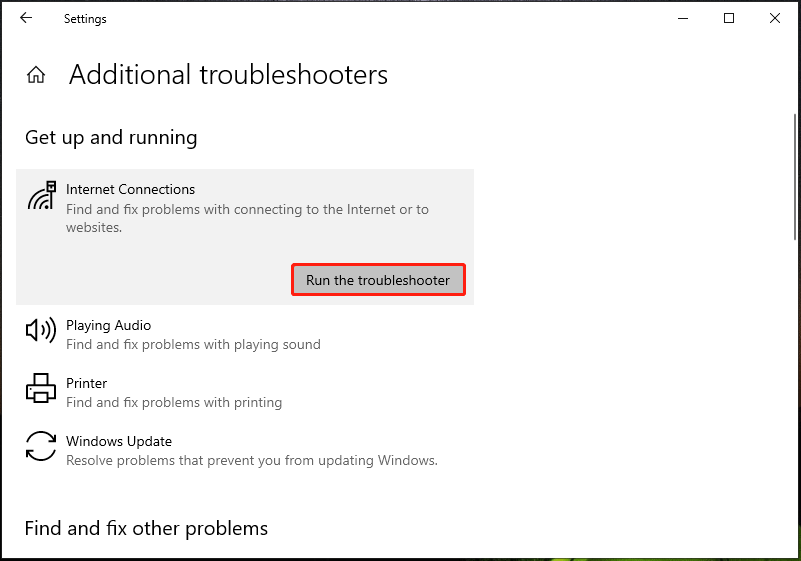
Windows offers multiple troubleshooters to you to fix some issues related to blue screen, Windows update, audio, printer, keyboard, Bluetooth, internet connection, and more. If you get the error “Windows could not start the WLAN AutoConfig service on Local Computer”, you can also run the network troubleshooter to fix your issue.
Step 1: In Windows 10, press Win + I to open the Settings interface.
Step 2: Go to Update & Security > Troubleshoot.
Step 3: Click Additional troubleshooters, locate Internet Connections, and click Run the troubleshooter.
Step 4: Finish the operations by following the on-screen prompts.
Reset Network Configurations
Network configurations may be interrupted by a virus or third-party app and resetting them can be helpful.
Step 1: Open Command Prompt with admin rights.
Step 2: Type in netsh winsock reset and press Enter.
Check Adapter Settings
If your adapter setting is disabled, you cannot connect to your network and you can have a check.
Step 1: Go to Control Panel > Network and Internet > Network and Sharing Center.
Step 2: Click Change adapter settings and you can see your adapter.
Step 3: If your wireless adapter is disabled, right-click it and choose Enable.
Reinstall the Wireless Adapter Driver
Windows could not start the WLAN AutoConfig service may be related to a wireless adapter driver and you can try to reinstall it.
Step 1: Go to Device Manager, expand Network adapters, right-click your wireless driver and choose Uninstall device.
Step 2: Click Uninstall.
Step 3: Go to the wireless card’s manufacturer website and download a driver.
Step 4: Install the new driver on your PC.
Edit Your Registry
If you get the issue – Windows could not start the WLAN AutoConfig on Local Computer error 1068/999/122/, etc., you can edit Windows registry.
Step 1: Type regedit to the search box in Windows and click Registry Editor.
Step 2: Go to HKEY_LOCAL_MACHINE\SYSTEM\CurrentControlSet\Services\Dhcp.
Step 3: Double-click DependOnService in the right pane and delete everything except Afd.
Step 4: Click OK, exit Registry Editor, and restart your PC.

Related article: [Solved] Error 1068: Dependency Service Failed to Start
Verdict
These are the common ways to fix WLAN AutoConfig error 1068/122/126/999, etc. If you are bothered by the issue, have a try now and you can easily get rid of the trouble.
About The Author

Position: Columnist
Vera has been working at the MiniTool Team for over 10 years as a technical editor and content writer. She mainly focuses on disk and partition management, data recovery, Windows backup and restore, and PC troubleshooting. Through in-depth software testing and hands-on experience, she has helped users solve a wide range of computer problems and better protect their data on Windows devices.
User Comments :