What is Windows Push Notification User Service? How to fix Windows Push Notification User Service high CPU or memory usage? Read this post from MiniTool Website carefully, and you will be enlightened.
Windows Push Notifications User Service High CPU Usage
Windows Push Notifications User Service is a background system process that manages push notifications from different services and applications. Usually, it might consume some system resources and the impact is minimal.
However, what should you do if you find this process is using excessive resource usage on Windows 10/11? In this post, we will explore how to fix Windows Push Notification User Service high CPU, disk, or memory usage for you.
MiniTool ShadowMaker TrialClick to Download100%Clean & Safe
How to Fix Windows Push Notifications User Service High CPU Usage on Windows 10/11?
Fix 1: Terminate the Process Manually
Most of the time, a simple restart of this process might help to solve some problems like Windows Push Notification User Service high CPU usage. To do so:
Step 1. Press Ctrl + Shift + Esc to launch Task Manager.
Step 2. In the Details tab, locate Service Host: Windows Push Notification User Service and then right-click on it to choose End task.
Fix 2: Disable All Notifications
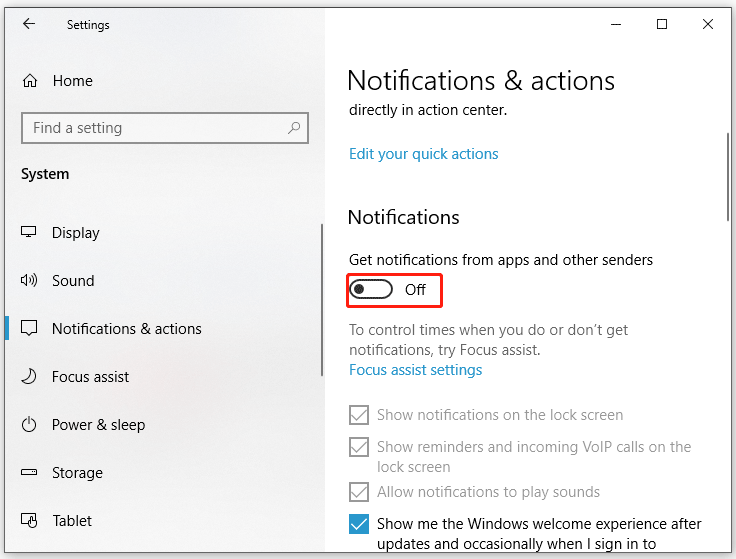
If there are so many notifications from different apps, no wonder you will receive Windows Push Notification User Service high CPU usage. In this condition, you can choose to stop receiving all notifications to fix this issue.
Step 1. Press Win + I to open Windows Settings.
Step 2. Go to System > Notification & actions > toggle off all notifications.
Fix 3: Restart Windows Push Notifications User Service
When certain background services or applications can not work properly, you can consider restarting them. Follow these steps:
Step 1. Press Win + R to open the Run box.
Step 2. Type services.msc and hit Enter to launch Services.
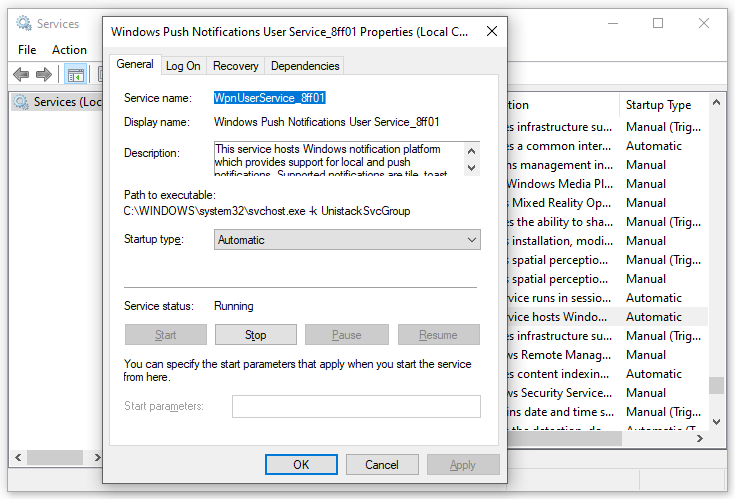
Step 3. In the services menu, find Windows Push Notification User Service and right-click on it to choose Properties.
Step 4. If this service is running, hit Stop and then restart it. If it is stopped, hit Start to run it.
Fix 4: Perform a Clean Boot
Third-party programs might be responsible for issues like Windows Push Notification User Service high CPU usage. If this is the case, you can perform a clean boot to exclude their interference. To do so:
Step 1. Type system configuration in the search bar and hit Enter.
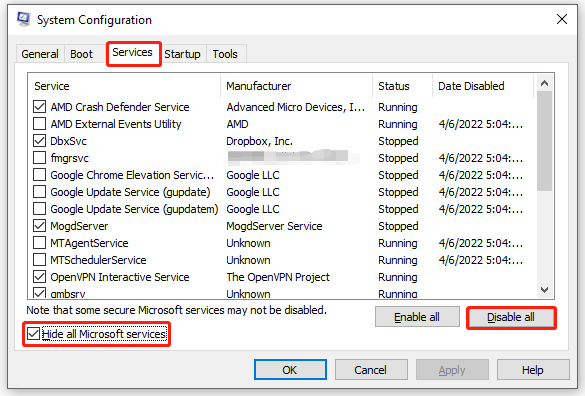
Step 2. In the Services tab, tick Hide all Microsoft services and hit Disable all.
Step 3. Head to the Startup tab, click on Open Task Manager and then disable all third-party apps & programs.
Step 4. Go back to the Services tab and hit Apply & OK to save the changes.
Step 5. Restart your computer to enter the clean boot state to check if Windows Push Notification User Service high memory or CPU usage persists. If not, a third-party could be to blame. Then you need to uninstall all recently installed applications to see if it works.
Fix 5: Run SFC & DISM
Chances are that some system files are corrupted or missing. Therefore, you can run SFC and DISM in sequence to detect and repair these system files. Here’s how to do it:
Step 1. Launch Command Prompt with administrative privilege.
Step 2. In the command window, type sfc /scannow and hit Enter.
Step 3. After completion, restart your computer.
Step 4. Launch an administrative Command Prompt and run the following commands one by one.
DISM /Online /Cleanup-Image /CheckHealth
DISM /Online /Cleanup-Image /ScanHealth
DISM /Online /Cleanup-Image /RestoreHealth
![CHKDSK vs ScanDisk vs SFC vs DISM Windows 10 [Differences]](https://images.minitool.com/minitool.com/images/uploads/2020/03/chkdsk-vs-scandisk-vs-sfc-vs-dism-thumbnail.jpg)
Final Words
After reading through this post, Windows Push Notification User Service high resource consumption will not be a concerning problem and your operating system will run smoothly.
User Comments :