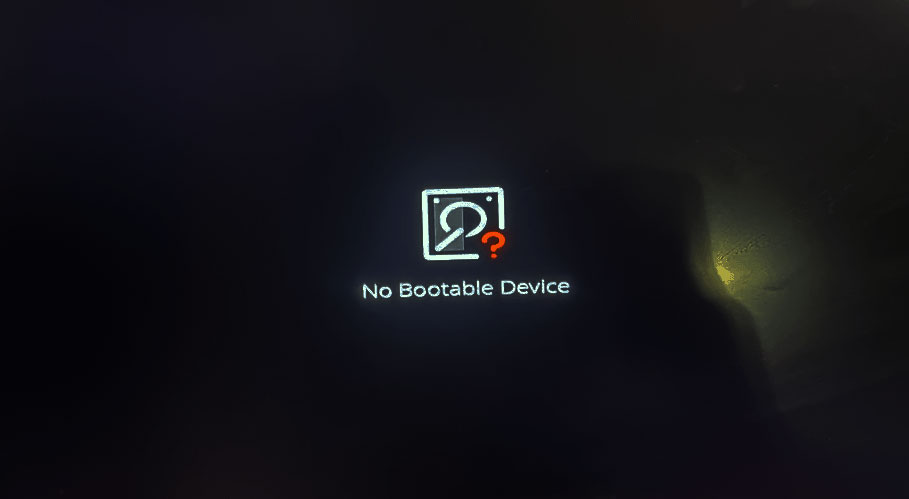
The No Bootable Device Acer error is often caused by BIOS issues, a damaged MBR, disk errors, or a missing system partition. This guide from MiniTool explains the causes and provides 8 simple fixes to help you restore your Acer laptop quickly.
What Does No Bootable Device Acer Mean?
Many Acer users encounter the “No Bootable Device” error on their Windows 7, 8, 10, or 11 systems. This issue is especially common on popular models such as the Acer Nitro 5, Acer Aspire 5, Acer Aspire 7, and Acer Aspire E15.
It typically occurs during startup and may show messages like:
- No Bootable Device
- Boot Device Not Found
- No Bootable Device — Insert Boot Disk
When this error appears, the system fails to detect a valid boot device, preventing Windows from loading properly and leaving users stuck at startup.
Have you ever run into the same error? It can be frustrating, especially when it occurs unexpectedly and blocks access to your system. The good news is that this issue is usually fixable.
This guide will walk you through practical solutions to resolve the No Bootable Device Acer error across various Acer laptops. If you’re currently facing this problem, keep reading to find effective ways to get your system back up and running.
Causes of No Bootable Device Acer
After searching this error on the Internet and reading extensive related posts, I find the error can be caused by these reasons:
- Boot order is incorrect.
- Master Boot Record (MBR) is corrupted.
- Disk errors or bad sectors on the primary hard drive.
- System partition is not set as active.
- System partition is lost.
- Operating system file is damaged.
Quick Fixes (Try These First – 2 Minutes)
Start with these simple solutions before moving to advanced methods:
# 1. Remove External Devices
Sometimes the system tries to boot from the wrong device. Therefore, unplug USB drives, external hard disks, or memory cards.
# 2. Restart Your Laptop
A temporary glitch can trigger the No Bootable Device Acer error easily.
A restart (or reboot) closes all applications and the OS, then restarts the device. It clears RAM and temp files, stops faulty processes, and reloads core software, improving performance and fixing bugs.
Thus, reboot your laptop to resolve it instantly.
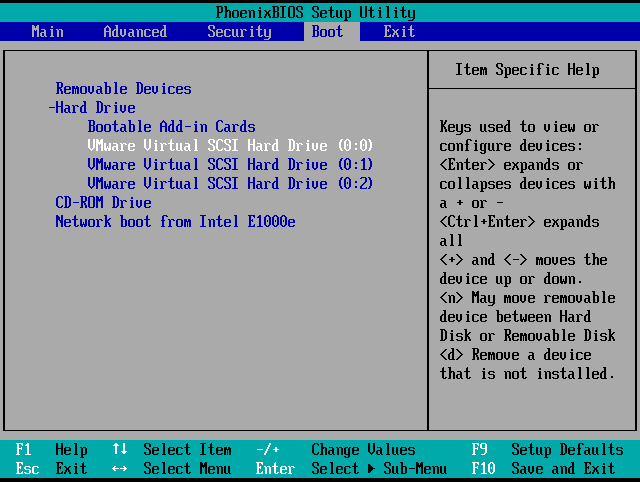
# 3. Check Boot Order in BIOS
If your Acer laptop shows “No Bootable Device,” it might be due to an unbootable disk or an incorrect boot order. To fix this, change the boot order.
- Restart your Acer laptop.
- Press F2 (or Del) to enter BIOS.
- Go to the Boot tab.
- Ensure your system disk is set as the first boot device.
- Save changes and restart.
Advanced Fixes
# 1. Set the System Partition as Active
You can also encounter the Acer No Bootable Device error if the system partition is not “active”. In this case, you can try setting the System Partition as Active to fix the error. Here’s the tutorial:
Step 1. Create a Windows installation disk and boot your PC from it.
Step 2. Select the language and region, and click Repair your computer.
Step 3. Then go to open Command Prompt.
For Windows 8/10 users: Select Troubleshoot > Advanced options> Command Prompt.
For Windows 7 users: Select Windows 7 as the operating system under “System Recovery Options“, click “Next“, and then “Command Prompt“.
Step 4. Type the following commands sequentially, and press Enter after each command:
- Diskpart
- list disk
- select disk X (X represents your system disk number)
- list partition
- select partition X (X represents the system partition number)
- active
Step 5. Once done, exit Command Prompt and restart your computer.
# 2. Repair Damaged MBR
The Master Boot Record (MBR) is the information in the first sector of a hard disk or a removable drive. It can be corrupted because of virus infection and bad sectors. So, if you suspect that the corrupted MBR causes the Acer laptop No Bootable Device error, you can try repairing the MBR to fix it. Here’s the way:
Method 1. Use Command Prompt
Step 1. Use the Windows installation disk to boot your computer and navigate the Command Prompt.
Step 2. Type the below commands in the given sequence. And don’t forget to press Enter after each command:
- bootrec /fixmbr
- bootrec /fixboot
- bootrec /scanos
- bootrec /rebuildbcd
Step 3. If those commands do not work, run the commands below:
- bcdedit /export C:BCD_Backup
- c:
- cd boot
- attrib bcd -s -h -r
- ren c:bootbcd bcd.old
- bootrec /RebuildBcd
Step 4. After running these commands, exit Command Prompt and restart your computer to check if your problem is resolved.
Method 2. Use MiniTool Partition Wizard
MiniTool Partition Wizard is a professional and multifunctional disk manager that can help you rebuild MBR with ease. In addition, this tool can also help you to partition hard drive, convert MBR to GPT, do data recovery, migrate OS to SSD without reinstalling OS, format USB to FAT32, and more.
Here’s how to use MiniTool Partition Wizard’s Rebuild MBR feature:
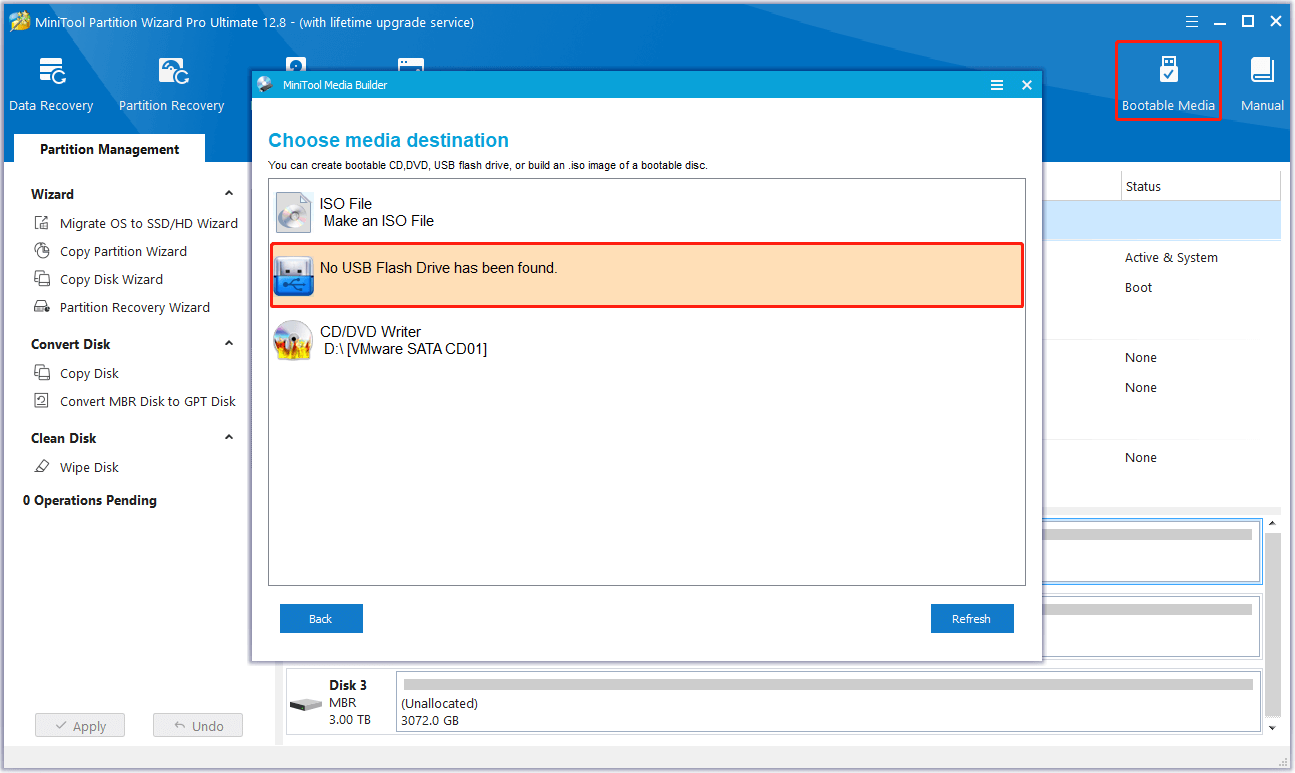
Part 1. Create Bootable USB Media
MiniTool Partition Wizard DemoClick to Download100%Clean & Safe
- Download and install MiniTool Partition Wizard on a working computer.
- Launch into its main interface, and then connect a USB flash drive to the computer.
- Click Bootable Media from the right corner of the top toolbar.
- Then select WinPE-based media with MiniTool plug-in.
- Next, click your USB flash drive.
- Wait for the process to complete.
Part 2. Rebuild MBR via MiniTool Partition Wizard
Step 1. Connect the created bootable USB media to your Acer computer, and then boot from it.
Step 2. In the MiniTool Partition Wizard’s interface, choose the system disk from the right disk map, and then select the Rebuild MBR feature from the left pane.
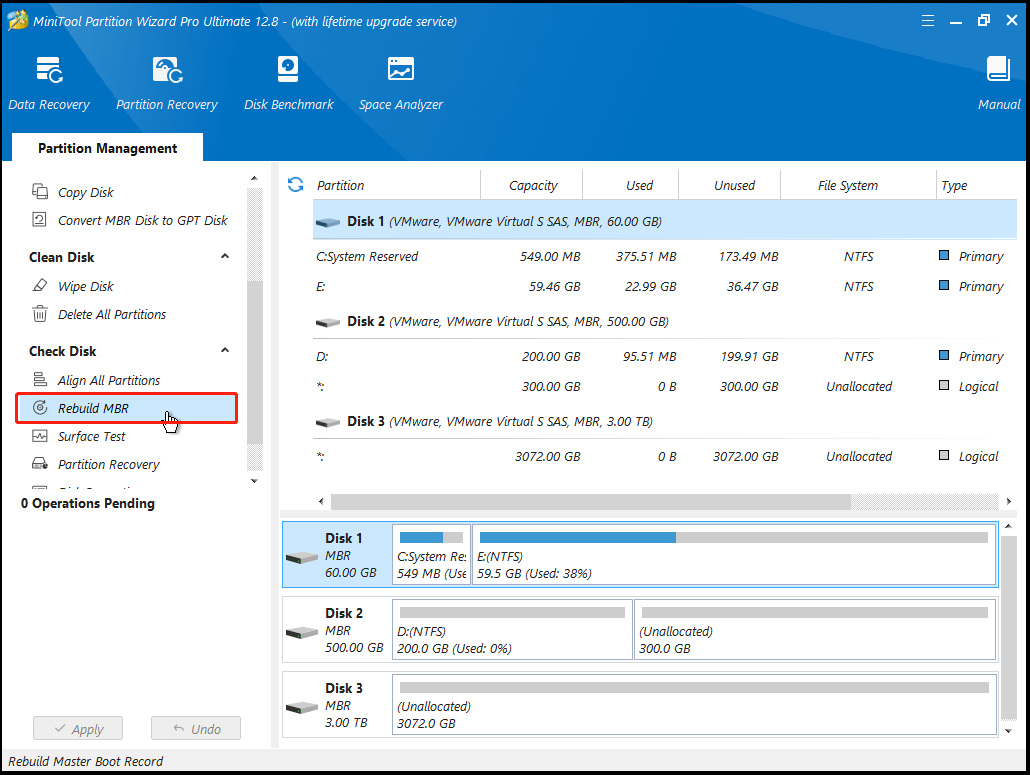
Step 3. Click the Apply button on the bottom left, and then click Yes in the pop-up window to execute the changes.

Once done, restart your computer and check if the No Bootable Device Acer error is fixed.
# 3. Fix the Disk Error
Disk errors and bad sectors on the system disk can also trigger the Acer No Bootable Device error. In this case, you can try using CHKDSK commands to fix the error. Here’s the guide:
- Use the Windows installation disk to boot your computer and open the Command Prompt.
- Type the command “chkdsk E: /f /r /x” and press Enter. (Replace “E” with the letter of that partition you want to fix)
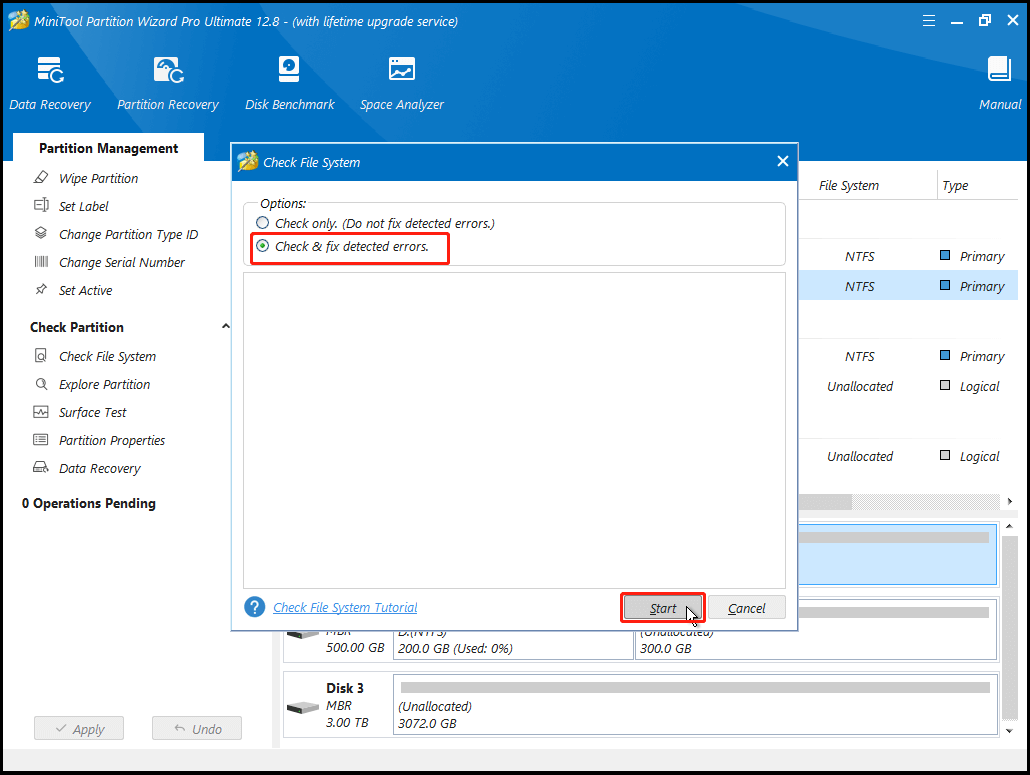
If you fail to perform the CHKDSK utility on your PC, you can also try using MiniTool Partition Wizard to help you do that. It provides the Check File System feature to help you check and fix disk errors and the Surface Test feature to help you scan the bad sectors. Here’s how to do it:
Check File System:
- Boot your PC from the created bootable USB media.
- Select the partition that you want to check from the disk map.
- Select Check File System from the left pane.
- In the Check File System window, select Check & fix detected errors.
- Next, click Start.
- Once done, all the disk errors will be fixed successfully.
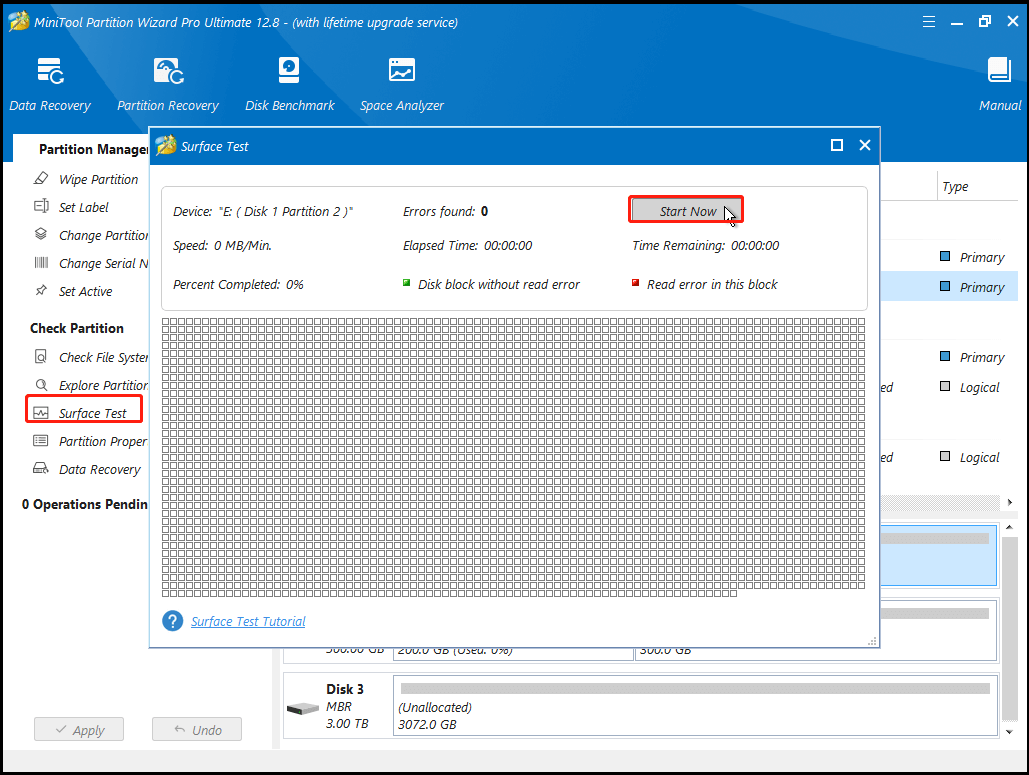
Surface Test:
- Boot your PC from the created bootable USB media.
- Select the partition that you want to check from the disk map.
- Select Surface Test from the left pane.
- In the Surface Test window, click the Start Now button.
- Once the scanning process is complete, bad sectors will be marked with red color.
- If there are too many bad sectors, you can consider replacing your hard disk.
# 4. Repair Corrupt Boot Files
Corrupted system files are also responsible for the No Bootable Device Acer error. So, you can perform SFC and DISM commands to fix the corrupted system files and then fix the No Bootable Device Acer error. To do that, you can do as follows:
Step 1. Use the Windows installation media to boot your PC and navigate to Command Prompt.
Step 2. Type the command “sfc /scannow /offbootdir=c: /offwindir=c:windows” and press Enter.
Step 3. If this command can’t solve the error, you need to try running the DISM command “DISM /Online /Cleanup-Image /RestoreHealth”.
Step 4. If the previous command also doesn’t work for the error on your PC, you can try the next commands:
- Dism /Image:C:offline /Cleanup-Image /RestoreHealth /Source:c:testmountwindows
- Dism /Online /Cleanup-Image /RestoreHealth /Source:c:testmountwindows /LimitAccess
# 5. Recover Lost System Partitions
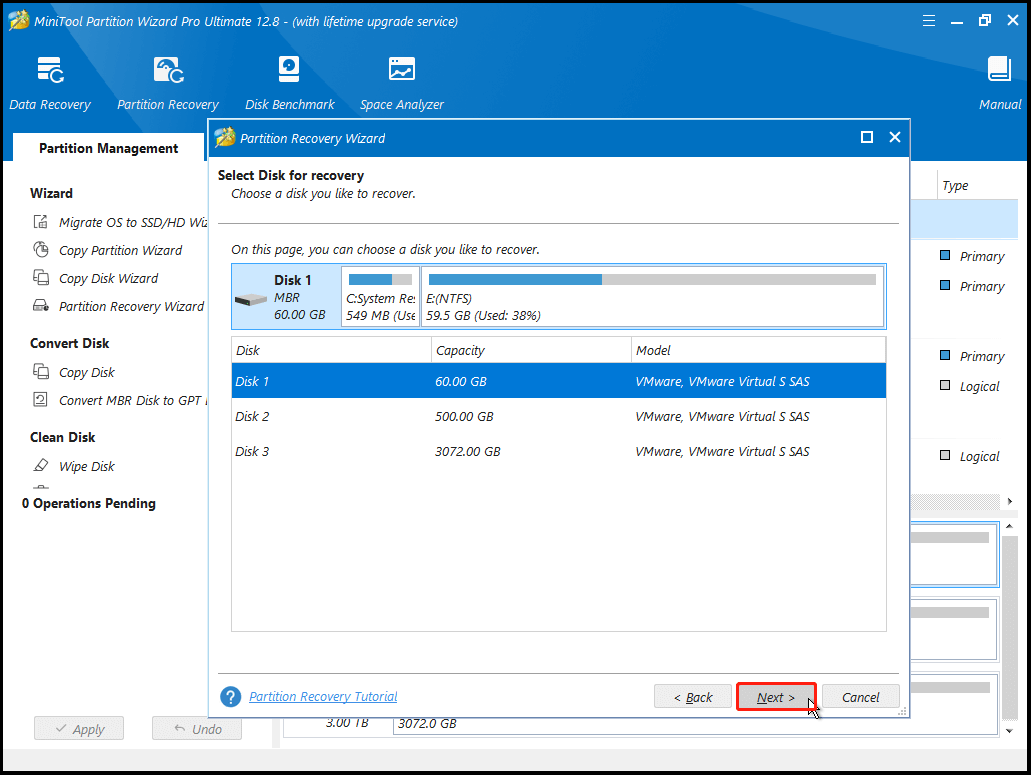
If the system partition of your Acer computer has been deleted accidentally, you can also encounter the Acer laptop No Bootable Device error. Luckily, MiniTool Partition Wizard provides the Partition Recovery feature that can help you recover lost partitions. So, you can use it to have a try. Here are the detailed steps:
Step 1. Use the created MiniTool Partition Wizard bootable USB media in # 4 to boot your computer.
Step 2. In the main interface of MiniTool Partition Wizard, click the Partition Recovery feature from the top toolbar, and then click Next in the pop-up window.

Step 3. Select the disk you like to recover and then click Next.
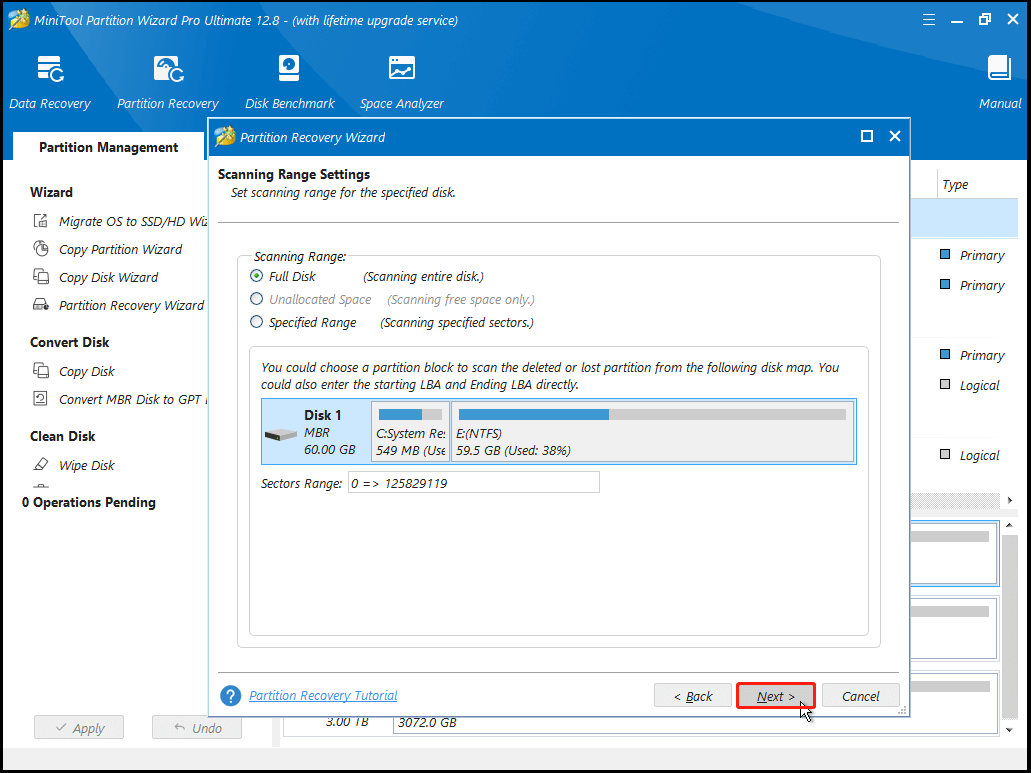
Step 4. Select the Scanning Range according to your needs, and click Next.
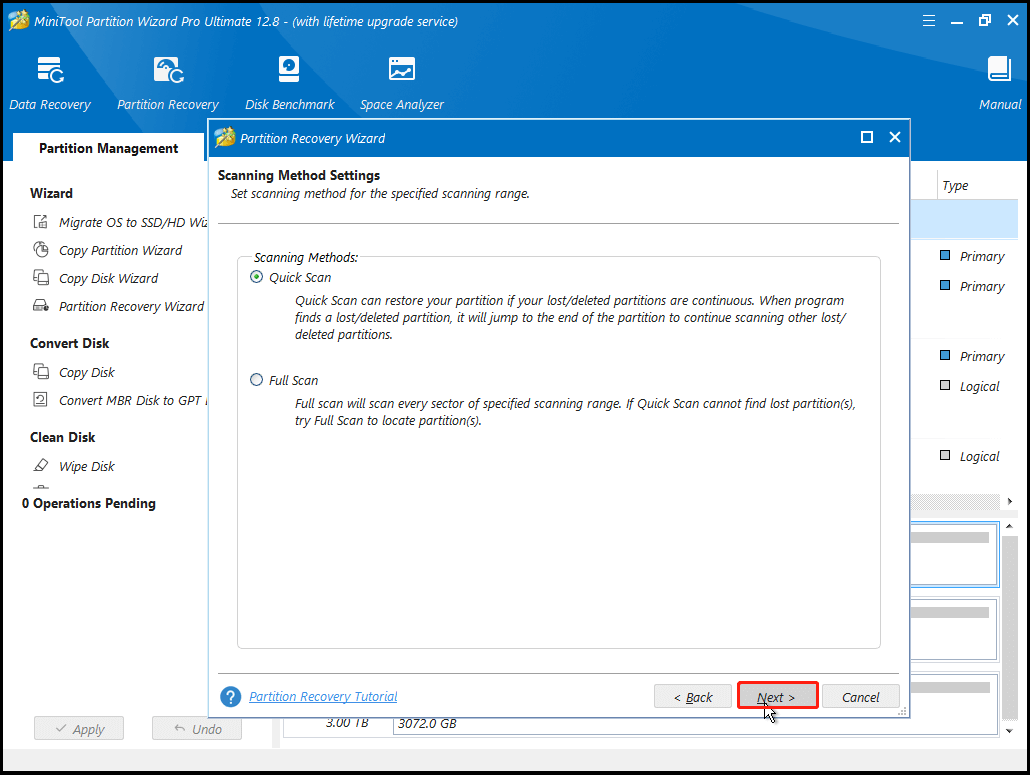
Step 5. Select the scanning method you like and click Next.
Step 6. Wait for the scanning process to complete.
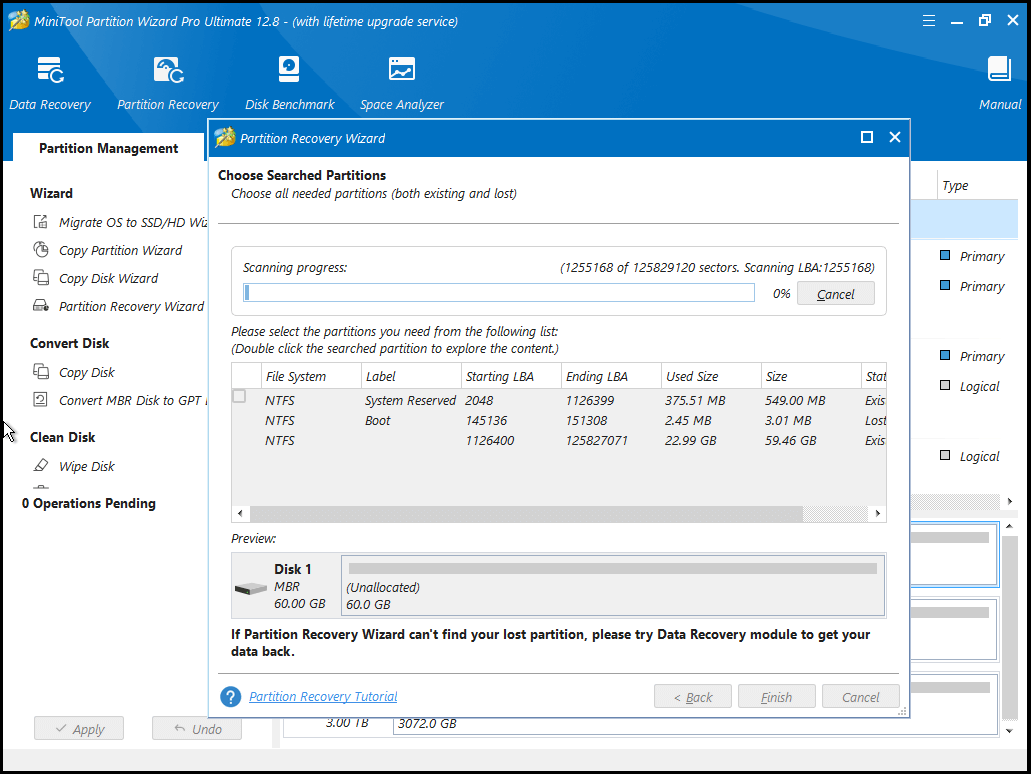
Step 7. Check all needed partitions, including existing partitions and deleted/lost partitions, and then click the Finish button.
Step 8. After that, use the Change Drive Letter feature to assign letters for the recovered partition(s).
Once done, restart your computer and check if the Acer computer can boot normally.
Final Verdict
The “No Bootable Device” error on Acer laptops is generally not as critical as it may seem. In most cases, this error results from incorrect BIOS settings or corrupted boot files rather than a complete disk failure.
Begin by trying simple solutions, such as verifying the boot order and checking BIOS settings. If the disk is still detected, repairing the Master Boot Record (MBR) is often sufficient to restore your system. Only consider replacing the drive or reinstalling Windows if all other solutions fail.
No Bootable Device Acer FAQ
If Windows doesn’t load, access the BIOS to verify if the SSD or HDD is detected and adjust the boot order if needed. You can also use Windows Recovery tools like Startup Repair.
If the drive isn’t detected or the issues continue, it may indicate hardware failure, requiring a Windows reinstall or repair.
Alternatively, go to Settings > System > Recovery in Windows and select "Reset this PC", then choose "Remove everything" for a full factory reset.
About The Author

Position: Columnist
Charlotte is a technology columnist with a strong focus on the Windows operating system, specializing in disk management, backup, and data recovery. She is passionate about analyzing computer errors, identifying root causes, and delivering practical solutions. In her free time, she stays updated on the latest developments in computer systems and hardware while continuously learning new technologies to broaden her expertise. Her writing style is clear and easy to understand, making complex technical topics accessible even to users with limited computer knowledge.
User Comments :