Windows Update Error 0x8007041D
This error code 0x8007041D can happen when you install a Windows update. It can stop you from further steps and may lead to some other severe issues. So, why does the 0x8007041D error happen?
Before we start the troubleshooting, we need to figure out the hidden reasons causing the 0x8007041D error.
- Incorrectly configured system settings.
- System file corruptions.
- Background app interference
- Virus or malware infiltration
Related articles:
- How to Fix Windows Update Error Encountered on Windows 11/10?
- How to Fix Windows 11/10 Updates Failed Error in Windows Update?
Troubleshooting Windows Update Error 0x8007041D
Method 1: Run the Windows Update Troubleshooter
Windows Update troubleshooter is useful to identify and repair the bugs that prevent the Windows update. You can follow the next steps to run the troubleshooter to fix 0x8007041D.
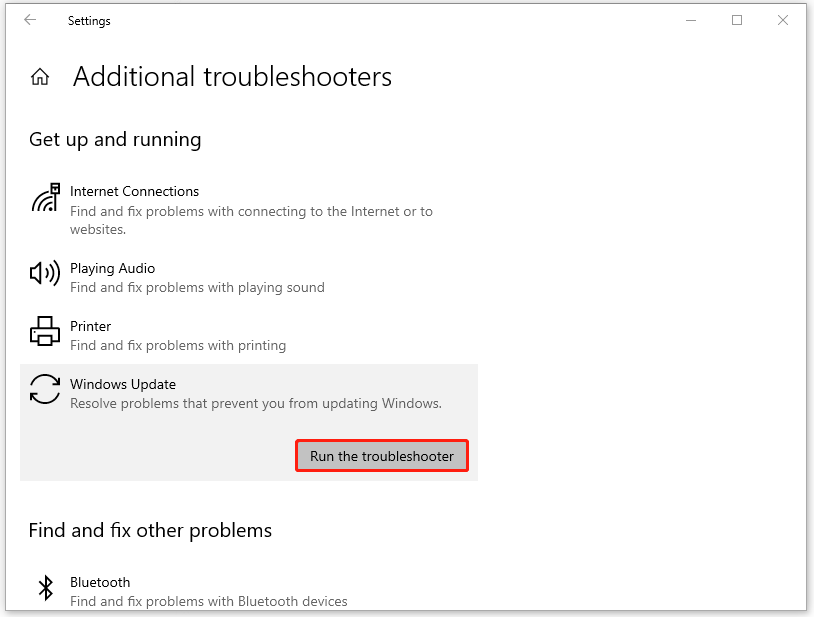
Step 1: Right-click on the Start icon to choose Settings and go to Update & Security > Troubleshoot.
Step 2: Click Additional troubleshooters from the right panel and click Windows Update under Get up and running to choose Run the troubleshooter.
![[Full Guide] How to Fix Windows Update Troubleshooter Not Working](https://images.minitool.com/minitool.com/images/uploads/2023/03/windows-update-troubleshooter-not-working-thumbnail.png)
Method 2: Run a SFC Scan
To fix system file corruptions, you can try a System File Checker (SFC) scan that can scan and check for possible corruptions and repair those damaged files. After the scan, you can also apply a DISM scan to perform a further check.
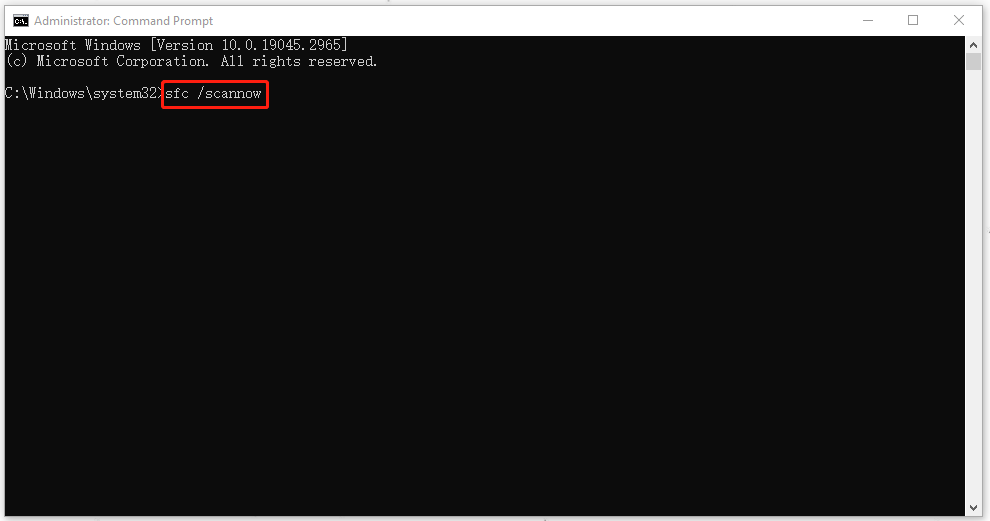
Step 1: Open Search by pressing the Win + S keys and input Command Prompt to run it as an administrator.
Step 2: When the window comes up, please type this command – sfc /scannow and press Enter to execute it.
When the verification finishes, you can close the window and restart the computer. If you find the error persists, you can go on with the DISM scans. Here is the way.
Still, run Command Prompt as an administrator and input the following command and press Enter to execute it.
DISM.exe /Online /Cleanup-Image /Restorehealth
Method 3: Delete the Software Distribution Folder
The software distribution folder, designed for Windows Update, is used to temporarily store files needed to install new updates. You can delete the folder and then try to install the updates again to check if the error 0x8007041D will occur.
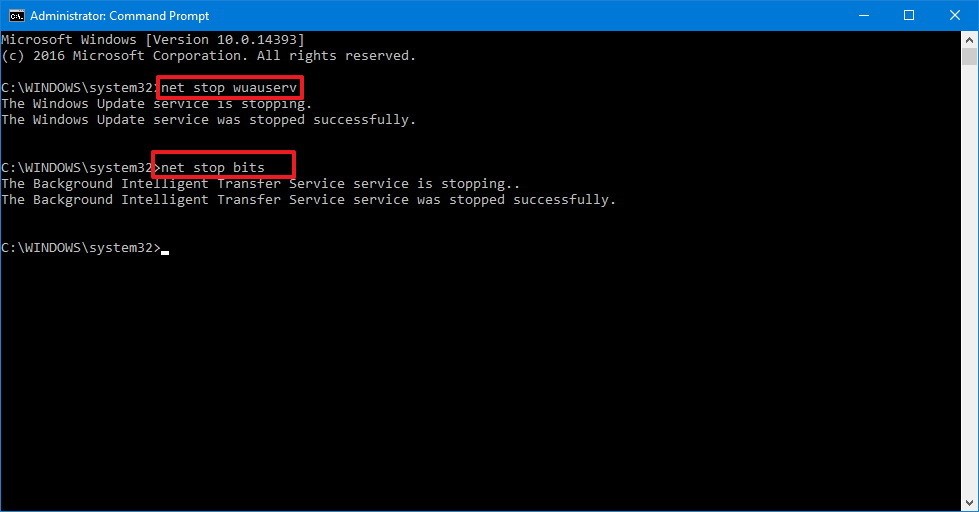
Step 1: Run command Prompt as an administrator and execute the following commands one by one.
net stop wuauserv
net stop bits
Step 2: Open File Explorer and go to the C:\Windows\SoftwareDistribution folder. Then delete all the files and folders in it.

Step 3: After emptying that, you can restart your computer and run Command Prompt as an administrator to execute the following commands.
net start wuauserv
net start bits
Now, you can perform a Windows update again.
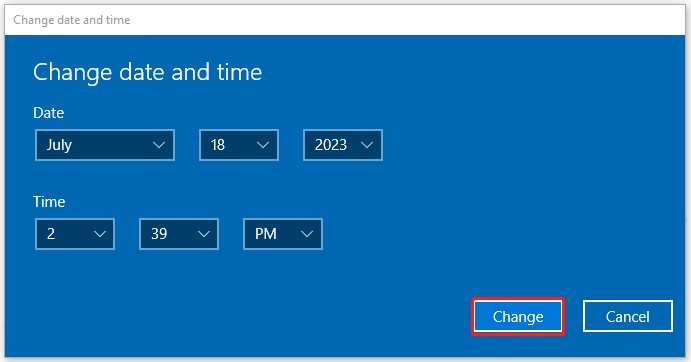
Method 4: Reset the Time and Date
You can try to fix 0x8007041D by resetting the time and date on your computer. Here are the specific steps.
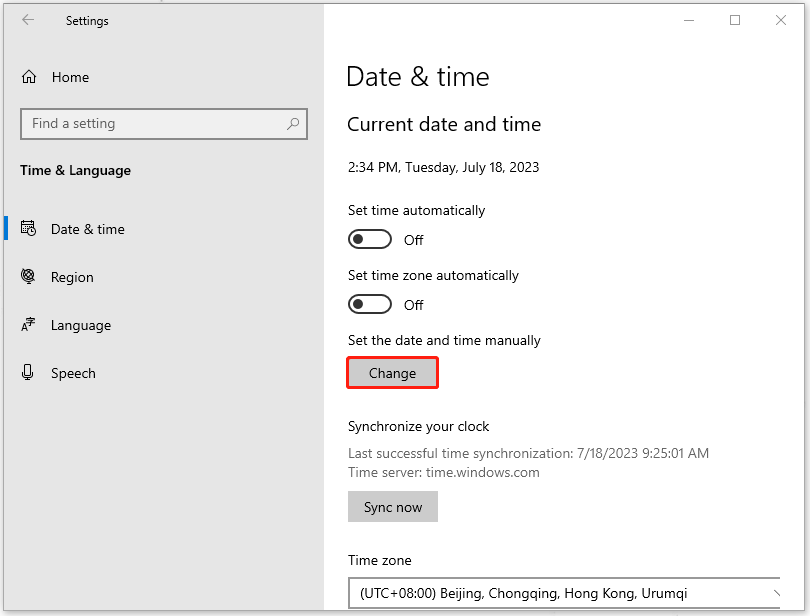
Step 1: Open Settings by pressing Win + I and click Time & Language.
Step 2: In the Date & Time tab, choose Change under Set the date and time manually.
Step 3: Then please input the correct date and time, and click Change to save and initiate the changes.
Apart from the above methods, there are some other troubleshooting methods that have been proven useful for some inflicted users:
- Disable background apps running in the background.
- Perform a virus scan for your system.
- Run your system into Safe Mode to check if the error happens.
Recommendation: Back Up Your Data Regularly
During the Windows update, all of your data will be transferred and a sudden malfunction may make that data loss. This occasion happens to many Windows users and they also complained about this condition in the Microsoft forum.
So, how to avoid this condition? After you have successfully removed the error, we would like to recommend MiniTool ShadowMaker for your regular backup.
It is a free backup software that you can back up your systems, files, folders, partitions, and disks. You can use it to perform scheduled backup and backup schemes.
This backup program can help you avoid losing your data when the error 0x8007041D occurs. To download and install the program, you can click this button and you are allowed to enjoy it for 30 days for free.
MiniTool ShadowMaker TrialClick to Download100%Clean & Safe
Step 1: Launch the program and click Keep Trial to get into the interface.
Step 2: In the Backup tab, choose your backup source and destination. In it, you have multiple choices and choose what you need.
Step 3: After everything has been settled, you can click Back Up Now or Back Up Later to perform the task. The delayed task will be displayed on the Manage tab.
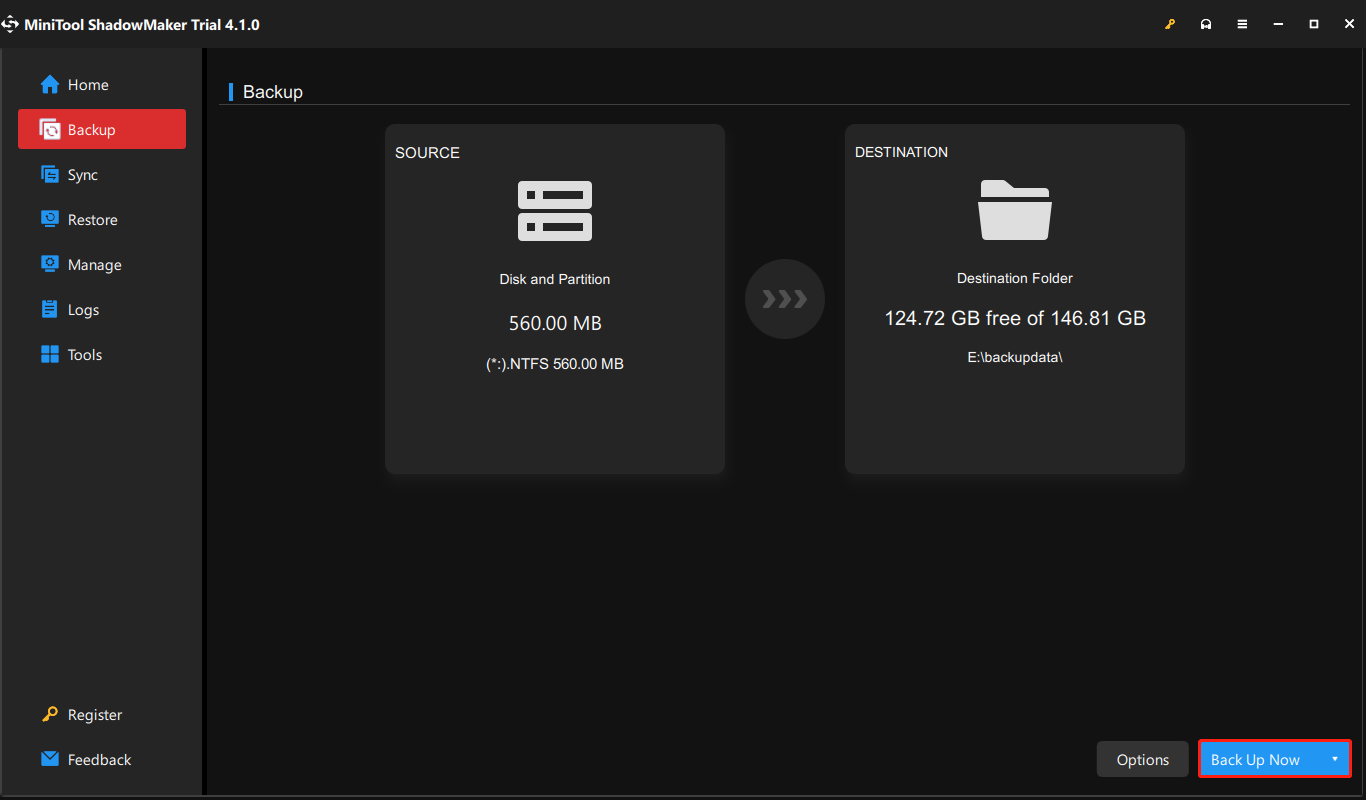
Then, if you want to configure some backup settings, you can click the Options feature. You can configure your image creation mode, file size, etc., and apply password protection.
Bottom Line:
How to fix the error code 0x8007041D? Now, this article has told you the answer. Besides, to better protect your data during the process, we highly recommend you should back up your data regularly.
If you have encountered any issues when using MiniTool software, you can leave a message in the following comment zone and we will reply as soon as possible. If you need any help when using MiniTool software, you may contact us via [email protected].
User Comments :