
If your Dell computer won’t boot, keeps crashing, or needs a factory reset, a Dell recovery disk can help you restore Windows quickly. This guide explains the differences and walks you through each method step by step.
Quick Answer
You can create a Dell recovery disk using Dell Backup & Recovery, Windows Recovery Drive, or backup software with bootable media. Dell’s built-in tools are best for factory restoration, while Windows Recovery Drive is suitable for troubleshooting and repairing Windows.
What Is a Dell Recovery Disk
A Dell recovery disk (or USB) is bootable media used to restore or repair your Dell computer when Windows won’t start.
Depending on how it is created, it may include the Dell factory image, Windows recovery tools, or both. Using a recovery disk saves time when fixing serious system issues or reinstalling Windows after a hard drive failure.
A Dell recovery disk can help you:
- Restore your Dell PC to factory settings.
- Repair Windows startup problems.
- Reinstall Windows after replacing the hard drive or SSD.
- Access Windows recovery and troubleshooting tools.
When Do You Need a Dell Recovery Disk
Creating a Dell recovery disk before problems occur is recommended. It allows you to recover your system even if Windows won’t start or the recovery partition is unavailable.
You may need one if:
- Windows won’t boot or keeps crashing.
- You replace the hard drive or SSD.
- The recovery partition is missing or damaged.
- You need to restore your Dell PC to factory settings.
- Your computer is infected with malware or affected by serious system errors.
How to Create a Dell Recovery Disk (3 Methods)
Method 1: Create a Dell Recovery Disk Using Dell Backup & Recovery
To create a Dell recovery disk Windows 10, Dell provides a built-in tool – Dell Backup & Recovery Software.
Now, we will show you how to use Dell Backup & Recovery to create a Dell recovery disk.
- Download Dell Backup & Recovery from its official website. If you already have one, go to the next step.
- Install it and launch it.
- In the main interface, choose Reinstall Disk/Rescue Disk.
- Now, you can select either a USB flash drive or discs. After selecting it, click Continue. Make sure that your USB drive has enough space or you have sufficient DVDs. Please note that you can’t use CDs or any rewritable media.
- Then connect the USB flash drive or insert the disc.
- Click Start to continue.
- If you use a USB flash drive, you will be notified that the data on the USB flash drive will be lost. So, please back up them Then click Yes to continue.
- Then wait for the process to be finished.
Once all steps are finished, you have successfully created the Dell recovery disk and you can use it to boot your computer when the PC failed to boot, reset your computer to factory settings or perform a system recovery, and more.
Method 2: Create a Dell Recovery Disk with Windows Recovery Drive
To create a Dell recovery USB, Microsoft also provides a built-in tool – Recovery Drive. It allows you to create the recovery drive so that you can use it to start your computer in case of a problem. This recovery drive contains Windows system recovery tools to restore the PC from a system image or recover Windows.
Now, we will show you how to create the Dell recovery disk Windows 10 via Recovery Drive.
1. Connect the USB drive or external disk to your computer. Please note that the USB drive should be larger than 8GB.
2. Type Recovery Drive in the search box of Windows and choose the best-matched one.
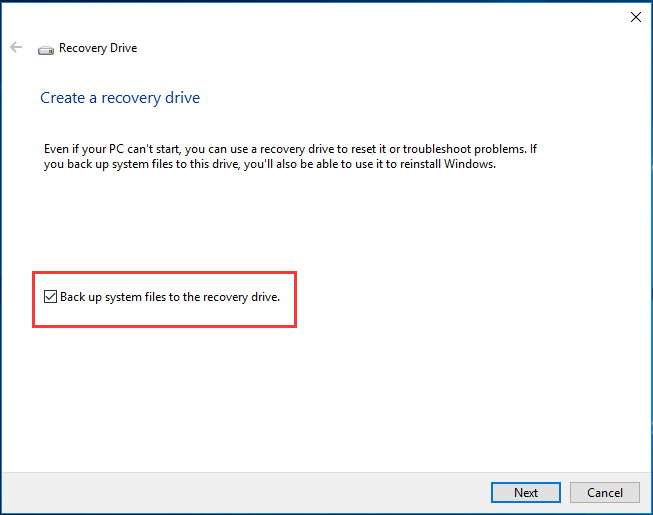
3. Then you will get a pop-up window that tells you that you can use the recovery drive to reset it or troubleshoot problems when the PC can’t start. If you back up system files to this drive, you can also use it to reinstall Windows. So, it is recommended to check the option Back up system files to the recovery drive. Then click Next to continue.
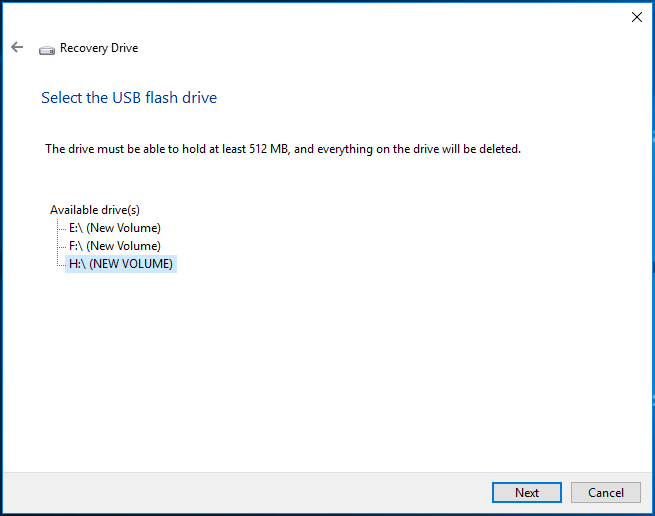
4. Then Windows 10 will detect your drives. Choose the one you inserted and click Next to continue. Please note everything on the drive will be deleted.
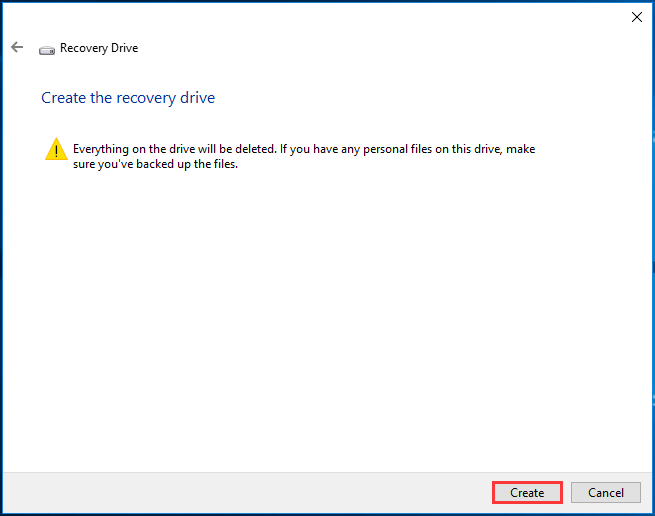
5. Then you will receive a warning message, read it carefully and click Create to continue.
6. Next, the Recovery Drive software will begin to create the recovery drive. You need to wait patiently until the process is finished. After that, you will see the message that the recovery drive is already and click Finish to close the window.
After all steps are finished, you have created the Dell recovery disk. This recovery drive created by Recovery Drive not only can be used on Dell PCs and laptops but also can be used on other brands’ computers.
When Windows 10 fails to boot, you can connect the drive to your computer, change the boot order and boot it from the Dell recovery disk. Then choose Recover from a drive or Advanced Options under the Troubleshoot window.
If you have backed up the system files to the recovery drive, you can use it to clean install the Windows system. Besides, the Advanced Options offers more options, such as system image recovery, system restore, command prompt, startup repair, and go back to the previous build. If your computer has some problems, you can choose one of the features to repair your PC.
Method 3: Create a Bootable Dell Recovery Disk with MiniTool ShadowMaker
Apart from the above two methods to create the Dell recovery disk, here is another way for you. You can choose to create the Dell Recovery Disk via MiniTool ShadowMaker. The Dell Backup & Recovery Software only allows you to run it on a Dell computer, while MiniTool ShadowMaker does not have this limitation.
MiniTool ShadowMaker, PC backup software, allows you to create a bootable USB drive or CD/DVD disc so that you can use it to boot your computer when it is unbootable. Besides, MiniTool ShadowMaker is designed to back up partitions, disks, files, folders and the operating system.
MiniTool ShadowMaker can help you to create the system image. When your computer encountered some errors, you can boot the computer from the bootable disk and restore the system with the previously created system image.
Now, we will show you how to use MiniTool ShadowMaker to create the Dell recovery disk Windows 10.
1. Connect the USB drive, USB external drive or the CD/DVD to your computer.
2. Download MiniTool ShadowMaker from the following button, install it and launch it.
MiniTool ShadowMaker TrialClick to Download100%Clean & Safe
3. Click Keep Trial.
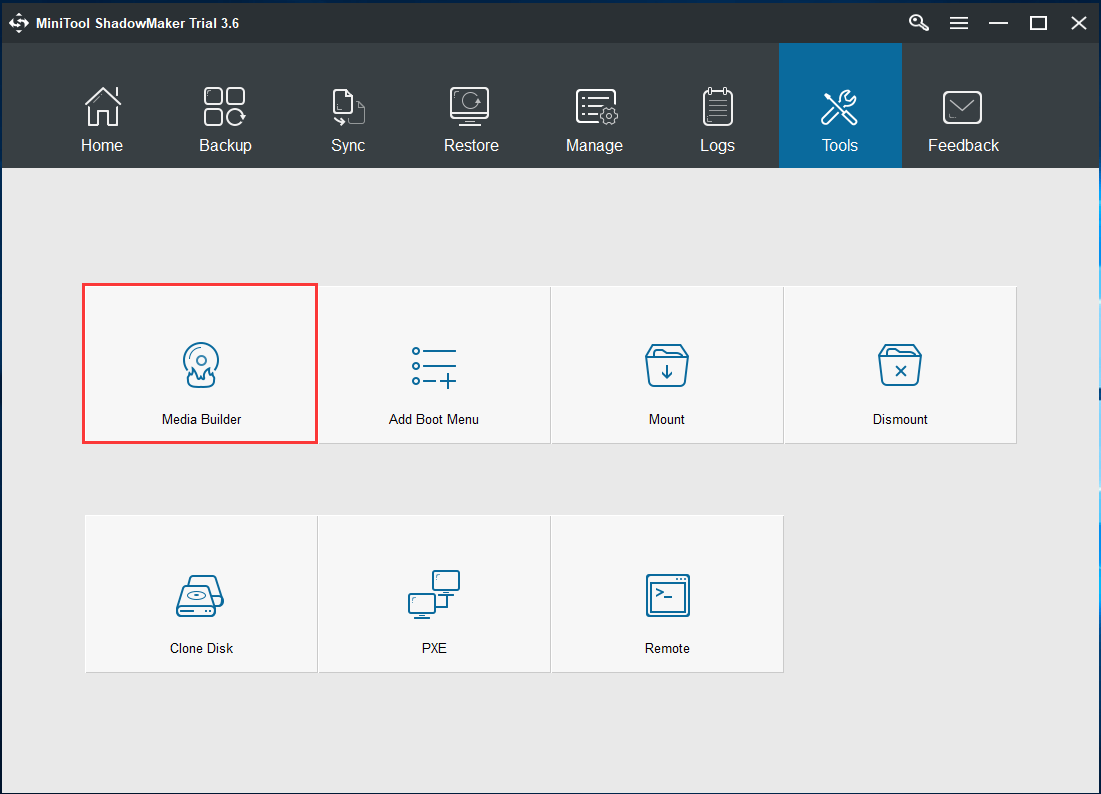
4. After entering the main interface, go to the Tools page.
5. Then click the Media Builder feature to continue.
6. Click the option WinPE-based media with MiniTool plug-in to continue.
7. MiniTool ShadowMaker allows you to make an ISO file, create a bootable USB flash drive, create a bootable external hard disk, and build a bootable CD/DVD. But the USB hard disk option appears when the USB hard disk is connected to your computer.
8. Then choose a medium you have connected to your computer. To create the Dell recovery disk, you can choose the USB hard disk.
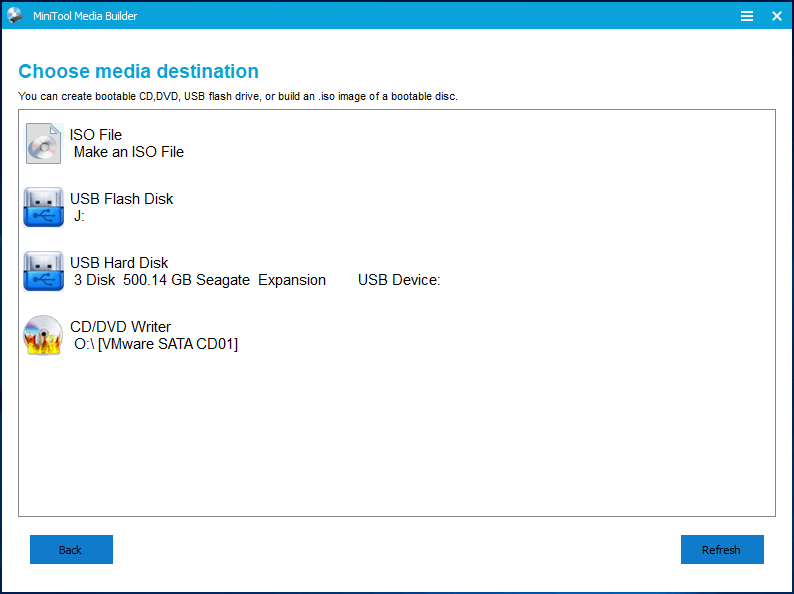
9. Then a warning message appears to tell you that your device will be formatted. To continue, click Yes. Actually, MiniTool ShadowMaker will format your USB external hard disk into two partitions. One is for Dell recovery disk and another one is for you to save data.
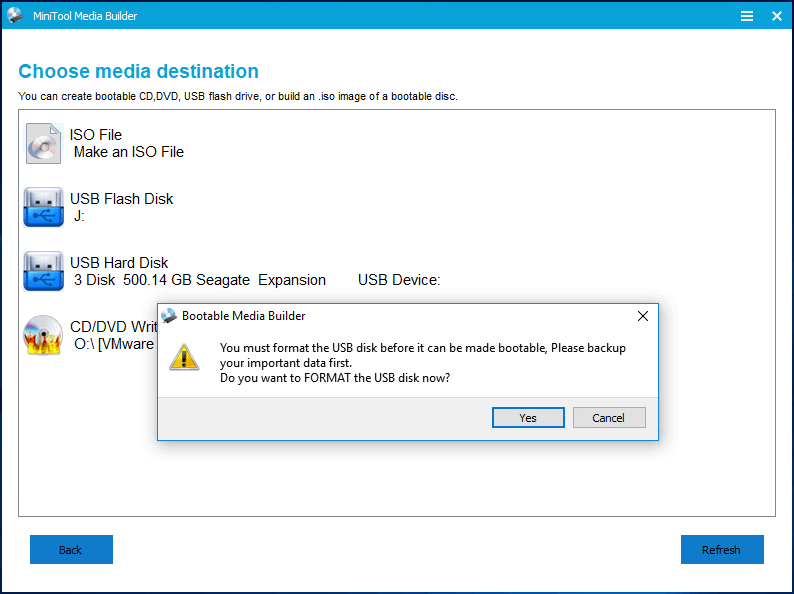
10. Then wait for the Media Builder to finish creating the Dell recovery disk. Click Finish to continue.
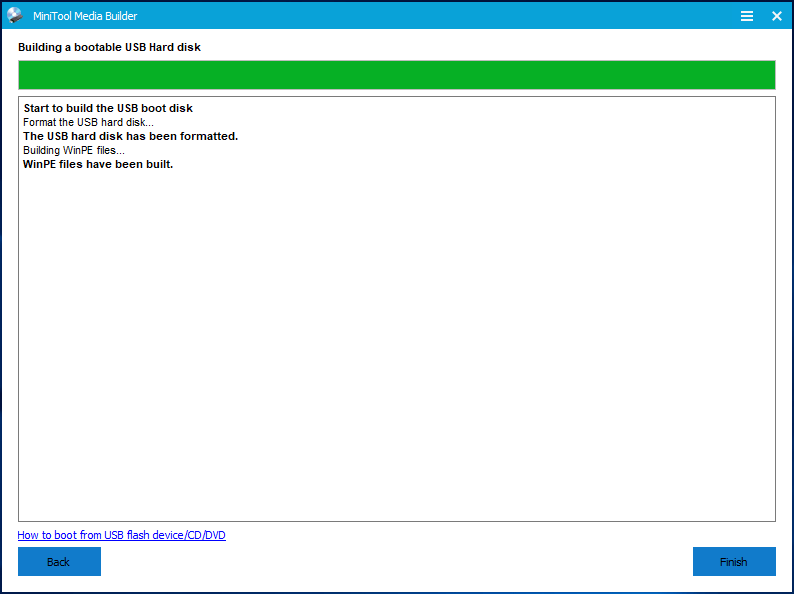
After creating the bootable disk, you need to back up the system so that you can restore the system when some accidents happen.
Back up system
1. Go back to the Backup page of MiniTool ShadowMaker.
2. You can see MiniTool ShadowMaker selects the system-related partitions as a backup source by default. So, you do not have to change it any longer.
3. Then click the Destination module to choose a target disk to save the backup image. Here, you need to choose the other partition of the USB hard disk as the target disk. Then click OK to continue.
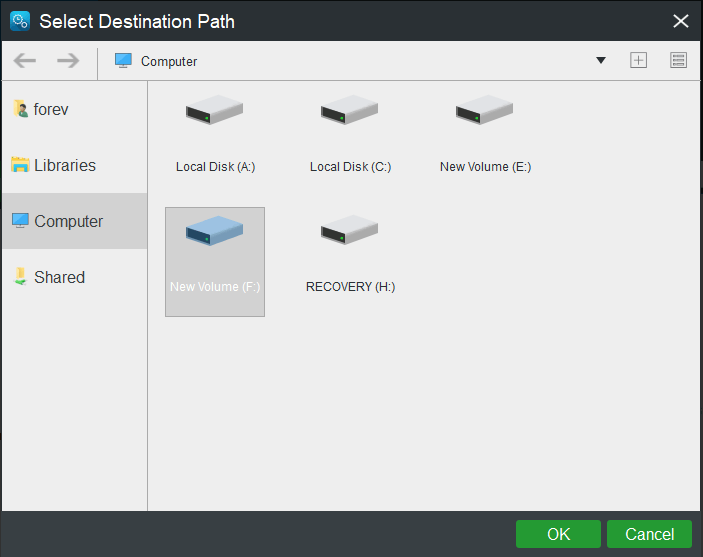
4. After selecting the backup source and destination, you can click Back up Now to continue and wait for the process to be finished.
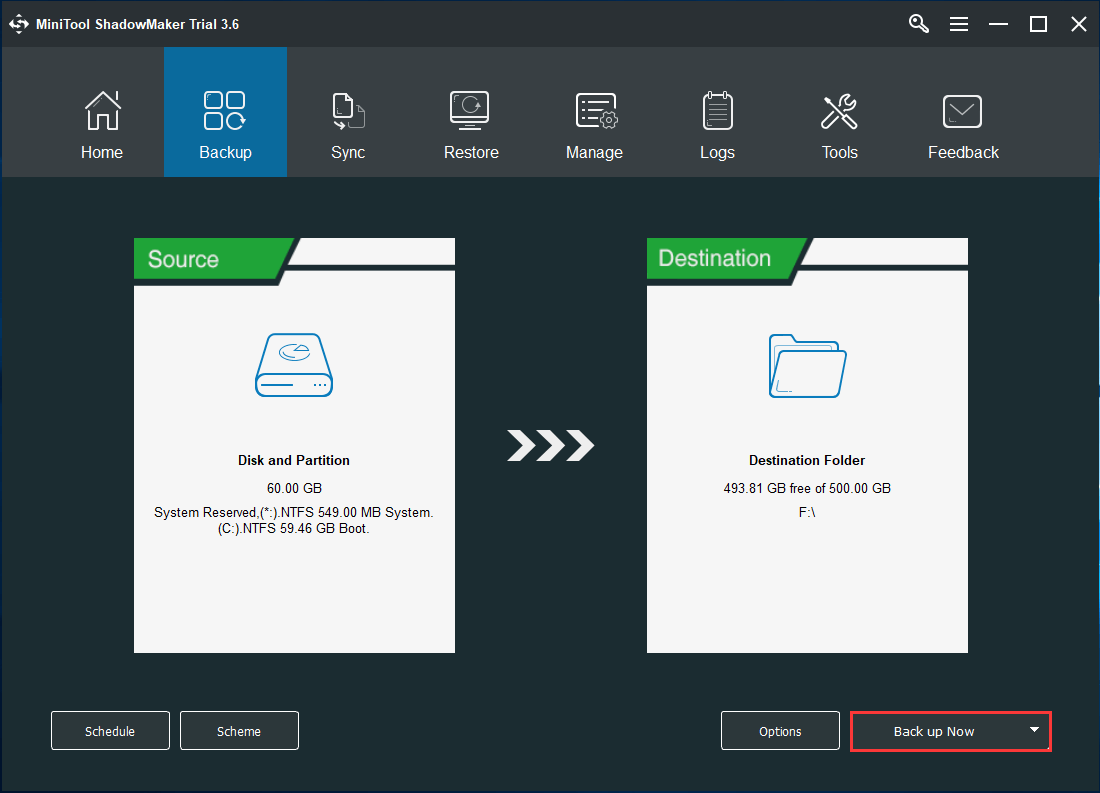
After all steps are finished, you have created the Dell recovery disk containing the system image. When your computer fails to boot due to some unexpected errors, you can connect the Dell recovery USB to your computer and boot from it and then perform a system recovery.
To know much information on how to perform a system recovery, you can read the post: Restore System Image from External Hard Drive in Windows 10/8/7.
The above content has introduced 3 ways to create a Dell recovery disk. Apart from those methods, there are other ways available. You can choose to create a Dell recovery disk via the Dell Datasafe Local Backup software, or Dell Recovery Restore software.
Dell Recovery Disk vs Windows Recovery Drive
| Feature | Dell Recovery Disk | Windows Recovery Drive |
| Factory image | Yes | No |
| Windows repair | Yes | Yes |
| Reinstall Windows | Yes | Yes |
| Dell drivers | Yes | No |
Which Method Should You Choose
| Need | Best Method |
| Factory restore | Dell Backup & Recovery |
| Windows repair | Windows Recovery Drive |
| Full system image | MiniTool ShadowMaker |
Bottom Line
Creating a Dell recovery disk beforehand saves time during issues. Using Dell’s recovery, Windows Recovery Drive, or backup software with bootable media helps restore Windows, fix startup problems, or reinstall the OS when needed.
Additionally, if you encounter issues or have any suggestions while using MiniTool ShadowMaker, please feel free to contact us via [email protected].
Dell Recovery Disk FAQ
About The Author

Position: Columnist
Charlotte is a technology columnist with a strong focus on the Windows operating system, specializing in disk management, backup, and data recovery. She is passionate about analyzing computer errors, identifying root causes, and delivering practical solutions. In her free time, she stays updated on the latest developments in computer systems and hardware while continuously learning new technologies to broaden her expertise. Her writing style is clear and easy to understand, making complex technical topics accessible even to users with limited computer knowledge.
User Comments :