How to remove hard drive from laptop? How to keep data safe so as to avoid data loss before removing hard drive from laptop? This post from MiniTool will show you the effective solutions.
There are a lot of reasons for you to remove a hard drive from a laptop. For example, when the computer is crashed, you can remove the hard drive from laptop and use it as an external hard drive. Or when you want to upgrade hard drive of the laptop, you can remove it from the laptop and replace it with a new and larger one.
Of course, there are also some other reasons that may require you to remove hard drive from laptop. So, in this post, we will show you how to remove hard drive from laptop with the detailed instructions.
But before going to remove hard drive from laptop, you need to back up data so as to avoid that something goes wrong. Or if you want to d remove hard drive from laptop due to hard drive upgrade, you can choose to clone all data including the operating system to the new hard drive. In this way, you do not need to reinstall the operating system and would not bring any damage to the original data.
Hence, before proceeding on how to remove a hard drive from a laptop, we will show you how to keep data safe firstly. In particular, if you want to upgrade hard drive without reinstalling OS and without losing data, this way is pretty essential for you.
How to Keep Data Safe Before Removing Hard Drive from Laptop?
In this part, we will show you how to keep data safe before removing hard drive from laptop. To keep data safe, you can choose to clone the whole disk to another hard drive. It is an easy and reliable way.
To clone a hard drive, it is recommended to use the clone tool – MiniTool ShadowMaker. MiniTool ShadowMaker is a piece of professional Windows backup software. It enables you to back up the operating system, disks, partitions, files and folders.
Besides the backup feature, MiniTool ShadowMaker is also a professional USB clone tool, and it can also help to clone OS to SSD without data loss.
Therefore, with so many powerful features, you can download it from the following button to keep your data safe before removing hard drive from laptop. Or you can choose to purchase an advanced edition.
MiniTool ShadowMaker TrialClick to Download100%Clean & Safe
Then we will show you how to clone hard drive so as to avoid data loss during the process of removing hard drive from laptop.
Now, here is the tutorial.
1. Connect the external storage device to your laptop. If you want to upgrade the hard drive of laptop, you can choose to connect the new hard drive to your computer.
2. Download MiniTool ShadowMaker and install it on your laptop.
3. Launch it.
4. Click Keep Trial to continue.
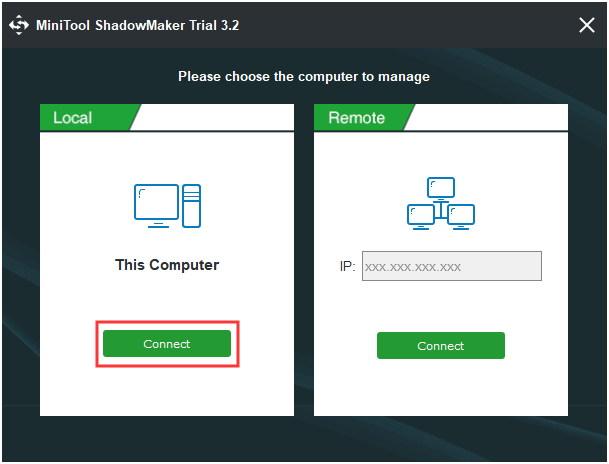
5. Click Connect in This Computer to enter its main interface.
6. After entering its main interface, go to the Tools page to continue.
7. Then click Clone Disk to continue.
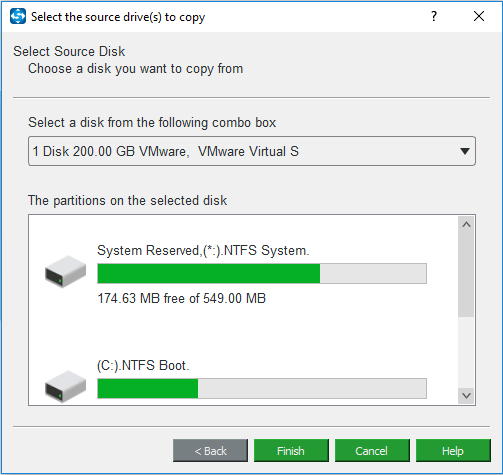
8. In the pop-up window, click Source module to select the disk clone source. Here you can choose the original hard drive of the laptop as the clone source. Then click Yes.
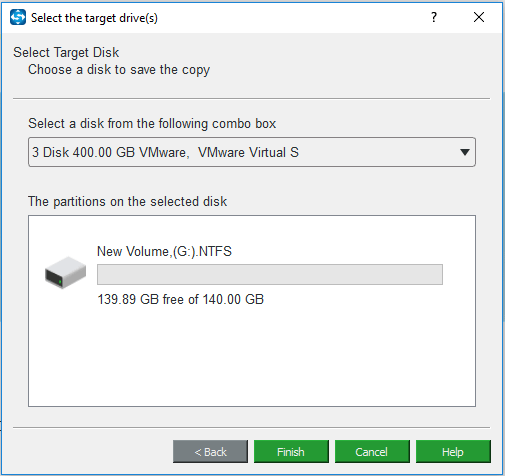
9. Click the Destination module to choose the target disk. Here you can choose the new hard drive as the target disk. Then click Finish.
10. Click OK to continue.
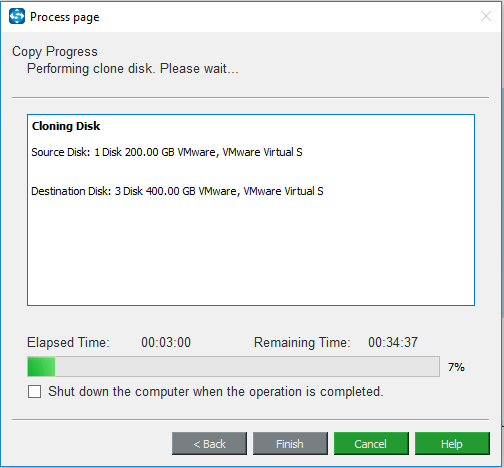
11. The disk cloning process will begin. The time it takes depends on the number of files on the hard drive. And please do not interrupt the disk clone process, otherwise, it will fail.
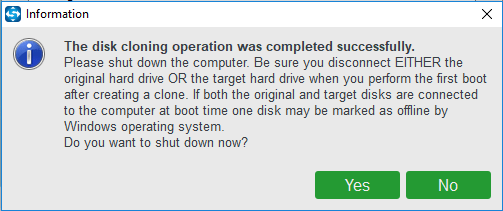
When the disk clone process is finished, you will receive a warning message which tells you that the original hard drive and the target disk has the same signature. If both are connected to your computer, either of them will be marked as offline. In addition, if you want to boot from the target disk, please change the BIOS order first.
When all processes are finished, you have cloned the original hard drive to the new disk. And you have kept your files on the hard disk safe.
MiniTool Partition Wizard FreeClick to Download100%Clean & Safe
MiniTool ShadowMaker TrialClick to Download100%Clean & Safe
After having cloned the hard drive, it is time to begin remove hard drive from laptop.
How to Remove Hard Drive from Laptop
- Prepare the screwdriver.
- Disconnect all cables.
- Remove battery of laptop.
- Remove screws on the main access panel.
- Remove hard drive mount.
- Pull out hard drive from connector.
- Take hard drive from brackets.
7 Steps: How to Remove Hard Drive from Laptop
In this section, we will show you how to remove hard drive from laptop. In general, the way you remove hard drive from a laptop may have a few difference from one laptop from another. If you want to know how to remove hard drive from hp laptop or how to remove hard drive from dell laptop, the following steps may help you.
Now, here is the tutorial on removing hard drive from laptop before disposal.
1. First of all, you need to prepare the required tools. In order to remove hard drive from laptop, you need to prepare the screwdriver, which can be used to remove the screws on the laptop.
2. After that, please disconnect all cables connected to your laptop, which include the power cable, any USB cables, network cables, phone lines or any other attached devices.
3. After disconnecting all devices connected to the laptop, you need to remove the battery of the laptop. The reason for you to remove the battery of the laptop is that even if your operating system is turned off while you are working on its inner components, it is possible that the power might come back on due to a short or mechanical jolt as long as it is still connected to the power source.
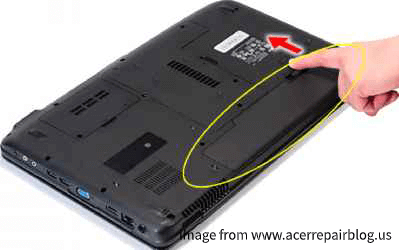
So, you need to remove the battery before removing hard drive from laptop. In most cases, the laptop battery has two release latches that you press to remove the battery. Thus, you need to press the release latches and remove the battery from the bay. As the following picture:
After removing the battery, depress the power button for a couple of seconds since it can reassure that there is no more electricity in the laptop.
4. After completing the above steps, you can go on the next step to remove hard drive from laptop and use it as external hard drive.
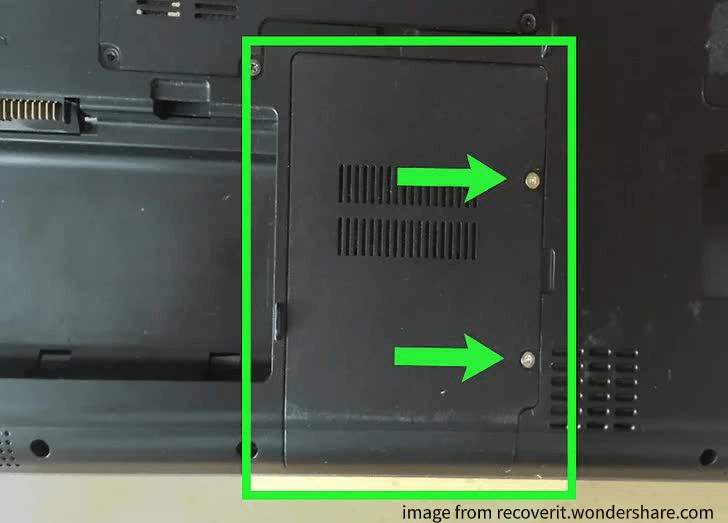
Next, you should remove all screws on the main access panel. The access panel may be located on the bottom of the laptop or on the one of the sides. It may vary depending on different laptop brands. As showing in the following picture:
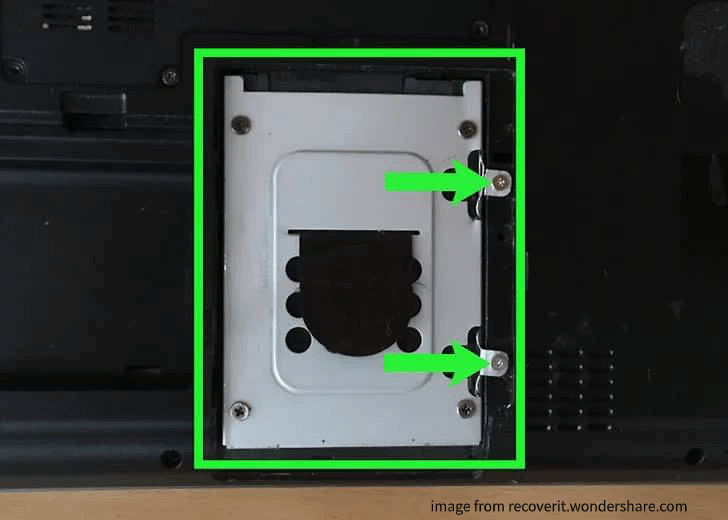
5. After removing the access panel, you can see the hard drive mount. Therefore, in this step, you need to remove the hard drive mount which is be used to further help to keep hard drive in place. Hence, you also need to unscrew the hard drive mount.
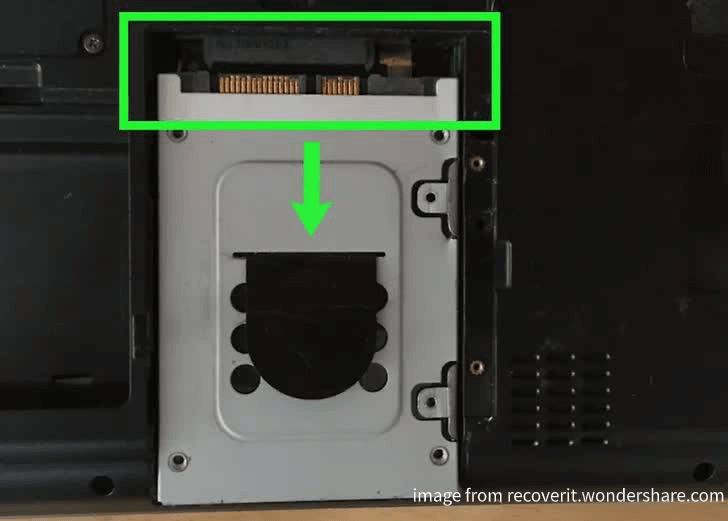
6. After completed the above steps, please go on. In this step, you should pull out the hard drive from the connectors. During the process of pulling hard drive from the connectors, please be careful and do not damage the connectors. Otherwise, you cannot insert an internal hard drive into the laptop any longer.
7. After you have disconnected the hard drive from the connectors. You can begin to take the hard drive from the bracket. In general, the brackets are held by screws on the sides of the hard drive. So, you need to unscrew the bracket and take the hard drive out.
When all steps are finished, you have successfully removed hard drive from the laptop. If you want to upgrade the hard drive of the laptop, you can put the new hard drive into the laptop.
In addition, removing hard drive from laptop before disposal is a risky thing. So, during the operating process, you need to take care and do not bring any damage to the laptop or the hardware.
Apart from that, it is also recommended to back up files on the hard drive before removing it from the laptop. In this way, you will avoid data loss. And if you want to upgrade the hard drive of the laptop, you can choose to clone the original operating system and files to the new hard drive.
To do that, there is no need for you to reinstall the operating system and it would not bring any damage to the original data.
If you want to know how to remove hard drive from hp laptop or how to remove hard drive from dell laptop or other different brands’ laptop such as Toshiba, Acer, ASUS etc., you can read this post to learn more detailed operation instructions.
Related article: How to Upgrade Laptop from HDD to SSD Without Reinstalling OS
Bottom Line
To sum up, this post has introduced how to remove hard drive from laptop. In general, to remove hard drive, there are 7 steps to follow. If you want to remove a hard drive from a laptop, you can find solutions in this post.
If you have any other different idea on how to remove hard drive from laptop, you can share it on the comment zone.
Before removing hard drive, it is suggested to clone the hard drive to another one so as to keep data safe in case some mistaken actions lead to data loss.
So, if you have any problem on MiniTool ShadowMaker, please feel free to contact us via the email [email protected] and we will reply to you as soon as possible.
How to Remove Hard Drive from Laptop FAQ?
To destroy a hard drive, you need to delete everything on the hard drive firstly. Then full format or wipe the hard drive. Besides that, you can do following things to physically destroy a hard drive.
- Hammer the hard drive.
- Burn your disk.
- Make disk magnetized.
- Dissolve the hard drive by using electrolysis.
You can read the post: The Best Way to Destroy Hard Drive Data Permanently in Windows 10 to learn more detailed solutions.
User Comments :