This article composed by MiniTool Technology introduces you with a Microsoft 365 service called data loss prevention. It elaborates its definition, function, configuration, and deployment. And more related information to be found when you start reading.
About Office 365 Data Loss Prevention
What Is Data Loss Prevention?
Data Loss Prevention (DLP) is a practice that protects sensitive data like financial data (credit card numbers), social security numbers, and proprietary data controlled by organizations and reduces data loss risk. For example, a way is needed to prevent users in organizations from inappropriately sharing sensitive data with others who are not expected to have it.
By defining and applying data loss prevention policies, you can apply DLP in Microsoft Office 365. With a DLP policy, you are able to identify, monitor, and protect sensitive data automatically across many applications and services as below.
- Microsoft 365 services including Exchange, Teams, SharePoint, and OneDrive.
- Office apps like Word, Excel, and PowerPoint.
- Windows 10/11 endpoints.
- Non-Microsoft cloud apps.
- On-premises SharePoint and on-premises file shares.
Office 365 DLP is just one of the Microsoft 365 Compliance tools that available to protect your sensitive data wherever you live or travel.
How Does Data Loss Prevention Office 365 Work?
MS 365 detects sensitive items relying on both simple text scan and deep content analysis. Content is analyzed for primary data matches to keywords, by regular expression evaluation, by internal function validation, and by secondary data matches that are in proximity to the primary data match. Besides, Microsoft data loss prevention also takes advantage of machine learning algorithms and other ways to detect content that matches your DLP policies.
Microsoft 365 DLP policies are how you monitor the activities that users take on sensitive items at rest, in transit, or in use and take protective actions. If a user violates the rules and try to share a sensitive item with someone unauthorized, DLP will:
- Show a pop-up policy tip to the user warning him that he may be trying to share a sensitive item inappropriately.
- Block the sharing, allow the user to override the block via a policy tip, and capture the user’s justification.
- Block the sharing without the override option.
- Lock and move the sensitive item to a secure quarantine location. (For data at rest)
- Display the sensitive info. (For Teams chat)
All data loss prevention monitored activities will be recorded to the Microsoft 365 Audit log by default and routed to Activity explorer. When a user carries out an action that meets the criteria of a DLP policy, if you have alerts configured, DLP provides alerts in the DLP alert management dashboard.
How to Configure Your DLP Policy?
There is flexibility in how to create and configure DLP policies. You can begin with a predefined template and create a policy in just a few clicks. Or, you can design your own style policy from the ground up. Yet, no matter which way you create your policy, you have to specify the below aspects.
1. Monitor Target
In the first place, you need to decide what you want to monitor.
For predefined data loss prevention policy templates, Office 365 contains many including privacy data for various countries and regions, financial data, as well as medical and health data.
As for custom policy, it uses the available sensitive info types, retention labels, and sensitivity labels.
2. Monitor Location
Then, you should select where to monitor with Office 365 data loss prevention policy. Just pick one or multiple locations from the below list.
- Microsoft Teams chat and channel messages
- Windows 10/11 devices
- On-premises repositories
- Exchange Online emails
- SharePoint Online sites
- OneDrive accounts
- Microsoft Cloud App Security
3. Policy Application Condition
Thirdly, choose the conditions that must be matched for a policy to be implemented to an item. You can accept the pre-configured conditions or configure your ones. Some of the pre-configured conditions are listed below.
- Item has a specified sensitivity label.
- An item with sensitive info is shared internally or externally.
- An item containing a specified type of sensitive info is being used in an unallowed situation.
4. Action to Take When the Policy Conditions are Met
Please note that the actions can be taken when the specified conditions are met but depending on the location where the activity is happening.
In Teams Chat and Channel, you can block sensitive information from being shared in the chat or channel.
In Exchange, SharePoint, or OneDrive, you are allowed to block people outside your organization from accessing the content while showing the users a tip and send them a mail notice telling them that they are performing an action prohibited by the DLP policy.
In the Office apps, you are enabled to show a popup informing the user that they are engaging in risky behavior. Meanwhile, block them while allowing with override or without.
In Windows 10/11 devices, you are able to audit or restrict copying a sensitive item to a removable USB device.
While in on-premises file shares, you can move the file from its origination to a quarantine place.
Once you have created an Office 365 data loss prevention policy in the Compliance Center, it will be saved in a central policy store and then synced to various content sources including:
- From Exchange Online to Outlook and Outlook on the web.
- Office desktop apps: Word, Excel, and PowerPoint.
- Microsoft Teams chat and channel.
- SharePoint Online sites.
- OneDrive for Business sites.
Eventually, when the policy is synced to the right locations, it will begin to evaluate the contents and enforce actions.
Lifecycle of Data Loss Prevention
In general, there are three phases during the implementation of DLP.
1. Plan for Data Loss Prevention
MS 365 DLP monitoring and protection are native to the apps that users use every day. So, even if your users are unaccustomed to data loss prevention thinking and practices, it can still protect your organizations’ sensitive data from risky activities.
If your organization and users are new to DLP practices, it may need a change to your business processes to adopt DLP. There will be a culture shift for your users. However, by proper planning, testing, and tuning, your DLP policies will protect your sensitive data while minimizing any potential business process disruptions.
Data Loss Prevention Technology Planning
Again, as a technology, DLP can monitor and protect sensitive data at rest, in use, and in motion across Microsoft 365 services, Windows 10/11 devices, on-premises SharePoint, and on-Promises file shares. There are planning implications for the different locations, target data type, and the actions to be taken when a policy match occurs.
DLP Business Processes Planning
Data loss prevention blocks prohibited actions such as sharing sensitive data via email inappropriately. When you plan your DLP policies, you have to identify the business processes that touch your sensitive items.
Then, how to identify between appropriate and inappropriate user behaviors? Don’t worry. The business process owners will help you. You need to plan your policies and deploy them in test mode. When in test mode, evaluate the impacts of the DLP policies through activity explorer. Finally, apply those policies to more restrictive modes.
DLP Organizational Culture Planning
A successful DLP implementation depends on getting your users trained and acclimated to Office 365 data loss prevention practices the same as on well-planned and tuned policies. You are recommended to rely on policy tips to raise awareness with your users before changing the policy enforcement from test mode to more restrictive modes.
2. Prepare for Data Loss Prevention
You can implement DLP policies to data at rest, in use, and in motion in locations mentioned above. For sensitive data in the above locations, each has different pre-requisites. In some locations such as Exchange Online, sensitive items can be protected by DLP by just configuring an applied policy. In other locations like on-premises file repositories, an Azure Information Protection (AIP) scanner is required. You need to prepare your environment and code draft policies and test them completely before activating any blocking operations.
3. Deploy DLP Policies in Production
Generally, there are four steps to deploy your data loss prevention policies in production.
Step 1. Design Your DLP Policies
First of all, define your control objectives and how they implement across each respective workload. Then, draft a policy that embodies your objectives. You can start with one workload at a time or with all workloads at the same time. It all depends on you and there is no impact so far.
Step 2. Apply Your DLP Policies in Test Mode
In this phase, you should evaluate the influence of the controls by applying them with a DLP policy in test mode. You can start with one workload. Also, you can implement the policy to all workloads but still in test mode to get complete results.
Step 3. Monitor the Outcomes and Tune the Policy
While in test mode, you need to monitor the outcomes of the applied DLP policy and fine-tune it to make it meets your control objectives. At the same time, ensure that you don’t impact valid user workflows and productivity inadvertently or adversely.
Some things you may need to fine-tune:
- The actions.
- The level of restrictions.
- Add new controls
- Add new people.
- Add new restricted apps.
- Add new restricted sites.
- Sensitive information definition(s).
- Locations/places and people that are in or out of scope.
- Conditions and exceptions are used to determine if an item matches the policy and what is being done with it.
Step 4. Deploy the Control and Tune Your Policies
When the policy meets all your objectives after fine-tune, it’s time to enable it (not in test mode but the real environment). Usually, policies take effect around an hour after being turned on. With the policy enabled, continue to monitor the outcomes of the policy implementation and tune it accordingly.
Office 365 Data Loss Prevention Companion – MiniTool ShadowMaker
Besides protect sensitive data by preventing it from being shared or accessed, you should also pay attention to crucial data damage or loss due to wrong operations, software errors, hardware damage, as well as malware or virus attacks.
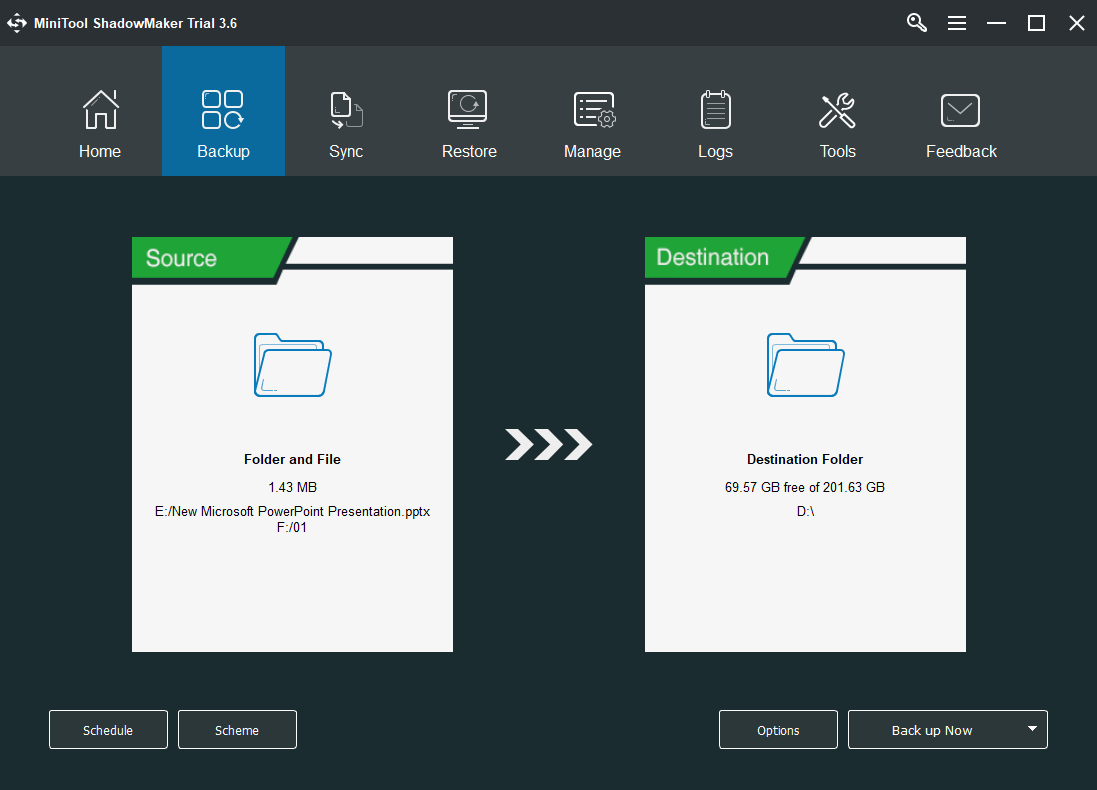
To protect important files from loss or damage, the most effective way is to make a backup of them. Therefore, you need a professional and reliable program such as MiniTool ShadowMaker. Unlike DLP policies, you don’t need to configure targets, locations, actions one by one, just select what you want to back up from your computer, choose a destination, and click Back up Now to finish.
MiniTool ShadowMaker TrialClick to Download100%Clean & Safe

Summary
Data loss prevention reports a large amount of info into Microsoft 365 from monitoring, policy matches and actions, and user activities. You need to consume and act on that information to tune the policies and triage actions taken on sensitive items.
That’s all about Office 365 data loss prevention we want to share with you. If you have any questions no matter about the topic or the companion tool we mention in the last, feel free to leave a comment below or consult at [email protected].
![[Review] Exchange Online Protection Office 365 Meaning & Features](https://images.minitool.com/minitool.com/images/uploads/2021/05/exchange-online-protection-thumbnail.png)
![[2 Ways] Fix Can’t Save Changes to Old Office Files Windows 11](https://images.minitool.com/minitool.com/images/uploads/2022/04/cant-save-changes-to-old-office-file-thumbnail.png)
![[Solved] 18 Fixes for Microsoft Office Won't Open Issues](https://images.minitool.com/minitool.com/images/uploads/2020/12/microsoft-office-wont-open-thumbnail.png)

User Comments :