Windows 11 Quick Settings Not Opening/Showing/Working
In the new operating system Windows 11, Microsoft deletes Action Center from the Taskbar but adds a new feature to Taskbar and it is Quick Settings. It allows you to easily change some common settings like Battery saver, Focus assist, Night light, etc. without going to the Settings menu. To access Quick Settings, you can click one icon like network or volume in the Taskbar.
However, sometimes Quick Settings is not working in Windows 11. When you try to open it, nothing happens. This is annoying. What should you do if you run into the issue of Quick Settings not showing/opening? It is easy to solve this issue and you can follow the solutions below for troubleshooting.
Fixes for Quick Settings Not Working/Opening/Showing Windows 11
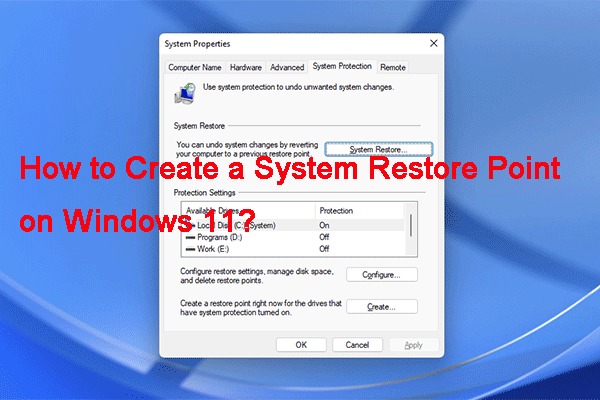
Run System Restore
If you have a restore point beforehand, you can quickly undo the changes and restore your PC to an earlier state to fix the Quick Settings not working issue in Windows 11.
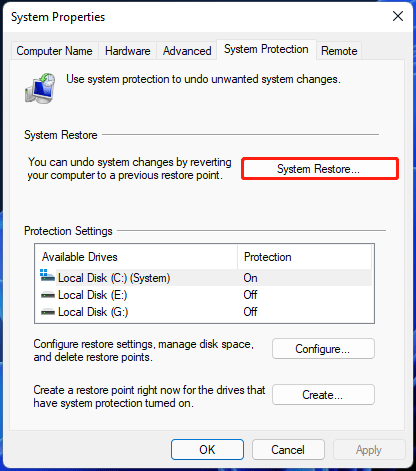
Step 1: Type create a restore point to the search bar and click the result to get the System Properties window.
Step 2: Click the System Restore button to restore the PC to its previous state.
Step 3: Choose a restore point you have created in advance based on the creation date (You can choose Show more restore points to list all the restore points.) and click Next.
Step 4: Confirm the restore point and click Finish.
Run SFC or DISM
If there are corrupt or damaged system files, Quick Settings won’t work/open in Windows 11. To fix this issue, you can perform a system scan and repair the corruption in the system files. To do this work, you should use System File Checker, a professional built-in Windows tool for damaged system file scan and repair.
Here is how to run SFC:
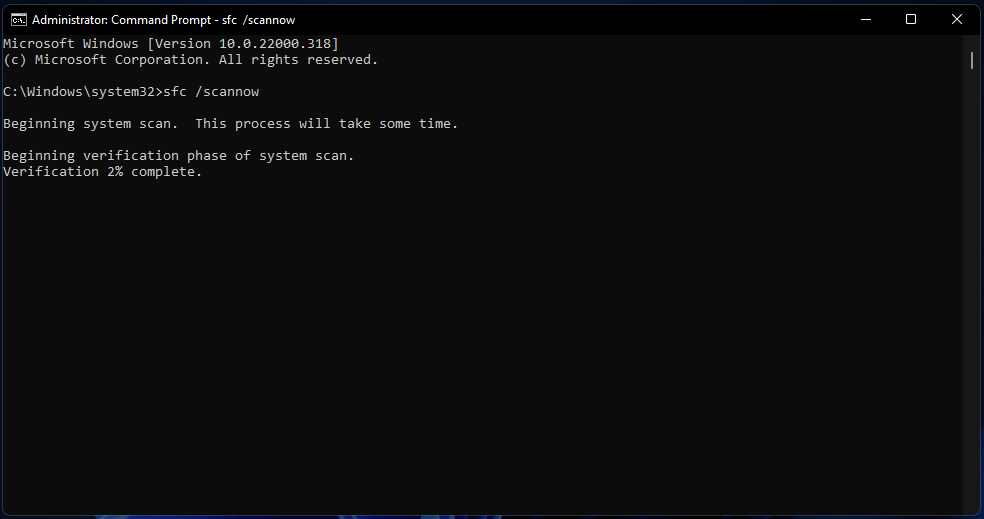
Step 1: Launch Command Prompt (CMD) with admin rights in Windows 11.
Related article: How to Open Command Prompt (CMD) in Windows 11? (7 Ways)
Step 2: In the CMD window, type in sfc /scannow and press Enter to start scanning your system and fixing the corruption in the system files. Wait patiently until the process finishes.
Step 3: Restart your computer and see if the issue of Quick Settings not showing/opening/working is fixed. If not, skip to the next step.
Step 4: Launch CMD again, type in DISM.exe /Online /Cleanup-image /Scanhealth, and press Enter.
Step 5: Type in DISM /Online /Cleanup-Image /RestoreHealth and press Enter.
Step 6: Restart the PC and check if you have fixed the issue. If not, try another method below.
Reinstall and Re-Register UWP Apps
According to users, this way is a good choice to fix Windows 11 Quick Settings not working/showing/opening if the issue is caused by a corrupted file or not properly registered app. Follow these instructions below:
Step 1: Click the Start button, type in powershell, right-click Windows PowerShell and choose Run as administrator.
Step 2: Copy & paste Get-AppXPackage | Foreach {Add-AppxPackage -DisableDevelopmentMode -Register”$($_.InstallLocation)\AppXManifest.xml”} to the PowerShell window and click Enter.
Keep Windows 11 Updated
Microsoft releases Windows updates including security updates, bug patches, and feature updates to the public. Windows 11 is not an exception. As a new operating system, Microsoft actively releases updates for known problems. If you are running into Quick Settings menu not working, you can try to update Windows 11 to the latest version by following the instructions below.
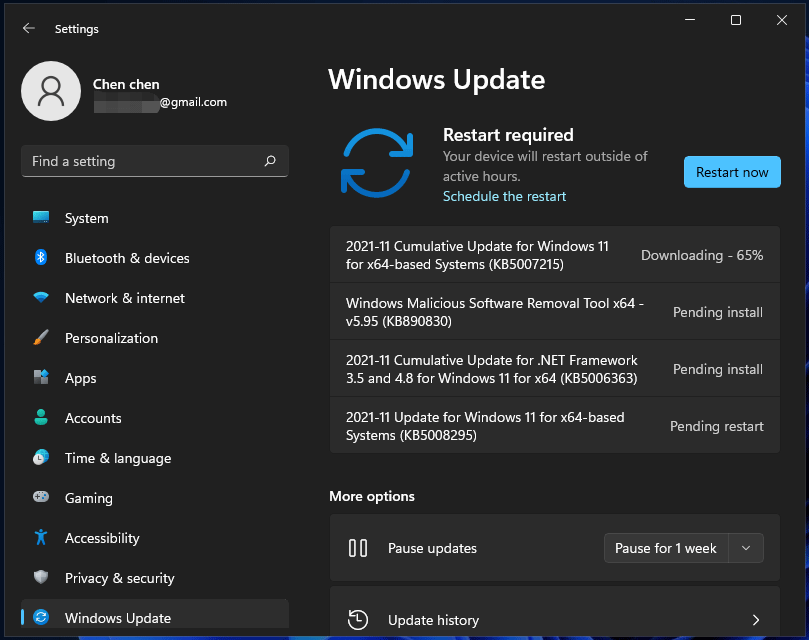
Step 1: Launch Windows 11 Settings by clicking Start and then Settings or pressing the Win + I keys on your keyboard.
Step 2: Go to click Windows Update in the left pane and check for updates. If Windows detects some available updates, the system will automatically download and install them. You are required to restart the system to finish the update installation.
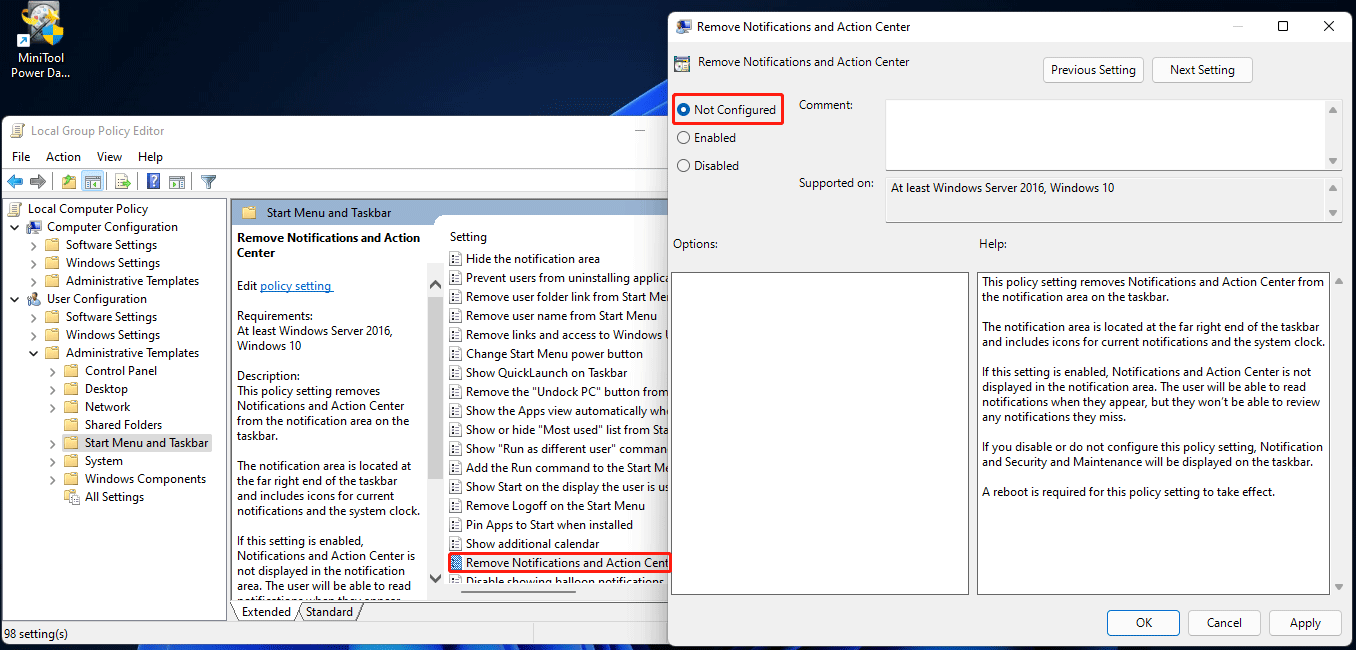
Change the Action Center to “Not Configured”
According to users from forums like Reddit, changing the action center to “not configured” works well to fix Windows 11 Quick Settings not working/opening/showing. You can also have a try by following the steps below.
Step 1: Open the Run dialog box by pressing Win + R, type in gpedit.msc to the text area and click OK to open Local Group Policy Editor. (Related article: 7 Ways: How to Open Windows 11 Group Policy Editor Step-by-Step?)
Step 2: Navigate to User Configuration > Administrative Template.
Step 3: Click Start Menu and Taskbar, scroll down to find Remove Notifications and Action Center, and double-click on it.
Step 4: In the pop-up window, choose Not Configured and save the change by clicking Apply and then OK.
Create a New User Account
To use Quick Settings in Windows 11 without any issue, you can try to create a new user account – a local account. This is a solution that has been proved to be helpful by some users to fix Quick Settings not working.
See how to do this work:
Step 1: Launch the Settings app in Windows 11.
Step 2: Go to the Accounts section from the left sidebar, click Family & other users.
Step 3: Click on Add account near Other users.
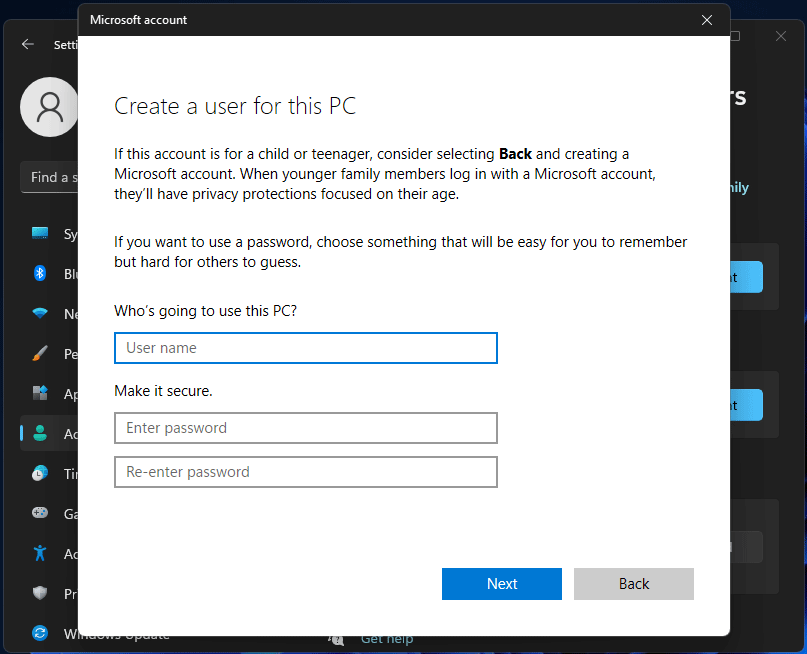
Step 4: Click I don’t have this person’s sign-in information and then choose Add a user without a Microsoft Account. Then, you can create a local account.
Step 5: Enter the user name, password, etc.
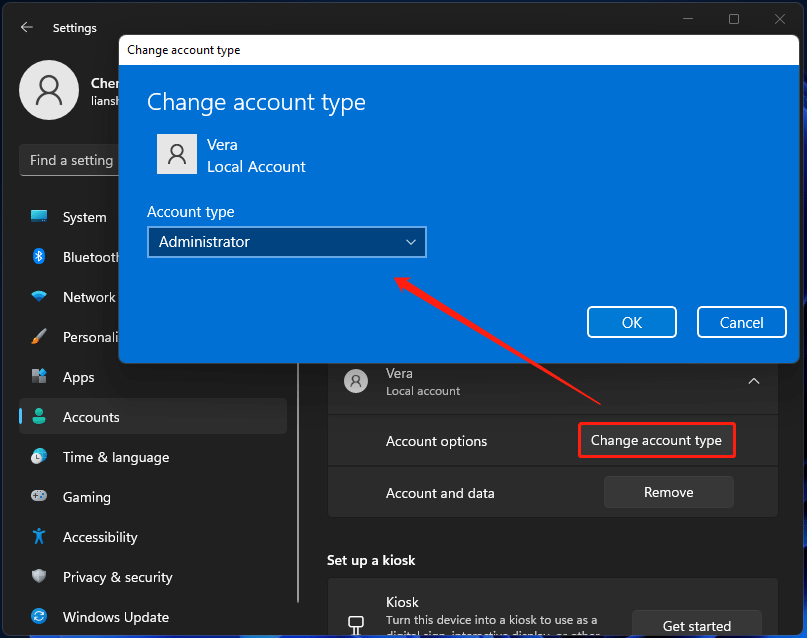
Step 6: Click the account, click Change account type and choose Administrator from the drop-down menu.
Step 7: Click OK to save the modification.
Perform a Clean Boot in Windows 11
In all probability, you can fix Quick Settings not opening in Windows 11 by running a clean boot. During a clean boot, the computer only runs a pre-selected, minimal set of drivers and startup programs that are required by the operating system.
Here is how to perform a clean boot in Windows 11:
Step 1: Get the Run window after pressing Win + R.
Step 2: Type MSConfig to the text section and press Enter.
Step 3: In the System Configuration window, uncheck the box of Load Startup Items, and check Load System Services.
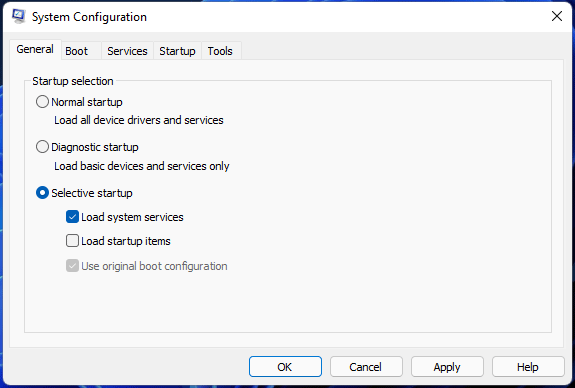
Step 4: Go to the Services tab, tick the checkbox of Hide All Microsoft Services and click Disable all.
Step 5: Click Apply and OK to save the changes. Then, restart Windows 11 to check if Quick Settings can work.
Reset Windows 11
If all of these solutions mentioned above cannot work to fix Windows 11 Quick Settings, you can choose to reset the PC to fix this issue.
Back up Files before PC Resetting
Resetting means erasing your important files. To make sure the security of your data, it is recommended to back up your critical files, documents, and other data before resetting the PC. Here, we recommend using MiniTool ShadowMaker, a professional and free backup software for Windows 11/10/8/7.
This backup program supports backing up and restoring Windows operating systems, files, folders, and disks. Besides, you can use this software to sync files & folders for backup and clone a disk for disk backup or upgrade.
To back up files, follow the steps below now.
Step 1: Download MiniTool ShadowMaker and install it on your Windows 11 PC.
MiniTool ShadowMaker TrialClick to Download100%Clean & Safe
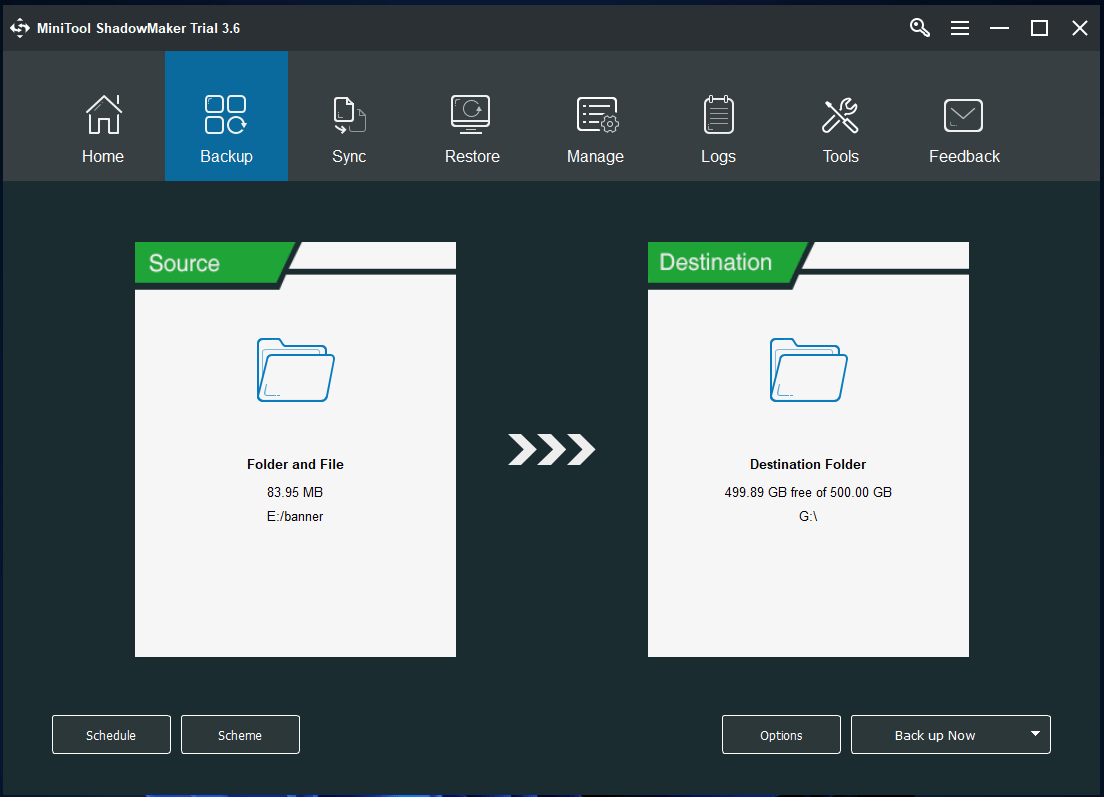
Step 2: Run this backup software and go to the Backup page.
Step 3: Click Source > Folders and Files, choose the items you want to back up, and click OK.
Step 4: Click Destination to choose a path to save the backup.
Step 5: Click the Back up Now to start the file backup.
After backup, now you should reset Windows 11 to fix the issue of Quick Settings not opening/showing/working.
PC Reset
How to reset Windows 11 to fix your issue? Follow the instructions below:
Step 1: Press the Win and I keys on your keyboard to open the Settings app.
Step 2: Click System from the left sidebar, click Recovery in the right pane and then go to the Recovery options section.
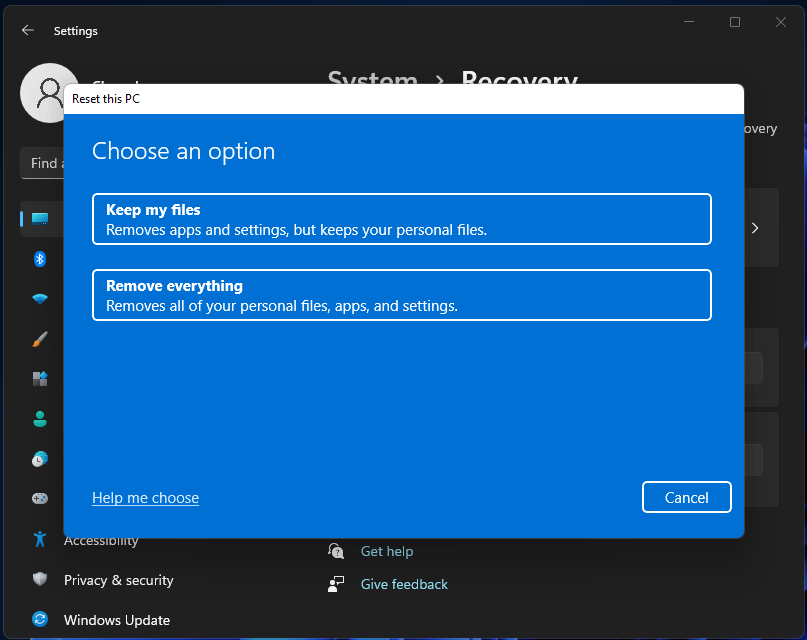
Step 3: In the Reset this PC section, click the Reset PC button.
Step 4: In the pop-up window, you see two options – Keep my files and Remove everything. Just choose one to continue the resetting process. Usually, we choose the first one to remove settings and apps but keep your personal files.
Step 5: Choose Cloud download or Local reinstall based on your needs. If you don’t know the difference between these two options, go to find the answer from this post – Cloud Download vs Local Reinstall: Differences on Win 10/11 Reset.
Step 6: Follow the on-screen wizards to finish resetting your PC.
After resetting the system, the issue of Quick Settings not showing/opening/working should be removed. In addition to PC resetting, you can perform a clean install as the last solution to the Quick Setting issue. Here is a related article for you – How to Reinstall Windows 11? Try 3 Simple Ways Here Now!
Suggestion: Create a System Point or Create a System Image
Fixing system issues in Windows is time-consuming and you may take much effort to solve your issues to let Windows run properly. To quickly restore the PC to an earlier state when Windows goes wrong, you can back up your Windows beforehand and perform a system restore or recovery.
To back up your PC, you can create a system restore point in Windows 11.
Step 1: Search for create a restore point to open System Properties.
Step 2: Click Create and name the restore point. Then, start the creation.
Or you can create a system image with Backup and Restore (Windows 10) or MiniTool ShadowMaker. By default, MiniTool ShadowMaker backs up the system. And you need to launch this software, choose the backup destination and start the backup. To know much information, go to this post – How to Create a System Image Windows 11 [2 Ways].
MiniTool ShadowMaker TrialClick to Download100%Clean & Safe
Final Words
Is Quick Settings not working/showing/opening in Windows 11? Now you should have solved this issue after trying these solutions above. After fixing it, you had better back up the Windows system for quick disaster recovery without spending much time finding troubleshooting tips.
If you have any other methods to fix the Quick Settings issue or any issues when using our software, you can contact our support team via [email protected] or directly leave a comment below.
About The Author

Position: Columnist
Vera has been working at the MiniTool Team for over 10 years as a technical editor and content writer. She mainly focuses on disk and partition management, data recovery, Windows backup and restore, and PC troubleshooting. Through in-depth software testing and hands-on experience, she has helped users solve a wide range of computer problems and better protect their data on Windows devices.
User Comments :