Windows Update – WOF Driver Encountered a Corruption
It is reported that when Windows users attempt to download and install the latest Windows update, the Windows will show they an error code, but when they turn to fix the error by running the command – DISM /Online /Cleanup-image /RestoreHealth in Command Prompt, the result will show as the following:
The WOF driver encountered a corruption in the compressed file’s Resource Table.
The DISM log file can be found at C:\Windows\Logs\DISM\dism.log
The issue can happen on Windows 10 and 11 when you try to use DISM scan to get rid of the Windows update error.
First of all, what is a WOF driver?
The full name of the WOF driver is the Windows Overlay Filter driver. This driver is used to manage virtual files on your computer. It is quite a crucial component containing regular physical files and overlays of virtual files, so if something wrong happens to the driver, the operating system will malfunction.
Tip:
We strongly recommend you back up your system to an external hard drive in advance so that once you, unfortunately, run into this kind of error, you can quickly recover your system. MiniTool ShadowMaker is a free backup expert and it can help you finish that.
Usually, this error message is associated with the Windows Update process, so we have concluded some reasons to explain this situation. You can check them according to your own condition.
- Corrupted Windows update components. If some of your Windows update components stop running, this WOF driver encountered a corruption error can happen.
- Drive errors. Bad disk sectors can fail to run your system normally and you can check your disk for hardware failure.
- Corrupted system files. “The WOF driver encountered corruption in the compressed file’s Resource Table” error can be triggered by a corrupted system file. In this way, you can try deploying a clean install, repair install, or an in-place upgrade.
- Corrupted temporary files in disks. Some temporary Internet or downloaded files can make the DISM error 4448.
After knowing all these possible culprits, now you can go to the next part to find the specific method or try them one by one to get rid of the “The WOF driver encountered a corruption” error.
Fix the WOF Driver Encountered a Corruption
Method 1: Perform a SFC Scan
Since the DISM error 4448 occurs when you attempt to run the DISM /Online /Cleanup-image /RestoreHealth command, you can change your first move to run an SFC scan first and then DISM scans.
SFC will perform a full scan of your system and repair and replace any files that are damaged or missing, using versions from the Windows component store.
Step 1: Input Command Prompt in the Search box and run it as an administrator.
Step 2: When the User Account Control window pops up to ask for access permission, click Yes.
Step 3: In the Command Prompt window, input the following command and press Enter to execute the SFC scan.
sfc /scannow
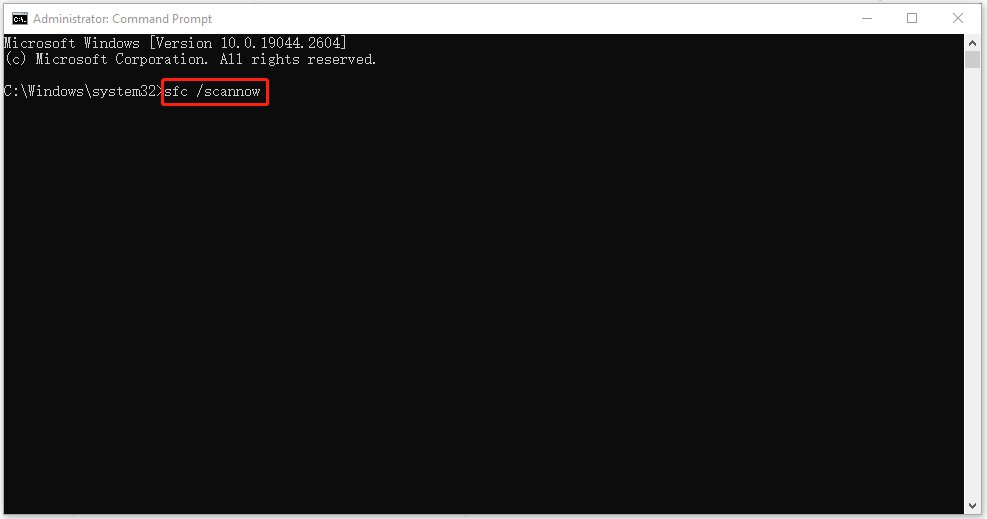
When the verification is up to 100%, you will see the result.
After that, you can restart your PC and try the DISM scans again to see if the error still exists.
Method 2: Run the Windows Update Troubleshooter
If you have failed to run the SFC scan, it is possible that the culprit is any potential Windows Update component issues. In this way, you can directly use the Windows Update troubleshooter to apply the recommended patch and fix “the WOF driver encountered a corruption”.
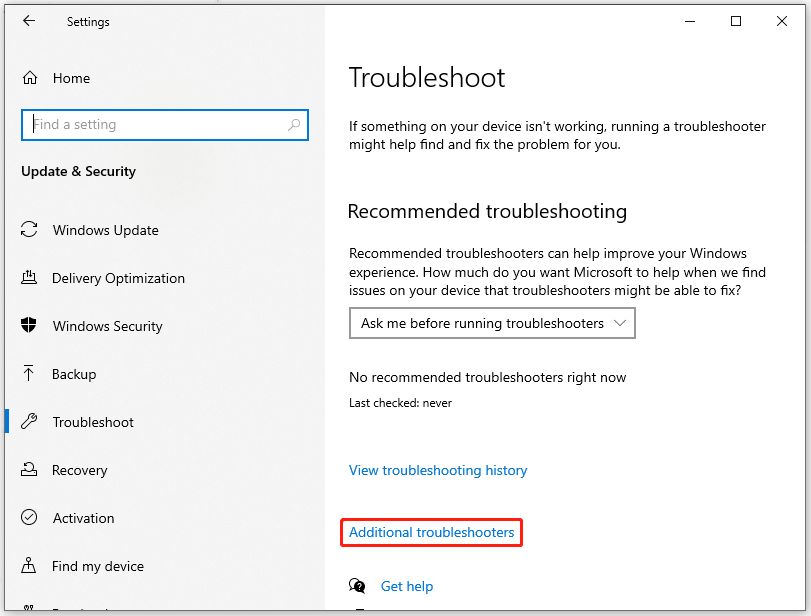
Step 1: Click Start (the Windows icon) and then Settings.
Step 2: Scroll down to choose Update & Security and click Troubleshoot from the left panel and Additional troubleshooters from the right panel.
Step 3: In the next window, choose Windows Update under Get up and running and click on Run the troubleshooter.
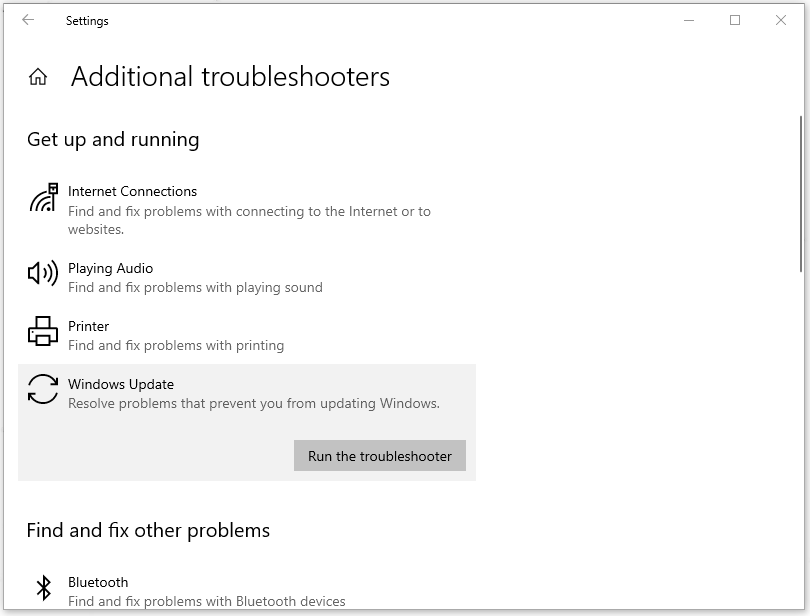
Wait until the detection ends and follow the on-screen instructions to finish the troubleshooting. Then restart your computer to see if the issue has been resolved.
Method 3: Reset Windows Update Components
Apart from the Windows Update troubleshooter, you can reset your Windows Update components to resolve those chronic problems that affect the Windows Update process. The specific steps are as follows.
Step 1: Open Command Prompt and run it as an administrator.
Step 2: When the window appears, please input the following commands and press Enter after each of them to terminate all these Windows Update-related services.
- net stop wuauserv
- net stop cryptSvc
- net stop bits
- net stop msiserver
Step 3: When those services have been stopped, you can input the following commands and press Enter after each of them to remove and rename the SoftwareDistribution and Catroot2 directories.
- ren C:WindowsSystem32catroot2 Catroot2.old
- ren C:WindowsSoftwareDistribution SoftwareDistribution.old
Step 4: After that, you can restart the Windows Update related services that you have disabled before. Please execute the next commands:
- net start wuauserv
- net start cryptSvc
- net start bits
- net start msiserver
now, restart your computer and see if the WOF driver encountered a corruption error has been gone.
Method 4: Perform a Drive Error Checking
As we mentioned, driver failure can lead to the “The WOF driver encountered corruption in the compressed file’s Resource Table” error, so checking for your driver failure is quite necessary for your next steps.
Step 1: Open File Explorer and click This PC.
Step 2: Right-click on your C: drive and choose Properties.
Step 3: Go to the Tools tab and click on Check in the Error checking section.
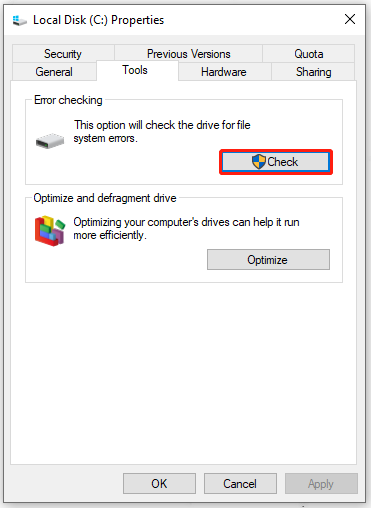
Then you can follow the on-screen steps to check your drive and repair the bugs in it.
Method 5: Deploy a Disk Cleanup
Any corrupted files in your disks can lead to “the WOF driver encountered a corruption”. In case any damaged files are left, you need to delete any unwanted DirectX Shader Cache, Delivery Optimization Files, Temporary Internet Files, or Downloaded Program Files.
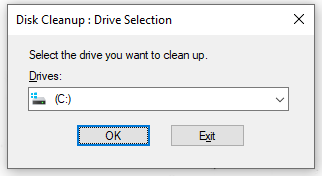
Step 1: Open the Run dialog box by pressing the Win + R keys and input cleanmgr.exe to enter the Disk Cleanup tool.
Step 2: Make sure that you have chosen the system-included drive from the drives drop-down option.
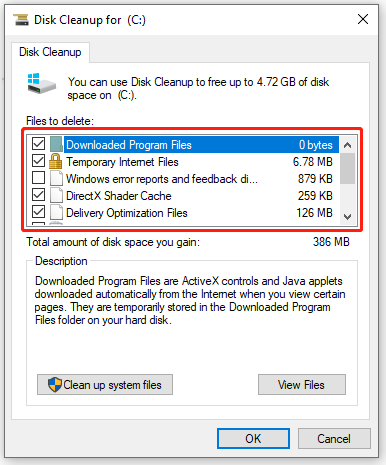
Step 3: Then it will show you the Disk Cleanup page and you need to make sure the following file options have been checked to delete:
- Downloaded Program Files
- Temporary Internet Files
- DirectX Shader Cache
- Delivery Optimization Files
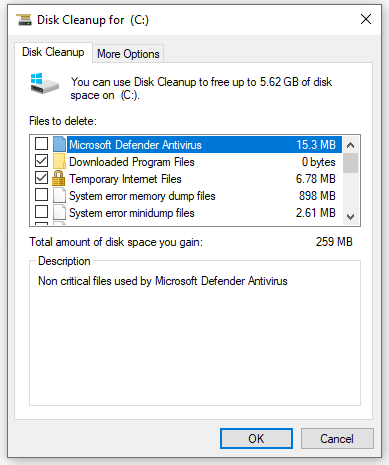
Step 4: After that, choose Clean up system files and choose the drive to click OK. On the next page, check the same options as step 3 to click OK.
After the procedure is finished, reboot your computer and check whether the ‘The WOF driver encountered corruption in the compressed file’s Resource Table’ error is now fixed.
Method 6: Use System Restore
Another method to fix “the WOF driver encountered a corruption’ is to restore your system to its normal state. But this method is only available for those who have created a restore point in advance, if you haven’t please go to the next moves.
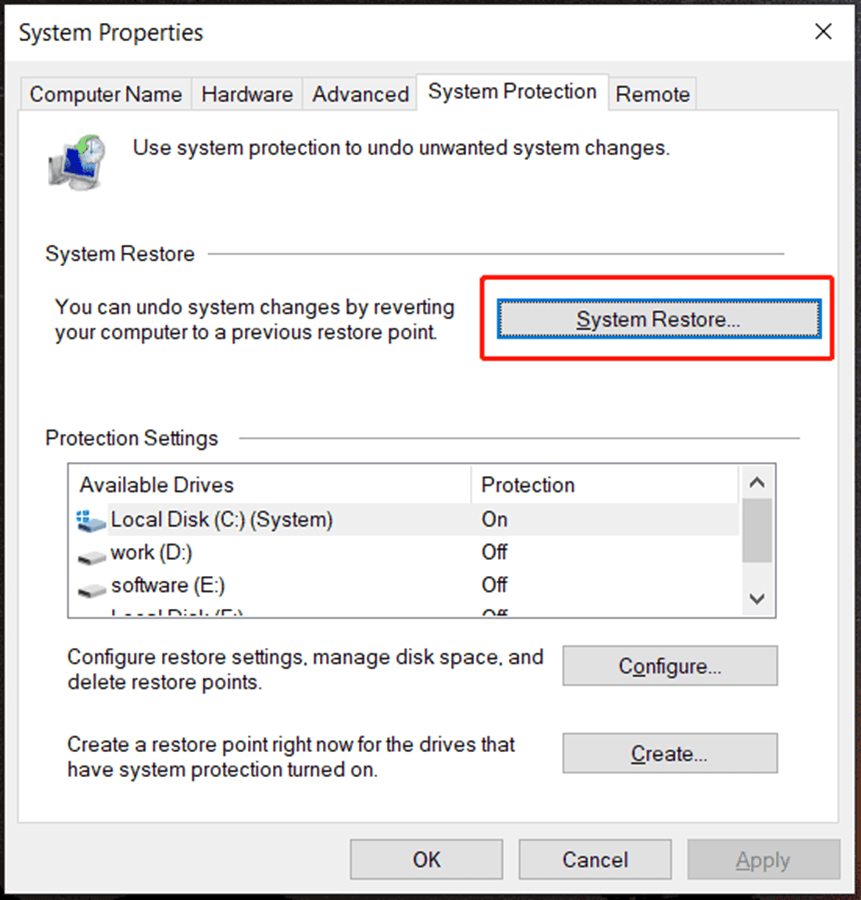
Step 1: Input Create a restore point in the Search box and open it.
Step 2: Click System Restore… to choose a restore point and follow the instruction to finish that.
Related articles:
- What Is System Restore Point and How to Create It? Look Here!
- How to Delete All System Restore Points | Step-by-Step Guide
Method 7: Perform a Clean Install
If all the above methods can’t resolve the “The WOF driver encountered corruption in the compressed file’s Resource Table” error, you can directly perform a clean install or an in-place upgrade to finish the Window update.
They are two totally different methods to install Windows, for more details about their differences, you can read this article: Full Guide – Windows 11 Upgrade VS Clean Install, Which to Choose.
Note: The in-place upgrade can only be applied by Windows 11 users.
If you choose to perform a clean install, we suggest you back up your important files first because a clean install can delete your personal files.
It is recommended to use this professional data backup program – MiniTool ShadowMaker. With its multiple features and functions, its direct and easy interface design is also friendly to novices. Without any complicated steps, you can easily back up your files, folders, systems, partitions, and disks.
Go to download and install the program for a 30-day free trial.
MiniTool ShadowMaker TrialClick to Download100%Clean & Safe
Step 1: Open the program and click Keeps Trial to enter the interface.
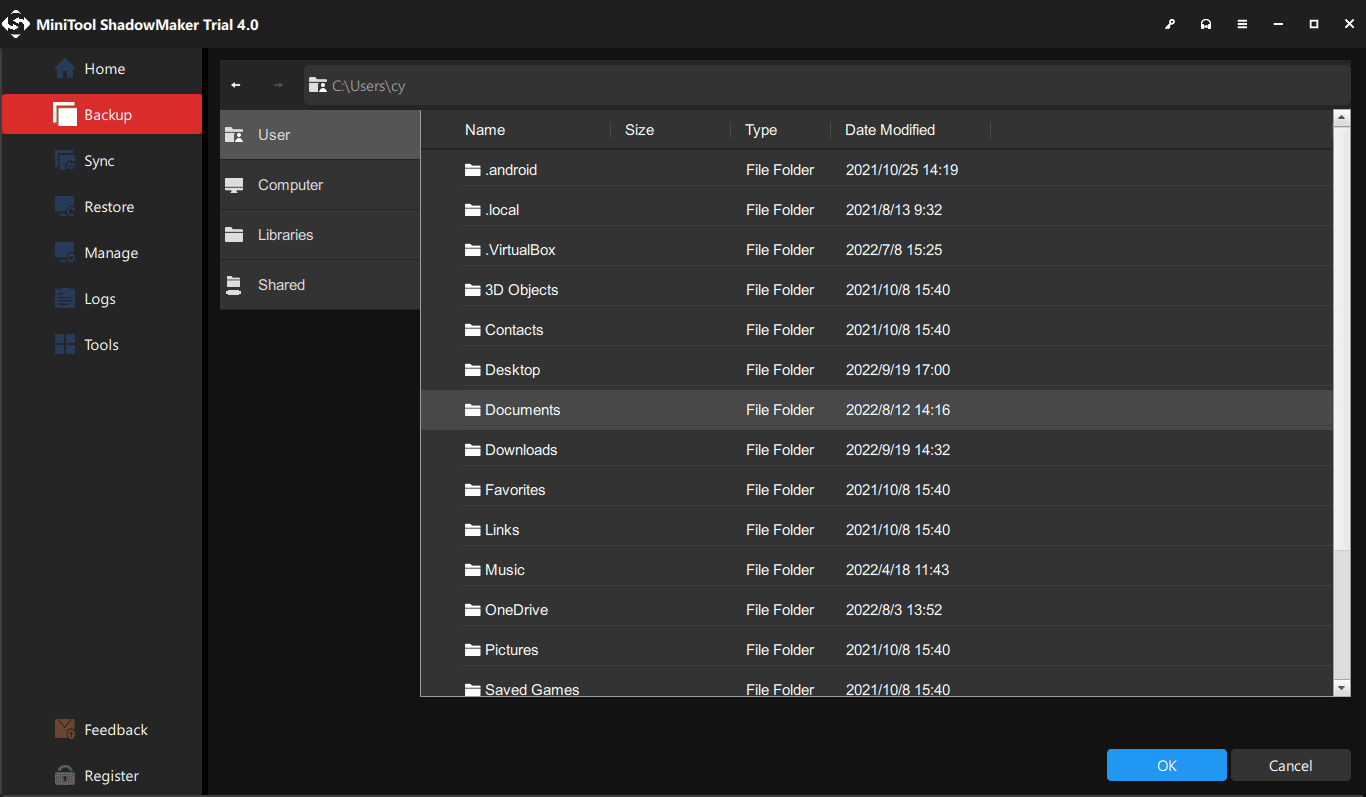
Step 2: Go to the Backup tab and click SOURCE to choose what you want to back up and then click on DESTINATION to choose where you want to back up to.
There are four backup destinations available for you – User, Computer, Libraries, and Shared.
Step 3: After choosing a destination path, choose Back Up Now or Back Up Later. You can start the delayed backup task on the Manage page.
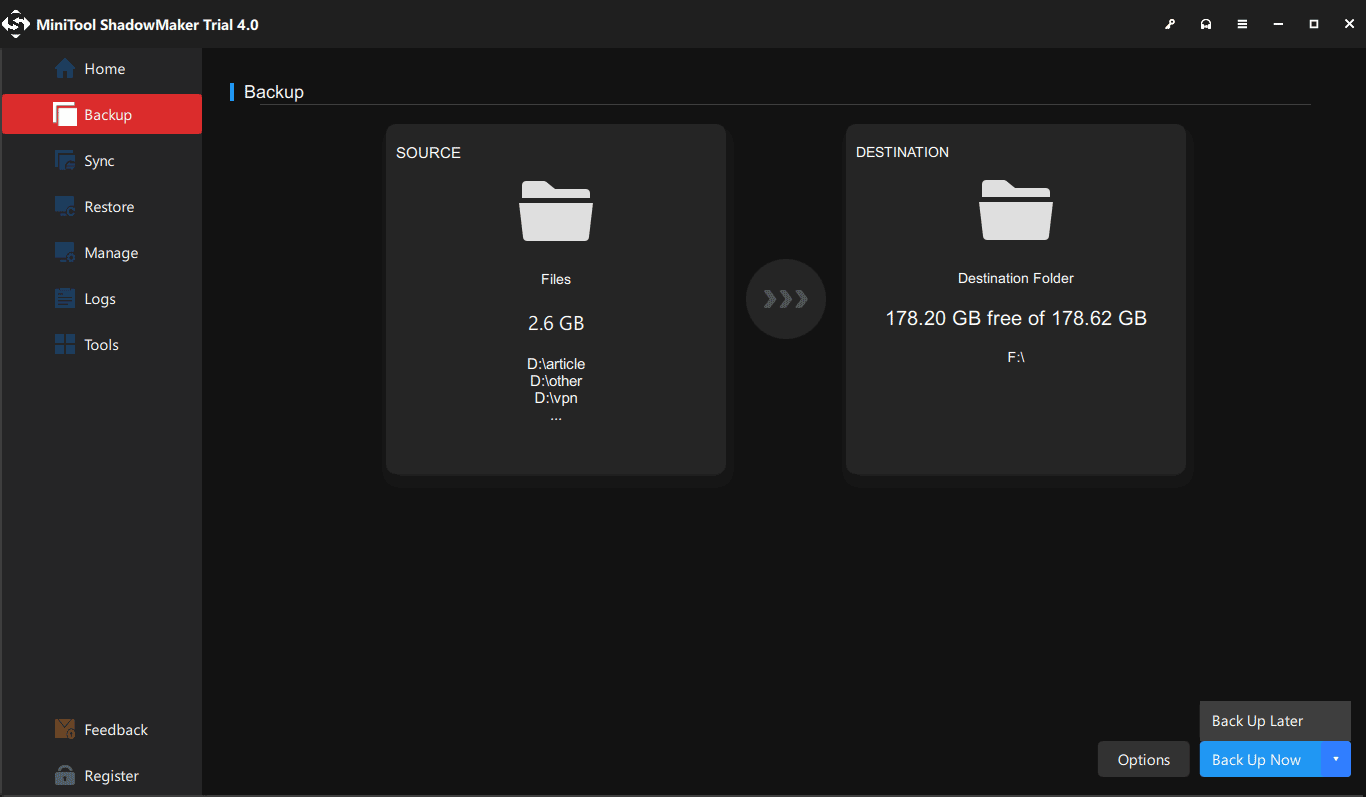
Besides, you can click Options to configure your backup settings. For example, you can different backup schemes, including Full, Incremental, and Differential backup. If you hope your backup tasks can be performed regularly, you can choose Options > Schedule Settings to set your backup daily, weekly, monthly, or on event.
To perform a clean install, you can do as follows.
Step 1: Go to download and launch the Media Creation Tool and choose USB flash drive to follow the instructions to create a bootable USB drive.
Step 2: Insert the drive into your computer and enter BIOS to change the boot order to run the PC from the USB drive.
Step 3: In the Windows Setup interface, follow the guide to configure settings and click Install now to start the installation.

Step 4: Then click I don’t have a product key and choose an edition of Windows; choose Custom: Install Windows only (advanced) to perform a clean installation.
The next moves will be shown on the screen and that will be easy to follow.
With this method, the “The WOF driver encountered corruption in the compressed file’s Resource Table” error can be fixed.
Bottom Line:
To some extent, the “The WOF driver encountered a corruption” error is hard to get rid of but don’t worry, this article has given you a series of methods to fix it. Just try the above methods one by one and you will find your solution. Besides, it is highly advised to protect your data by backup, which can help avoid further troubles.
If you have encountered any issues when using MiniTool ShadowMaker, you can leave a message in the following comment zone and we will reply as soon as possible. If you need any help when using MiniTool software, you may contact us via [email protected].
User Comments :