
If you’re planning to install Windows 11, you can choose between an in-place upgrade and a clean install. These two options differ mainly in how they handle your files, apps, and settings.
Windows 11 Upgrade VS Clean Install
To quickly find the differences between an update and a clean install, check the comparison table below.
| Feature | Windows 11 Upgrade | Windows 11 Clean Install |
| Personal files | Kept | Removed |
| Installed apps | Kept | Removed |
| Windows settings | Kept | Removed |
| Existing system | Preserved and upgraded | Replaced with a fresh installation |
| Setup process | Simple | More steps |
| Best for | Keeping the current setup | Starting fresh |
| Backup | Recommended | Essential |
| Advantages | 1. Faster and easier process 2. Keeps your files and apps intact 3. Eliminates data migration | 1. Provides a clean slate 2. Resolves persistent system issues 3. Removes bloatware |
| Disadvantages | Can transfer old system errors, legacy drivers, and accumulated junk files into Windows 11 | 1. Requires tech knowledge 2. Needs to reinstall apps 3. Requires more time |
What Are Upgrade and Clean Install Windows 11
Upgrade or in-place installation is a common way and it means moving from an older version of the Windows operating system to a newer version.
Windows keeps your personal files, installed apps, and Windows settings while replacing the existing Windows installation with Windows 11.
A clean install means formatting your hard drive, wiping the current operating system, and installing Windows 11 from scratch. It requires you to have some technical skills.
Clean Install Windows 11 VS Upgrade: Pros and Cons
Advantages of Windows 11 Upgrade
An in-place upgrade is a common way to install Windows 11 on your PC since it is very easy. With Windows 11 Installation Assistant, the upgrade process is almost automated.
Besides, you won’t need to format your hard drive and reinstall apps, change Windows settings, and copy over your files after everything is done. All the contents can be kept on the PC.
An upgrade can save some time. Although an upgrade keeps your files and apps, back up important data beforehand in case something goes wrong.
Additionally, you can roll back to the previous version if you don’t want to keep the new version or something goes wrong.
Disadvantages of Windows 11 Upgrade
When performing an in-place upgrade of Windows 11, Windows attempts to bring all the contents of the old version to a new version.
During the process, an amount of old & unnecessary files, registry entries of some uninstalled programs, and some other junk files are also kept in Windows 11. This makes the new system cluttered at the beginning.
Besides, some programs and drivers are not compatible with Windows 11 and cannot run properly. Furthermore, you may run into some errors caused by pre-existing issues in the system and some peripherals cannot be used. You need to troubleshoot the issues, which is annoying.
Benefits of Clean Install Windows 11
Clean install offers a chance to start from scratch and any bloatware & trial software that may come pre-installed with your system isn’t installed. And you can get a clean Windows registry.
Clean install helps you to get rid of all incompatible programs since it deletes all the apps. You won’t need to manually uninstall these apps. Besides, you will regain control over your apps since you only need to install programs that you want.
Moreover, you will rarely run into errors & other issues and a clean install can fix some issues.
Demerits of Windows 11 Clean Install
For most users, the worst is some data will be deleted after a clean install. You need to back up your personal files before you do. After installing, you need to spend time personalizing your PC.
Windows 11 Upgrade VS Clean Install: Which One to Choose
Two options are available, and you can choose one based on your situation.
- If you want to keep your files, apps, and settings, perform an in-place upgrade.
- When your computer has severe issues, or you want a fresh start, perform a clean installation.
Back up Files Before an Upgrade or Clean Install
Regardless of the method you choose, back up important files first to prevent unexpected data loss.
To do this work, we strongly recommend using a professional file backup software, MiniTool ShadowMaker.
MiniTool ShadowMaker can be used to back up your files, folders, systems, partitions, and disks to an external hard drive, USB flash drive, SSD, NAS, and more in Windows 11/10/8/7. It makes data backup and disaster recovery easy. Although you are a novice, you can easily finish PC backup.
To start a backup, download this backup software by clicking the following button and install it on your PC.
MiniTool ShadowMaker TrialClick to Download100%Clean & Safe
Step 1: Double-click the desktop shortcut of this software to launch it.
Step 2: Click Keep Trial to continue.
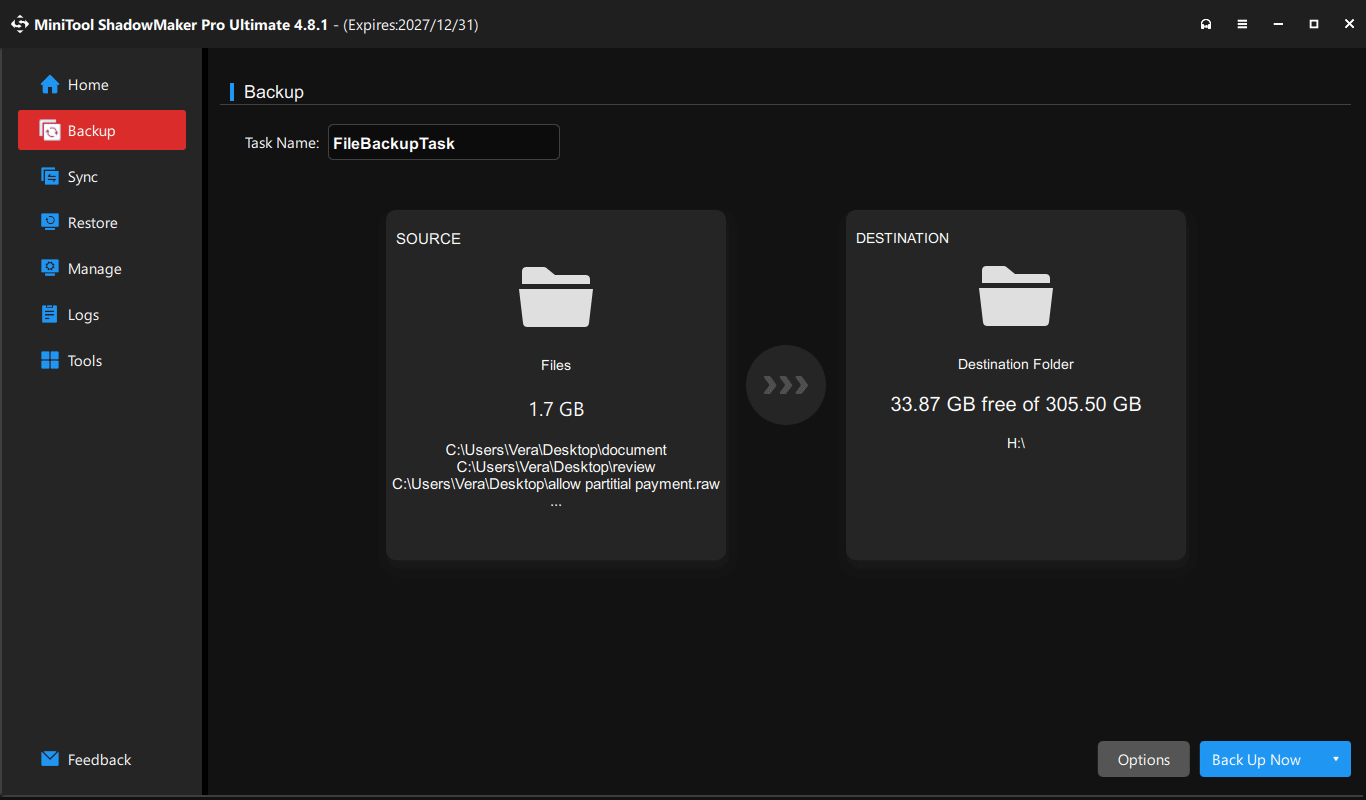
Step 3: Go to the Backup interface, click SOURCE > Folders and Files, check all the items you want to back up, and click OK.
Step 4: Click DESTINATION and choose a drive as the target path to save the backed-up files.
Step 5: Click Back Up Now to execute the file backup task.
After finishing data backup, it is time to install Windows 11 without losing important data.
How to Upgrade to Windows 11 via In-Place Upgrade
There are two methods for you to perform a Windows 11 in-place upgrade – Windows 11 Installation Assistant and a Windows 11 ISO file. Let’s go to see them.
Upgrade Windows 10 to Windows 11 via Installation Assistant
Microsoft offers you a tool called Windows 11 Installation Assistant that can help you easily upgrade your PC from Windows 10 to Windows 11. It is the best easy option for installing this new operating system on the device.
Attentions before you do:
- Windows 11 Installation Assistant can only be used on PCs with Windows 10, version 2004 or higher installed.
- 9 GB of disk space is required to download Windows 11.
- A Windows 10 license is required.
- Your PC must meet Windows 11 PC specifications for supported features and upgrade requirements.
See how to use it:
Step 1: Download Windows 11 Installation Assistant from the Microsoft website.
Step 2: Double-click on the exe file to launch this tool.
Step 3: Click the Accept and Install button to continue.
Step 4: This tool will download and install Windows 11 on your PC. During the process, you can use your PC as normal.
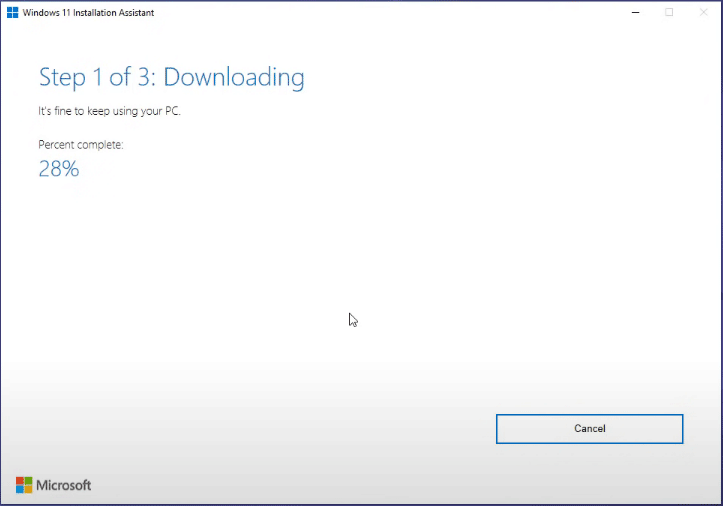
Step 5: After everything is ready, click Restart now and the system starts the upgrade process.
Run a Windows 11 Upgrade via an ISO File
To upgrade to Windows 11, you can also use the ISO file Microsoft provides. See how to do it:
Step 1: Download a Windows 11 ISO file from the Microsoft website.
Step 2: Right-click on the ISO file and choose Mount.
Step 3: Open the folder and double-click on the setup.exe file to start.
Step 4: Click Next and accept license terms to continue.
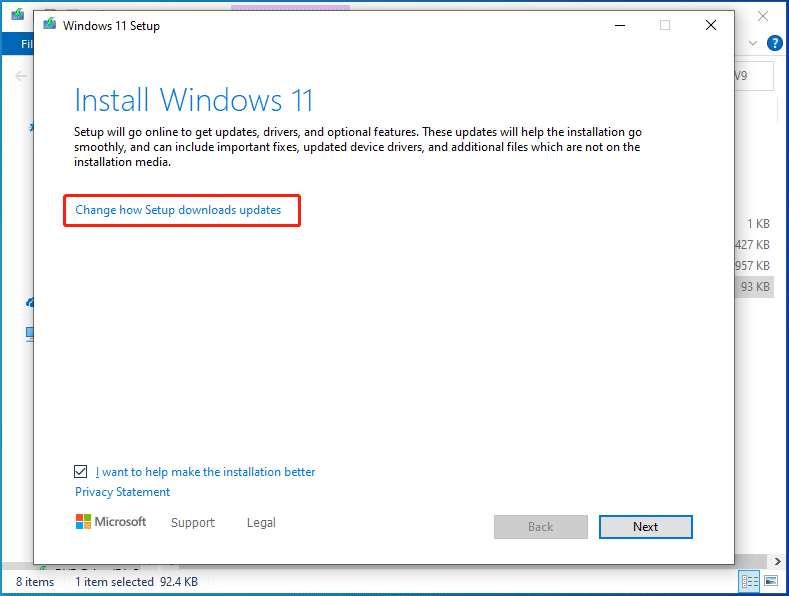
Step 5: The setup tool is checking for updates.
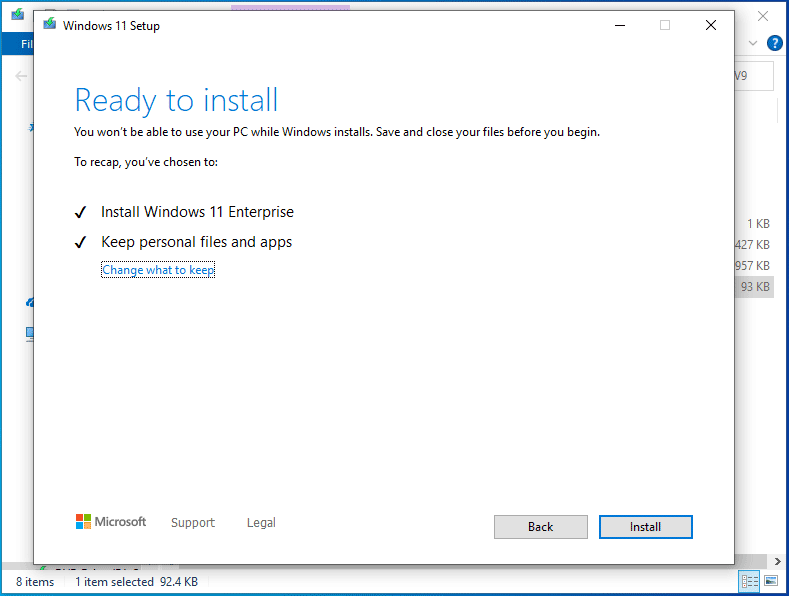
Step 6: You will get a window to tell you what to keep. If you want to change the setting, click Change what to keep. To run an in-place upgrade, keep your personal files and apps. Then, click Install and the tool starts installing Windows 11 on your PC.
To know much information, refer to this post – How to Install Windows 11 Using an ISO File on Your Computer.
How to Clean Install Windows 11
Preparation before installing
To install Windows 11 with a fresh start, you need to prepare a bootable drive. There are two options for you:
- Download a Windows 11 ISO file from the Microsoft website, get Rufus and burn the ISO file to your USB flash drive. (Related article – Rufus Windows 11 Download & How to Use Rufus for a Bootable USB)
- Go to download Windows 11 Media Creation Tool, launch it, choose USB flash drive and follow the on-screen instructions to create a bootable USB drive.
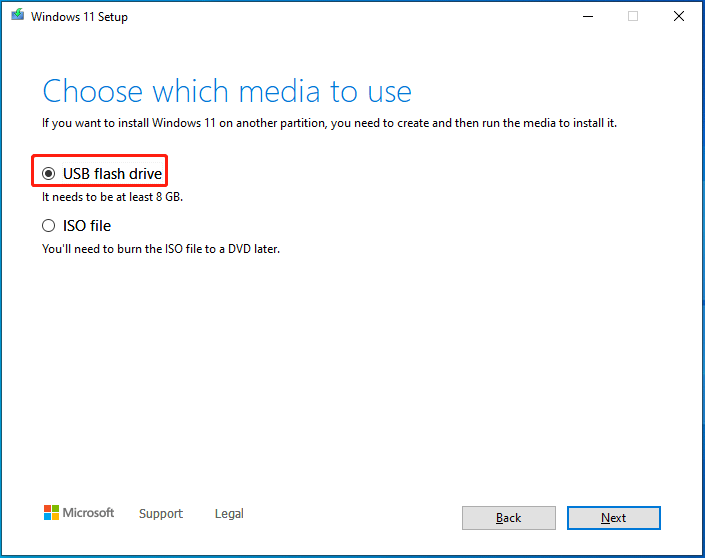
Then, perform a clean install of Windows 11 by following the steps below.
Step 1: Insert the USB drive to your computer, enter BIOS by pressing F2, Del, or another key (it is different based on different manufacturers) when seeing the Windows logo during a restart, and change the boot order to run the PC from the USB drive.
Step 2: In the Windows Setup interface, choose a language, keyboard/input method, and time format.
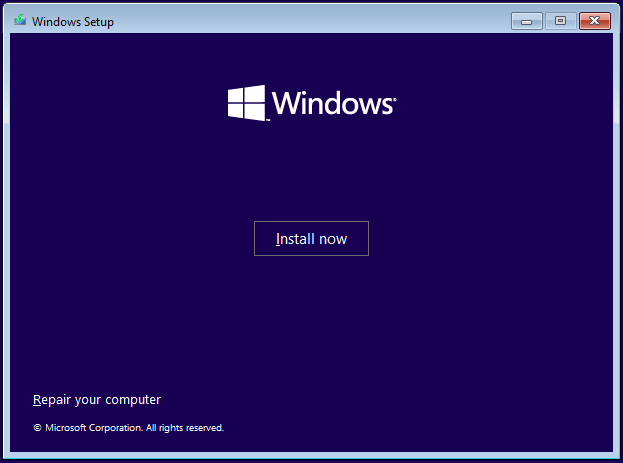
Step 3: Click Install now to start Windows 11 installation.
Step 4: Click I don’t have a product key and choose an edition of Windows 11.
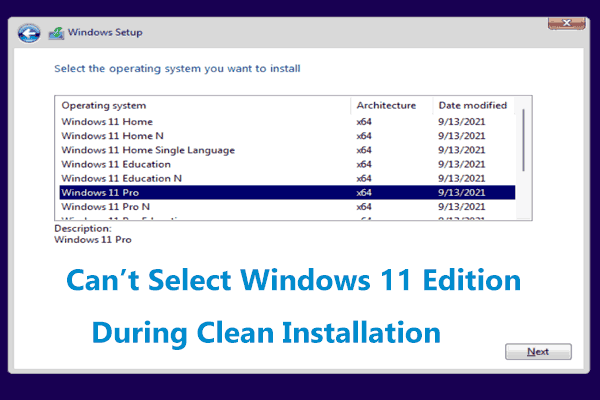
Step 5: Click Custom: Install Windows only (advanced) for a clean install.
Step 6: Decide where you want to install Windows 11. Here, you can choose the drives (system reserved partition and C or EFI partition and C) with Windows 10 installed. The selected drives will become unallocated space.
Step 7: The installation process begins.
After finishing the installation or in-place upgrade, you need to set up your PC and what you should do is mentioned in this post – 6 Tips on How to Set up the New Windows 11 Laptop.
Verdict
After reading this post focusing on Windows 11 upgrade vs clean install, you should have a complete understanding of these two installation methods of Windows 11. Just choose a proper way according to your actual situations or needs.
No matter which one you choose, it is better to back up your data before you do to avoid unexpected data loss. Besides, you can also create a system image beforehand with MiniTool ShadowMaker for fast disaster recovery in case of update issues related to the system.
MiniTool ShadowMaker TrialClick to Download100%Clean & Safe
If you have any ideas about clean install Windows 11 vs upgrade, let us know by leaving a comment below. We will reply to you as soon as possible.
Windows 11 Upgrade vs Clean Install FAQ
About The Author

Position: Columnist
Vera has been working at the MiniTool Team for over 10 years as a technical editor and content writer. She mainly focuses on disk and partition management, data recovery, Windows backup and restore, and PC troubleshooting. Through in-depth software testing and hands-on experience, she has helped users solve a wide range of computer problems and better protect their data on Windows devices.
User Comments :