How to transfer files between computers on the same network? If you have such a need, you come to the right place. This post from MiniTool offers a step-by-step tutorial to do that in five different ways.
Nowadays, it’s common for you to use two computers in life and work. When you want to transfer files, you may choose the way of copying your files in the computer and pasting them to another computer. But it’s inconvenient and time-consuming. You can directly transfer files between computers on the same network. This post provides 5 ways for you.
Way 1: Via Network Share
Windows 11/10 has a feature called Nearby Sharing. It allows you to transfer files between computers on the same network. Before starting the following steps, make sure your Windows version is Windows 10 1803 or later.
Step 1. Press the Windows + I keys together to open Settings.
Step 2. Go to System > Shared Experiences, and turn on Nearby sharing under Share across devices. Click the drop-down menu to choose Everyone nearby.
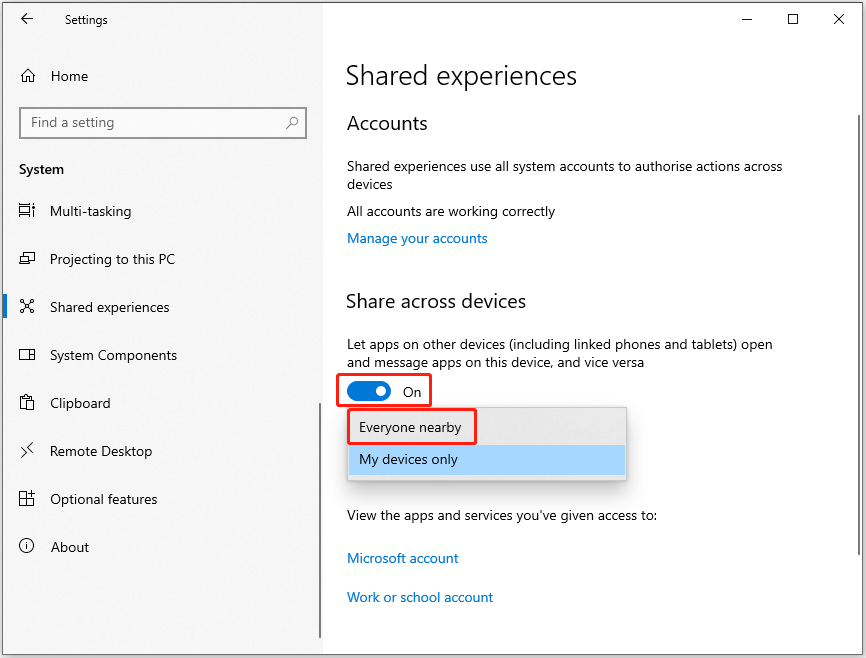
Step 3. Repeat the steps on another PC.
Step 4. On the source computer, find and right-click the file to choose Share. Select the PC you want to transfer the file.
Step 5. A notification will appear on another computer. Click Save & Open or Save.
Way 2: Via Nearby Sharing
Windows also offers the built-in tool Network Share that enables you to transfer files between computers on the same network Windows 10/11. Here are the steps:
Step 1. Type Control Panel in the Search box to open it.
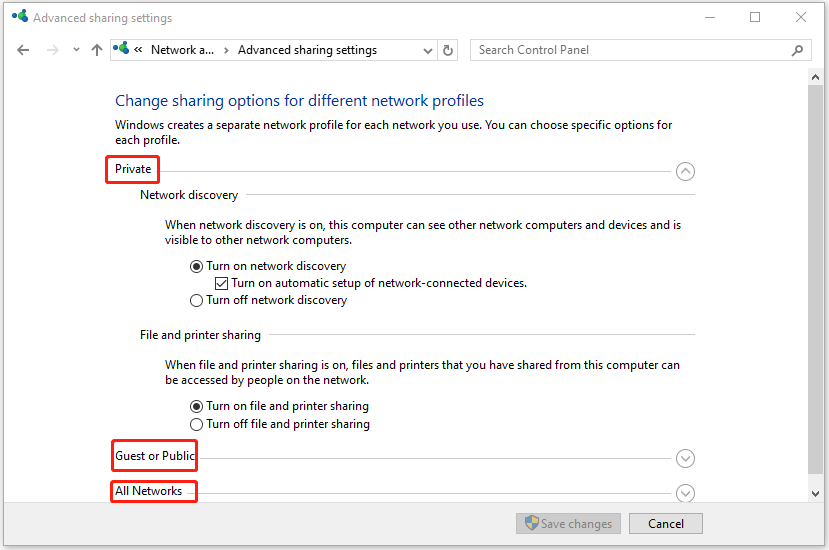
Step 2. Go to Network and Internet > Network and Sharing Center > Change advanced sharing settings.
Step 3. You need to turn on file sharing under Private, Public, and All networks.
1. Private
Network discovery: Check Turn on network discovery and also check Turn on automatic setup of network-connected devices.
File and printer sharing: Check Turn on file and printer sharing.
2. Guest or Public (current profile)
Check Turn on file and printer sharing under Network discovery and File and printer sharing.
3. All Networks
Turn on public file sharing and turn off password-protected sharing.
Step 4. Right-click the folder you want to transfer to choose Give access. Then, select Specific people….
Step 5. Choose Everyone from the expanded menu, and click click Add to confirm.
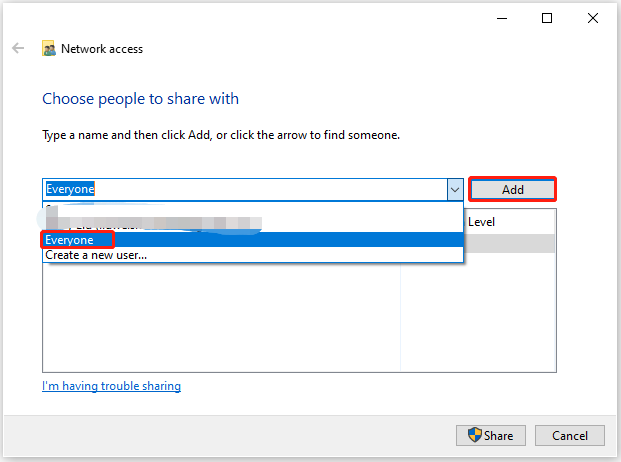
Step 6. Select Everyone and set permissions to Read/Write. Click Share.
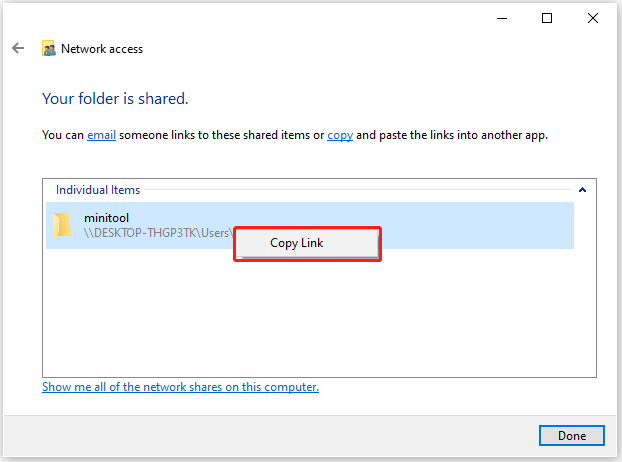
Step 7. Now you can copy the shared link and paste it on another device’s File Explorer.
Related posts:
- How to Turn on Network Discovery and File Sharing in Windows 11
- How to Fix the “Windows 11 Cannot Access Shared Folder” Error
Way 3: Via the Cloud Service
You can also transfer files between computers on the same network Windows 11 via cloud storage, such as OneDrive, Google Drive, Dropbox, etc. If you have a Microsoft account, you can use OneDrive to do that.
You can sign in to your Microsoft account on both computers at the same time to transfer files. If your two computers are syncing folders locally, then the one uploads files while the other will download at the same time.
Way 4: Via Email
Another way to transfer files between computers on the same network is by sharing with email. Here are the steps:
1. Right-click the file you want to transfer and select Share.
2. Choose Mail to continue.
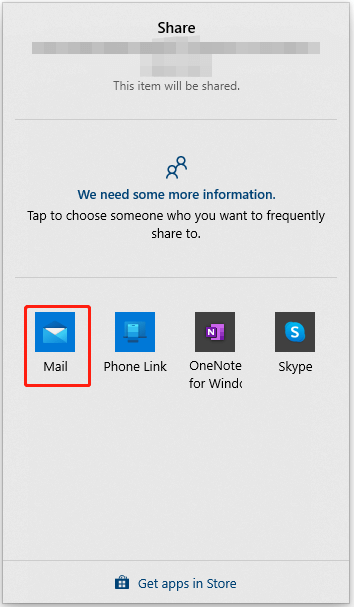
3. Enter the email address and click Send to send off the file.
Way 5: Via the File Sharing Software
From the above content, you will find that some methods are only working on Windows 11 and Windows 10. How about Windows 7 and Windows 8? There is a piece of PC backup software – MiniTool ShadowMaker for you to transfer files between computers on the same network on Windows 11/10/8/7 and Windows Server 2022/2019/2016/2012/2012 R2.
It is a program that can be used to back up systems, disks, partitions, files, and folders, sync files, and move Windows to another drive. MiniTool ShadowMaker supports almost all storage devices that can be recognized by Windows, such as HDD, SSD, USB external disks, Hardware RAID, NAS, Home file servers, workstations, and so on.
Now, let’s see how to transfer files between computers on the same network with MiniTool ShadowMaker.
Step 1. Download and install MiniTool ShadowMaker.
MiniTool ShadowMaker TrialClick to Download100%Clean & Safe
Step 2. Launch MiniTool ShadowMaker and click Keep Trial to continue.
Step 3.Go to the Backup page and click the SOURCE module. Choose Folders and Files, then choose the files you want to transfer and click OK to save your selection.
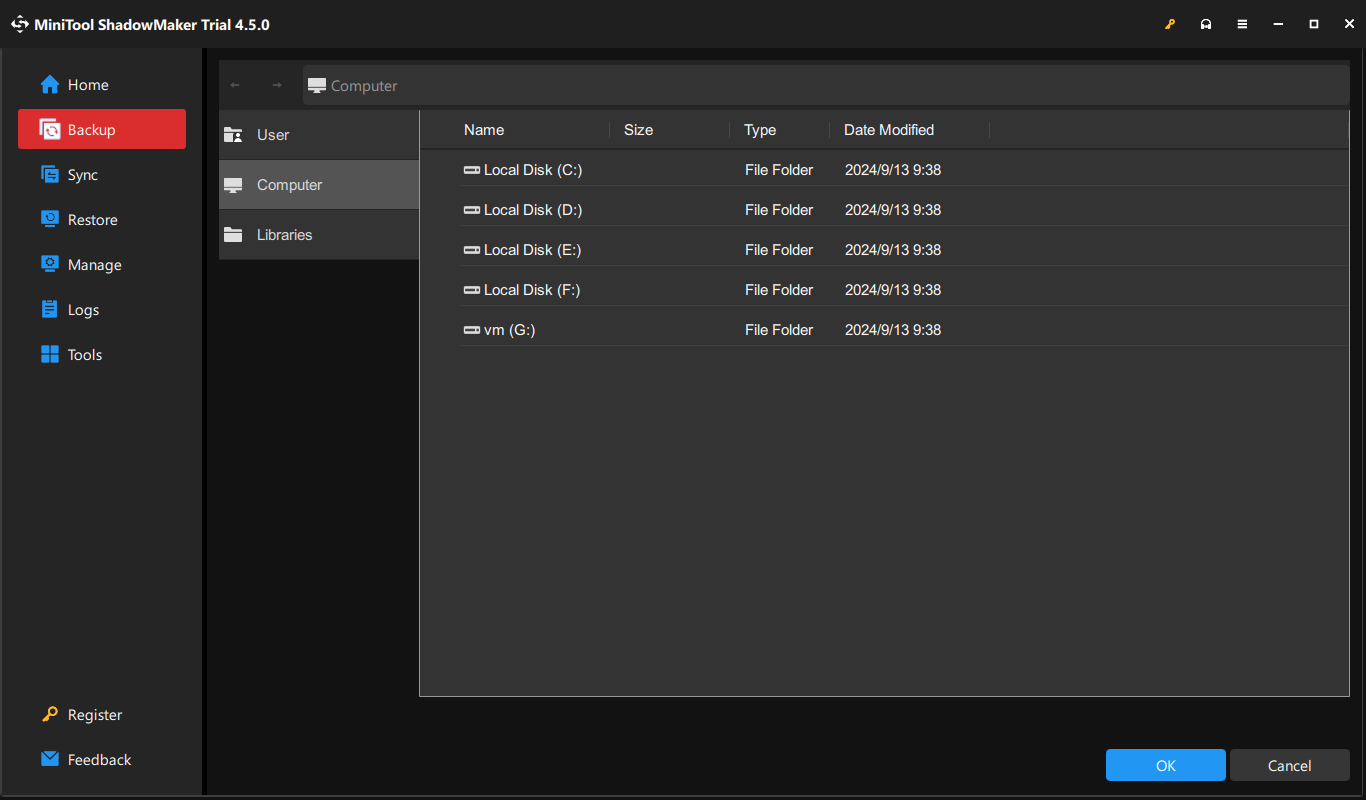
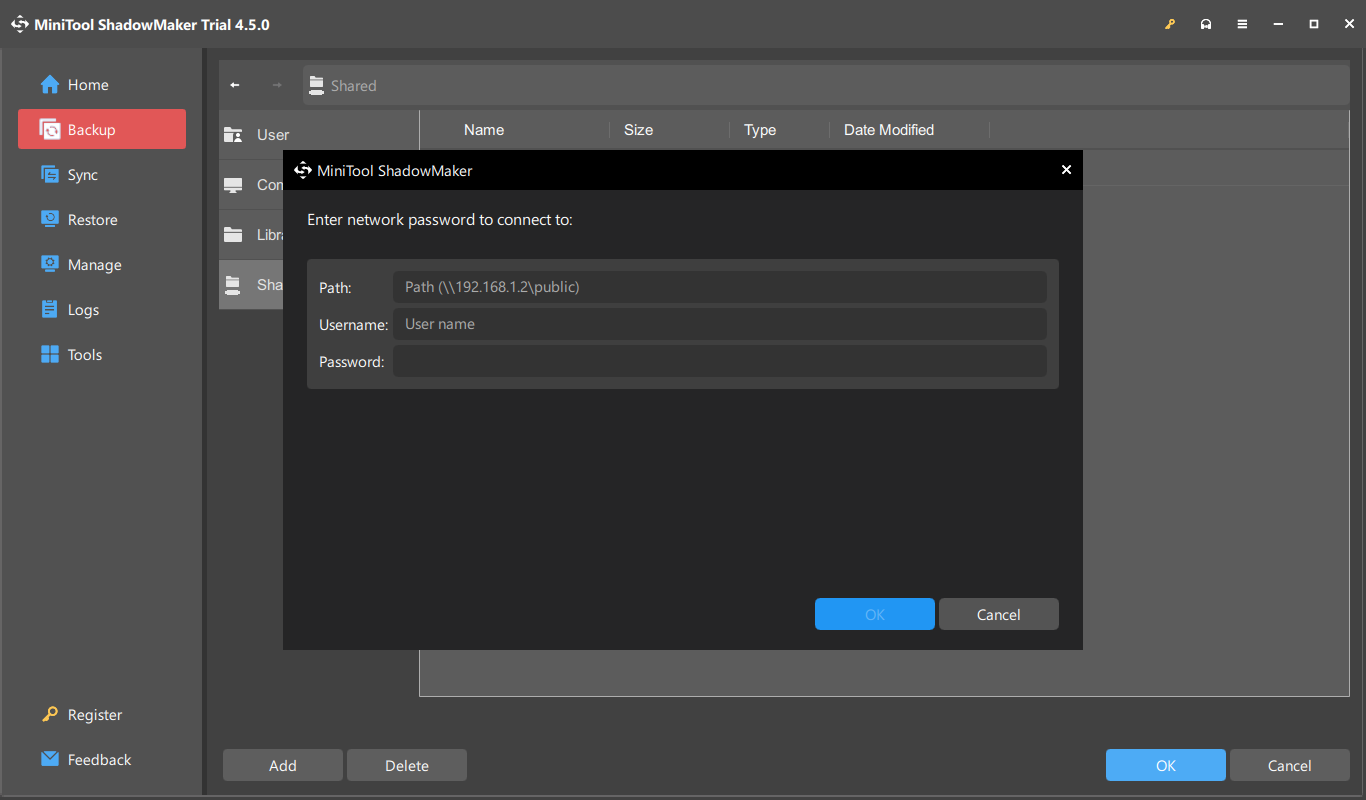
Step 4.Click the DESTINATION module to continue. MiniTool ShadowMaker allows you to back up your computer in multiple places. Just go to the Shared tab. Click the Add button. Type the folder’s path, user name, and password. Then, click OK.
Step 5. Click Back Up Now to start the process or click Back Up Later to delay the backup. And you can restart the delayed backup task in the Manage window.
Final Words
To sum up, this post introduced 4 feasible methods to transfer files between computers on the same network. If you need to do that, you can refer to this post. If you have any questions when using MiniTool ShadowMaker, you can contact us via [email protected], and a professional support team is dedicated to resolving the concerns.


User Comments :