You create a worksheet and want to send it to others, but you may be concerned that someone else will tamper with the contents in cells. In a situation like this, how to protect cells in Excel from being re-edited? The answer is: you can make your Excel lock cells according to your requirements.
You can choose to lock cells in Excel. Then anyone who opens this Excel is not allowed to edit the cells that are protected. On other hand, you can also choose to lock specific cells in Excel according to your requirements.
In this blog, MiniTool Software will introduce how to lock cells in Excel and how to lock specific cells in Excel.
These methods work in Excel for Microsoft 365, Excel 2021, Excel 2019, Excel 2016, Excel 2013, Excel 2010, and Excel 2007.

How to Lock Cells in Excel?
In this part, we will show you how to lock all cells in a worksheet. By doing this, all cells in the Excel file will become uneditable.
How to Lock and Protect All Cells in Excel?
Step 1: Select all cells in Excel. You can move the mouse cursor to the top-left corner of the sheet and click your mouse to select all cells. You can also click one cell outside the range of cells that contain contents and press Ctrl + A to select all cells.
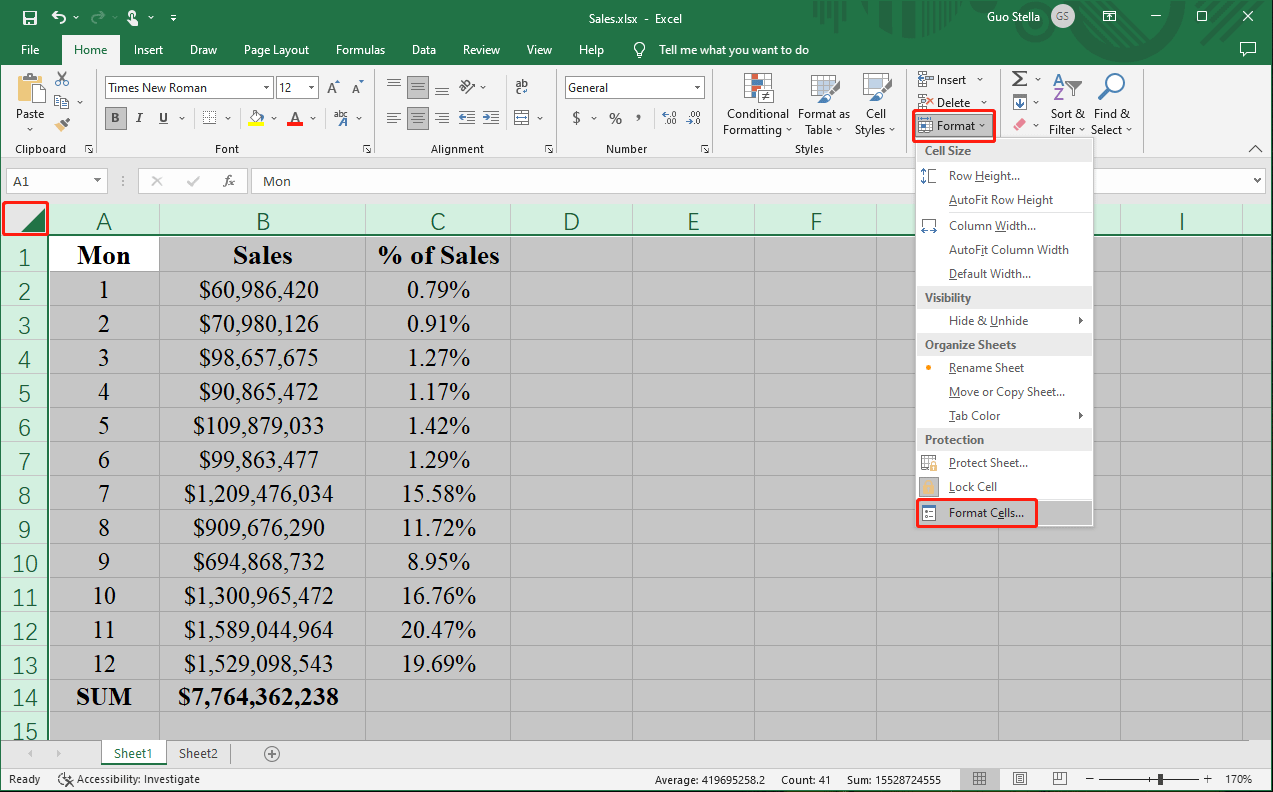
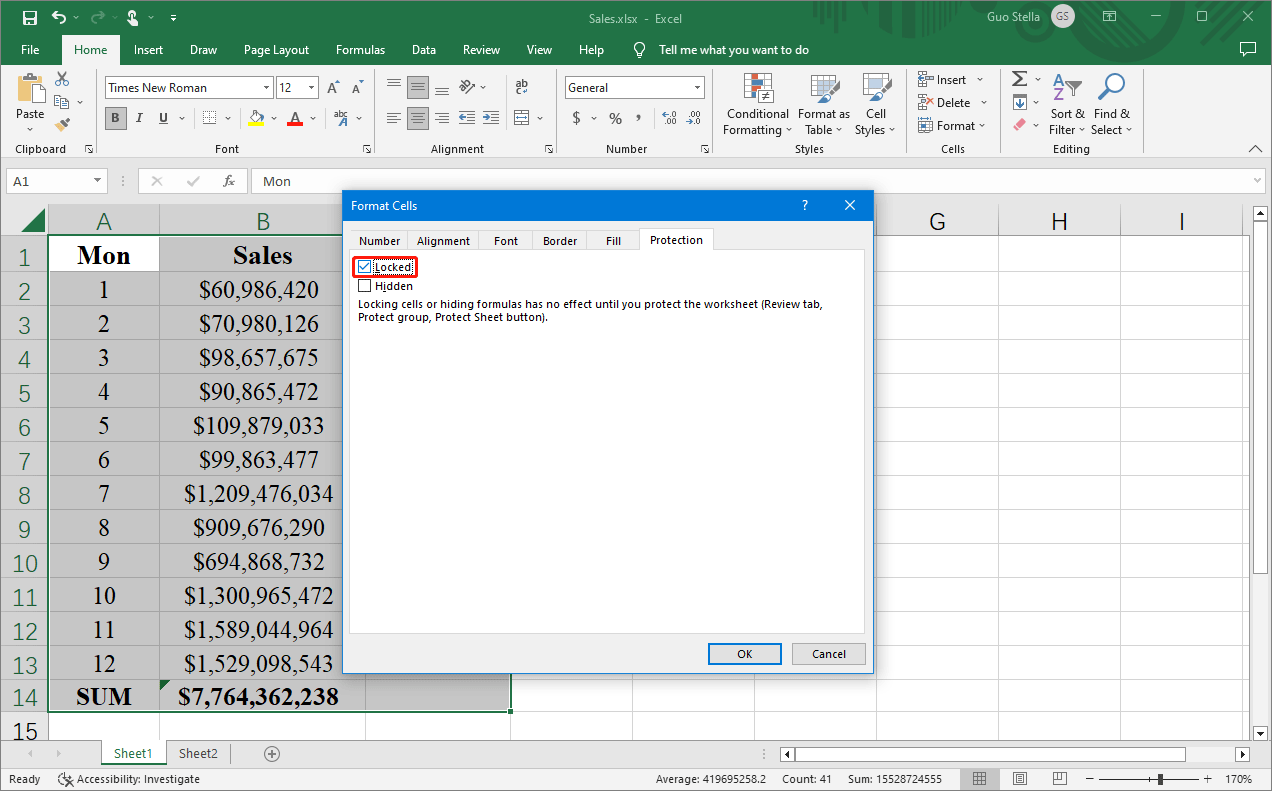
Step 2: Under the Home tab, click Format in the Cells group and then select Format Cells from the expanded menu.
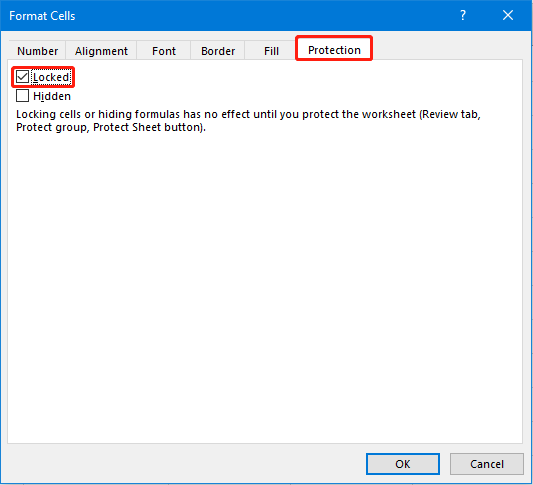
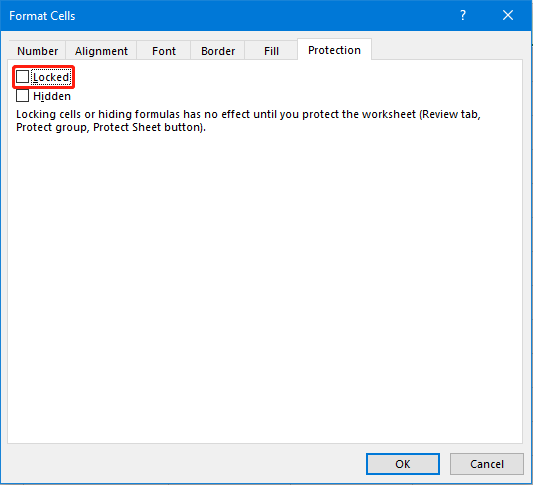
Step 3: The Format Cells interface will pop up. Then, you need to switch to the Protection tab and make sure the checkbox next to Locked is selected.
If you use these steps on a workbook or worksheet you haven’t protected, you’ll see the cells are already locked. This means that the cells are ready to be locked when you protect the workbook or worksheet. You can also see that there is a message saying Locking cells or hiding formulas has no effect until you protect the worksheet (Review tab, Protect group, Protect Sheet button). This is a guide to tell you how to protect your worksheet to lock cells or hide formulas.
Step 4: Click the OK button to save the change.
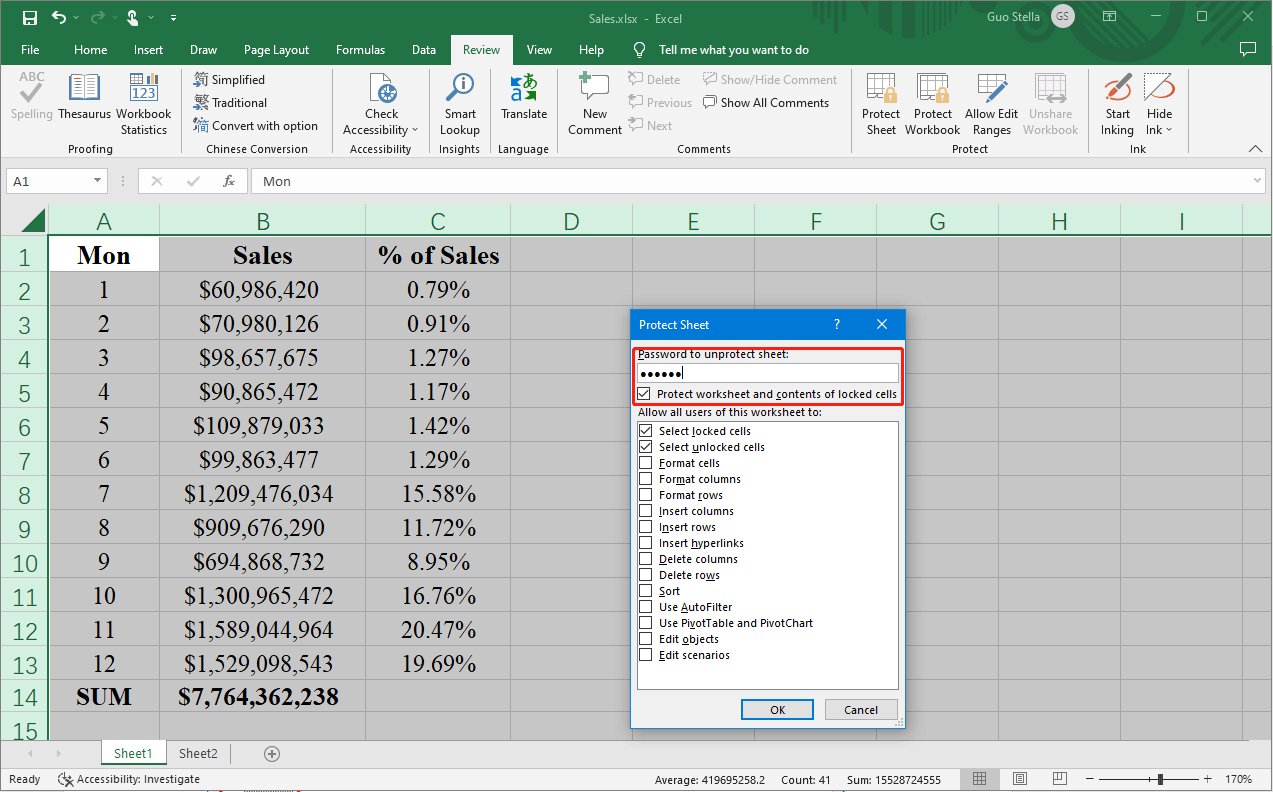
Step 5: Switch to the Review tab and click Protect Sheet in the Protect group. Alternatively, you can go to Home > Format in the Cells group > Protect Sheet to do the same job.
Step 7: You will see the Protect Sheet interface. Make sure the Protect worksheet and contents of locked cells option is selected. Then, input a password to unprotect the sheet if necessary.
Step 8: Click the OK button to continue.
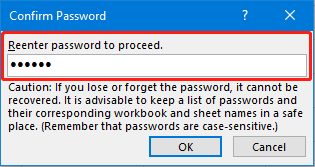
Step 9: If you have set a password, you will see the Confirm Password interface. You need to reenter the password and click the OK button to proceed.
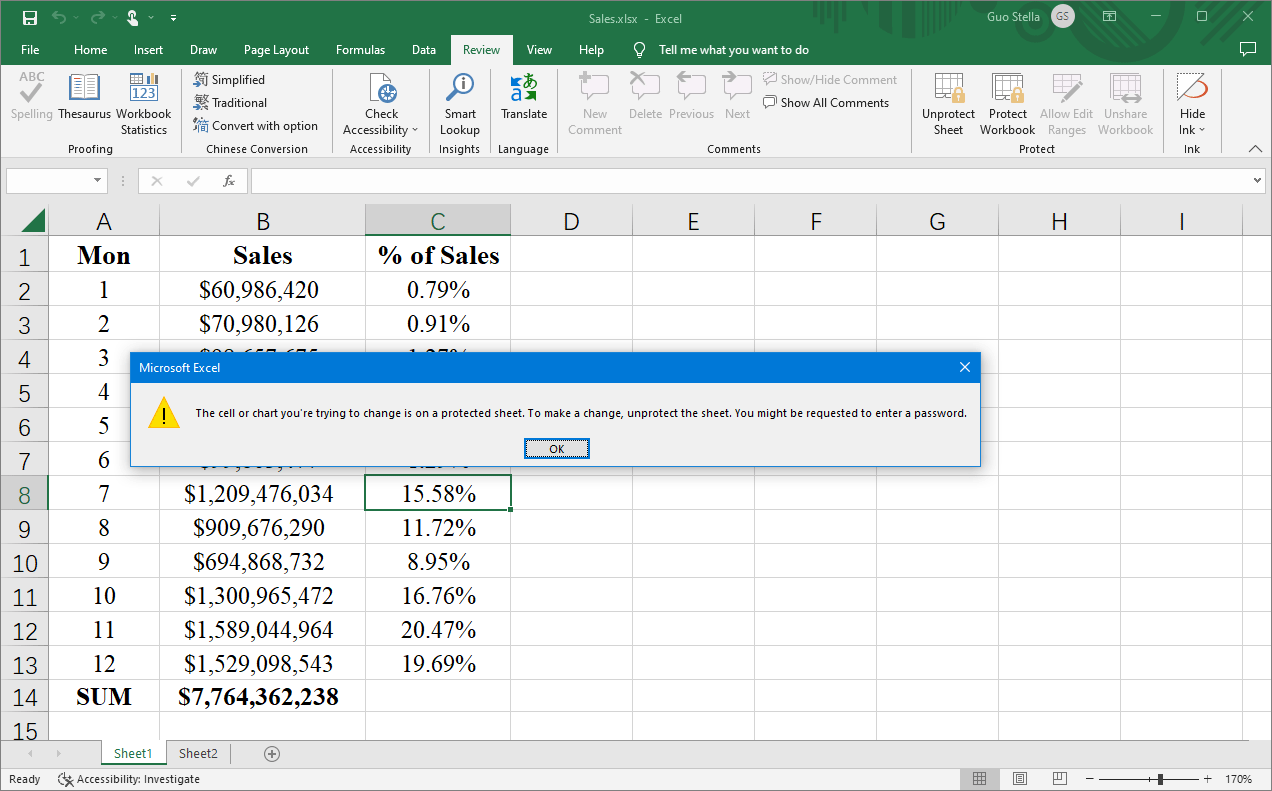
After these steps, all cells will be locked and protected. When you double-click a cell (even an empty cell), you will receive a warning message saying:
The cell or chart you’re trying to change is on a protected sheet. To make a change, unprotect the sheet. You might be requested to enter a password.
If you use an Excel formula in the cell, the formula will also become invisible. On the other hand, you can choose to hide or unhide formulas in Excel if you need to do this.
How to Unprotect Cells in Excel?
If you want to unprotect a worksheet, you can use one of the following methods:
Way 1: Via File
Step 1: Open the worksheet you want to unprotect all cells in it.
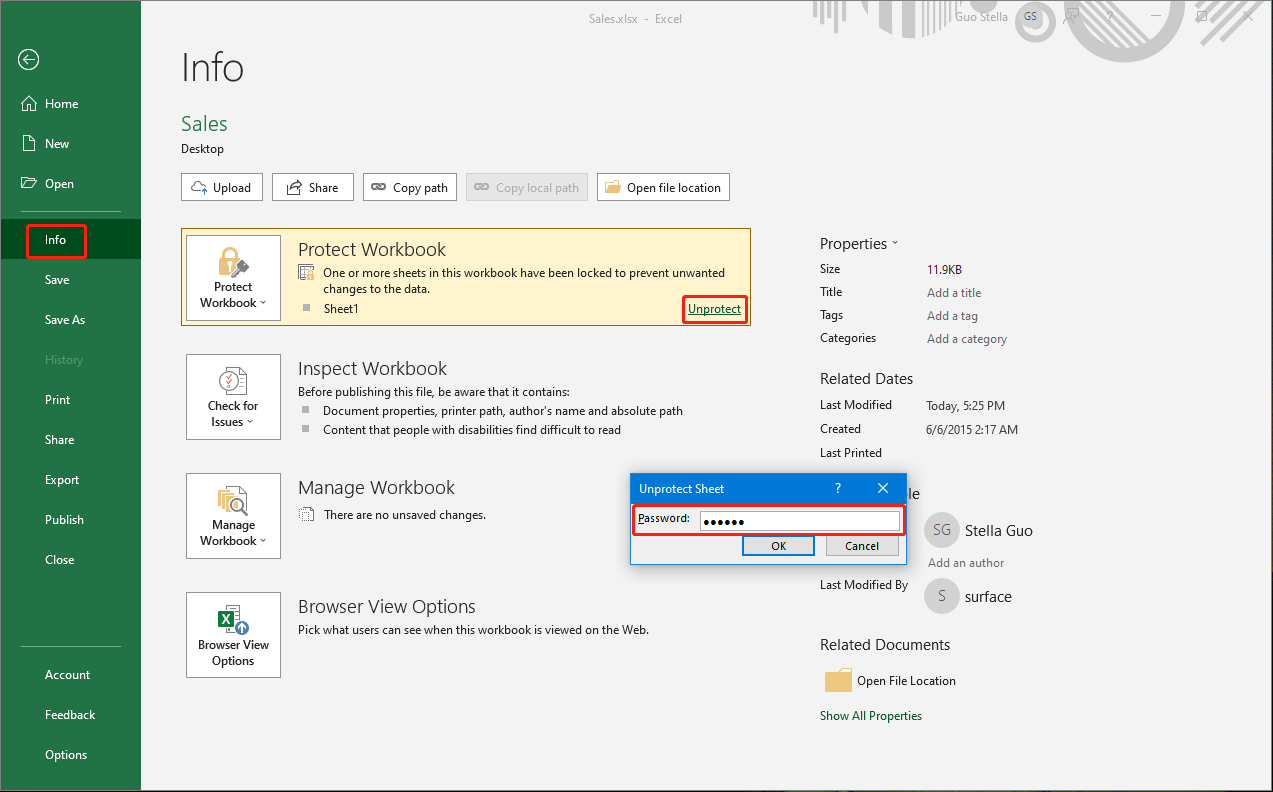
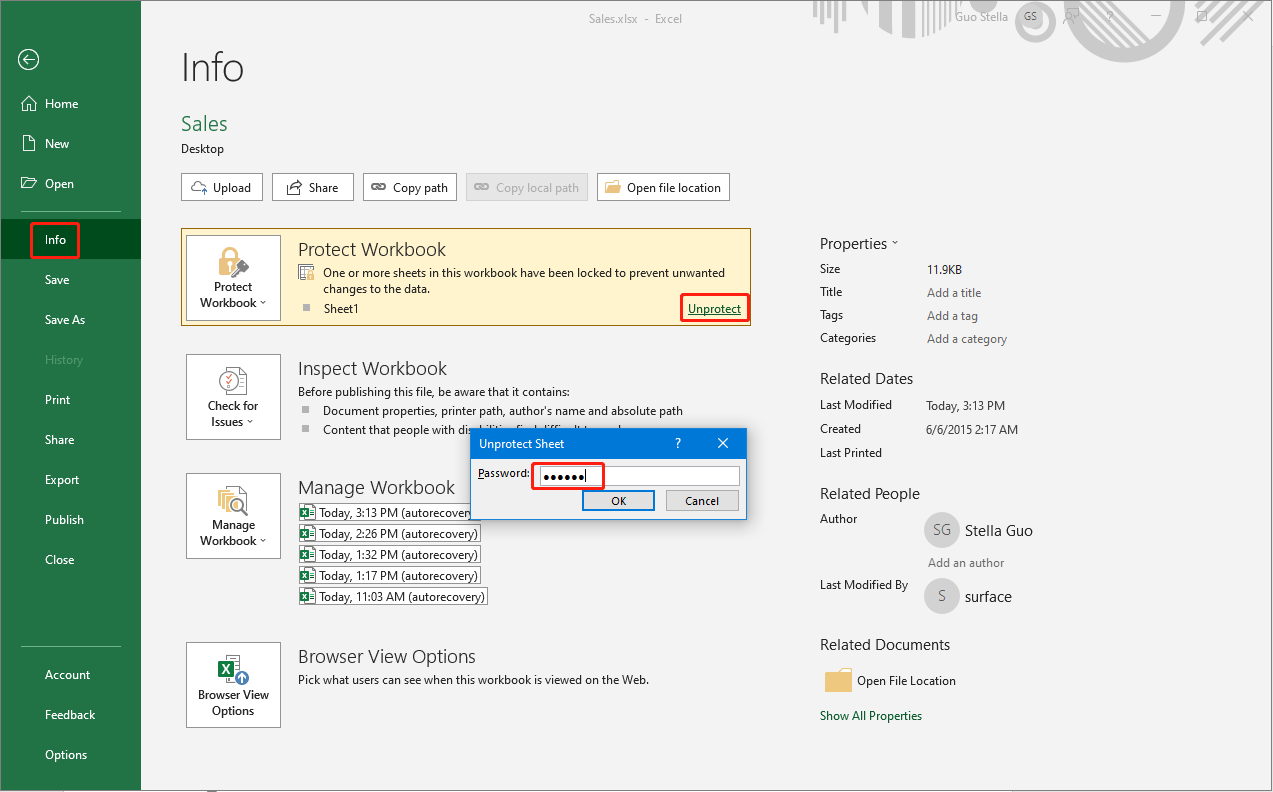
Step 2: Go to File > Info.
Step 3: Click Unprotect under Protect Workbook.
Step 4: You need to enter the password if you have set one.
Step 5: Click the OK button.
Way 2: Via Review
Step 1: Open the worksheet you want to unprotect all cells in it.
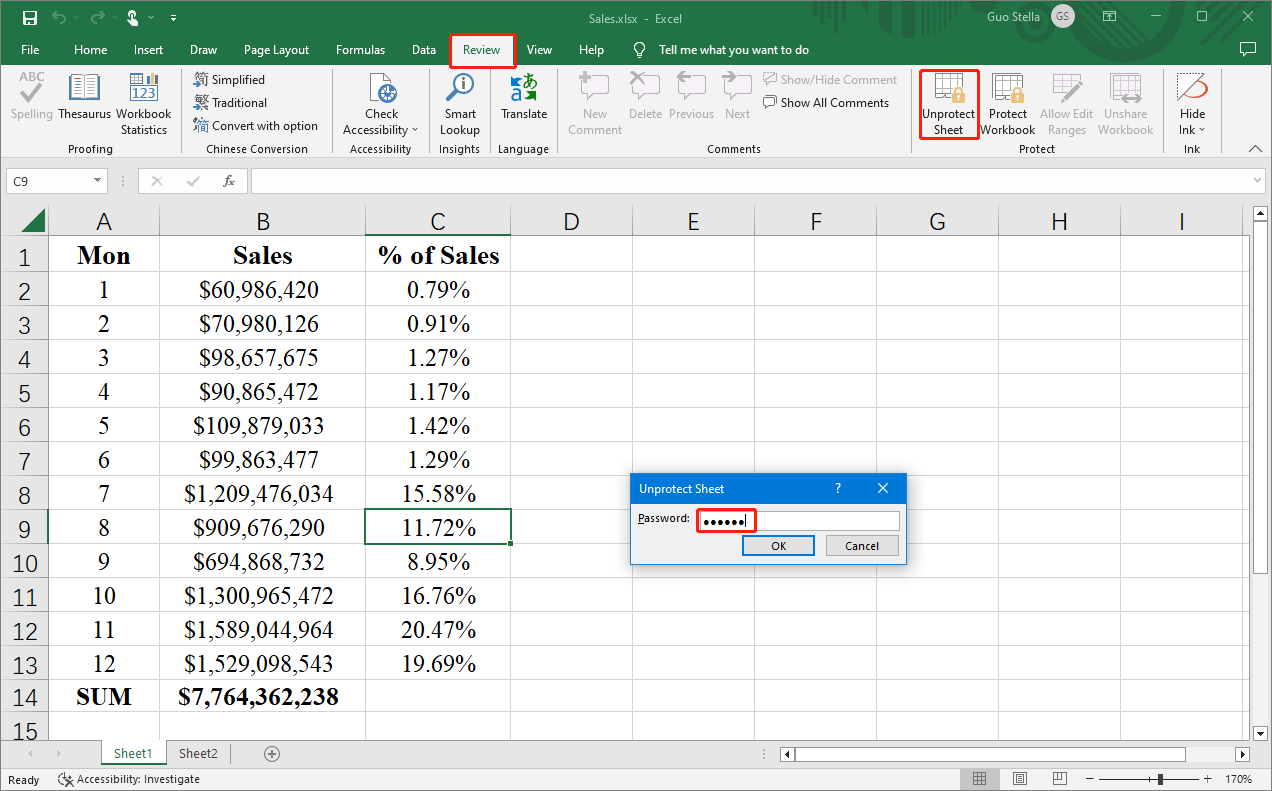
Step 2: Switch to the Review tab, then click Unprotect Sheet.
Step 3: Enter the password if required and then click the OK button to unprotect the cells.
Way 3: Via Home
Step 1: Open the worksheet you want to unprotect all cells in it.
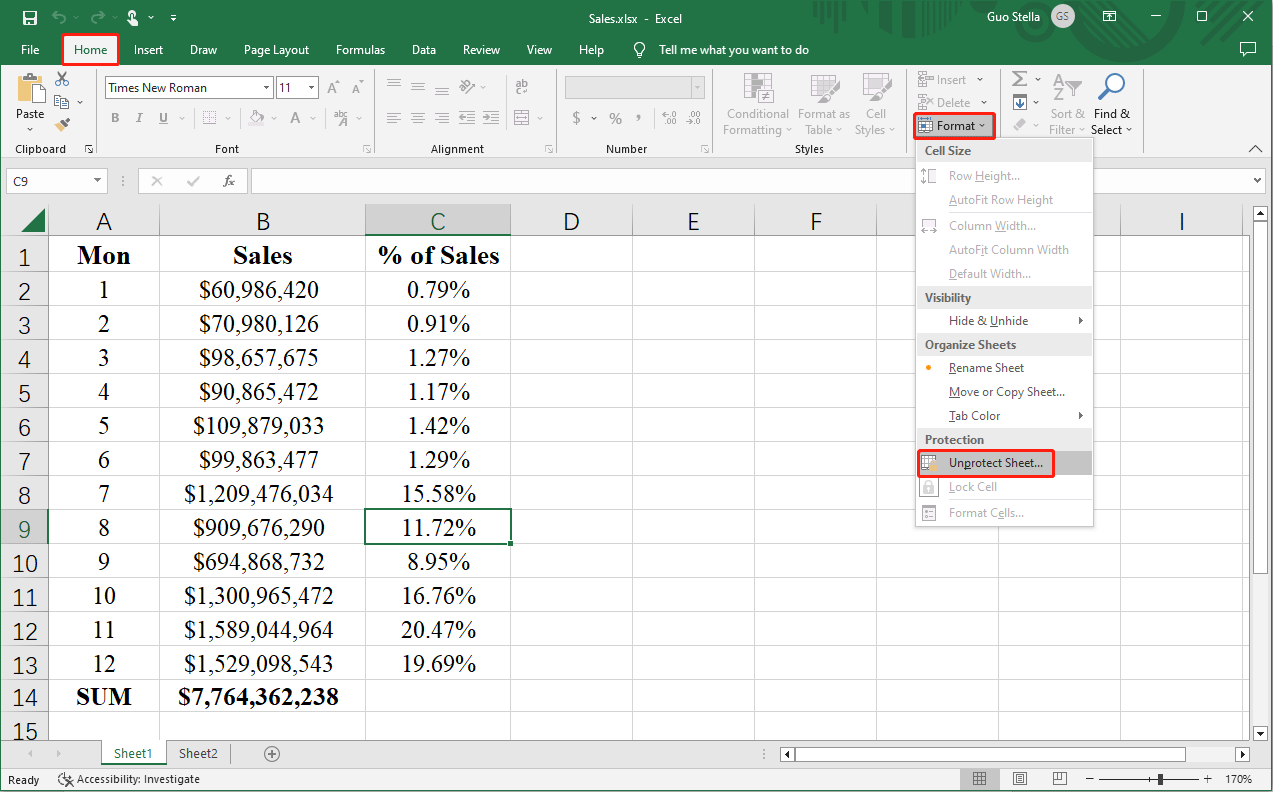
Step 2: Go to Home > Format > Unprotect Sheet.
Step 3: Enter the password if prompted, then click the OK button.
You see: you need to use the password to unprotect the worksheet if you have set one. So, you should remember the password.
How to Lock Special Cells in Excel?
You can also choose to only lock special cells in Excel when you want to do this. It is also simple to do this:
How to Lock and Protect Special Cells in Excel?
Step 1: Open the worksheet that contains the cells you want to lock and protect.
Step 2: Since all cells in the Excel are ready for being locked, you need to first unlock this status. You need to select all cells in the Excel file, then go to Home > Format in the Cells group > Format Cells.
Step 3: Switch to the Protection tab, then select the checkbox next to Locked.
Step 4: Click the OK button to save the setting and exit this interface.
Step 5: Select the cells or the specific area of cells you want to protect. Perhaps, you may want to know how to lock a cell in Excel. If you want to do this, you can only select one column in Excel in this step.
Step 6: Go to Home > Format in the Cells group > Format Cells.
Step 7: Switch to the Protection tab in the Format Cells interface, then select Locked.
Step 8: Click the OK button to save the setting.
Step 9: Then, you need to change some settings to protect the selected column or columns. Likewise, there are 3 ways to do this job:
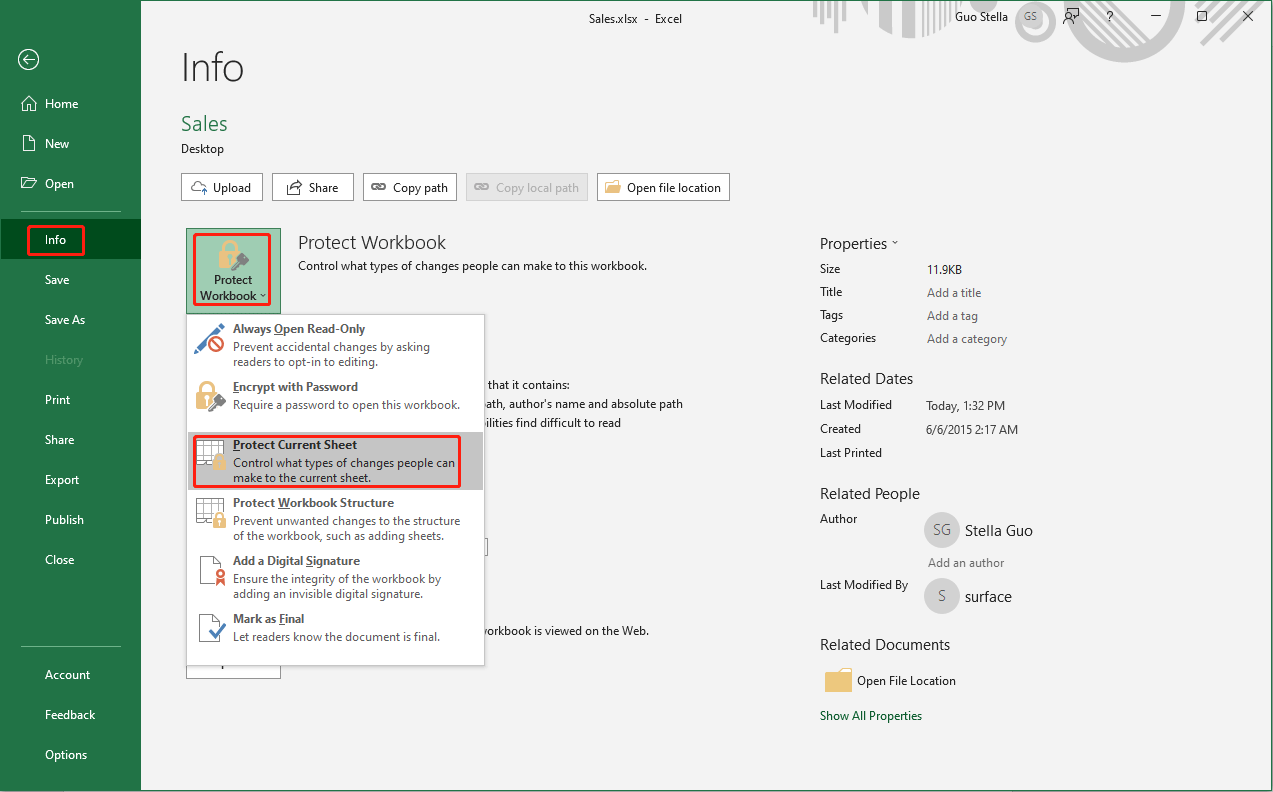
1. Go to File > Info, then expand Protect Workbook and select Protect Current Sheet.
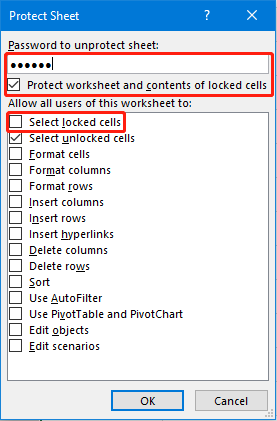
On the pop-up Protect Sheet interface, enter a password to protect the selected cells in Excel, make sure the Protect worksheet and contents of locked cells option is selected, and deselect the Select locked cells option under Allow all users of this worksheet to. Next, click the OK button to save the settings. If you have set a password, you will need to reenter it again on the second pop-up interface.
2. Go to Review, then click Protect Sheet in the Protect When you see the Protect Sheet interface, you can enter a password for the locked cells, make sure the Protect worksheet and contents of locked cells option is selected, and deselect the Select locked cells option under Allow all users of this worksheet to. Then, click the OK button to save the settings. Reenter the password if prompted.
3. Go to Home > Format in the Cells group > Protect Sheet. Then, you will see the Protect Sheet interface, on which you can type a password, make sure the Protect worksheet and contents of locked cells option is selected, and deselect the Select locked cells option under Allow all users of this worksheet to. At last, you still need to click the OK button to save your settings. Reenter the password if required.
Now, your selected or specific cells in the Excel file are locked and protected. When you click on one of these cells, there is no response. But when you click on the unlocked cell, you will see it is still editable.
How to Unprotect Special Cells in Excel?
Now, it’s time to unprotect special cells in Excel. You can undo the settings you have made. You can use one of the following 3 ways to do this:
Way 1: Via File
Step 1: Open the Excel you want to unprotect a column or columns in it.
Step 2: Go to File > Info.
Step 3: Click the Unprotect link in Protect Workbook.
Step 4: Enter the password if needed, then click the OK button.
Way 2: Via Review
Step 1: Open the Excel you want to unprotect a column or columns in it.
Step 2: Go to Review > Unprotect in the Protect group.
Step 3: Enter the password you have set.
Step 4: Click the OK button.

Way 3: Via Home
Step 1: Open the Excel you want to unprotect a column or columns in it.
Step 2: Go to Home > Format > Unprotect Sheet.
Step 3: Enter the password you have set.
Step 4: Click the OK button.

How to Recover Your Lost or Deleted Excel Files on Windows?
MiniTool Power Data Recovery is a free file recovery tool that is specially designed to recover all kinds of files from different types of data storage devices. This software supports recovering lost and deleted Excel files if they are not overwritten by new data. This MiniTool data recovery software can work on all versions of Windows, including Windows 11, Windows 10, Windows 8/8.1, and Windows 7.
With the free edition of this software, you can recover up to 1 GB of files without paying any cent.
MiniTool Power Data Recovery FreeClick to Download100%Clean & Safe
Here, we will show you how to recover deleted Excel files using this tool:
Step 1: Download and install this software on your device.
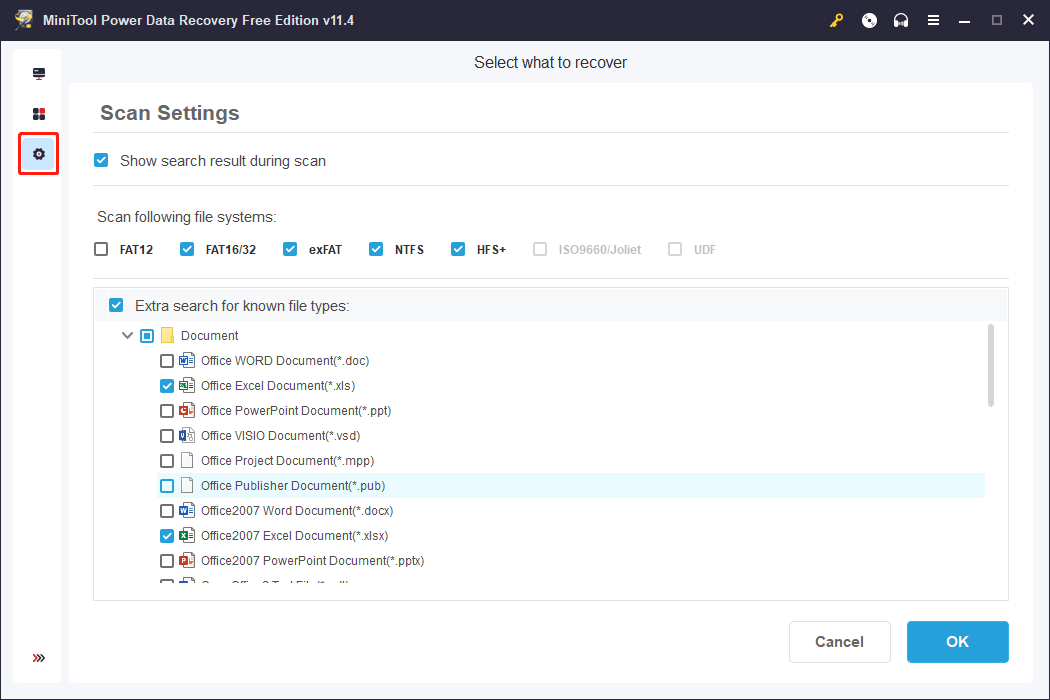
Step 2: Open the software to enter the main interface of the software. If you only want to find your Excel files, you can click the gear icon from the left menu, only make the types of Excel selected in Document, and click the OK button to save the selections and go back to the main interface.
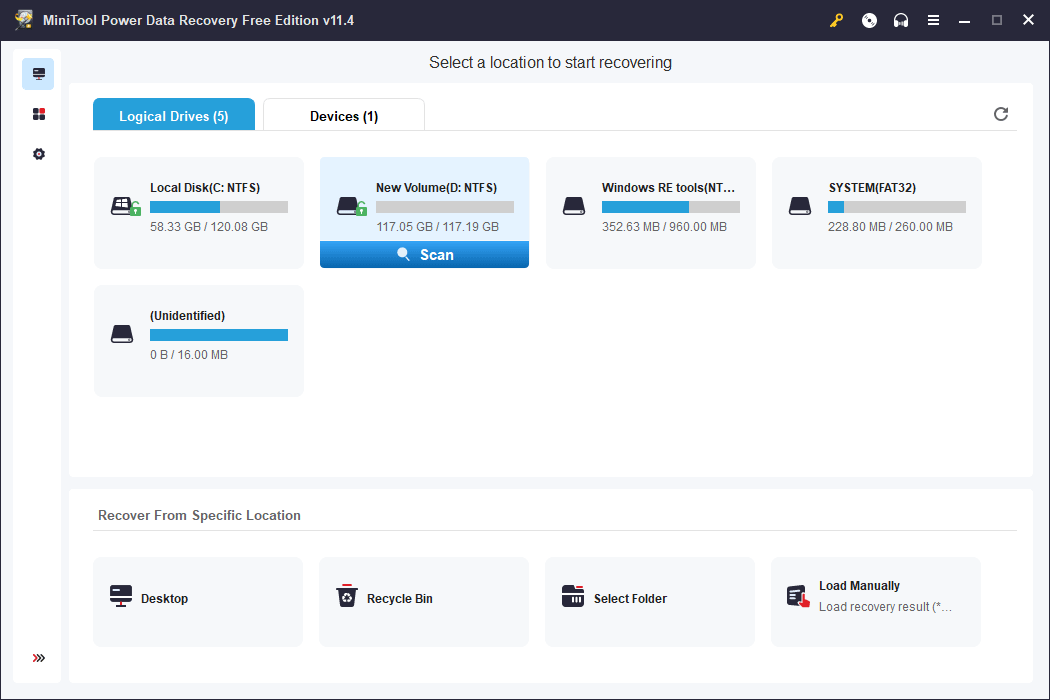
Step 3: Select the target drive to scan.
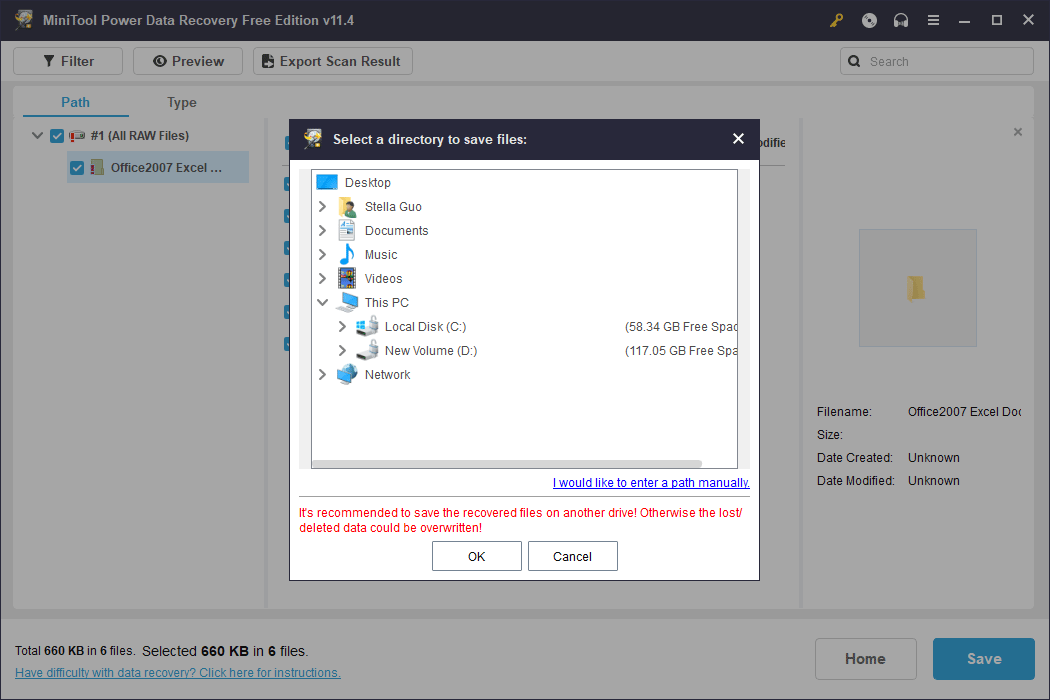
Step 4: After scanning, you can see this software only shows the found Excel files. Select your needed Excel files, click the Save button, and choose a suitable location to save them. To prevent your missing Excel files from being overwritten by new data, you should not select the original location of the files you want to recover as the destination folder.
You see! It is easy to recover your lost and deleted Excel files using this software. Of course, you can also use this software to recover other types of files like images, photos, music files, movies, videos, Word documents, and more.

Bottom Line
How to lock or unlock cells in Excel to protect or unprotect these cells? This post introduces the methods you can try in different situations. Should you have other related issues that need to be fixed or other suggestions, you can let us know in the comments. You can also contact us via [email protected].
About The Author

Position: Columnist
Stella has been working in MiniTool Software as an English Editor for more than 8 years. Her articles mainly cover the fields of data recovery including storage media data recovery, phone data recovery, and photo recovery, videos download, partition management, and video & audio format conversions.
User Comments :